FUJI NXT Programming Manual QD004-18.pdf - 第75页
QD004-18 3. Job Builder NXT Programming Manual 65 3.5 Line Balancing Line balance is performed to balance the worklo ad of each machine as mu ch as possible. Due to the unique natur e of putting m ultiple NXT b ases toge…
3. Job Builder QD004-18
64 NXT Programming Manual
Specifying in MEdit
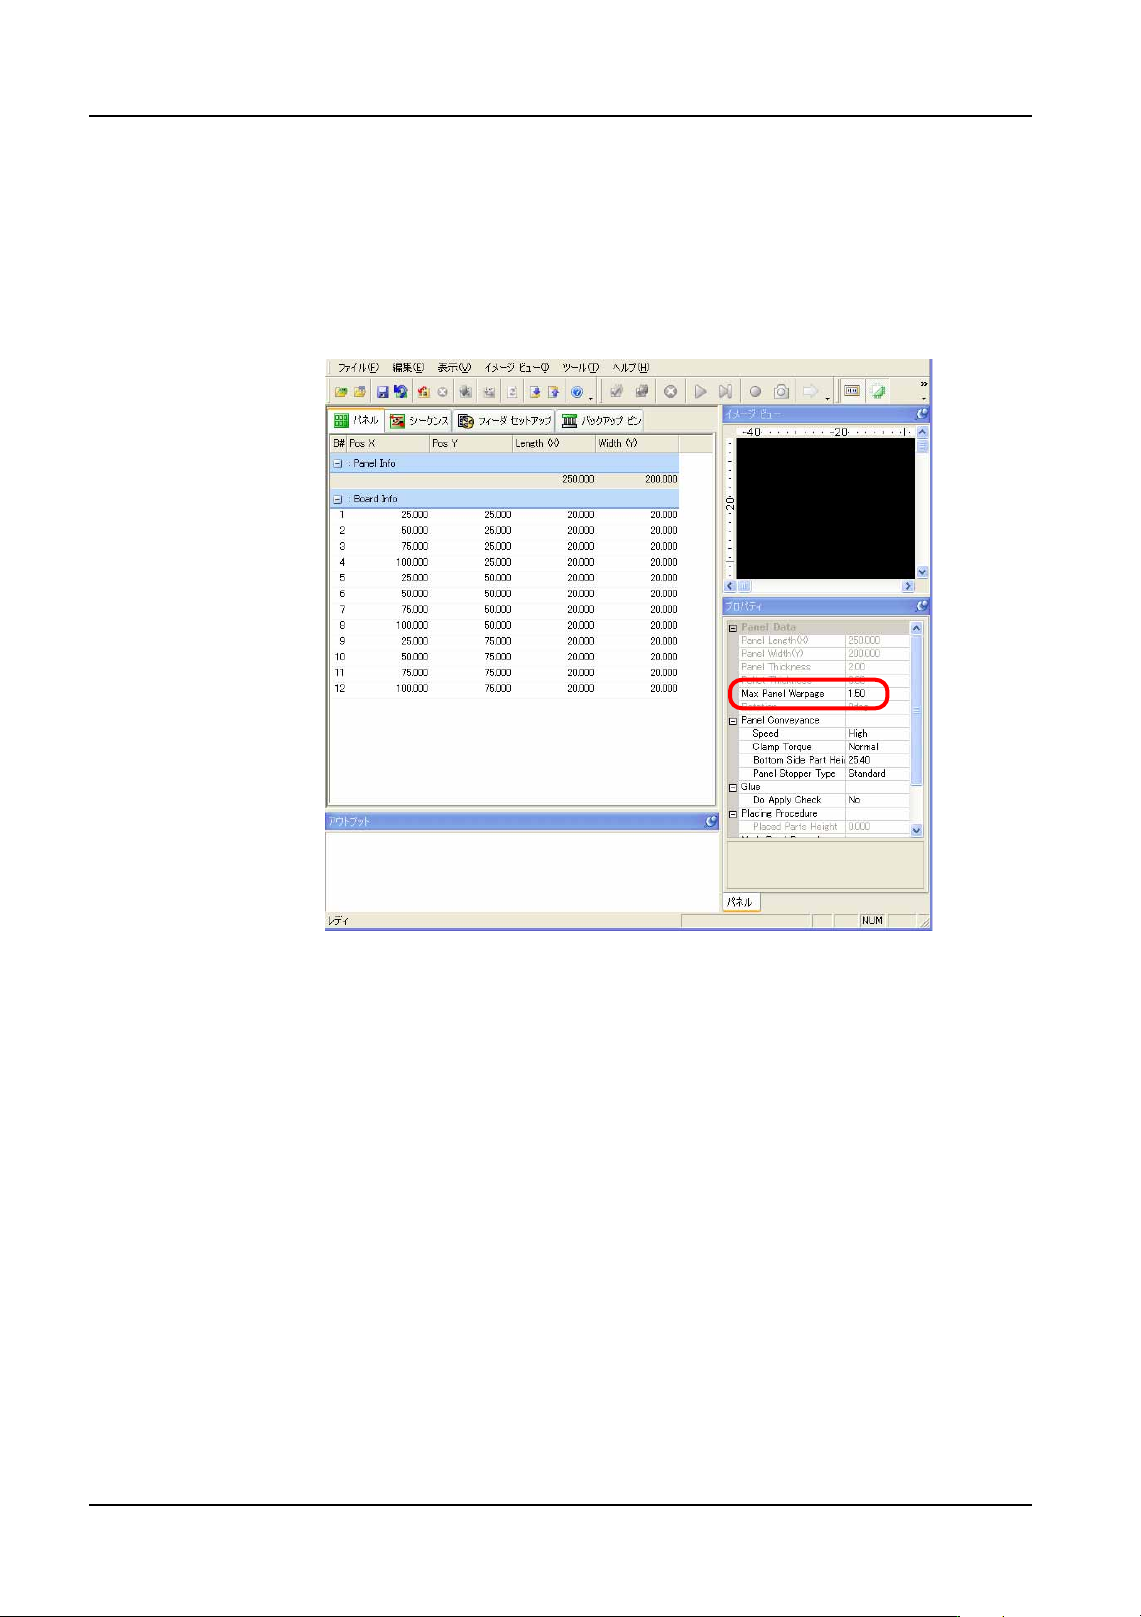
1. Open the job in MEdit. (Refer to "5. Editing Jobs on the Machine (MEdit)" for details.)
2. Select the [Panel] tab. Input the maximum warpage in the [Max Panel Warpage] field of
the [Properties] pane.
• Setting range: 0.00 to 2.00 mm, default value: 0.00 mm (placement movement is not
changed)
Important points
• There are cases in which placement may not occur properly if the warpage set
in the job is less than the actual warpage.
• Even when also using the panel height detection function, the result from that
function does not influence head speed change height here.
01PRG-0117J

QD004-18 3. Job Builder
NXT Programming Manual 65
3.5 Line Balancing
Line balance is performed to balance the workload of each machine as much as possible.
Due to the unique nature of putting multiple NXT bases together to create one large NXT
machine, the concept of line balancing has greatly changed for lines with only NXT bases.
For line with only NXT bases made up into one NXT machine, all parts will be simply
assigned to the NXT machine. This will still be an important step for lines with multiple
machines though. However, there is a special outside line balancer/optimizer available for
multi-machine NXT lines called NXT Multi Machine Optimizer. Refer to the Optimizing
section for procedures on using this software to line balance/optimize.
Note: This means that if a NXT machine is the only machine in a line then the assign part
command can be used to simply assign all of the parts to the NXT machine.
3.5.1 Line balancing in Job Builder
Follow the procedures below to line balance using the function in Job Builder.
1. Select [Line Balance] from the [Tools] menu and the [Line Balancer Options] dialog box
displays.
2. Select the appropriate option and click [Start] to start the line balancing process and the
[Line Balancer] dialog box displays with the current status of the balancing process. If
the option “Do not use current feeder allocation” is used, then all of the parts are
assigned to the different machine without considering any parts already set in the feeder
setups. If the option “Use current feeder allocation” is selected, then parts are assigned
to machines while considering any parts already present in the feeder setup. This
means that if a part is already in the feeder setup for a machine, then the matching part
is possibly assigned to that machine.
3. If there are any errors, click [Error Details] to view the errors. Once completed, click
[Close] to close the dialog box. If there were errors, note what the errors were and
correct them and then rebalance the line again.
3.5.2 NXT Multi Job Line Balancer (option)
The NXT Multi Job Line Balancer is exclusively for creating feeder setups that contribute to
the reduction of feeder changeover time for NXT machines. This software is an option and
requires a license in order to use it.
Important points to note before using the NXT Multi Job Line Balancer.
Be sure to note the following points.
• Part data on the part data server is used by this software. Therefore, copy the
part data to be used from the jobs to the server if they are not already on the part
data server.
• Select a line that includes an NXT machine type for all jobs being used in the
NXT Multi Job Line Balancer.
• The NXT Multi Job Line Balancer does not change parts assignments. If
necessary, make these settings before processing.
Procedure
1. Click the [Start] button, point to [Programs] > [Fuji Flexa] > [Multi Job Line Balancer] and
then click [NXT MultiJob LineBalancer]. The wizard starts and the first step displays.
3. Job Builder QD004-18
66 NXT Programming Manual
Note: It is possible to start this wizard from Director by clicking the icon for it in the
[MultiJobLineBalancer] section of the icon bar.
2. Click [Next] to proceed to the next step.
3. Click [Add] and the [Select Job] dialog box displays.
4. Using the dialog box, locate and select the jobs on which to perform multi job line
balancing.
Note: Hold down Ctrl when selecting multiple jobs.
5. Select the side of the panel to be line balanced and then click [OK] in the dialog box that
is displayed.
Note: It is possible to change the side after this step by right-clicking the job name in the list and
then specifying the side in the shortcut menu.
6. Continue adding jobs until all of the jobs you want to line balance have been specified.
7. If you want to specify production quantity settings for jobs, right-click the job name and
then select [Enter the production quantity] and then specify the production quantity in
the dialog box and click [OK].
8. If you want to prioritize production for a side of the panel in a job, then right-click the job
name and then specify the side from [Prioritizing Production].
9. Once all of the jobs and desired settings have been specified, click [Next] to display Step
2.
10.Click the [...] button and specify the name of the job to be used for the line/feeder setup.
11.In the [Feeder allocation setting] group box, select the feeder allocation method to be
used.
12.In the [Settings] group box, select the appropriate setting.
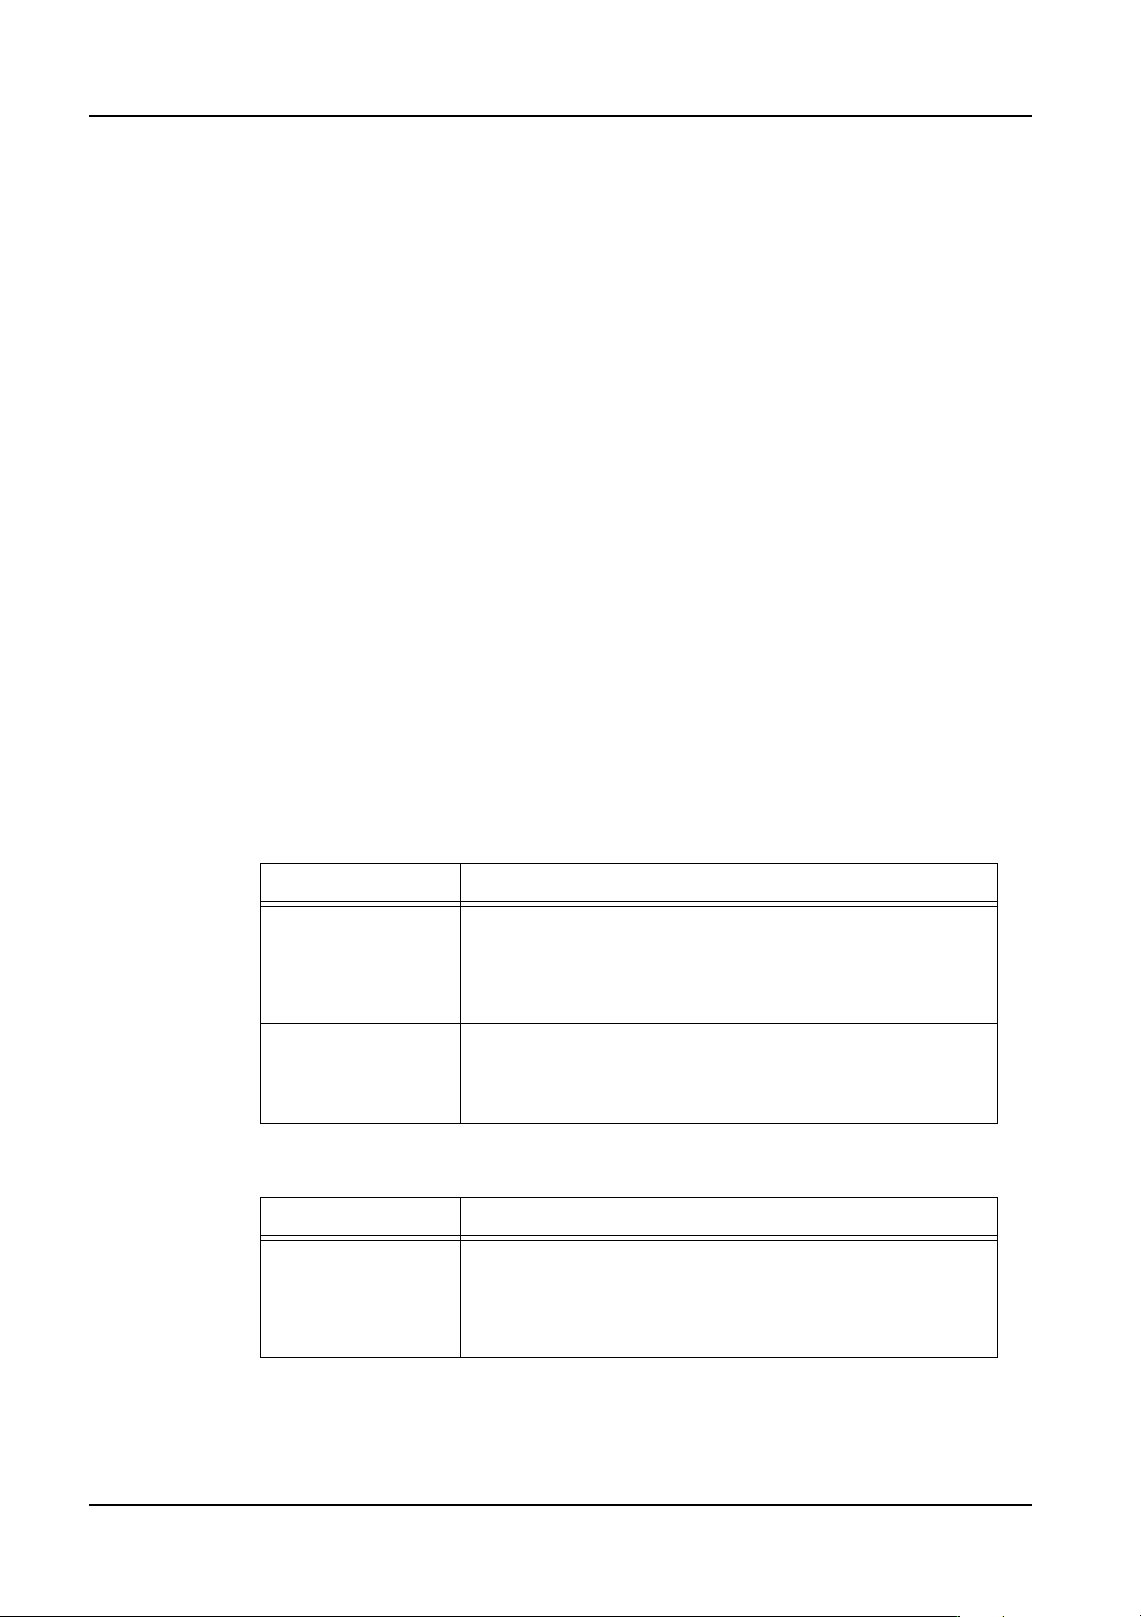
Setting Description
Consider the
allocation of all
feeders
All of the variable status feeders for the job in the [Job used
for line or feeder setup] setting are not moved from their
position as much as possible (a feeder will be altered if
necessary for other jobs). Fixed and reserved feeder
positions from this job cannot be altered.
Consider the
allocation of
Reserved and Fixed
feeders only
Fixed and reserved feeder positions for the job in the [Job
used for line or feeder setup] setting cannot be altered, but
the variable status feeders can be altered freely.
Setting Description
Group jobs for
batch changeover:
A common feeder allocation for multiple jobs is created and
the jobs are grouped. There are times when multiple
groups are possible. In this case, changeover between
groups occurs but the groups do not share a common
feeder allocation.