XP Type II 工程师培训手册 (2.0).pdf.pdf - 第11页
FK-9F98-34 XP T ype II Series T raining T ext for Service Engineers Edition 2.0 XP142E – Chapter 1 Initial Adjustment Page 1 of 8 Fuji Machine Mfg. Co., Ltd.Okazaki Chapter 1 – Initial Adjustment 1.1 Leveling 1. Place tw…

C
C
h
h
a
a
p
p
t
t
e
e
r
r
1
1
I
I
n
n
i
i
t
t
i
i
a
a
l
l
A
A
d
d
j
j
u
u
s
s
t
t
m
m
e
e
n
n
t
t
FK-9F98-34 XP Type II Series Training Text for Service Engineers
Edition 2.0 XP142E – Chapter 1 Initial Adjustment Page 1 of 8
Fuji Machine Mfg. Co., Ltd.Okazaki
Chapter 1 – Initial Adjustment
1.1 Leveling
1. Place two track levels at position A, shown in the following diagram:
3 2
A
4 1
2. Carry out initial leveling at points 1,2,3,4, then lock all 8 leveling sheets.
3. Leveling tolerance is 0.10mm/1000mm.
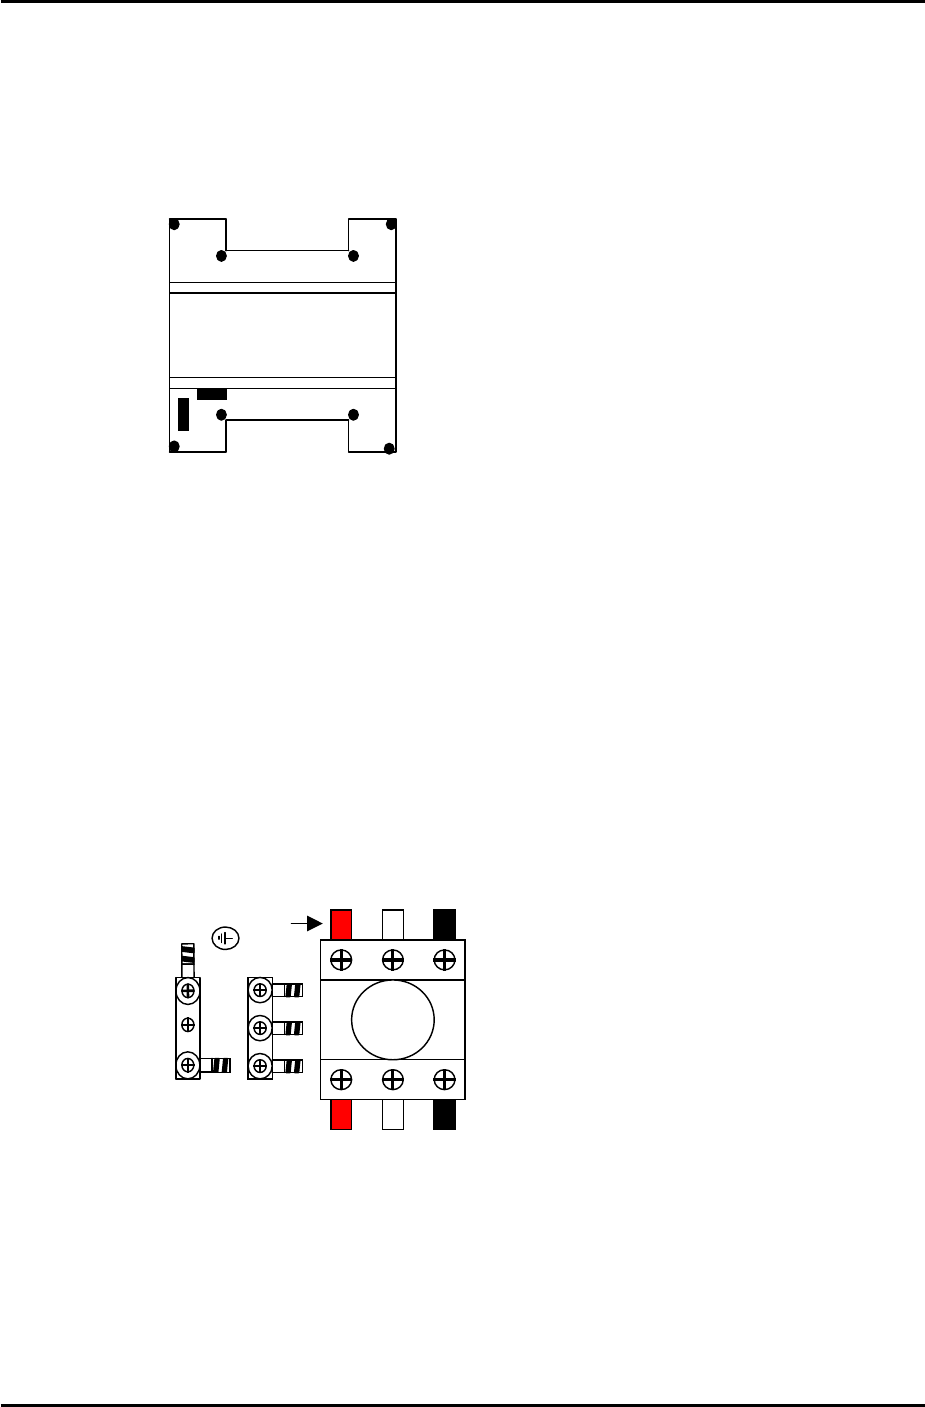
1.2 Power and Air Connection
Power Supply Connection
1. Open the power supply box at the lower right hand side of the machine and pull the power
line through the bottom of the box.
2. Connect the ground terminal and the ground wire first.
L1 L2 L3
Red
3. Connect the three wires of the power supply cable to the three breaker box (KG41B)
terminals.
L1: red L2: white L3: black
SMT Equipment Quality Assurance Dept.
1 – 1 CS Section
FK-9F98-34 XP Type II Series Training Text for Service Engineers
Edition 2.0 XP142E – Chapter 1 Initial Adjustment Page 2 of 8
Fuji Machine Mfg. Co., Ltd.Okazaki
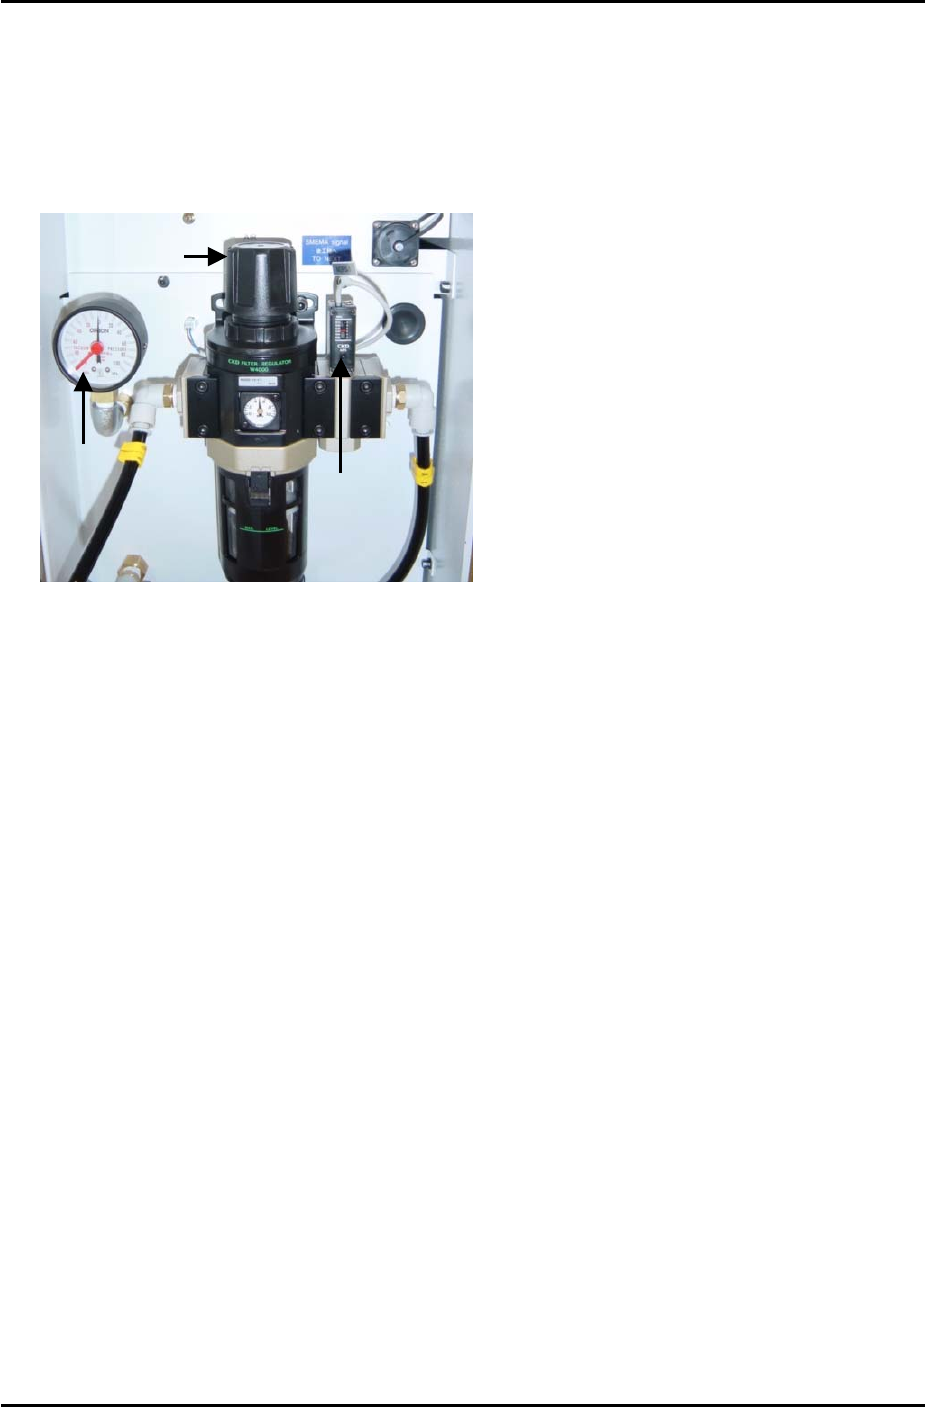
Air Hose Connection
1. Connect the hose to the air inlet at the machine.
2. Pull up on the regulator knob to release the lock.
Pressure
Gage
Vacuum
Sensor
Regulator Knob
3. Turn the regulator knob until the pressure level indicated at the regulator shows 0.5Mpa
(5kgf/cm2).
4. Push down the regulator knob to lock it.
5. Adjust the screw on the top of the vacuum sensor so that the 200-volt power supply to the
servos cuts out when the air pressure drops to 0.4Mpa and below.
6. Select [Maintenance A] – [I/O Check] – [Y016 VacuumPump] – [ON] and confirm that the
pressure gage shows negative pressure.
7. If the dial indicates positive pressure the power cable connection may be reverse phased.
8. In this case turn the machine power OFF, trip the breaker and disconnect the power cable
from the mains socket.
9. Check that the power supply connection is correct, and then confirm the power cable itself
is not reverse phased.
SMT Equipment Quality Assurance Dept.
1 – 2 CS Section