XP Type II 工程师培训手册 (2.0).pdf.pdf - 第221页
FK-9F98-34 XP T ype II Series T raining T ext for Service Engineers Edition 2.0 XP242E – Chapter 9 Options Page 9 of 12 Resolution 1. Return to the [Main] screen. 2. Select [Manual Operation] – [Nozzle Operation] – [Plac…
FK-9F98-34 XP Type II Series Training Text for Service Engineers
Edition 2.0 XP242E – Chapter 9 Options Page 8 of 12
Focus
1. Press the [READY ON] button to turn ON the 200V power supply to the servos.
2. Select [Maintenance] – [Focus Adjustment] – and then press and hold down the
[START] button until the machine stops.
3. Press [OK] – [Focus Adjustment] – and then press and hold down the [START] button
to move the nozzle to the vision processing position.
4. When the “Move” message displays press [OK].
5. If the focus is within range the buzzer should beep. If the buzzer doesn’t beep adjust
the focus ring on the camera until it does.
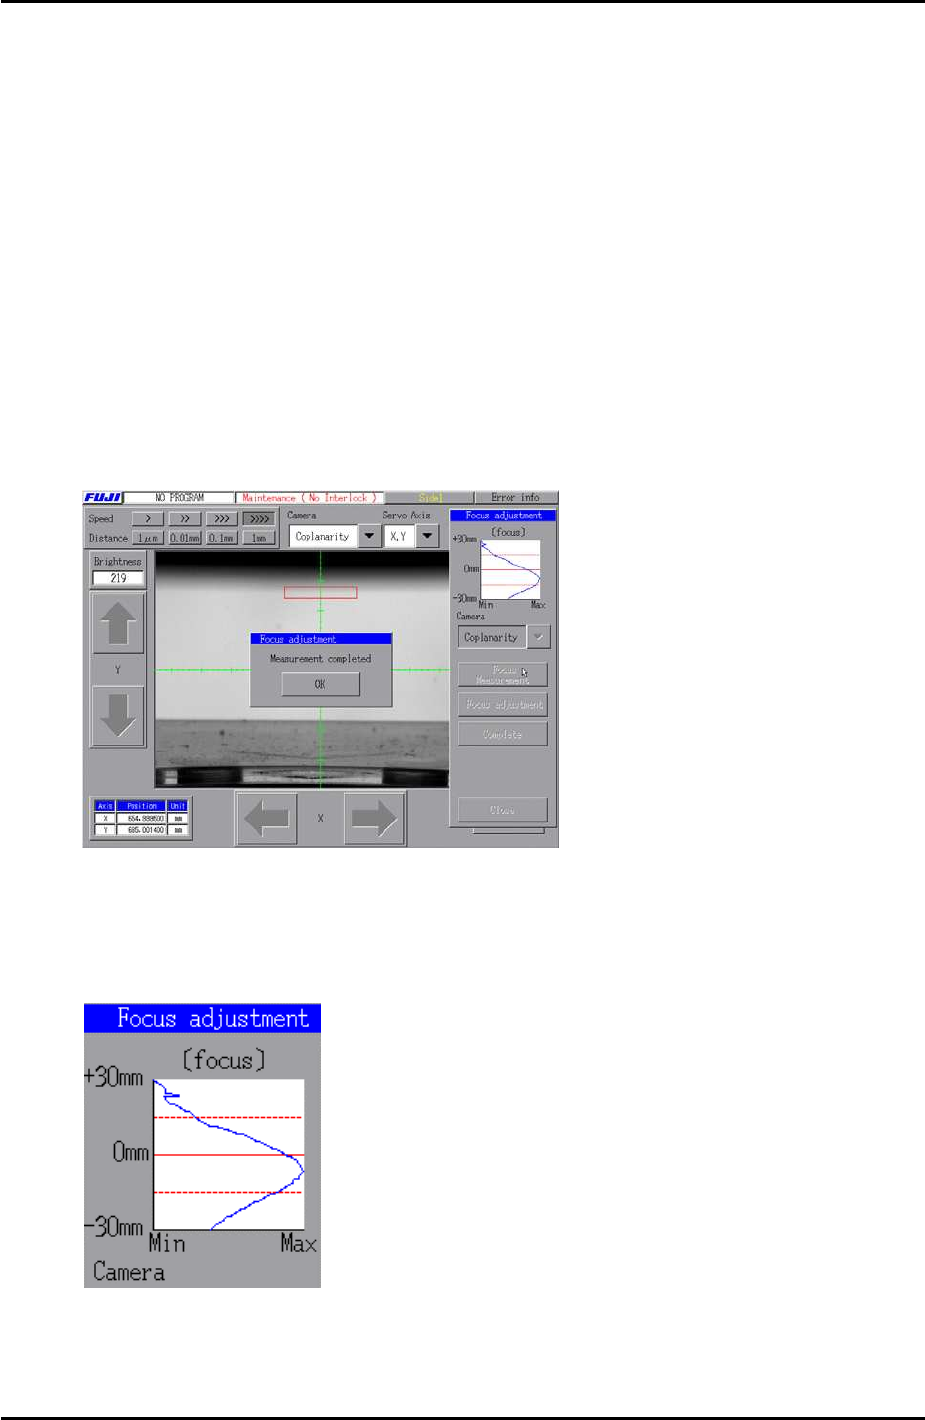
6. Press [Complete] – [OK] – [Focus measurement] – and then press and hold down the
[START] button until the following screen displays indicating the measurement is
complete:
7. Take a look at the focus adjustment graph. If the focus is at its optimum the graph will
peak on the center 0mm line. Adjust the focus and repeat the measurement until the
peak of the graph is on or close to the 0mm line.
8. Finally apply Loctite 425 and lock the focus ring hollow bolt.
Fuji Machine Mfg. Co., Ltd. Okazaki
SMT Equipment Quality Assurance Dept.
9 – 8 CS Section

FK-9F98-34 XP Type II Series Training Text for Service Engineers
Edition 2.0 XP242E – Chapter 9 Options Page 9 of 12
Resolution
1. Return to the [Main] screen.
2. Select [Manual Operation] – [Nozzle Operation] – [Place] – [START] to return the
nozzle.
3. Put the coplanarity jig (Z9631DEPJ3410) in the nozzle station and select the nozzle
slot number, then [START] to pickup the jig.
Coplanarity Jig
4. Select [Maintenance C] – [Custom Maintenance] – [Maintenance] – [Focus
Adjustment] – and then press and hold down [START] until the following message
displays:
5. Press [OK] then select [Coplanarity] from the camera drop down list.
6. Press [Focus adjustment] – and then press and hold down the [START] button until
the following message displays:
7. Press [OK] and the display should be as shown in the following image:
Fuji Machine Mfg. Co., Ltd. Okazaki
SMT Equipment Quality Assurance Dept.
9 – 9 CS Section
FK-9F98-34 XP Type II Series Training Text for Service Engineers
Edition 2.0 XP242E – Chapter 9 Options Page 10 of 12
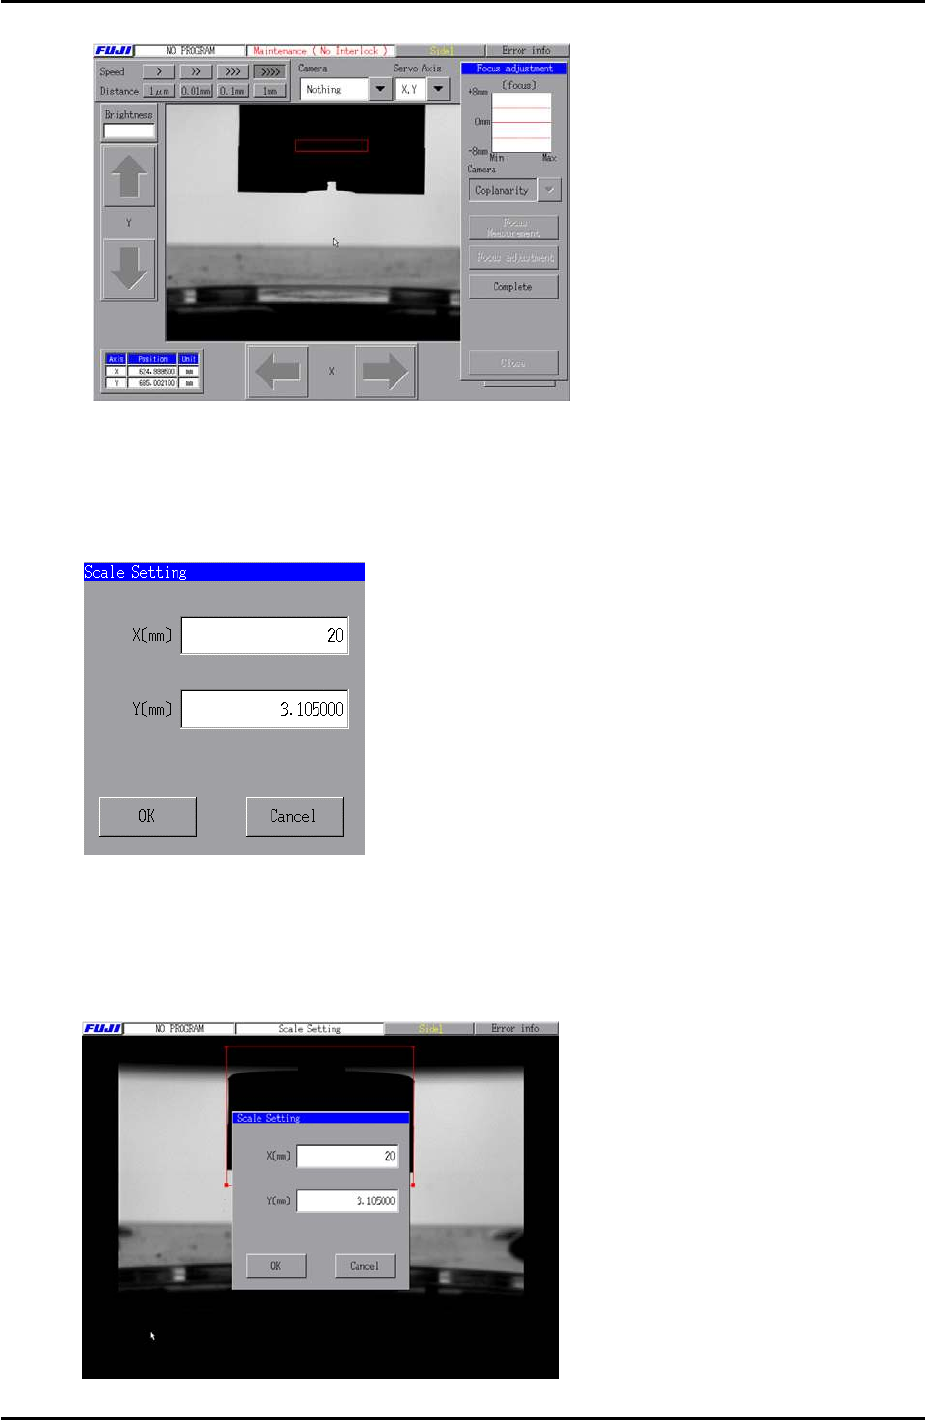
8. Return to the [Main] screen and select [Maintenance A] – [Scale Setting] – and select
[Coplanarity] from the camera drop down list.
9. Select [Manual Scale Setting] and the following text box displays:
10. Input a value of “20” in the X field. There is no need to edit the value in the Y field.
11. Use the mouse to align the X caliper lines with the coplanarity jig as shown in the
following image:
Fuji Machine Mfg. Co., Ltd. Okazaki
SMT Equipment Quality Assurance Dept.
9 – 10 CS Section