YRM20_Ope_E.pdf - 第114页
2. Operation screen and buttons 2-17 Chapter 2 Basic operation 2.3 Unit scr een T his section describes the manual operation buttons on the Unit screen. █ Manual conveyor operation [Unit] - [Conveyor] screen Conveyor man…
2. Operation screen and buttons
2-16
Chapter 2 Basic operation
Button name Function
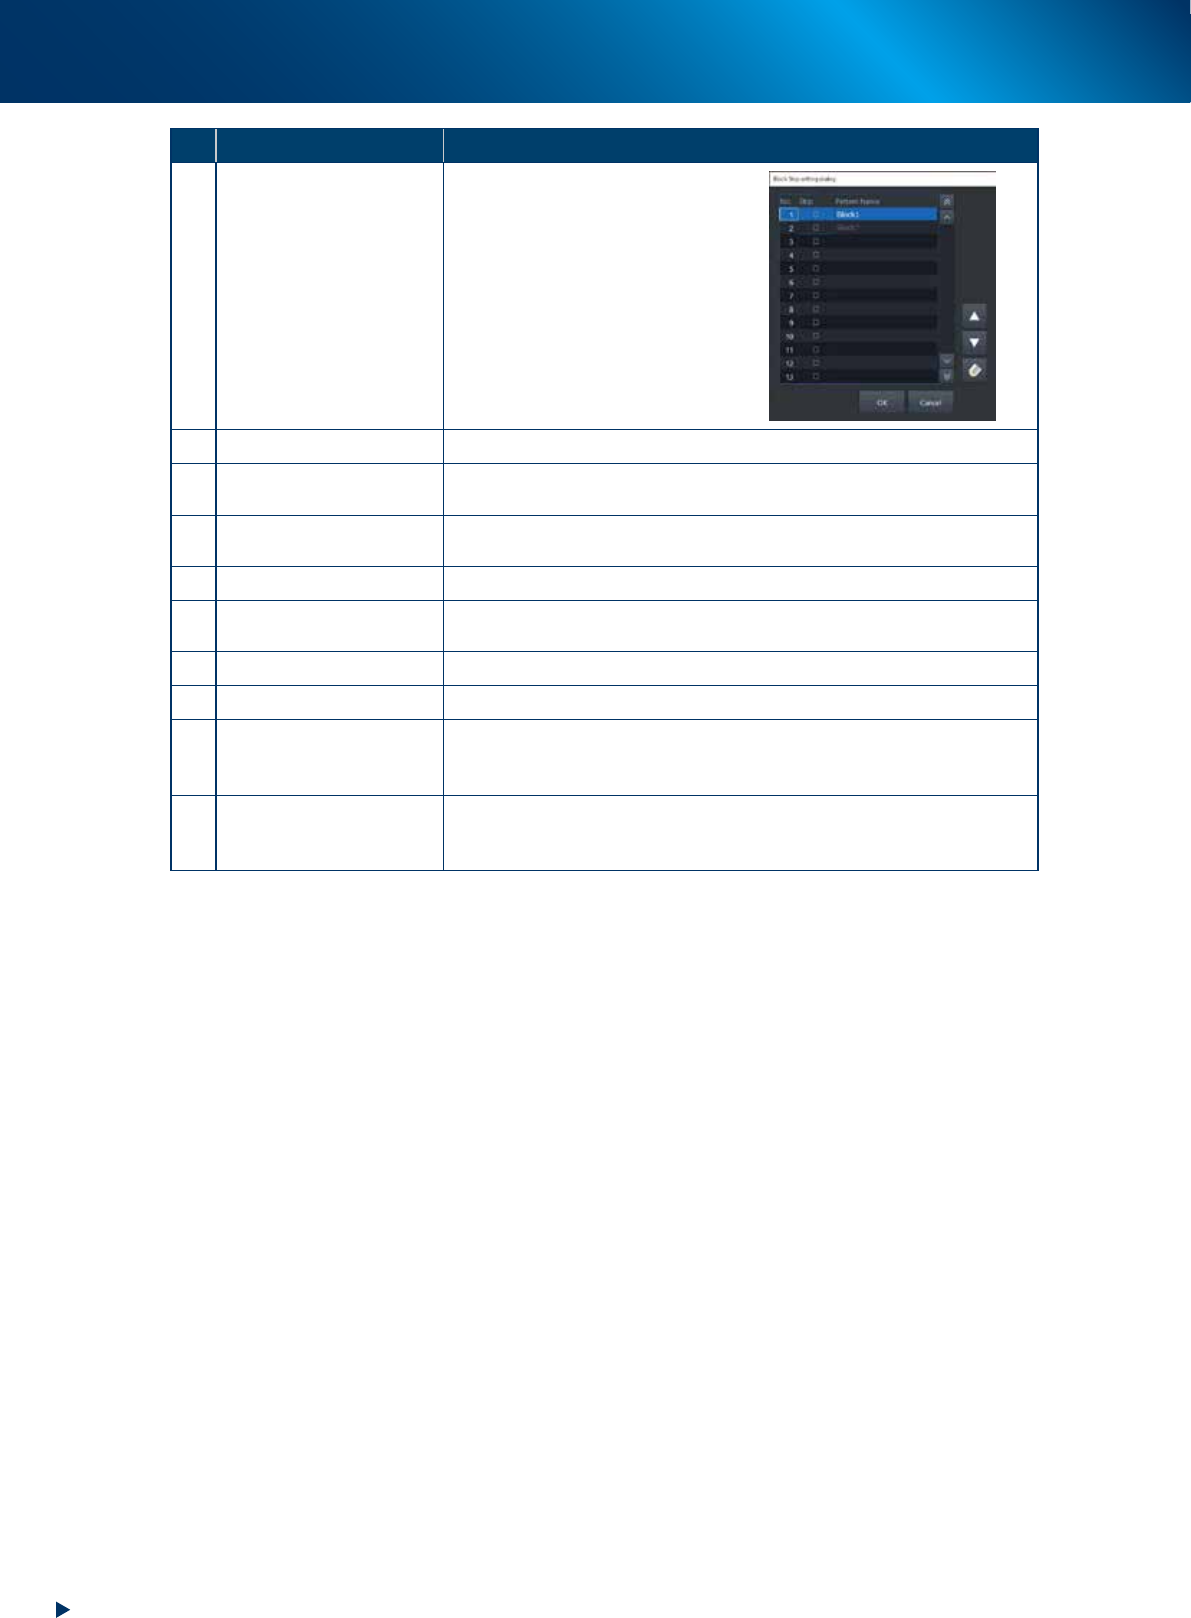
14 Block skip
This button becomes active when
board data with block distribution
performed is loaded.
Pressing this button displays the
"Block Skip Utility" dialog box that
allows you to set whether to skip
mounting components in each
block.
Refer to Chapter 3 "1.12
Resuming operation from the
stopped point" for more details.
15 Mount Position Moves the conveyor to the mounting position for the backup pin setup.
16 Transfer Position
Aligns the conveyor with the transfer position when carrying in the board
manually.
17
Head movement
(rear, center, front)
Moves head to the machine rear, center, or front.
18 History Saves and deletes production history data.
19 Software Setting
Sets machine screen display items, adds or deletes operators, and sets
passwords.
20 SW Version Info Shows version information on application software and system.
21 Board Explorer Moves, backs up, restores or copies board data.
22 Database
Makes a backup of and restores database regarding components required
for production and mark information. Also it can specify the database
reference destination.
23 System Backup
Makes a backup of machine coordinates, accuracy information, option
device information and standard coordinates necessary for machine
operation or restores the data using the backup.
2. Operation screen and buttons
2-17
Chapter 2 Basic operation
2.3 Unit screen
This section describes the manual operation buttons on the Unit screen.
█
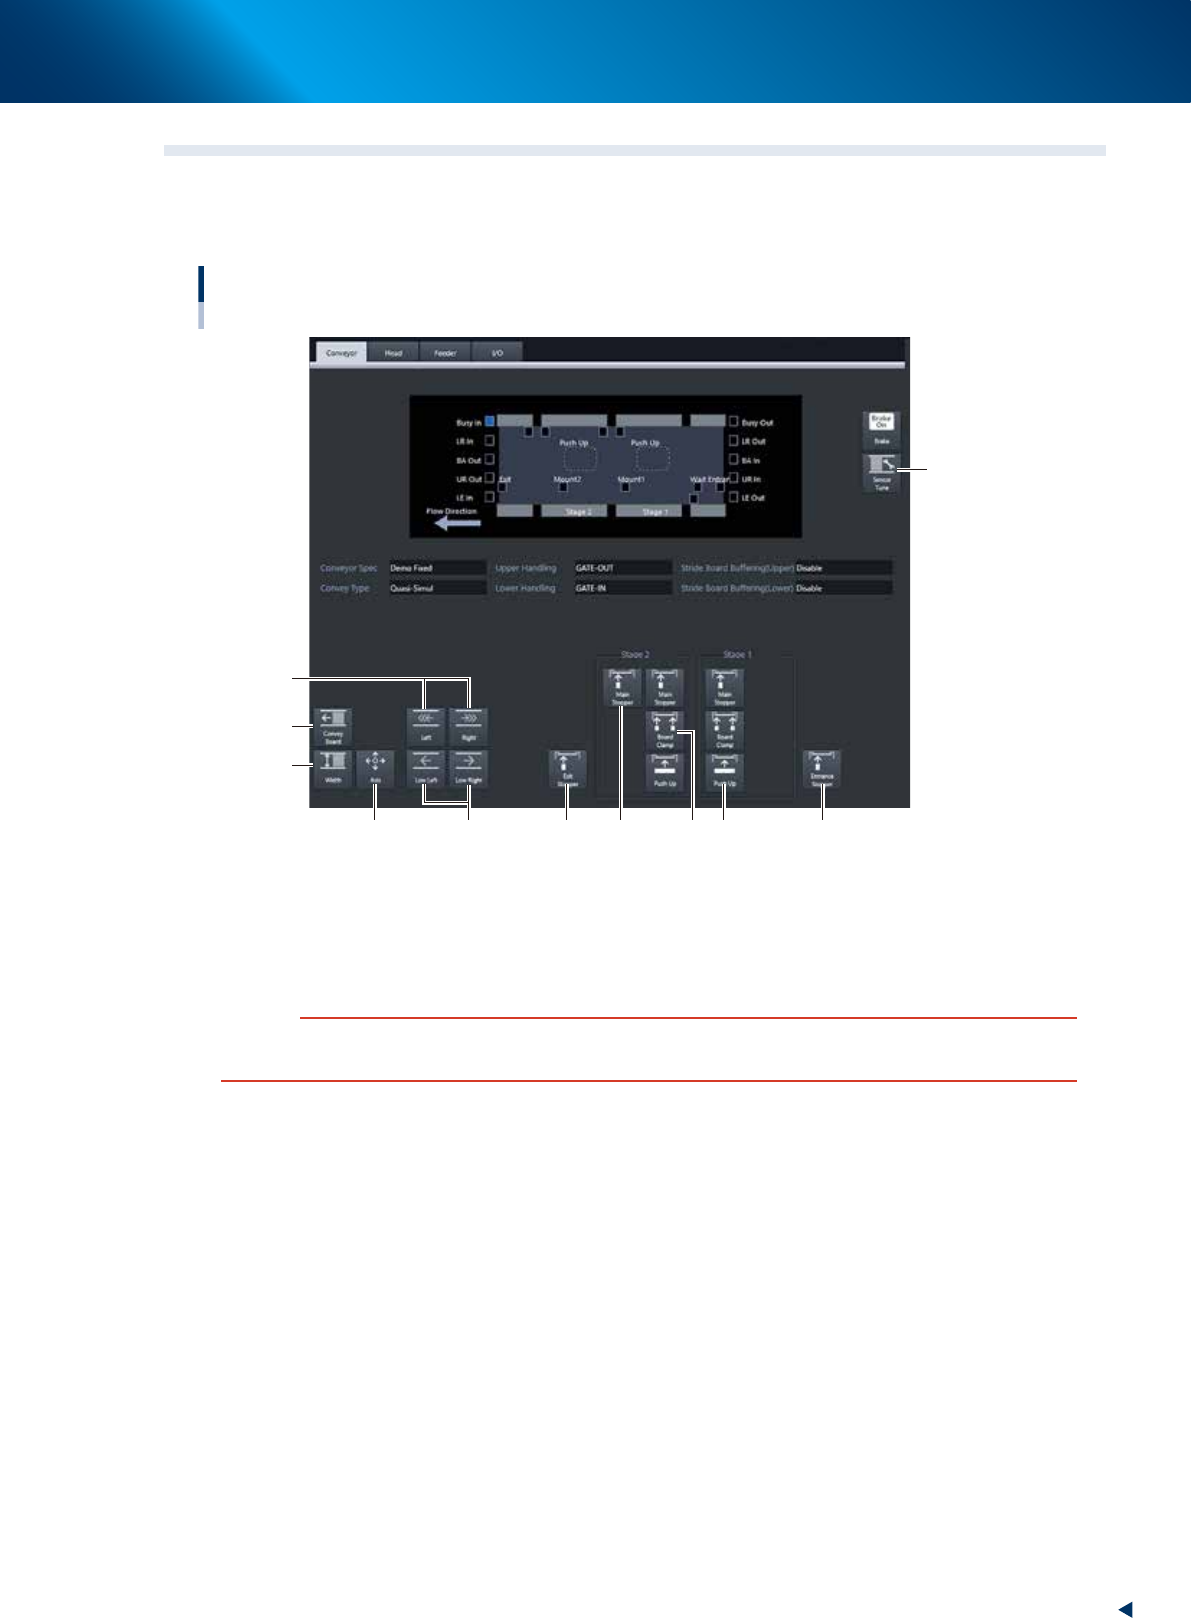
Manual conveyor operation
[Unit] - [Conveyor] screen
Conveyor manual buttons : YRM20 Dual stage screen
2
3
5
1
6
74 8 9 10 11
24205-KMX-00
1. [Sensor Tune] button
Tunes the conveyor sensor automatically. It is not required to perform auto tuning during normal
operation. However, it is used in the case where the conveyor width is changed manually or that the
board cannot be detected correctly due to the conveyor sensor malfunction.
c
CAUTION
Make sure that no board is on the conveyor before tuning the conveyor sensor.
See the maintenance manual, chapter 3, " 2.3.1 Checking conveyor sensor condition and operation”.
2. Operation screen and buttons
2-18
Chapter 2 Basic operation
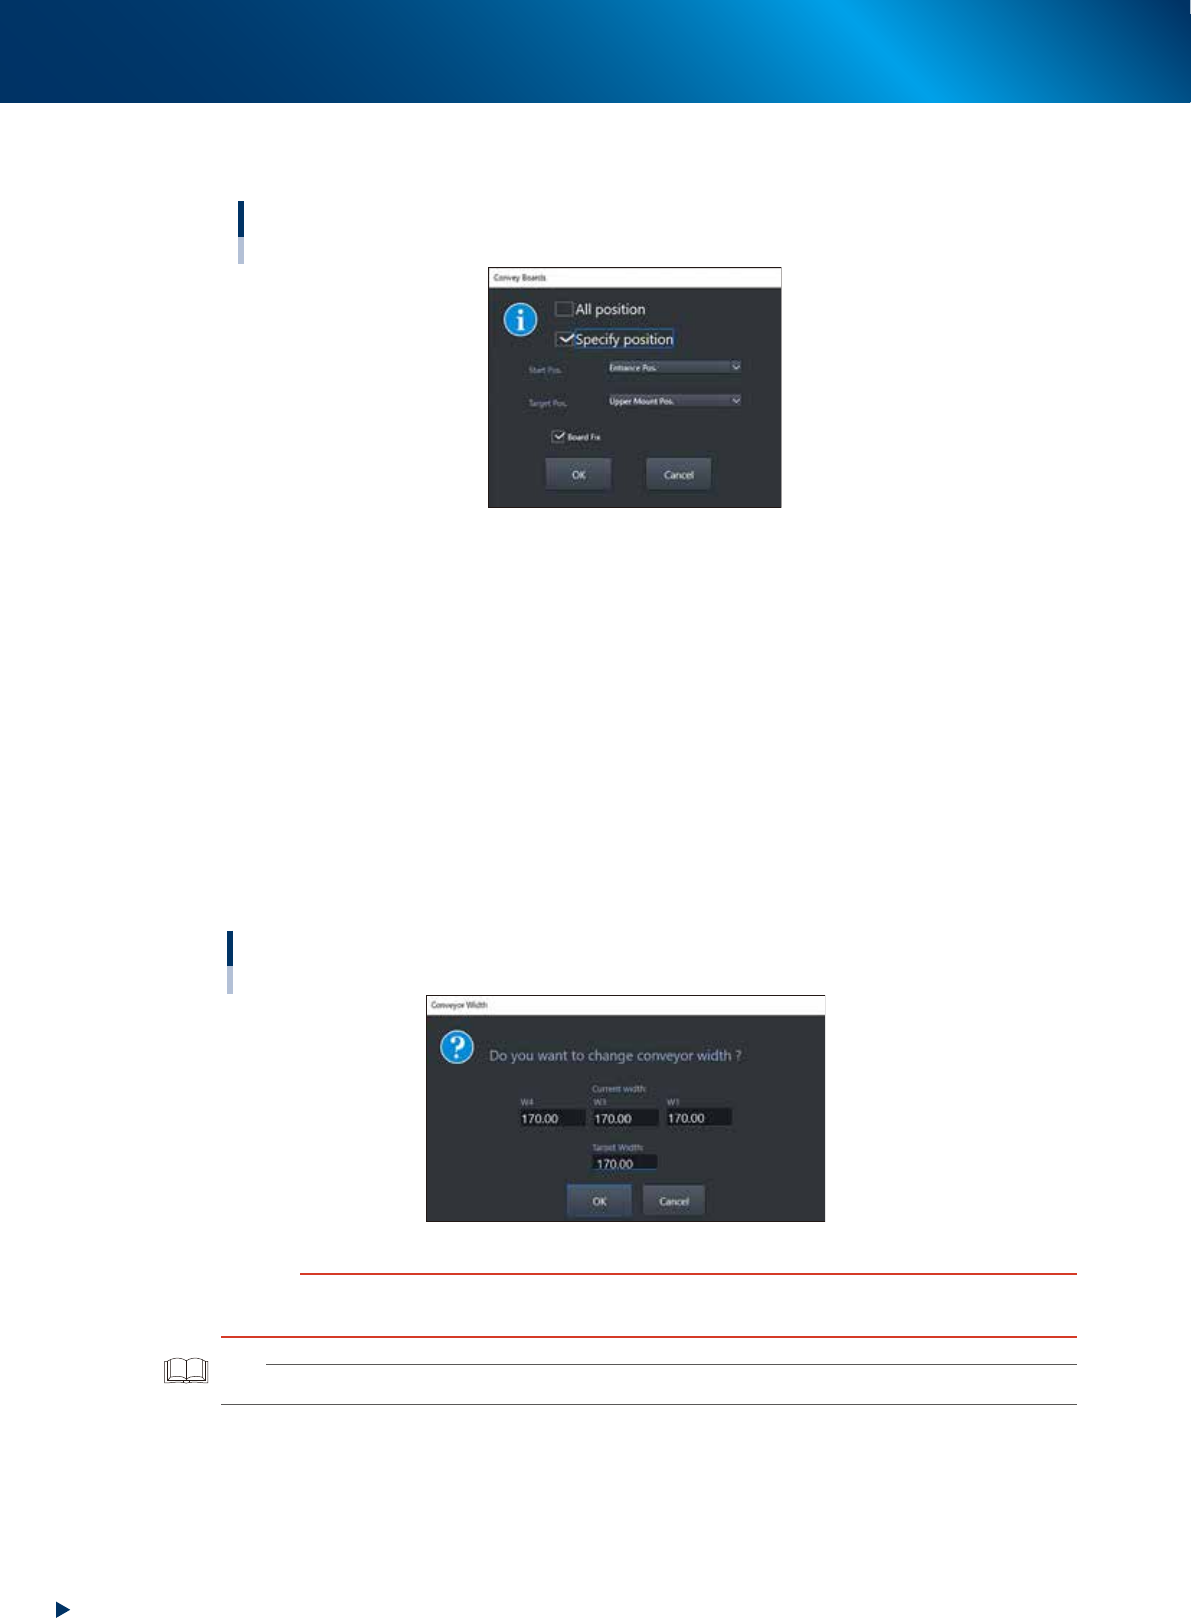
2. [Convey Board] button
When pressing the [Convey Board] button, the following dialog box will appear.
"Convey Boards" dialog box
24206-KMX-00
• All position
When selecting [All position], the board is transferred "entrance
→
Mounting stage 1", "Mounting
stage1
→
Mounting stage 2", and "Mounting stage 2
→
exit".
• Specify position
Specify one of entrance, upstream mounting position, downstream mounting position, or exit as a
start position and target position.
• Board fix
Tick the checkbox when the board is fixed after conveying board.
3. [Width] button
Use this button to adjust the conveyor width to match the width of boards to be produced.
Pressing the [Width] button displays the "Conveyor Width" screen. Check the conveyor width and
press the [OK] button. The conveyor width is changed to the specified width. The desired conveyor
width can be set by entering the value.
"Conveyor Width" screen
24207-KMX-00
c
CAUTION
When changing the conveyor width, check in advance that the conveyor rails do not collide the push-up pins and other
devices.
TIP
W1-axis and W2-axis are represented as "W1" in this screen, as they move at once.