YRM20_Ope_E.pdf - 第174页
4. Preparing component tape 2-77 Chapter 2 Basic o pera tion 5 Check th e state of setting in fe eder . View the feeder from the side to se e that “the tape guide assembly is not lifted”, “the positioning pins placed at …
4. Preparing component tape
2-76
Chapter 2 Basic operation
4.2.1 Setting SS feeder on the feeder exchange carriage
1
Clean the feeder plate.
Remove dust or foreign matter from the feeder plate using a feeder plate cleaning brush or so, as the
same procedure of Step 1 of "4.1.2 Setting feeders on the feeder exchange carriage" in this chapter.
2
Place a tape reel on the reel holder of feeder exchange carriage.
3
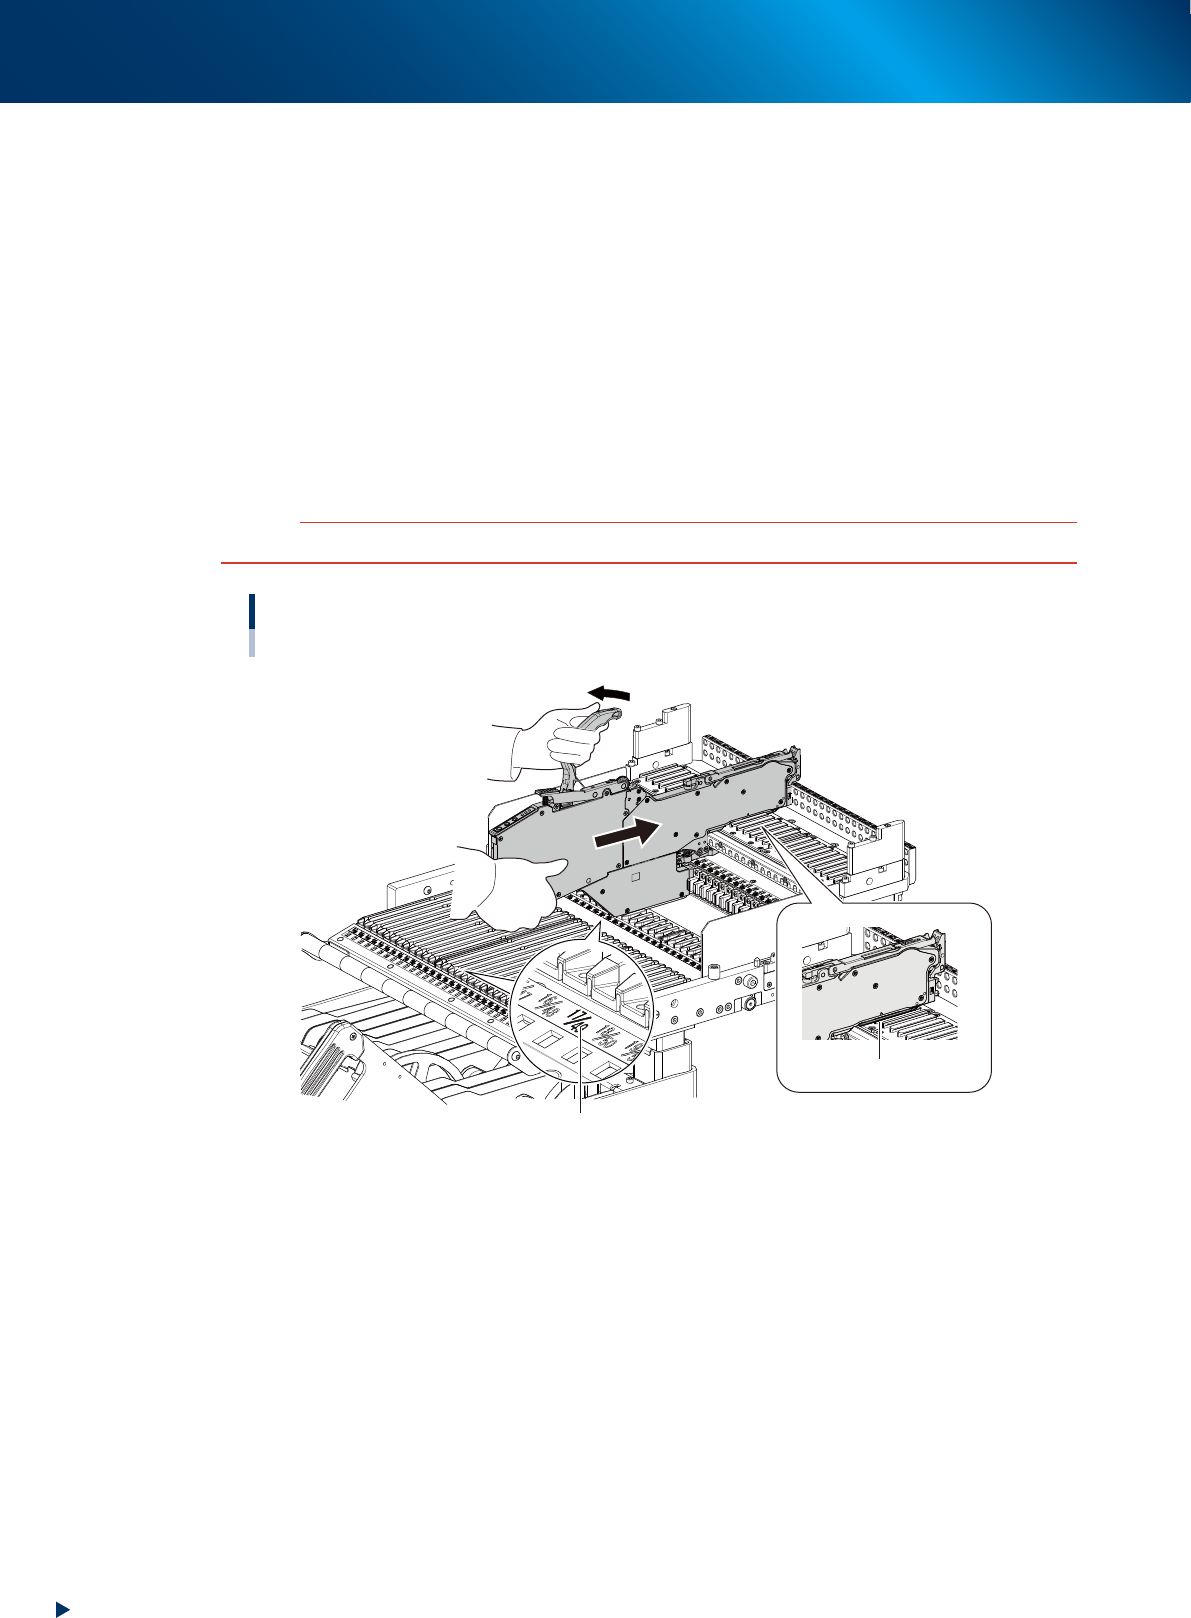
Set SS feeder on feeder exchange carriage.
1. Hold the bottom of SS feeder and pull the handle to near side of operator.
2. Confirm the setting position number written on carriage.
3. Place the feeder temporarily with its under rail aligned with the guide on the feeder plate side.
4. While keeping pulling the handle backward, slide the feeder on the feeder plate to surely insert
the feeder to the end.
c
CAUTION
Do not use excessive force of shock to the devices while setting the feeder.
Feeder exchange carriage
Setting SS feeder on feeder exchange carriage
Under rail
Pull out the handle to near side of operator
Confirm the setting position number
23232-KMX-00
4
Lock the clamping lever assembly.
The clamping lever assembly clamps and locks upon releasing the unclamping lever. Check that the
clamping lever assembly locks firmly and the feeder does not come off. The incorrectly locked
clamping lever assembly may cause the feeder come off while mounting.
4. Preparing component tape
2-77
Chapter 2 Basic operation
5
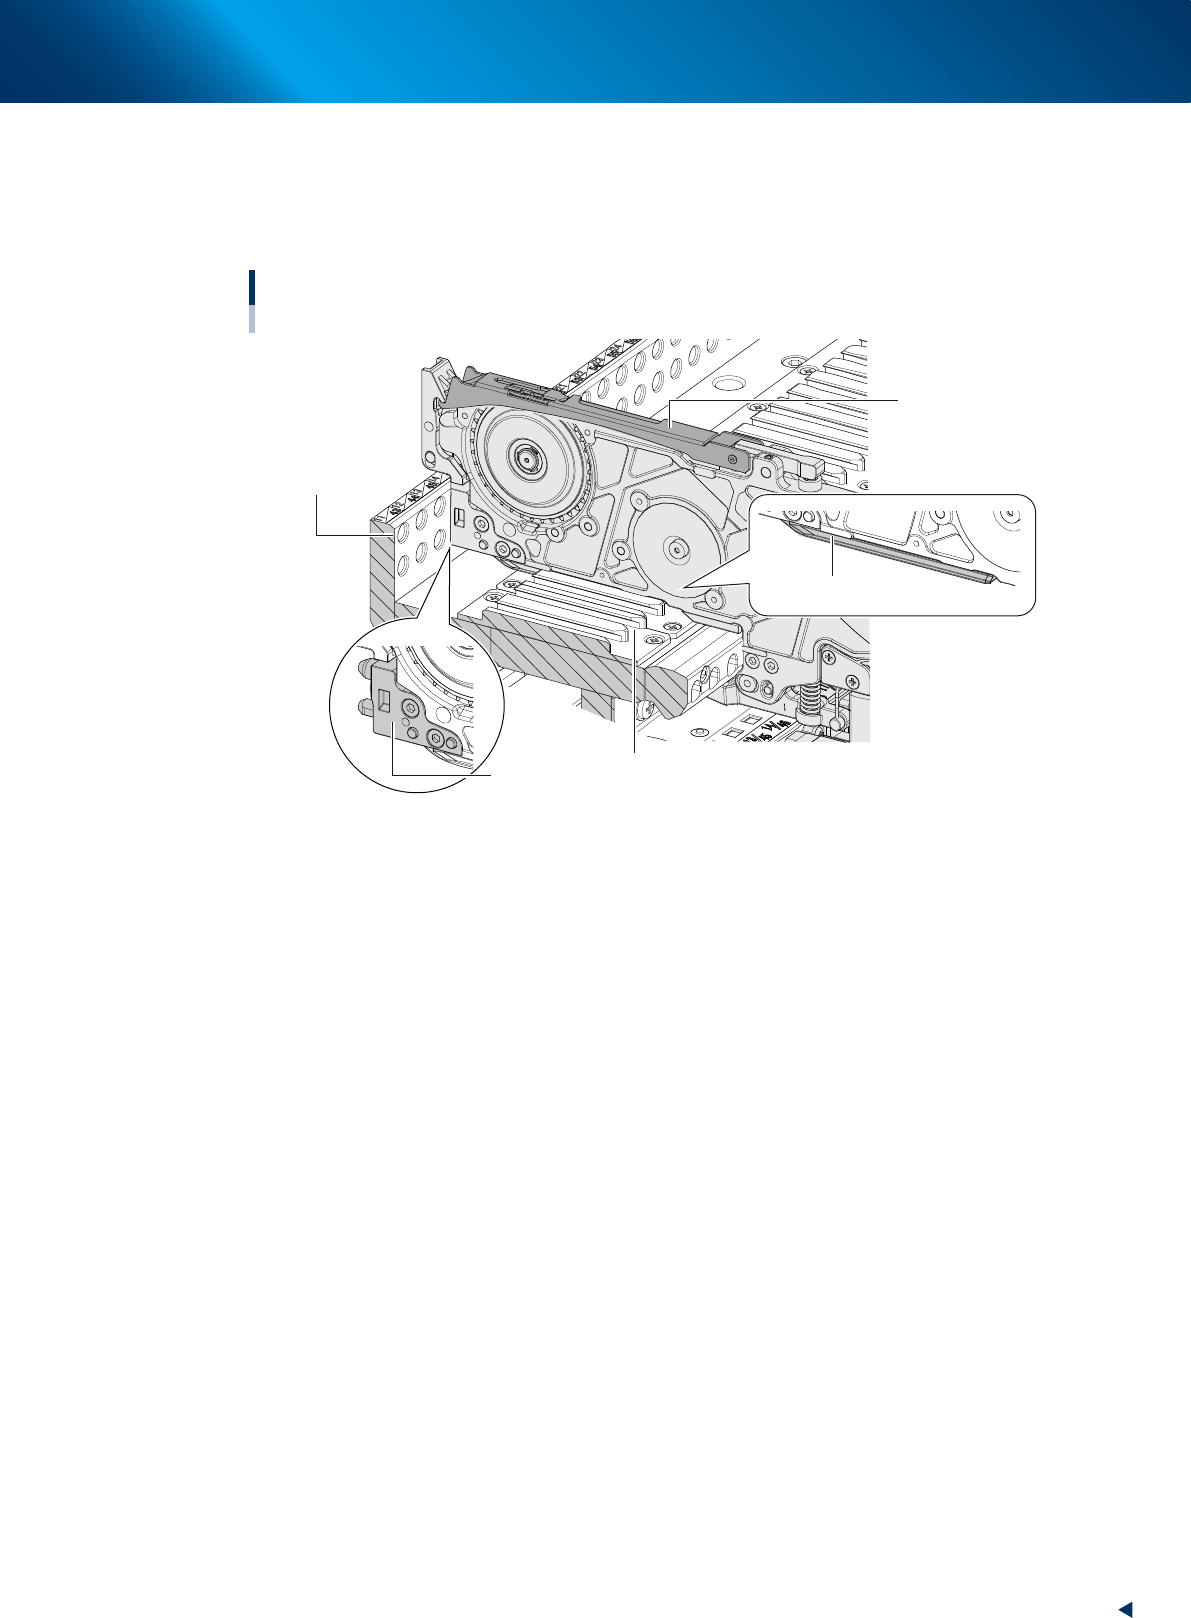
Check the state of setting in feeder.
View the feeder from the side to see that “the tape guide assembly is not lifted”, “the positioning pins
placed at far end of front block are inserted throughly into the feeder positioning holes” and “the
under rail of the feeder firmly, correctly sits in the guide of feeder plate side”.
Checking the state of setting in feeder
SS feeder viewed from side
Front block
Feeder plate guide
Tape guide assembly
Under rail
Feeder positioning hole
23233-KMX-00
4. Preparing component tape
2-78
Chapter 2 Basic operation
4.2.2 Attaching the feeder exchange carriage on the mounter
This section describes the procedure to attach the feeder exchange carriage that is set SS feeders on the mounter.
1
Clean around the clamp units of the machine.
Remove dust or foreign matter around the clamp units of the mounter, using a feeder plate cleaning
brush or so, as the same procedure of Step 1 of "4.1.3 Attaching the feeder exchange carriage on
the mounter" in this chapter.
2
Open the machine safety cover.
3
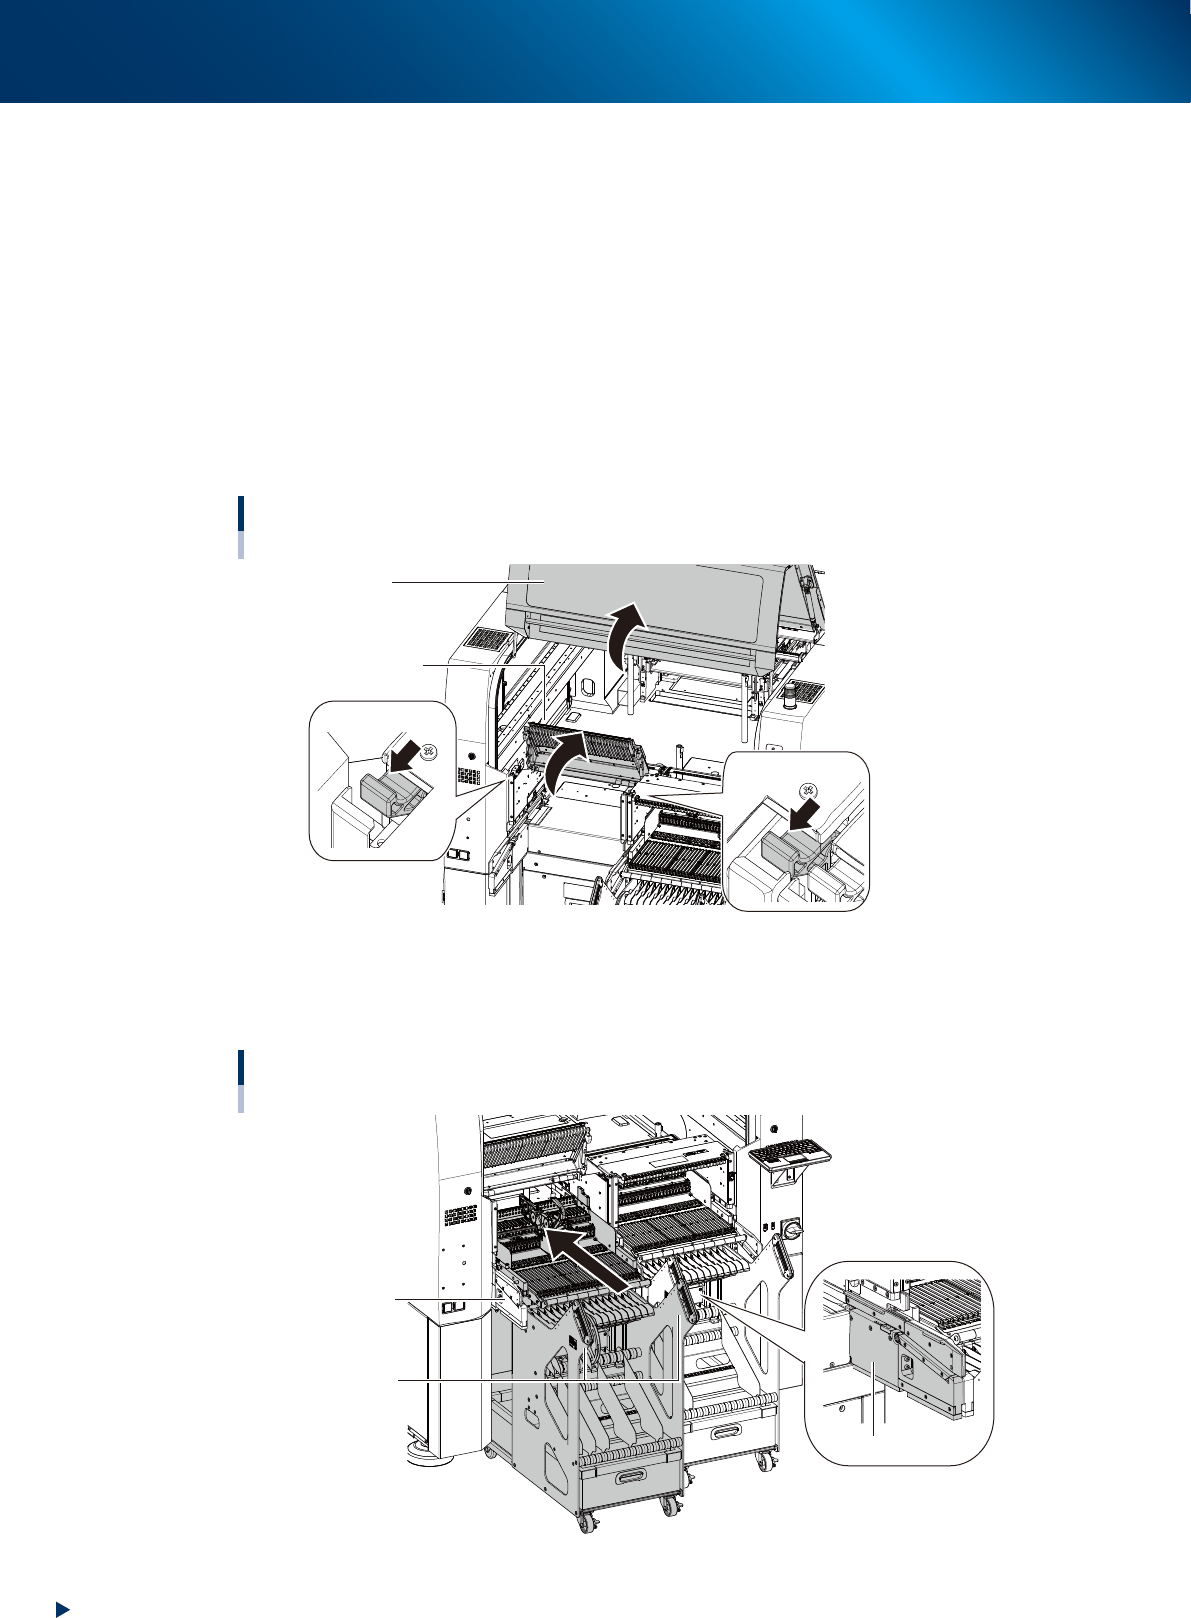
Open the upper cover of machine.
1. Push the cover locks on both sides of upper cover and unlock the upper cover locks.
2. Open upper cover with hands.
Opening the safety cover and upper cover
Cover lock
Safety cover
Cover lock
Upper cover
23234-KMK-00
4
Put the carriage into the machine.
1. Move the feeder exchange carriage in front of the position to attach the carriage.
2. While holding the carriage handle, put it into the mounter straight along the carriage guide.
Attaching the feeder exchange carriage on the mounter
Feeder exchange carriage that is set SS feeders
Handle
Carriage guide
Carriage guide
23235-KMK-00