YRM20_Ope_E.pdf - 第158页
4. Preparing component tape 2-61 Chapter 2 Basic o pera tion 4.1.3 Attaching the feeder exchange carriage on the mounter T his section describes the procedure to attach the feeder exc hange carriage on the mounter . See …
4. Preparing component tape
2-60
Chapter 2 Basic operation
5
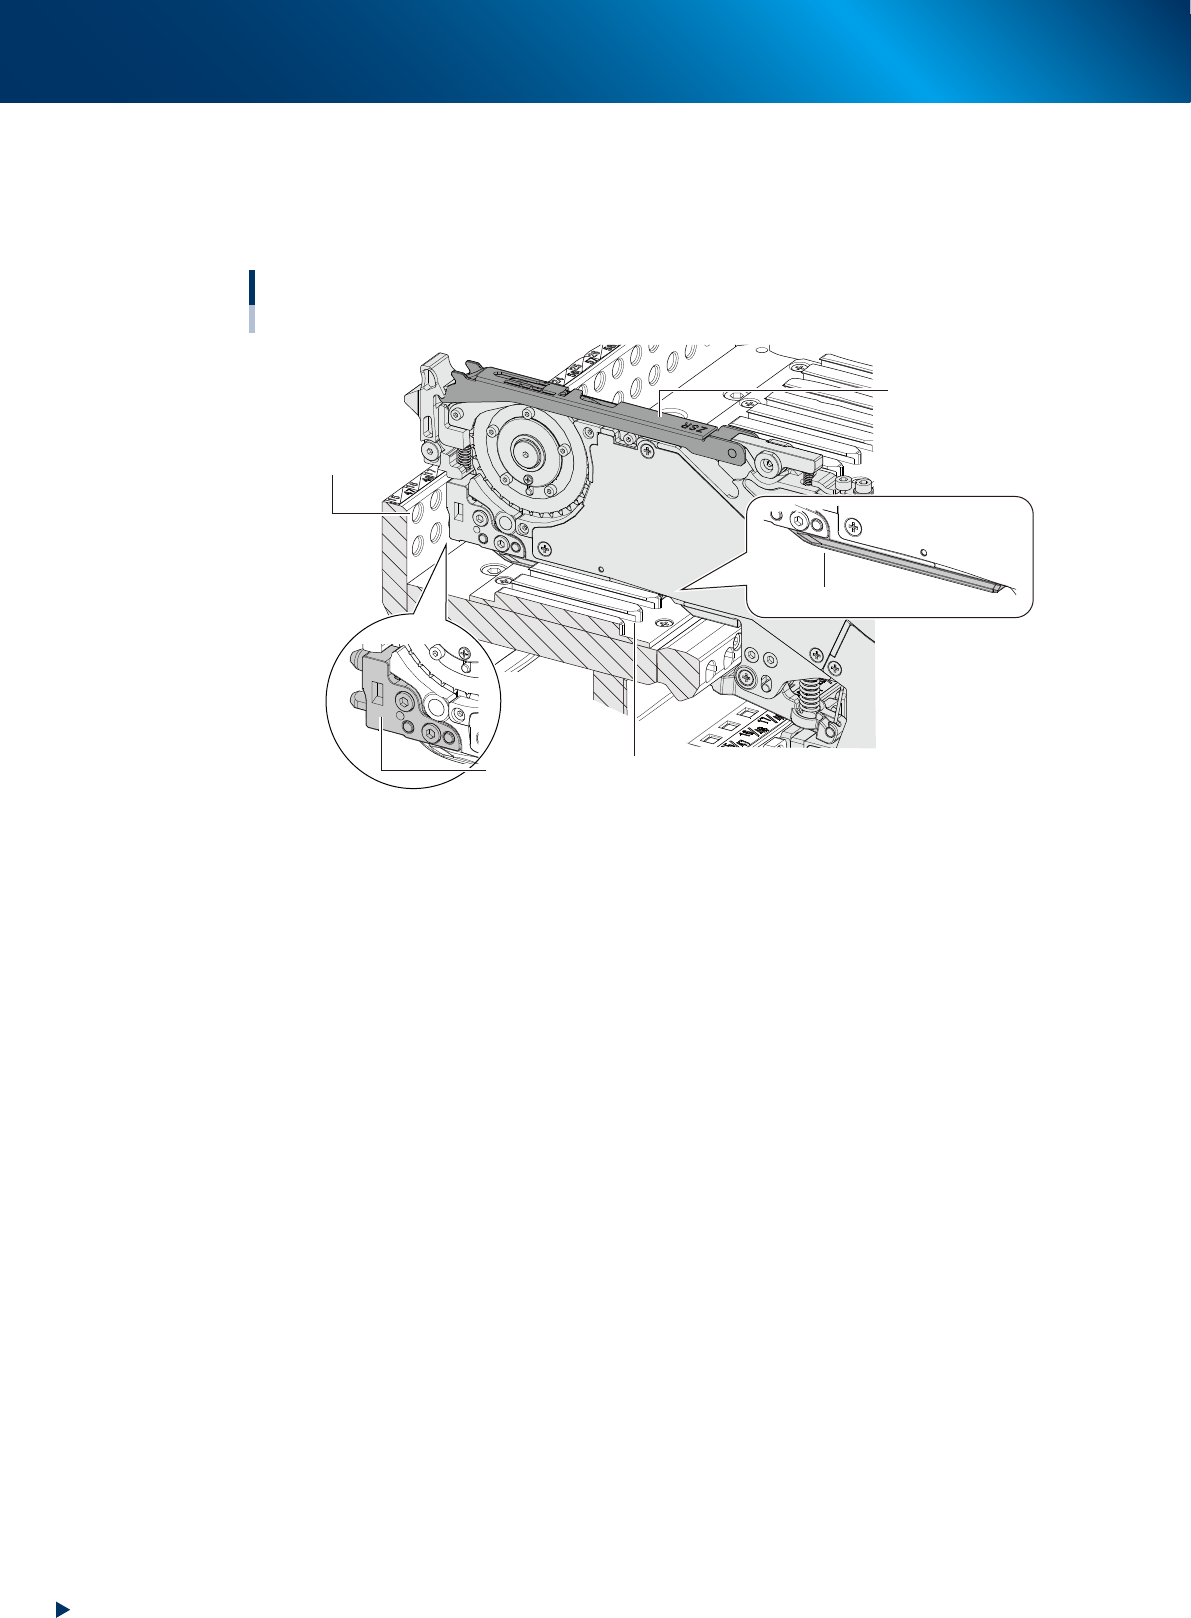
Check the state of setting in feeder.
View the feeder from the side to see that “the tape guide assembly is not lifted”, “the feeder
positioning pin equipped at the front end of front block is inserted to the end of feeder positioning
hole” and “the under rail of the feeder firmly, correctly sits in the feeder plate guide”.
Checking the state of setting in feeder
ZSR feeder viewed from side
Under rail
Tape guide assembly
Feeder plate guide
Front block
Feeder positioning hole
23216-KMX-00
4. Preparing component tape
2-61
Chapter 2 Basic operation
4.1.3 Attaching the feeder exchange carriage on the mounter
This section describes the procedure to attach the feeder exchange carriage on the mounter. See "4.2 SS
Feeder" in this chapter for procedure of attaching the feeder exchange carriage with SS feeder to mounter.
1
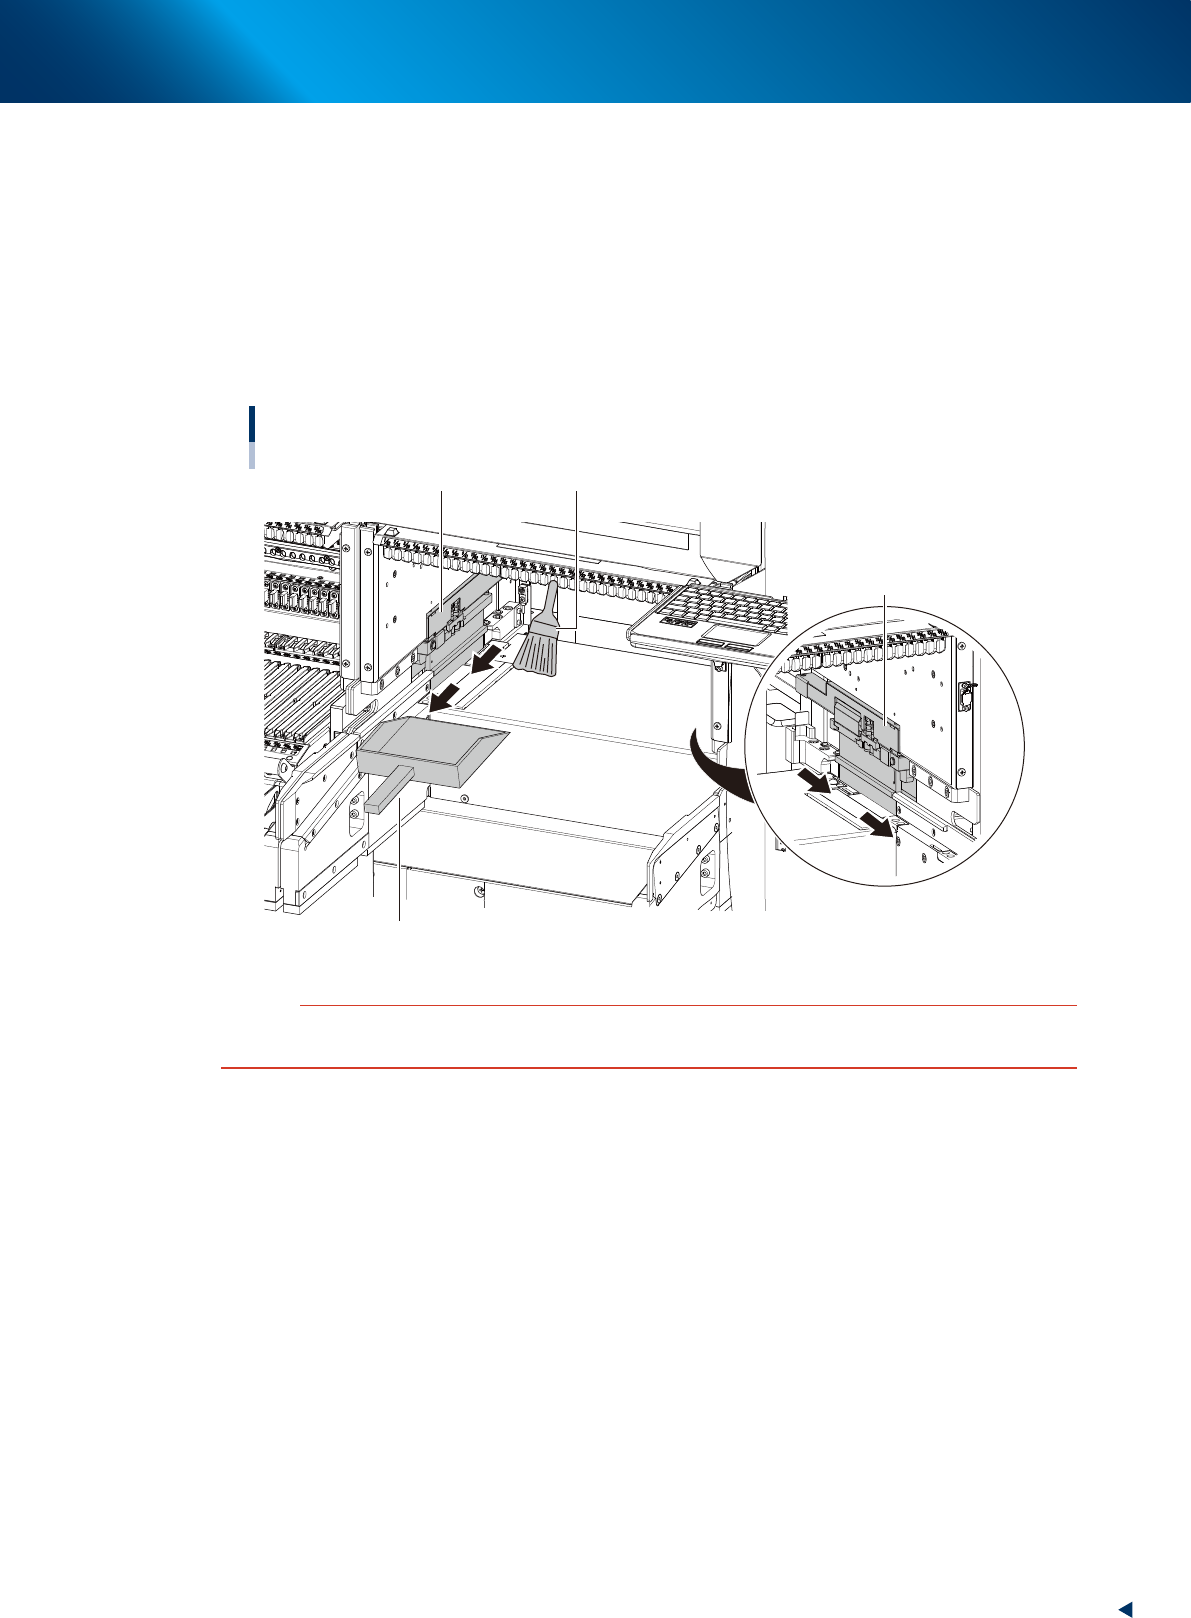
Clean around the clamp units of the machine.
Before attaching the carriage on the mounter, remove the dust or foreign matter around the clamp
units of the carriage at machine side. Use the feeder plate cleaning brush that comes with the
machine, a vacuum cleaner (home use) or the vacuum assembly (option) to get rid of dust or foreign
matter around the clamp units.
Cleaning the clamp unit
Clamp unit
Receive dust with a dustpan
Cleaning brush
Clamp unit
23217-KMX-00
c
CAUTION
A connector unit supplying power and air to carriage is equipped at the carriage clamp unit. Some foreign matters
entering to the connector of the clamp unit might cause the short circuit to damage the equipment.
4. Preparing component tape
2-62
Chapter 2 Basic operation
2
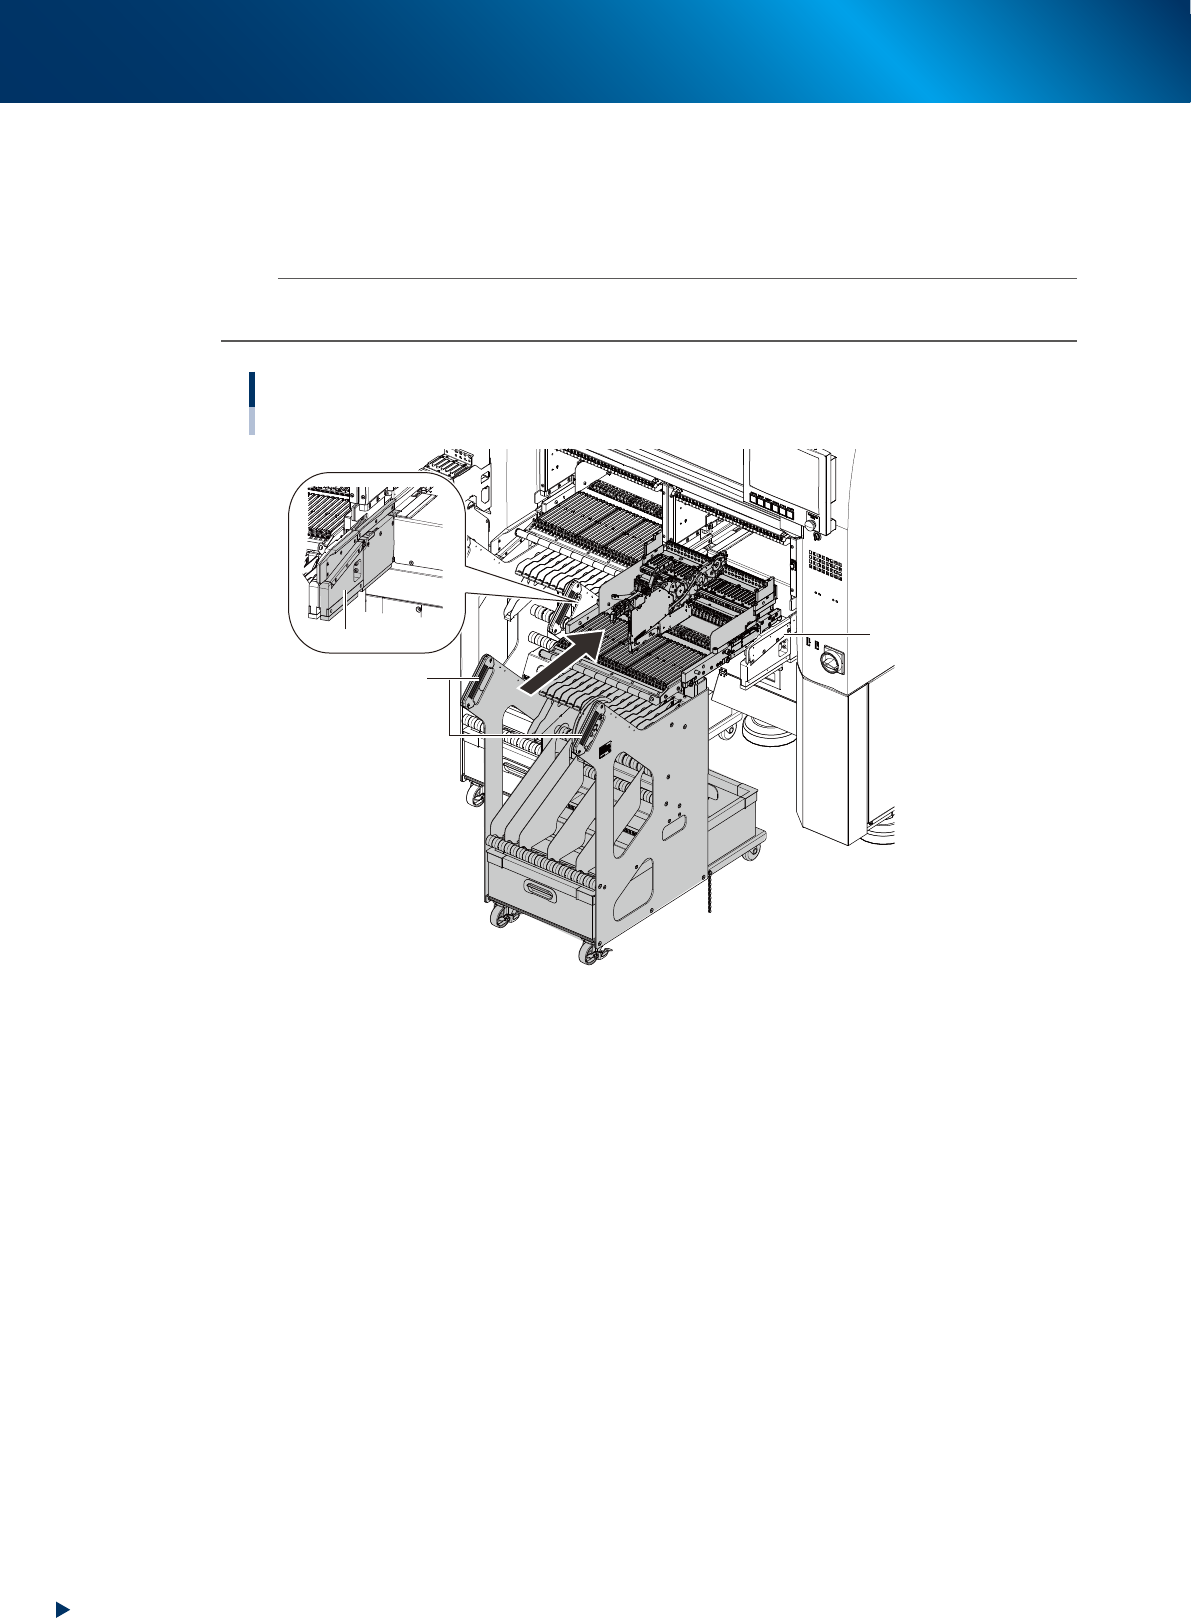
Put the carriage into the machine.
1. Move the feeder exchange carriage in front of the position to attach the carriage.
2. While holding the carriage handle, put it into the mounter straight along the carriage guide.
3. Keep fixing the carriage by holding handles while inserting the carriage to the end.
n
NOTE
The feeder exchange carriage may deviate upon clamping depending on the installed position as the floor tilts.
Hold the handles to fix the feeder exchange carriage till the end of the carriage clamping of Step 3 to 4.
Putting the carriage into the mounter
Handles
Carriage guide
Carriage guide
23218-KMX-00