YRM20_Ope_E.pdf - 第176页
4. Preparing component tape 2-79 Chapter 2 Basic o pera tion 5 Close th e upper co ver of mach ine. 6 Clo se the machi ne saf et y c o ver . 7 While holdi ng the carriage handles and put the feeder exchange carriage into…
4. Preparing component tape
2-78
Chapter 2 Basic operation
4.2.2 Attaching the feeder exchange carriage on the mounter
This section describes the procedure to attach the feeder exchange carriage that is set SS feeders on the mounter.
1
Clean around the clamp units of the machine.
Remove dust or foreign matter around the clamp units of the mounter, using a feeder plate cleaning
brush or so, as the same procedure of Step 1 of "4.1.3 Attaching the feeder exchange carriage on
the mounter" in this chapter.
2
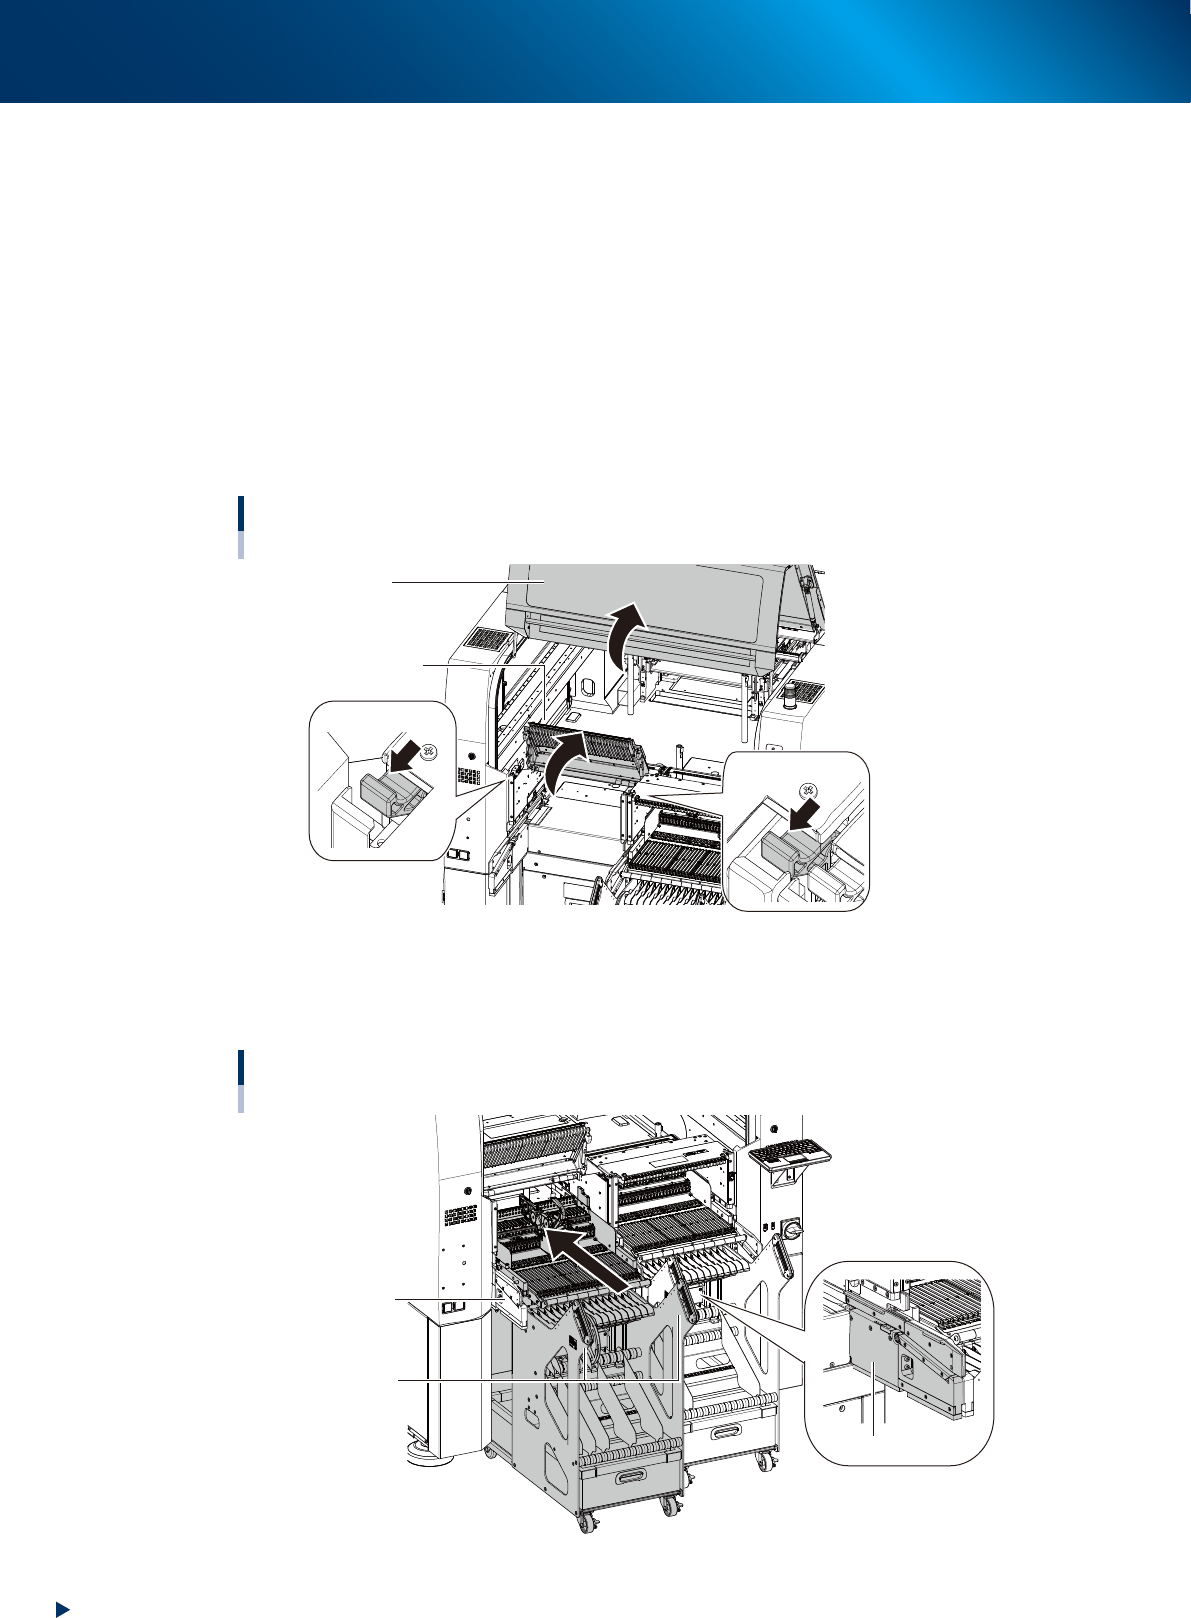
Open the machine safety cover.
3
Open the upper cover of machine.
1. Push the cover locks on both sides of upper cover and unlock the upper cover locks.
2. Open upper cover with hands.
Opening the safety cover and upper cover
Cover lock
Safety cover
Cover lock
Upper cover
23234-KMK-00
4
Put the carriage into the machine.
1. Move the feeder exchange carriage in front of the position to attach the carriage.
2. While holding the carriage handle, put it into the mounter straight along the carriage guide.
Attaching the feeder exchange carriage on the mounter
Feeder exchange carriage that is set SS feeders
Handle
Carriage guide
Carriage guide
23235-KMK-00
4. Preparing component tape
2-79
Chapter 2 Basic operation
5
Close the upper cover of machine.
6
Close the machine safety cover.
7
While holding the carriage handles and put the feeder exchange carriage into the
end again. Then keep it in its position.
n
NOTE
The feeder exchange carriage may deviate upon clamping depending on the installed position as the floor tilts.
Hold the handles to fix the feeder exchange carriage till the end of the carriage clamping of Step 7 to 8.
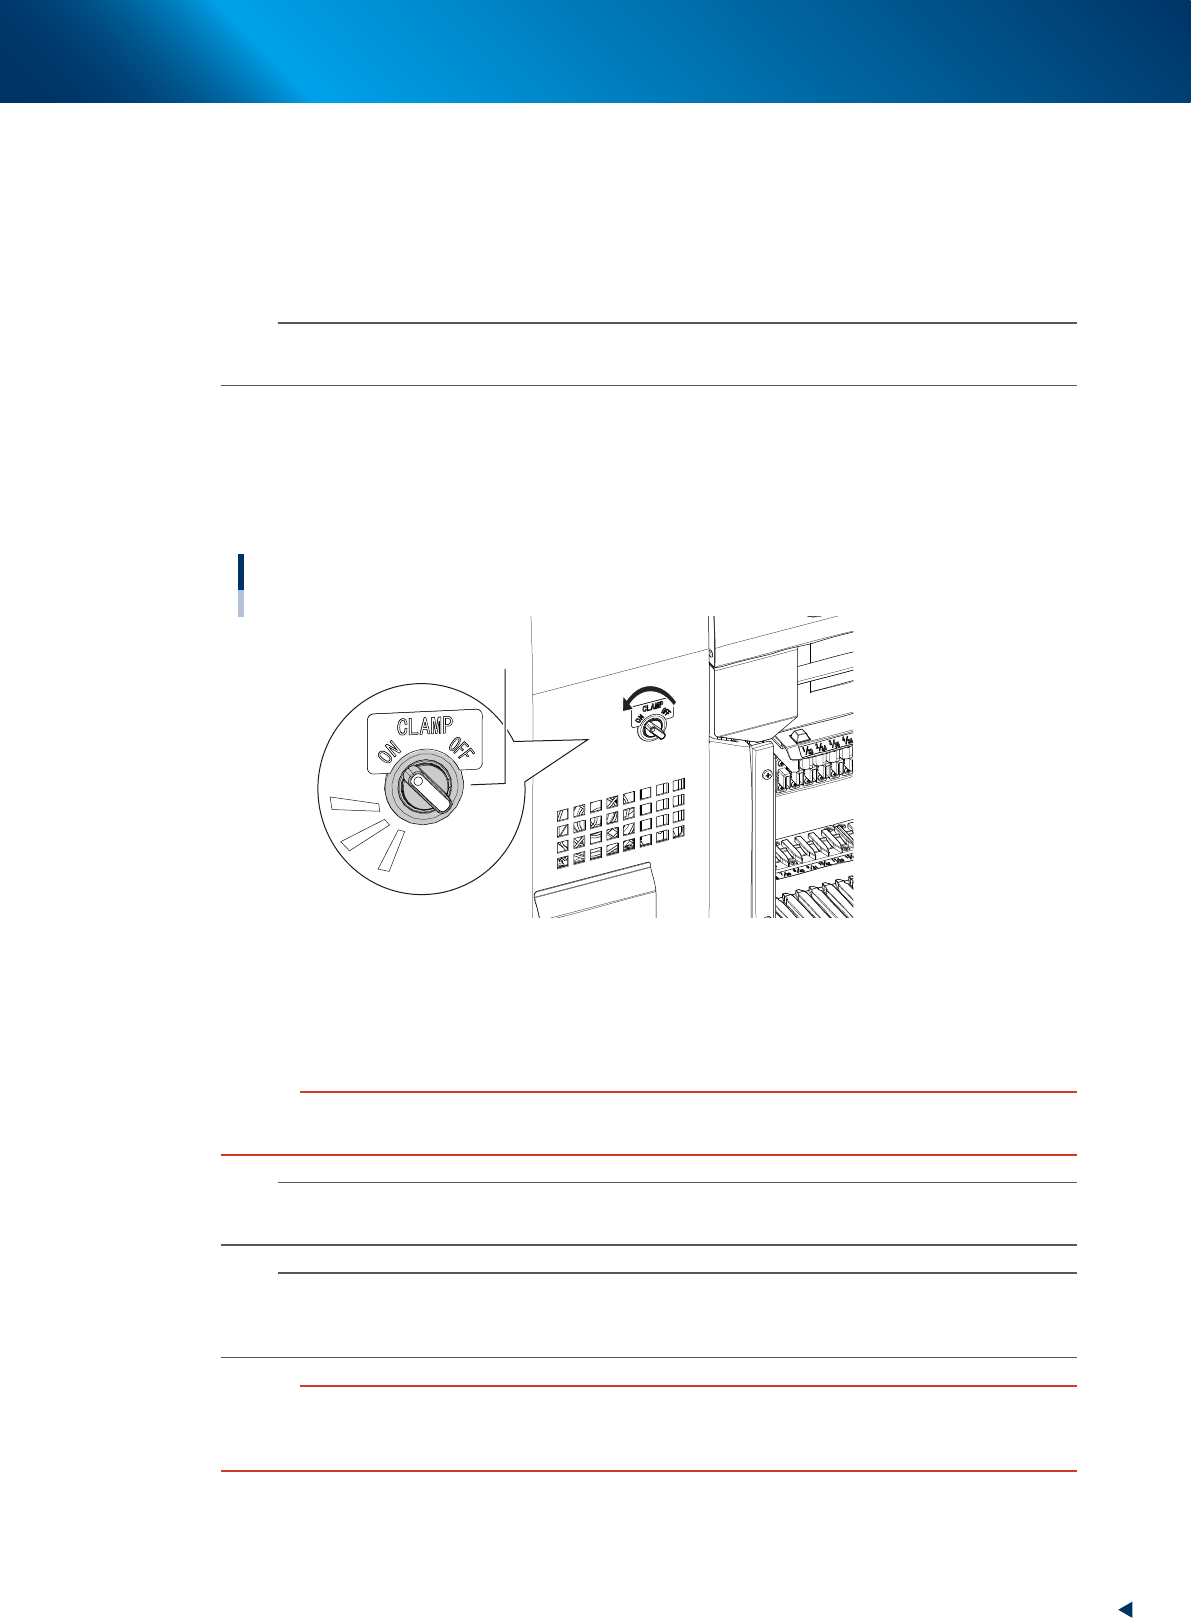
8
Turn the clamp switch ON.
Turn the clamp switch corresponding the position where the carriage is inserted to left (ON), then the
carriage clamp unit at the mounter side moves down to clamp the carriage. During clamping
carriage, the LED indicator of the clamp switch starts blinking. After that, the communication is
checked automatically between the mounter, the carriage and the feeders.
Carriage clamp switch
Clamp switch
23236-KMX-00
9
Confirm the clamp switch light is on.
After the communication check between the mounter, the carriage and the feeders are completed, the
switch indicator is changed from blinking to lighting. Let go of carriage handles.
c
CAUTION
While the clamp switch is blinking, do not touch inside of mounter (carriage). The clamp unit moving down might pinch
hands.
n
NOTE
While the machine safety cover or upper cover is open, the clamp unit doesn't move down even with turning the clamp
switch.
n
NOTE
There is the sensor called "forward end sensor(FDR FORWARD SENSOR)" at far end of the carriage set position of the
mounter. When the carriage is inserted to far end, this sensor recognizes. When this sensor doesn't recognize the carriage,
the clamp units doesn't move down even with turning the clamp switch.
c
CAUTION
The deviation of carriage during clamping motion loads the clamp connector and the repetition of this motion may damage
the clamp connector.
Make sure to keep firmly the carriage handles to attach the carriage.
4. Preparing component tape
2-80
Chapter 2 Basic operation
4.2.3 Detaching the feeder exchange carriage from mounter
e
1
Press the emergency stop button.
2
Turn the clamp switch to the right (OFF).
Upon turning to right (OFF) the clamp switch corresponding to the detaching carriage, the clamp unit
of machine side moves up. The LED indicator of clamp switch blinks during moving up the clamp unit.
When the feeder is unclamped, the clamp switch indicator will go off.
c
CAUTION
While the clamp switch is blinking, do not touch inside of machine or carriage.
The clamp unit moving down might pinch hands.
n
NOTE
When the emergency stop button is nott pressed, the clamp unit does not move up even the clamp switch is turned OFF.
3
Check that clamp switch lamp is off.
4
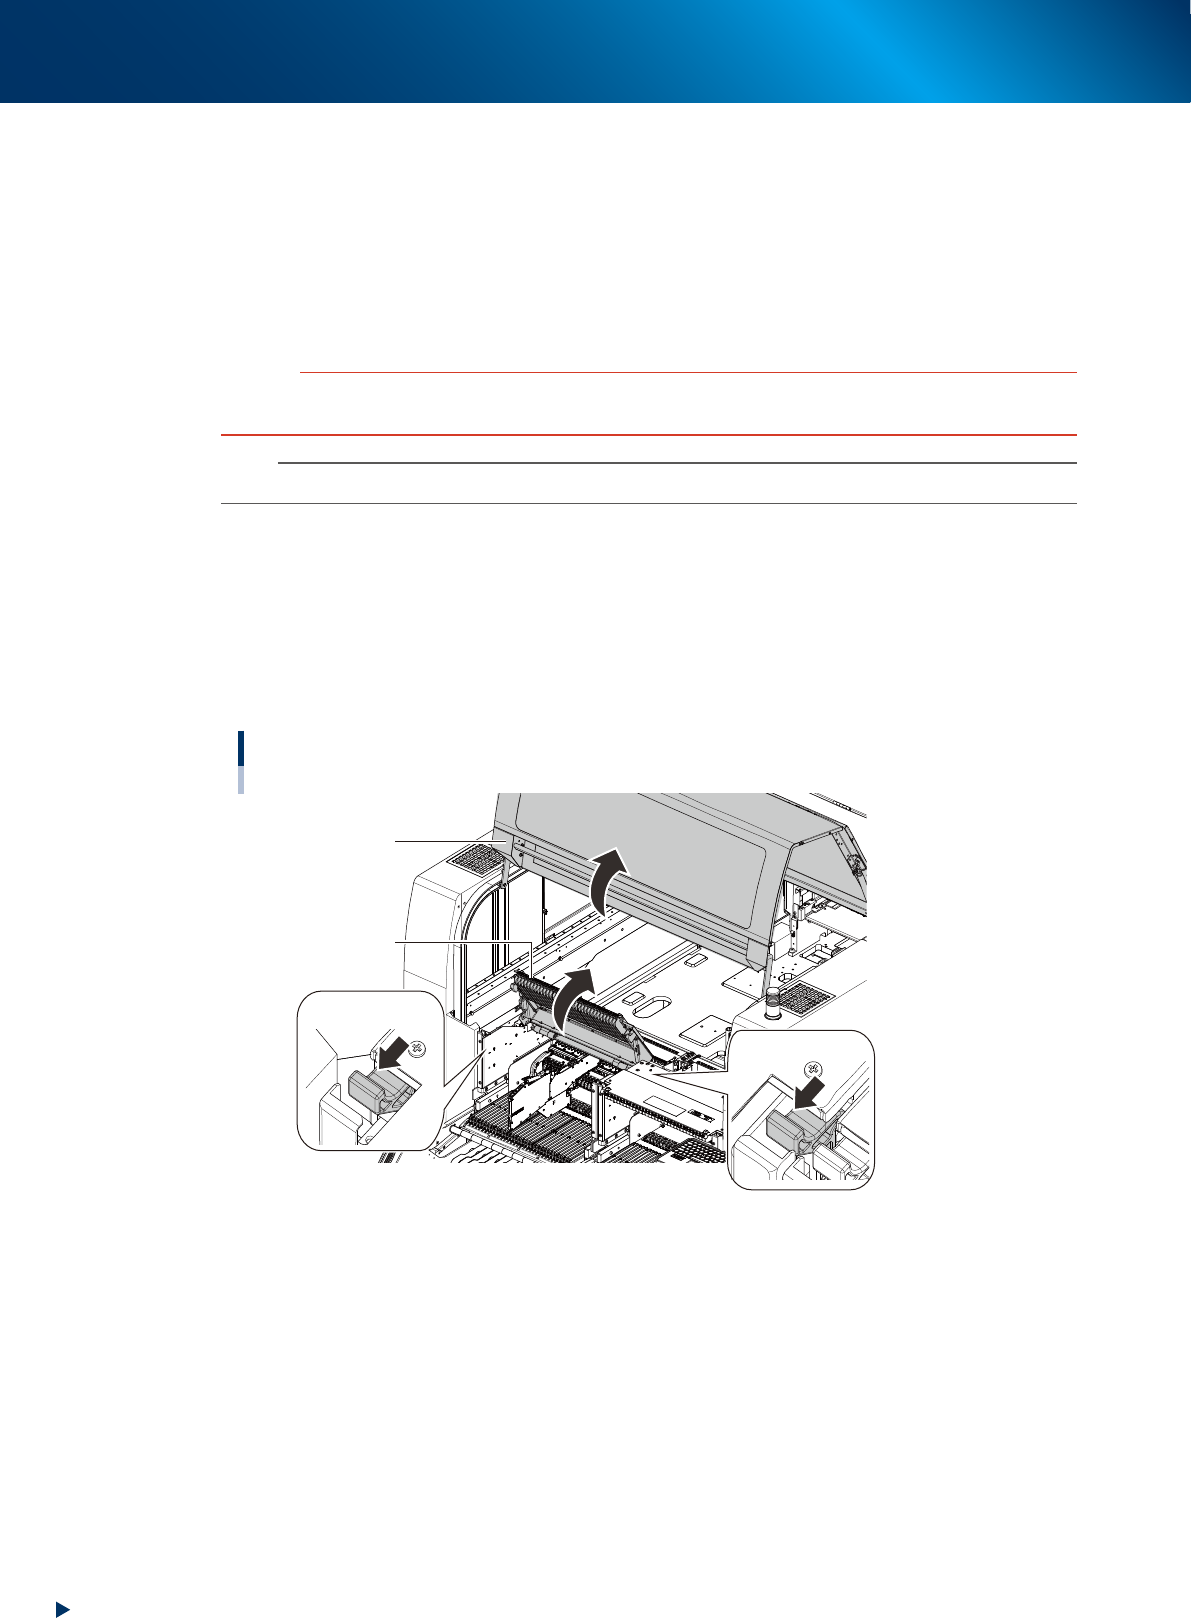
Open machine safety cover.
5
Open upper cover of machine.
1. Push the cover locks on both sides of upper cover and unlock the upper cover locks.
2. Open upper cover with hands.
Opening the safety cover and upper cover
Cover lock
Cover lock
Upper cover
Safety cover
23237-KMX-00