YRM20_Ope_E.pdf - 第118页
2. Operation screen and buttons 2-21 Chapter 2 Basic operation ► Manual head operation [Unit] – [Head] screen RM head 3 10 6 7 8 12 2 11 5 9 4 1 Currently placed heads under the rods (Z-axis and V -axis). 24234-KMX-00 Bu…

2. Operation screen and buttons
2-20
Chapter 2 Basic operation
5. [Left] button, [Right] button
Rotates the conveyor motor in the left or right direction at high speeds.
6. [Low Left] button, [Low Right] button
Rotates the conveyor motor in the left or right direction at low speeds.
7. [Exit Stopper] button
Raises or lowers the exit stopper.
Use this button to stop a board carried-out at the conveyor exit.
8. [Main Stopper] button
Raises or lowers the main stopper.
Use this button to stop the board transferred onto the conveyor at mounting position.
9. [Board Clamp] button
Raises or lowers the board clamp plate.
Clamps the board by pushing up its edges from the bottom (underside).
10. [Push Up] button
Press this button to call up the “Board thickness” screen. Enter the data in the parameters on the
screen. Press the [OK] button. Then, the push-up stage goes up to clamp the board from the bottom
(underside).
11. [Entrance Stopper] button
Raises or lowers the entrance stopper.
Use this button to stop the board carried-in at the standby position.
2. Operation screen and buttons
2-21
Chapter 2 Basic operation
►
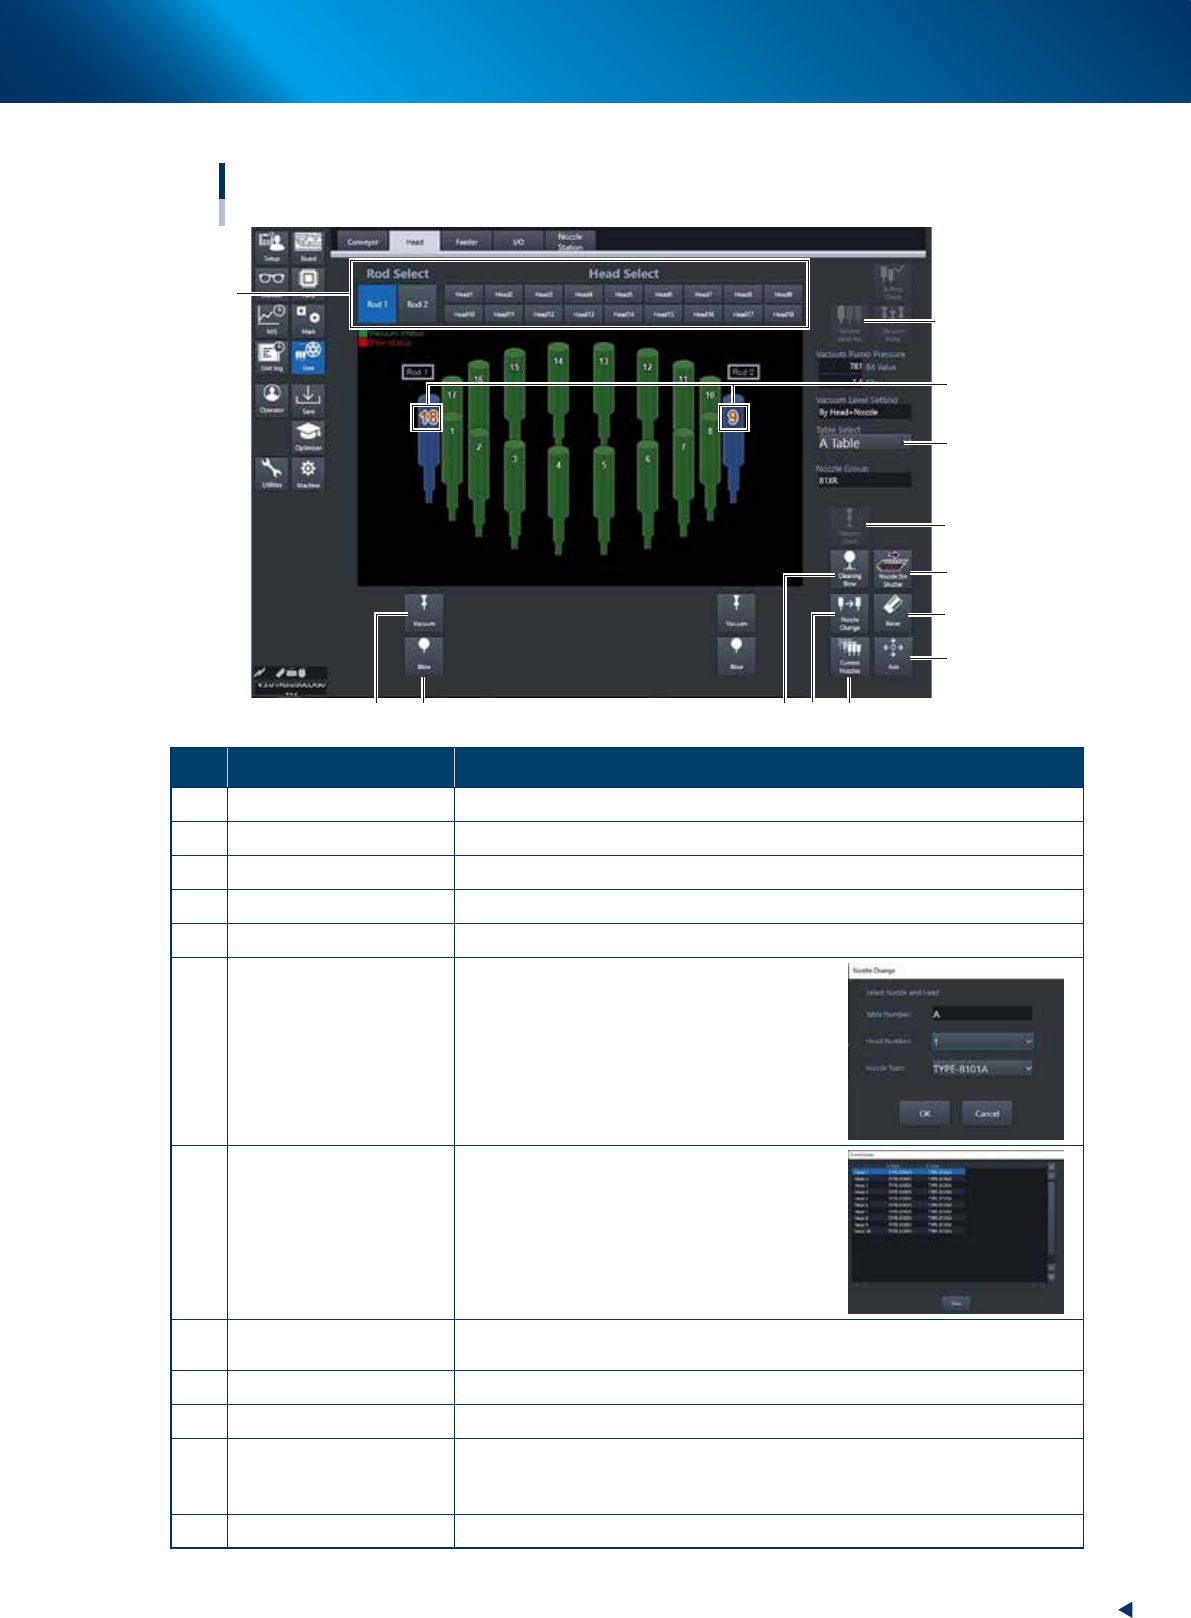
Manual head operation
[Unit] – [Head] screen
RM head
3
10
6 7
8
12
2
11
5
9
4
1
Currently placed heads
under the rods
(Z-axis and V-axis).
24234-KMX-00
Button name Function
1 Rod Select, Head Select Selected head moves under selected rod.
2 Recover Valve Pos
Moves the V-axis on the rod side selected by "Rod select" to the initial position.
3 Vacuum Turns the vacuum of heads placed under the rods 1 and 2 ON/OFF.
4 Blow Turns the blow of heads placed under the rods 1 and 2 ON/OFF.
5 Cleaning Blow Displays the "Execution Nozzle Cleaning Blow" screen.
6 Nozzle Change
Opens the "Nozzle Change" screen. Specify
the head and nozzle type to perform nozzle
change.
7 Current Nozzles
Shows a list of nozzle types currently
attached to each head.
8 Axis
Opens the "Move Axis" screen. This is the same as the [Axis] button on the
[Unit] - [Conveyor] screen.
9 Reset
Resets maximum and minimum values measured by the [Negative Pressure] button.
10 Nozzle STN Shutter Opens or closes the nozzle station shutter.
11 Vacuum Check
Measures head negative pressure placed under the rod selected at "Rod
Select". The maximum, minimum and current values appear beneath each
rods after completing measurement.
12 Table Select Switches the head unit to be displayed.
2. Operation screen and buttons
2-22
Chapter 2 Basic operation
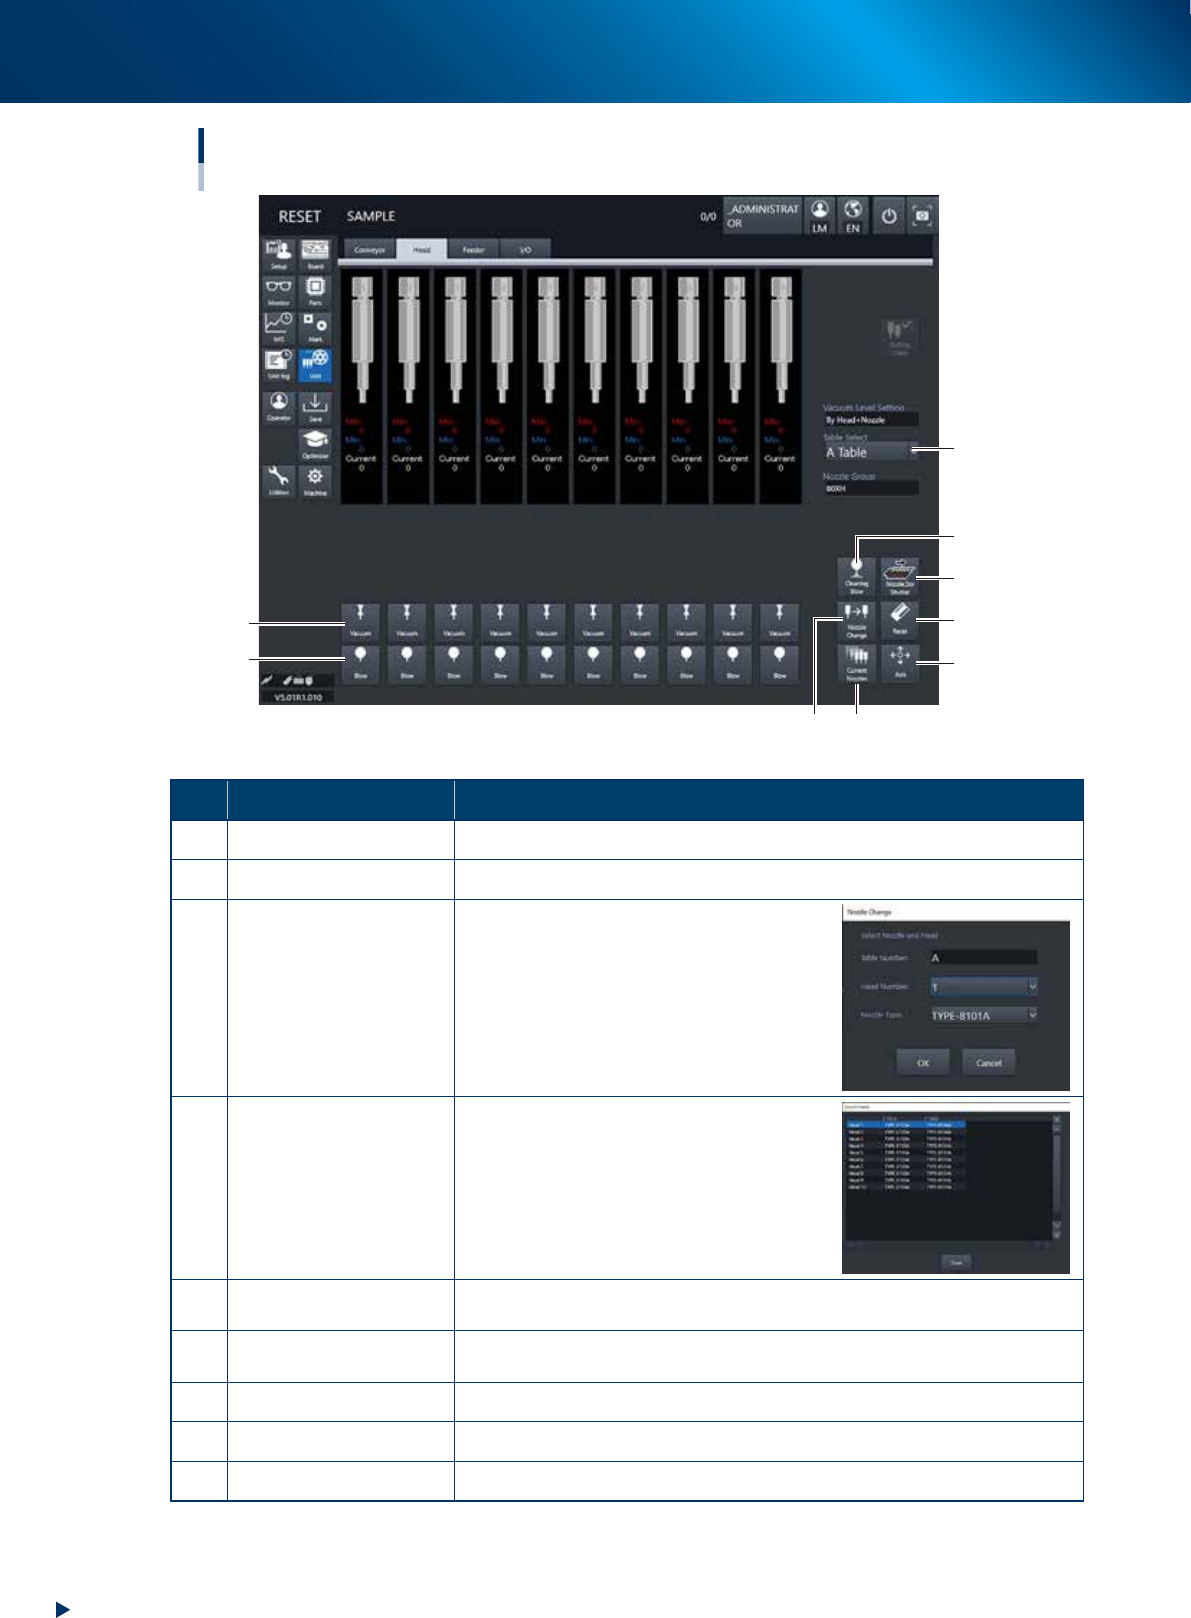
[Unit] – [Head] screen
HM head
1
2
7
6
43
5
9
8
24209-KMX-00
Button name Function
1 Vacuum Turns the vacuum of each head on or off.
2 Blow Turns the air blow in each head on or off.
3 Nozzle Change
Opens the "Nozzle Change" screen. Specify
the head and nozzle type to perform nozzle
change.
4 Current Nozzles
Shows a list of nozzle types currently
attached to each head.
5 Axis
Opens the "Move Axis" screen. This is the same as the [Axis] button on the
[Unit] - [Conveyor] screen.
6 Reset
The maximum, minimum and current values appear under each heads. Resets
the maximum and minimum values.
7 Nozzle STN Shutter Opens or closes the nozzle station shutter.
8 Cleaning Blow Displays the "Execution Nozzle Cleaning Blow" screen.
9 Table Select Switches the table display.