YRM20_Ope_E.pdf - 第211页
1. Flow from starting up machine to production 3-31 Chapter 3 Flow from starting up machine to production 3 Check and edi t the sta te of moun ting. Check the s tate o f component mounting of the abor t ed informat ion. …
1. Flow from starting up machine to production
3-30
Chapter 3 Flow from starting up machine to production
1.12 Resuming operation from the stopped point
If resuming to mount a board that has been reset due to an error occurrence in the middle of production or
mounting the components on a particular block or at a particular mounting point, use this “Halfway
Continue (Resuming operation from the stopped point)” function. Note that this function can be used just
for the first board after the operation is resumed, with routine mounting operation beginning from the next
board.
1
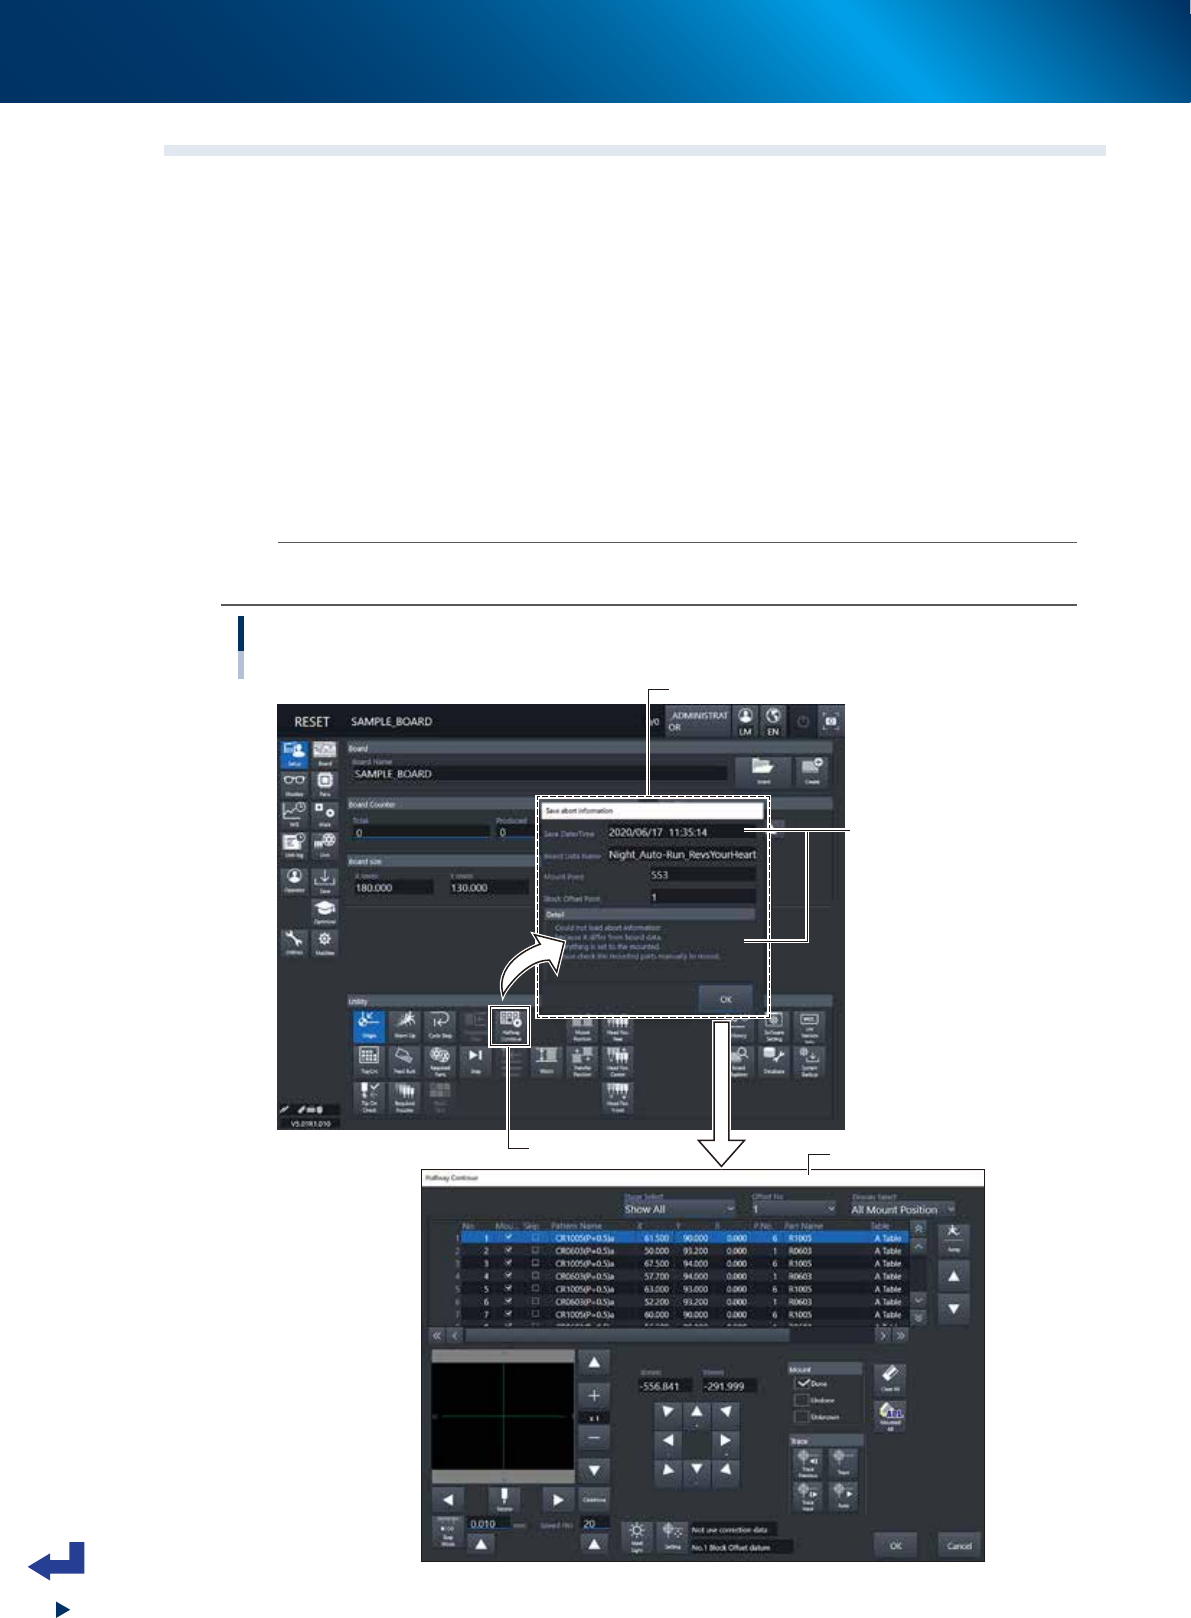
Press the [Halfway Continue] button.
Press the [Halfway Continue] button on the “Setup” screen, then the “Save abort information” screen
appears.
2
Read out the aborted information that has been saved.
After confirming the “Save Date/Time” and other details on the “Save abort information” screen,
press the [OK] button to open the “CONFIRMATION OF BOARD FIX” screen and then open the
“Halfway Continue” screen.
n
NOTE
When system error occurred and machine stopped due to power outage, the error message "Check the inside of machine" may
appear in addition to “CONFIRMATION OF BOARD FIX” screen. In this case, follow the message and check machine inside.
Halfway Continue
[Setup] screen -"Halfway Continue" screen
[Halfway Continue] button
“Save abort information” screen
“Halfway Continue” screen
Check the aborted time
and details.
24320-KMX-00
1. Flow from starting up machine to production
3-31
Chapter 3 Flow from starting up machine to production
3
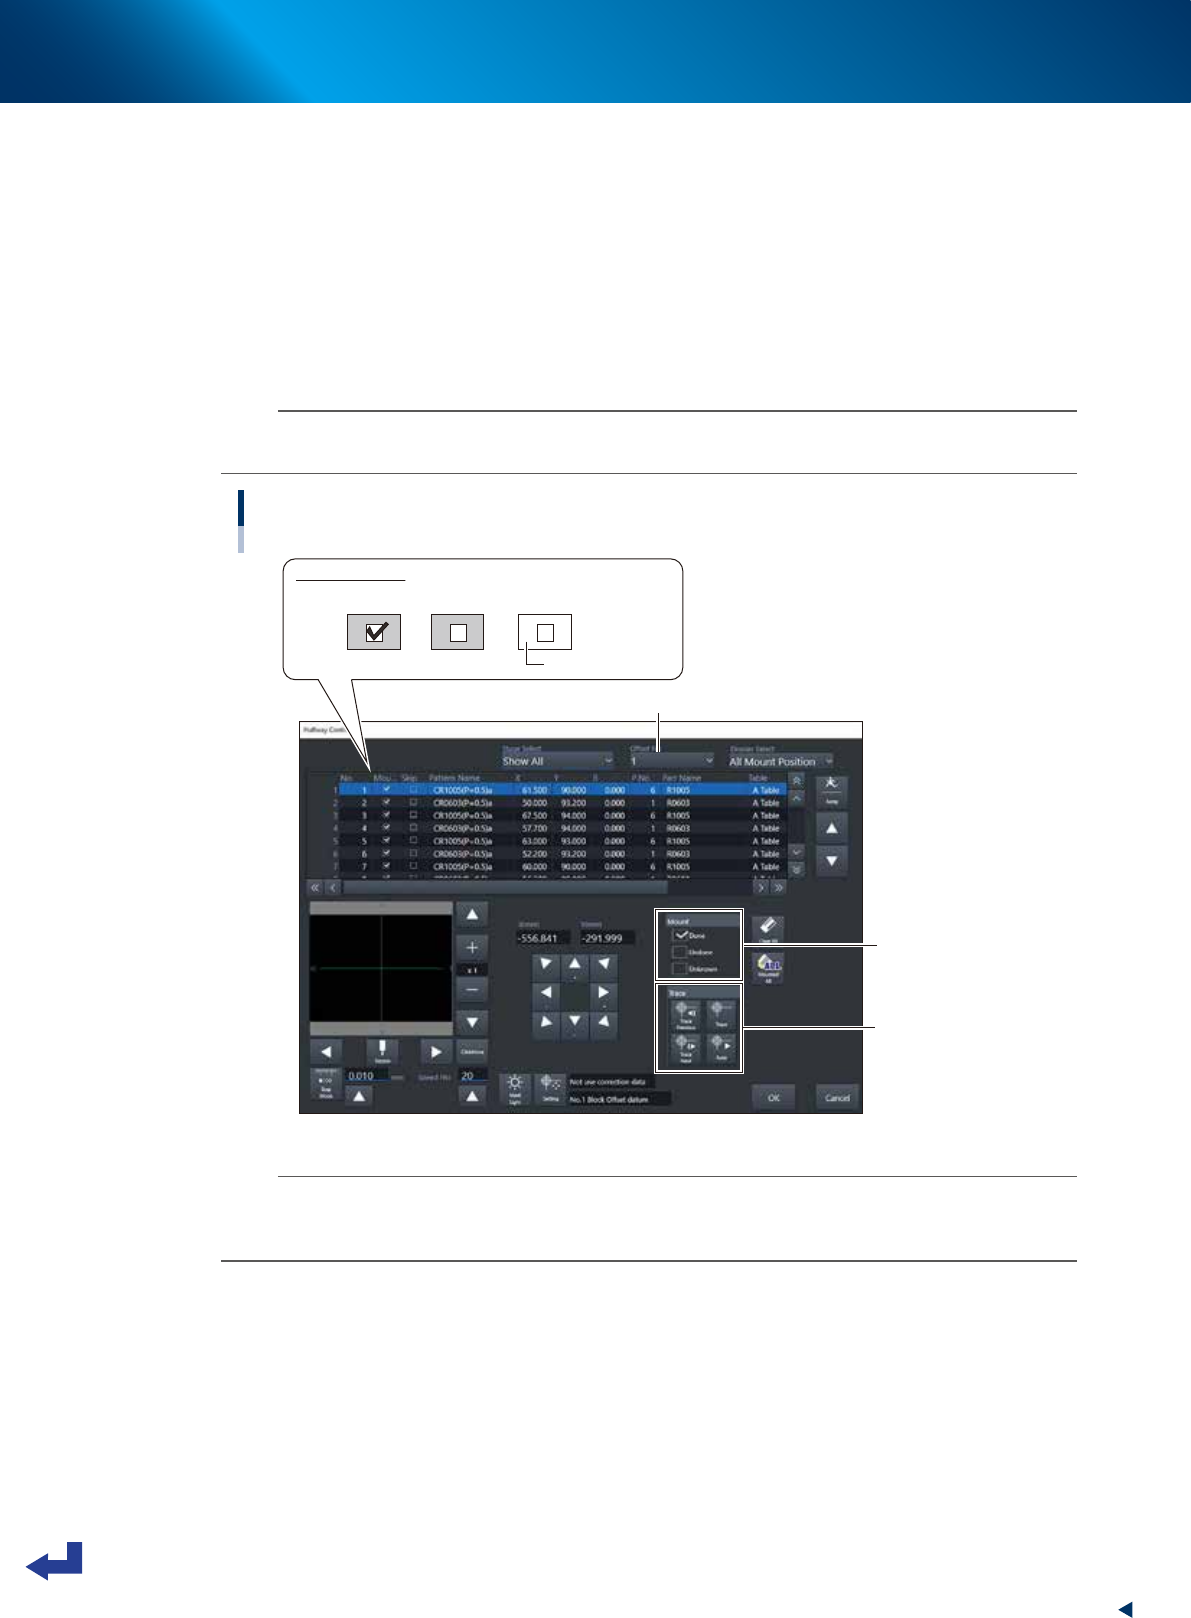
Check and edit the state of mounting.
Check the state of component mounting of the aborted information. For instance, if the machine has
stopped due to an error after a head picked up a component, the mounting information column
indicates “Unknown”.
After selecting the mounting points to be checked, press the [Trace] button to move the head unit
(camera) to the actual mounting position. While checking each of the mounting points on the board
with the camera, pressing the [Mount] check button changes the setting of the selected mounting
status.
After changing all the "Unknown” positions to “Done” or “Undone”, press the [OK] button to exit the
screen.
n
NOTE
Pressing the [OK] button while an “Unknown” mounting point still remains, an error message appears. The “Halfway
Continue” screen cannot be closed.
Editing on “Halfway Continue” screen
"Halfway Continue" screen
[Mount] check button
[Trace] button
Mounted status
Done Undone Unknown
Background: Yellow
Select “Offset No.”
24321-KMX-00
n
NOTE
When using the block offset function for a multi-board, for instance, selecting the “Offset No.” enables to edit the state of
components mounting per block. However, the editing on the “Halfway Continue” screen is available only when mounting
the first board.
4
Resume the automatic operation.
Press the [START] button to resume the automatic operation. The machine starts mounting the
components at the mounting points set to “Undone” of the first board after resumption.
1. Flow from starting up machine to production
3-32
Chapter 3 Flow from starting up machine to production
█
“Block Skip” function
The “Halfway Continue” function is available for operation to mount components only at specified
mounting points by setting the mounting status. This function is therefore not only useful in the event of
an error but also when going through trial/test mounting. This machine provides the “Block Skip”
function that is similar to the “Halfway Continue” operation. The “Block Skip” function enables to
designate whether to mount components or skip mounting per block.
n
NOTE
The block skip function can only be used for board data that the block distribution (with Note Data) was performed. See
Surface Programming Manual for information on block distribution.
TIP
For using board data created by other machine of an earlier version (earlier than V3.11STDR1.00), it is necessary to redo
the block distribution on this machine. Note, however, that this function is not available for board data if it has 512 or
more block offsets before the block distribution.
1
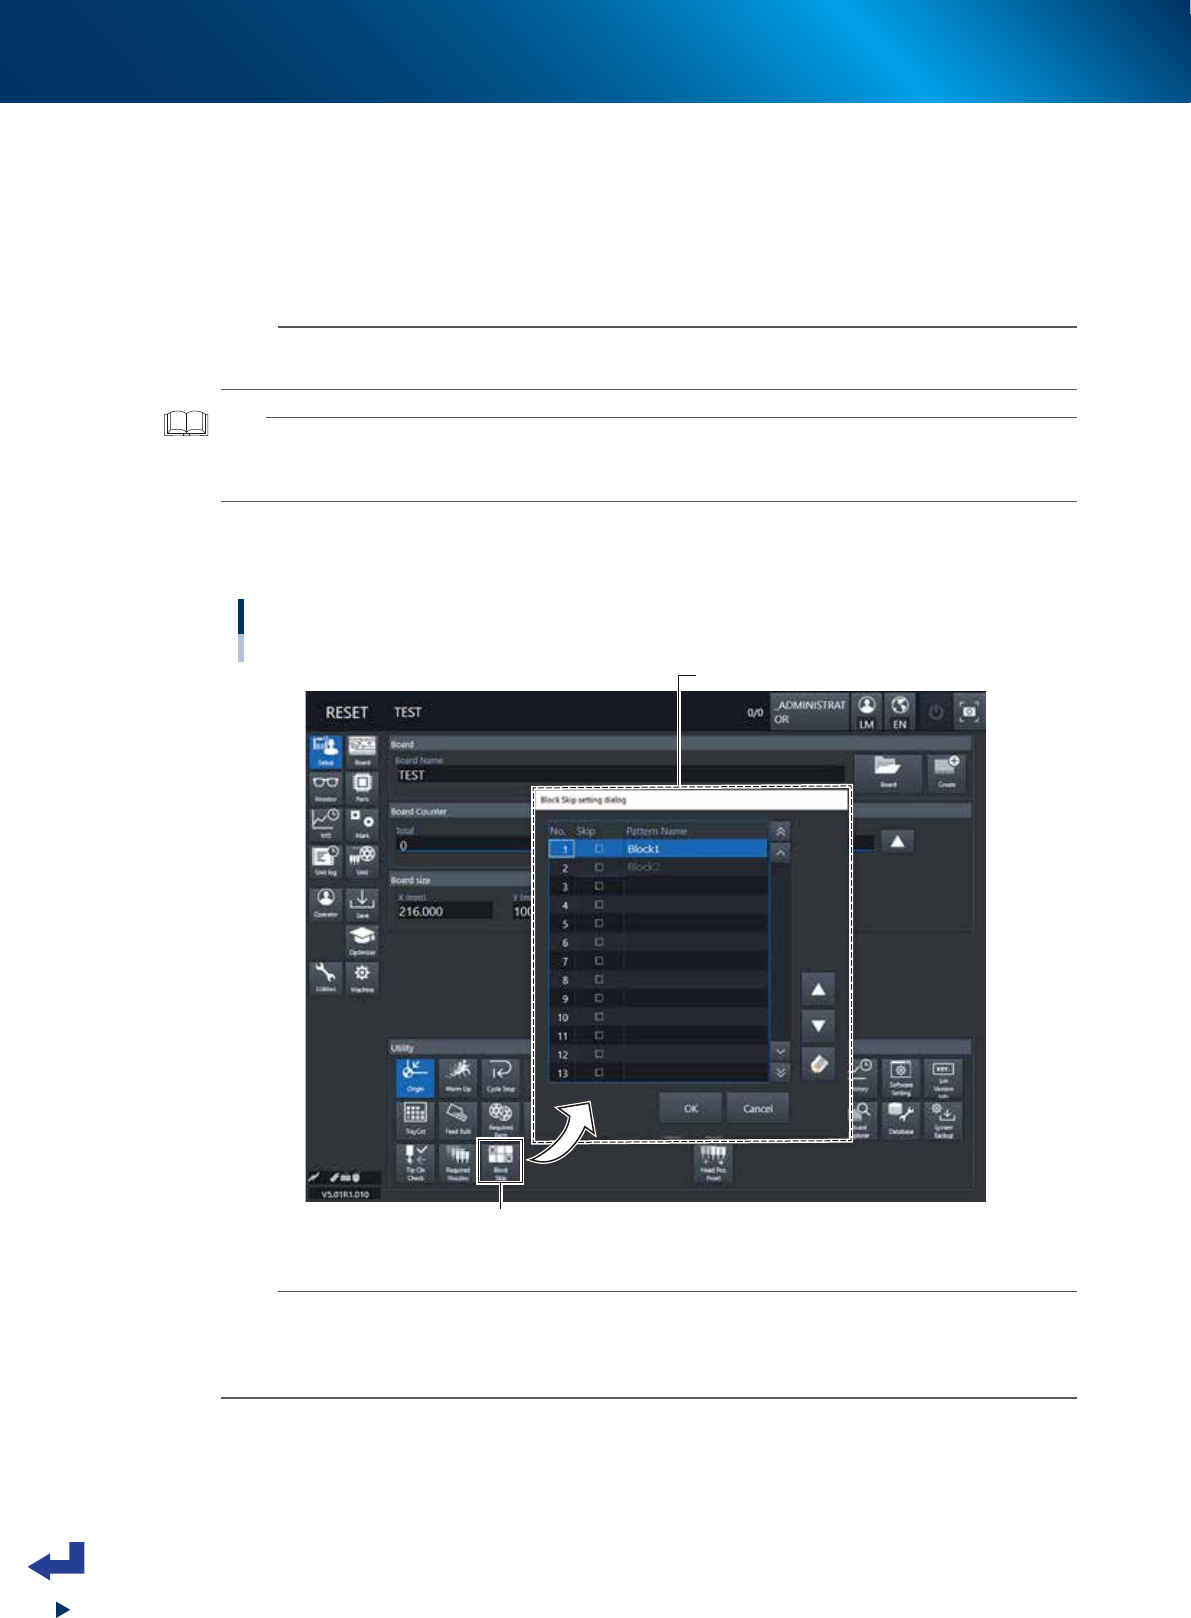
Press the [Block Skip] button.
Press the [Block Skip] button on the “Setup” screen to open the “Block Skip setting” screen.
Block Skip function
[Setup] screen - "Block Skip setting dialog”
"Block Skip setting dialog”
[Block Skip] button
24322-KMX-00
n
NOTE
Pressing the [Block Skip] button holds it pressed. (To invalidate the status, press the [Block Skip] button again.) Note that
when the machine has read out the board data of different name identification or when powering off the machine, the
block skip function becomes invalid. The [Block Skip] button automatically returns to off status. With the [Block Skip] button
turned off, no block skip takes place.