YRM20_Ope_E.pdf - 第116页
2. Operation screen and buttons 2-19 Chapter 2 Basic operation 4. [Axis] button Use this button when moving each axis manually . Pressing the [Axis] button displays the "Move Axis" screen. Switch tabs on this s…
2. Operation screen and buttons
2-18
Chapter 2 Basic operation
2. [Convey Board] button
When pressing the [Convey Board] button, the following dialog box will appear.
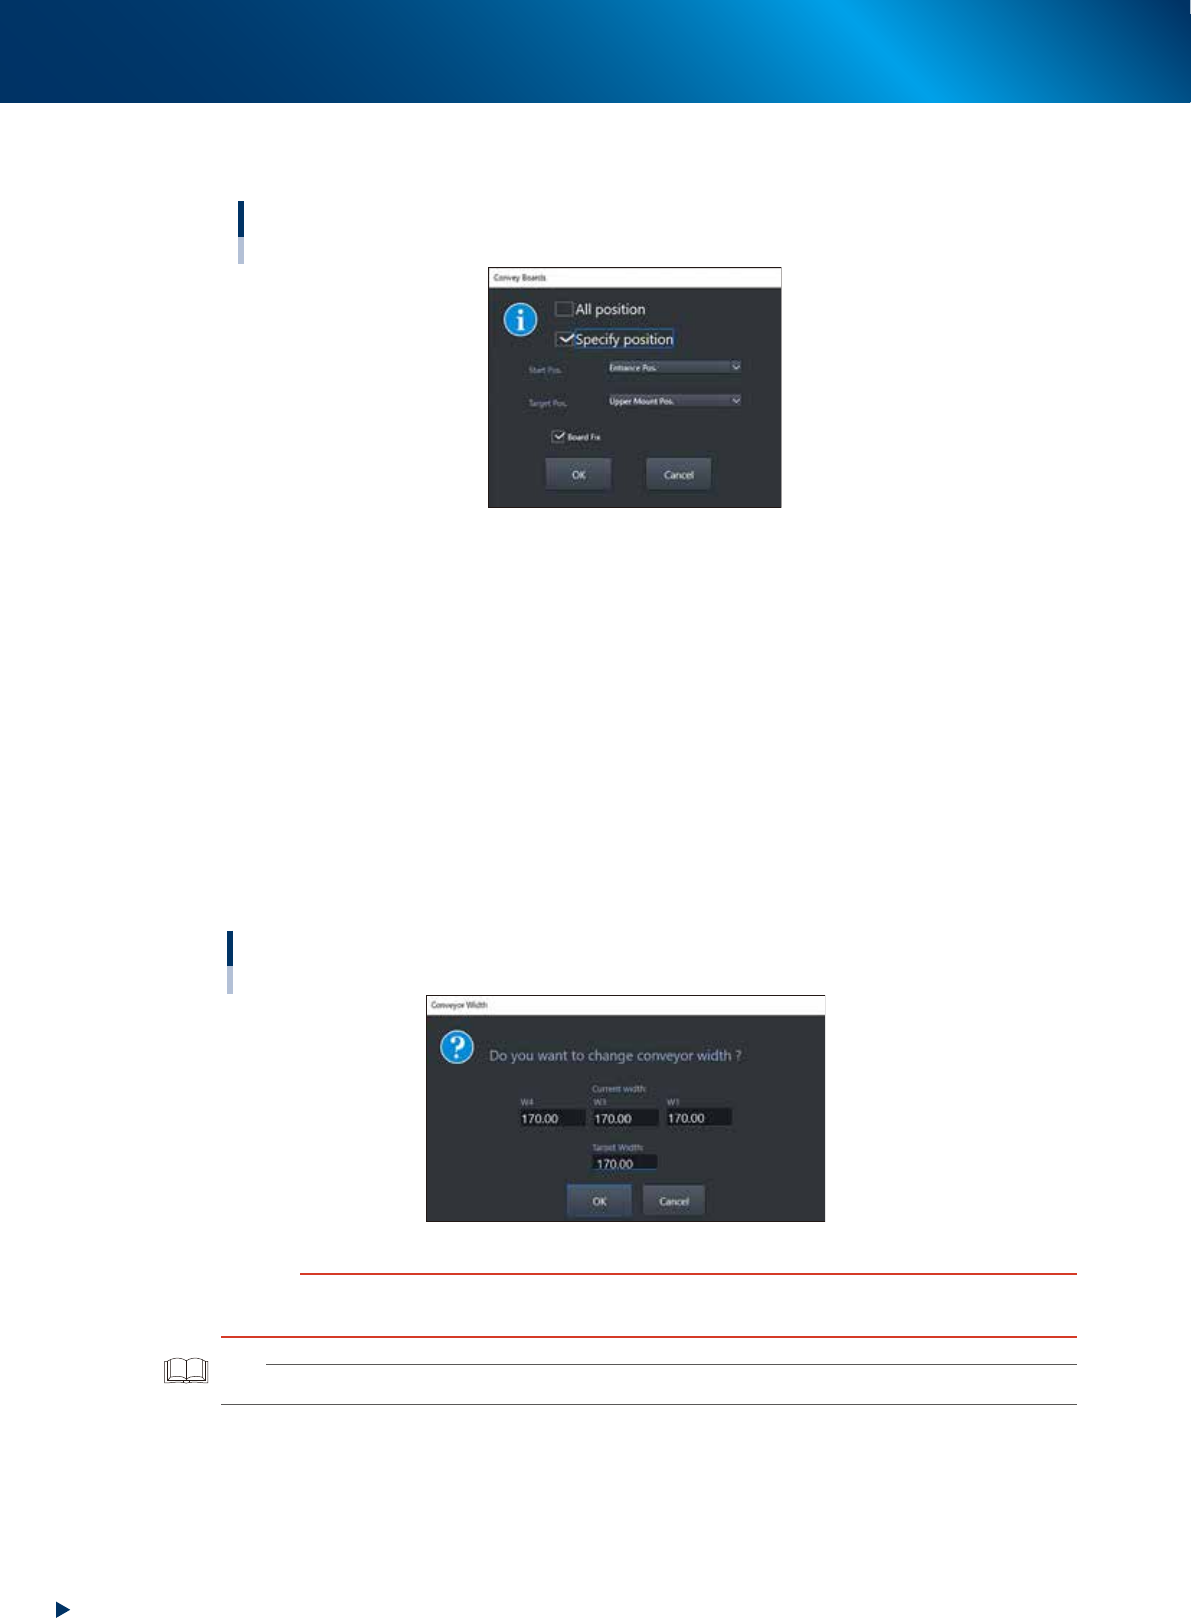
"Convey Boards" dialog box
24206-KMX-00
• All position
When selecting [All position], the board is transferred "entrance
→
Mounting stage 1", "Mounting
stage1
→
Mounting stage 2", and "Mounting stage 2
→
exit".
• Specify position
Specify one of entrance, upstream mounting position, downstream mounting position, or exit as a
start position and target position.
• Board fix
Tick the checkbox when the board is fixed after conveying board.
3. [Width] button
Use this button to adjust the conveyor width to match the width of boards to be produced.
Pressing the [Width] button displays the "Conveyor Width" screen. Check the conveyor width and
press the [OK] button. The conveyor width is changed to the specified width. The desired conveyor
width can be set by entering the value.
"Conveyor Width" screen
24207-KMX-00
c
CAUTION
When changing the conveyor width, check in advance that the conveyor rails do not collide the push-up pins and other
devices.
TIP
W1-axis and W2-axis are represented as "W1" in this screen, as they move at once.
2. Operation screen and buttons
2-19
Chapter 2 Basic operation
4. [Axis] button
Use this button when moving each axis manually.
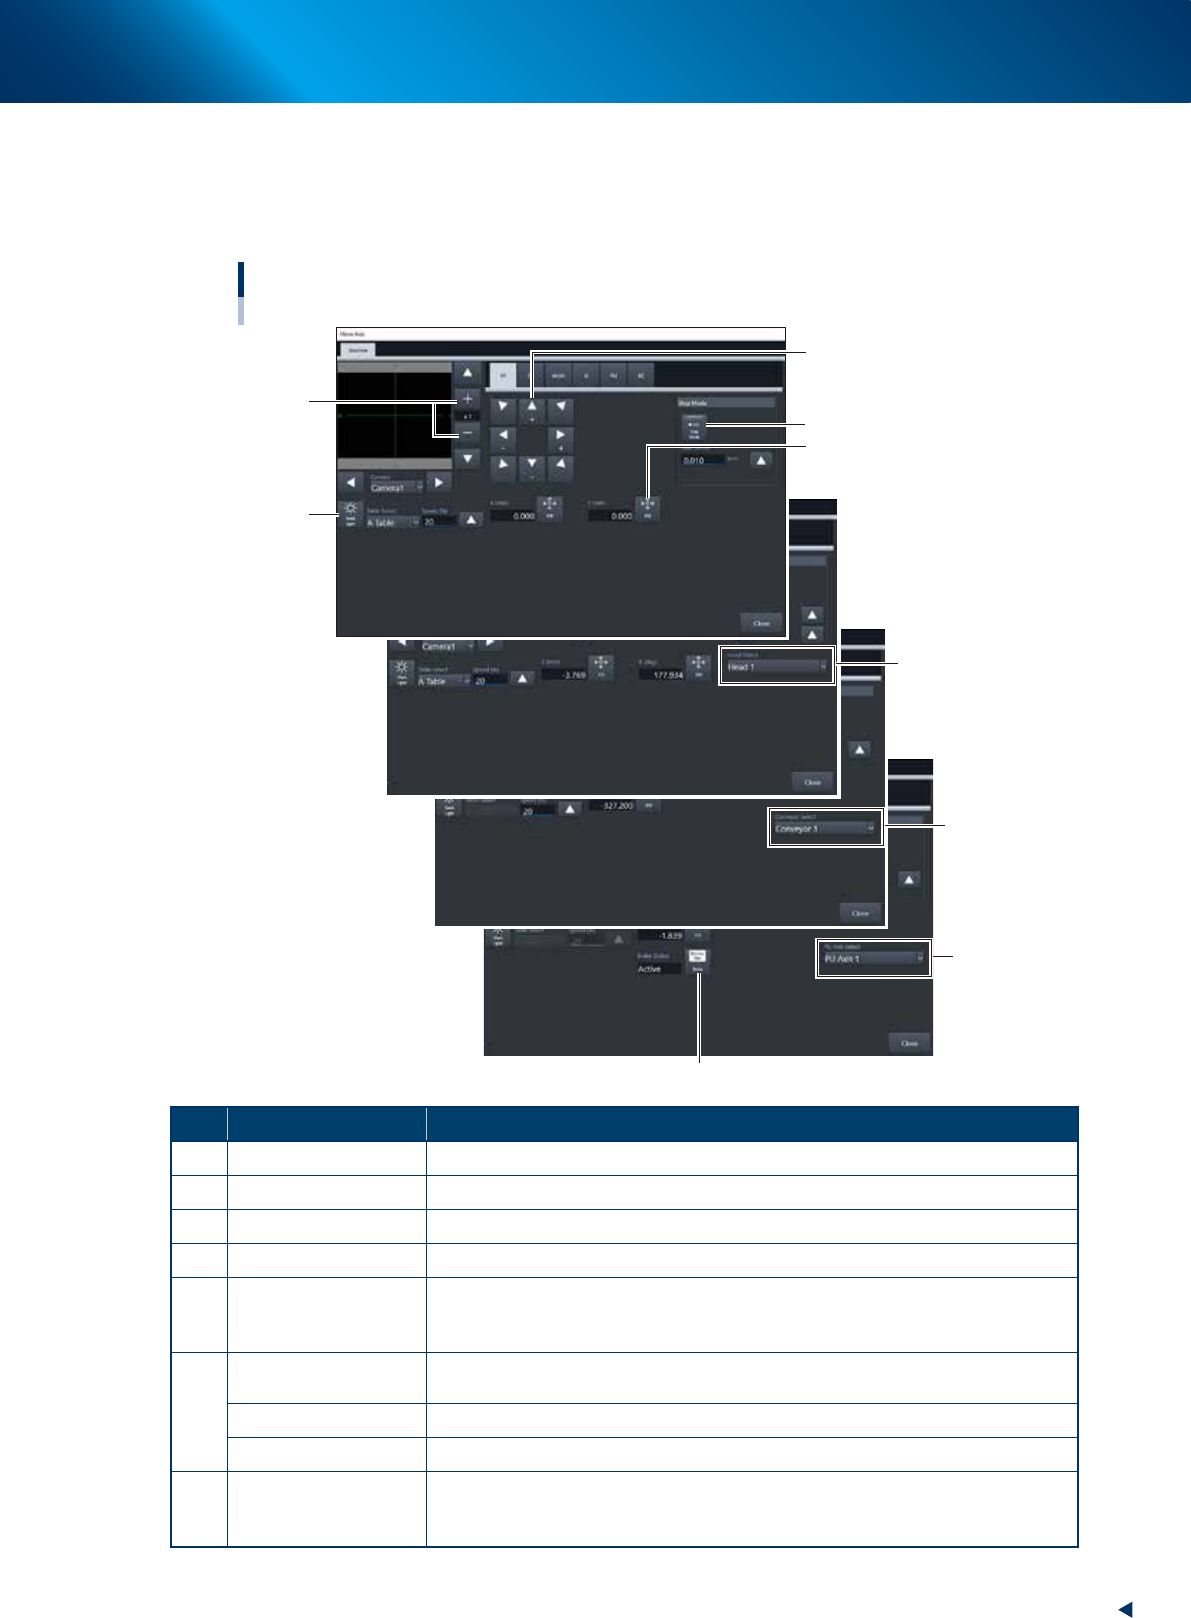
Pressing the [Axis] button displays the "Move Axis" screen. Switch tabs on this screen to select the
axis to be moved. Press the [Arrow] buttons or the [PTP] button to move the axis over to the desired
position.
"Move Axis" screen
1
2
3
5
4
6
7
6
6
24208-KMX-00
Button name Function
1 Zoom in/out (+, -) Zooms in or out the image. (16 times to 1/16 times)
2 Mark Light Allows changing mark lighting manually. Using this button does not affect data.
3 PTP The object moves to the numerically input coordinate.
4 Arrow Moves the target to the desired direction. Moves quickly by long-pressing.
5 Step Mode
The inching stroke defines the distance to move when pressing an arrow button
once. With the [Step Mode] button pressed, pressing and holding an arrow button
does not stroke fast.
6
Head Select
Selects the head to be operated. (Available for operating the Z-axis and R-axis
only. Note that the several heads on the R-axis rotate simultaneously.)
Conveyor Select Selects the conveyor to be operated.
PU Axis Select Selects the PU axis to be operated.
7 Brake
Use this button when you want to release the brake during emergency stop.
(PU-axis only)
The brake is automatically released when the servo is turned on.

2. Operation screen and buttons
2-20
Chapter 2 Basic operation
5. [Left] button, [Right] button
Rotates the conveyor motor in the left or right direction at high speeds.
6. [Low Left] button, [Low Right] button
Rotates the conveyor motor in the left or right direction at low speeds.
7. [Exit Stopper] button
Raises or lowers the exit stopper.
Use this button to stop a board carried-out at the conveyor exit.
8. [Main Stopper] button
Raises or lowers the main stopper.
Use this button to stop the board transferred onto the conveyor at mounting position.
9. [Board Clamp] button
Raises or lowers the board clamp plate.
Clamps the board by pushing up its edges from the bottom (underside).
10. [Push Up] button
Press this button to call up the “Board thickness” screen. Enter the data in the parameters on the
screen. Press the [OK] button. Then, the push-up stage goes up to clamp the board from the bottom
(underside).
11. [Entrance Stopper] button
Raises or lowers the entrance stopper.
Use this button to stop the board carried-in at the standby position.