YSP_Users_E.pdf - 第104页
4-1 4 Creating and setting the data 1. Creating new data First, you must register a new board name to create new data. Register a new board name as follows. 1 Pr ess the [Cr eate] button on the Setup screen. The "Cr…

Chapter 4 Creating and setting the data
This chapter describes how to create new data necessary for solder printing and how to edit the data and parameters, as well
as the definitions of parameters.
Contents
1. Creating new data 4-1
2. Basic data setting 4-3
2.1 Configuration of [Basics] tab screen 4-3
3. Board data setting 4-5
3.1 Board marks and parameter setting 4-5
3.2 Board data detail setting 4-10
4. Mask data setting 4-13
4.1 Mask marks and parameter setting 4-13
4.2 Mask data detail setting 4-17
5. Squeegee data setting 4-19
5.1 Squeegee detail setting 4-25
6. Cleaner data setting 4-25
7. Creating the mark data 4-29
7.1 Creating procedure 4-30
7.2 Basic parameters 4-31
7.3 Shape parameters 4-32
7.4 Vision parameters 4-34
7.5 Mark Adjust mode 4-36
8. Graphic alignment 4-39
9. Making a test print 4-45
4-1
4
Creating and setting the data
1. Creating new data
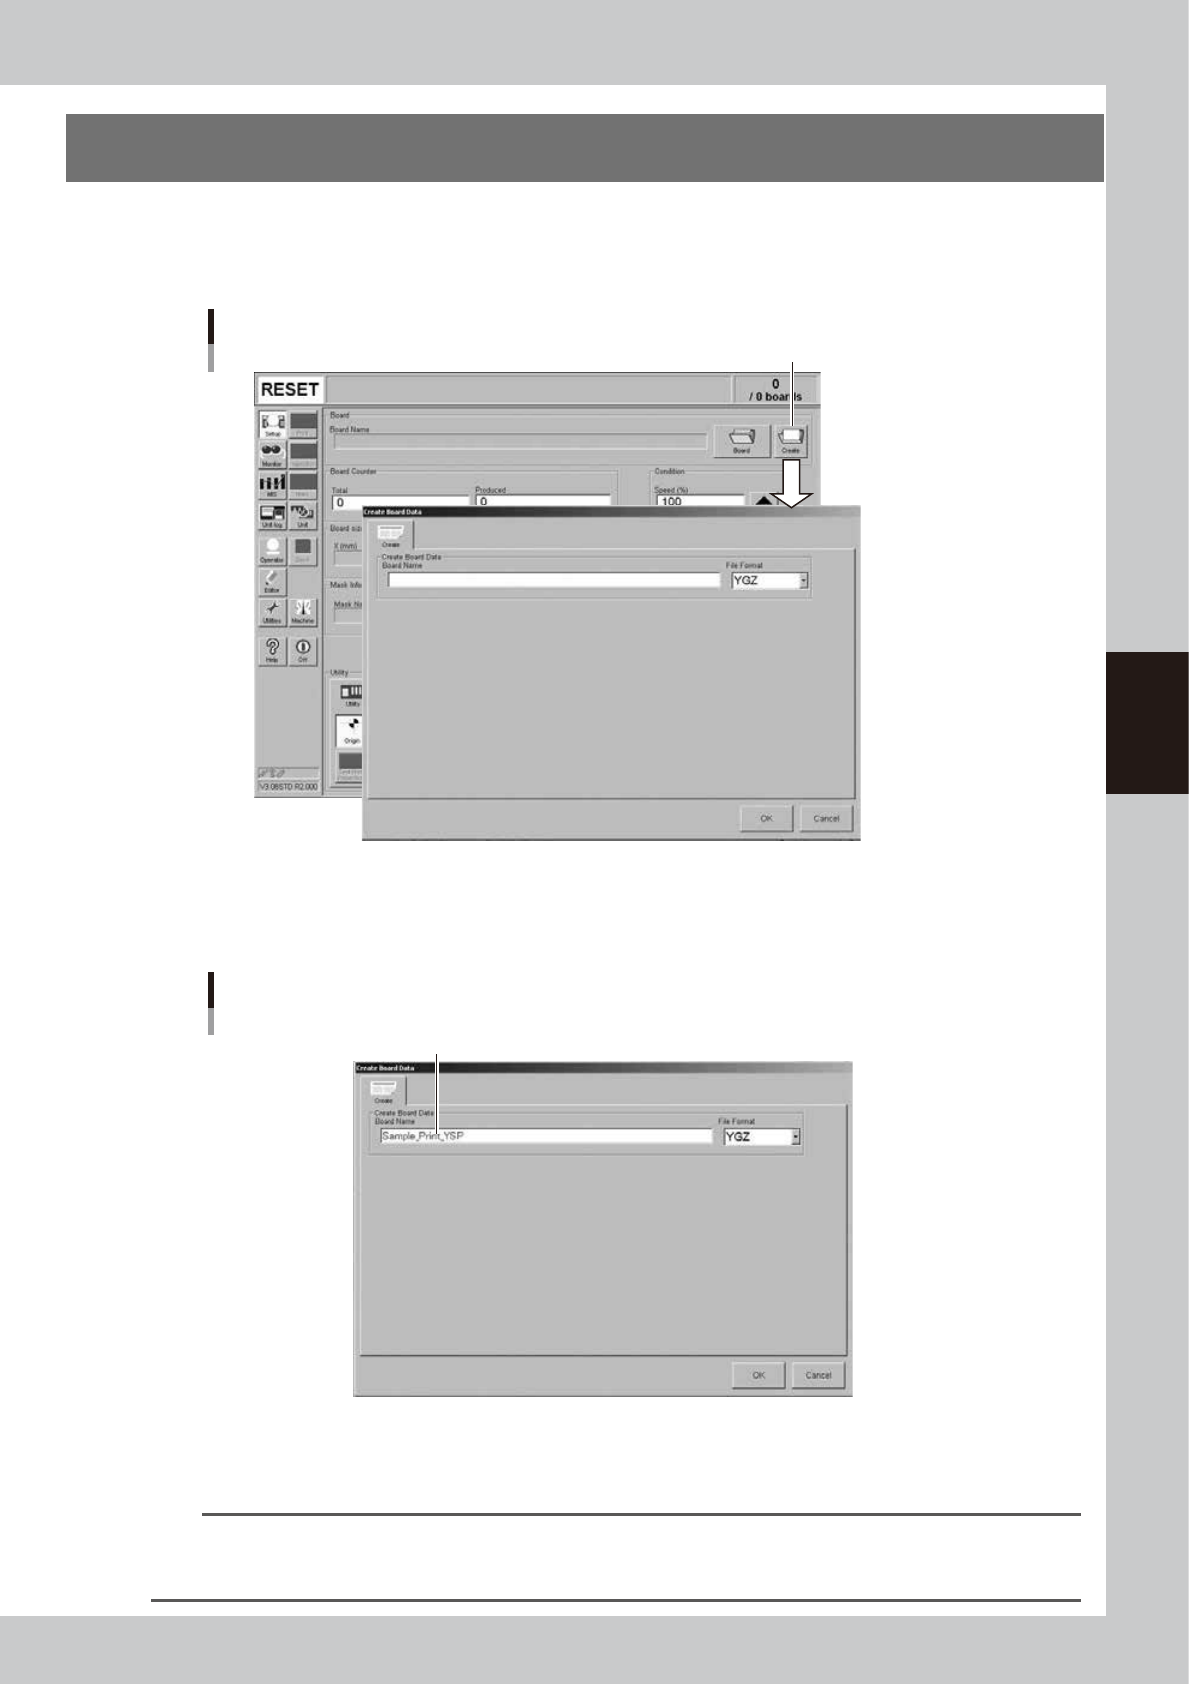
First, you must register a new board name to create new data. Register a new board name as follows.
1
Press the [Create] button on the Setup screen.
The "Create Board Data" dialog box appears as shown below.
[Create] button
Create Board Data dialog box
64401-L3-00
2
Enter a board name in the "File name" box.
Enter a board name within 20 alphanumeric characters from the keyboard.
Do not use spaces and symbols other than underbars ( _ ) .
Entering a board name
Enter the board name and press [OK].
64402-L3-00
3
Press the [OK] button.
The display returns to the Setup screen.
TIP
An alert dialog box appears if a board data with the same name has already been registered. If this happens, press
the [Cancel button and reenter a different name. (If you register the same name by overwriting the previous data,
press the [OK] button.)
4-2
4
Creating and setting the data
4
Create necessary data.
Default values are preset for the newly registered board data. Create or edit necessary data while
referring to the descriptions and guidelines in subsequent sections "2 to 7" in this chapter.
5
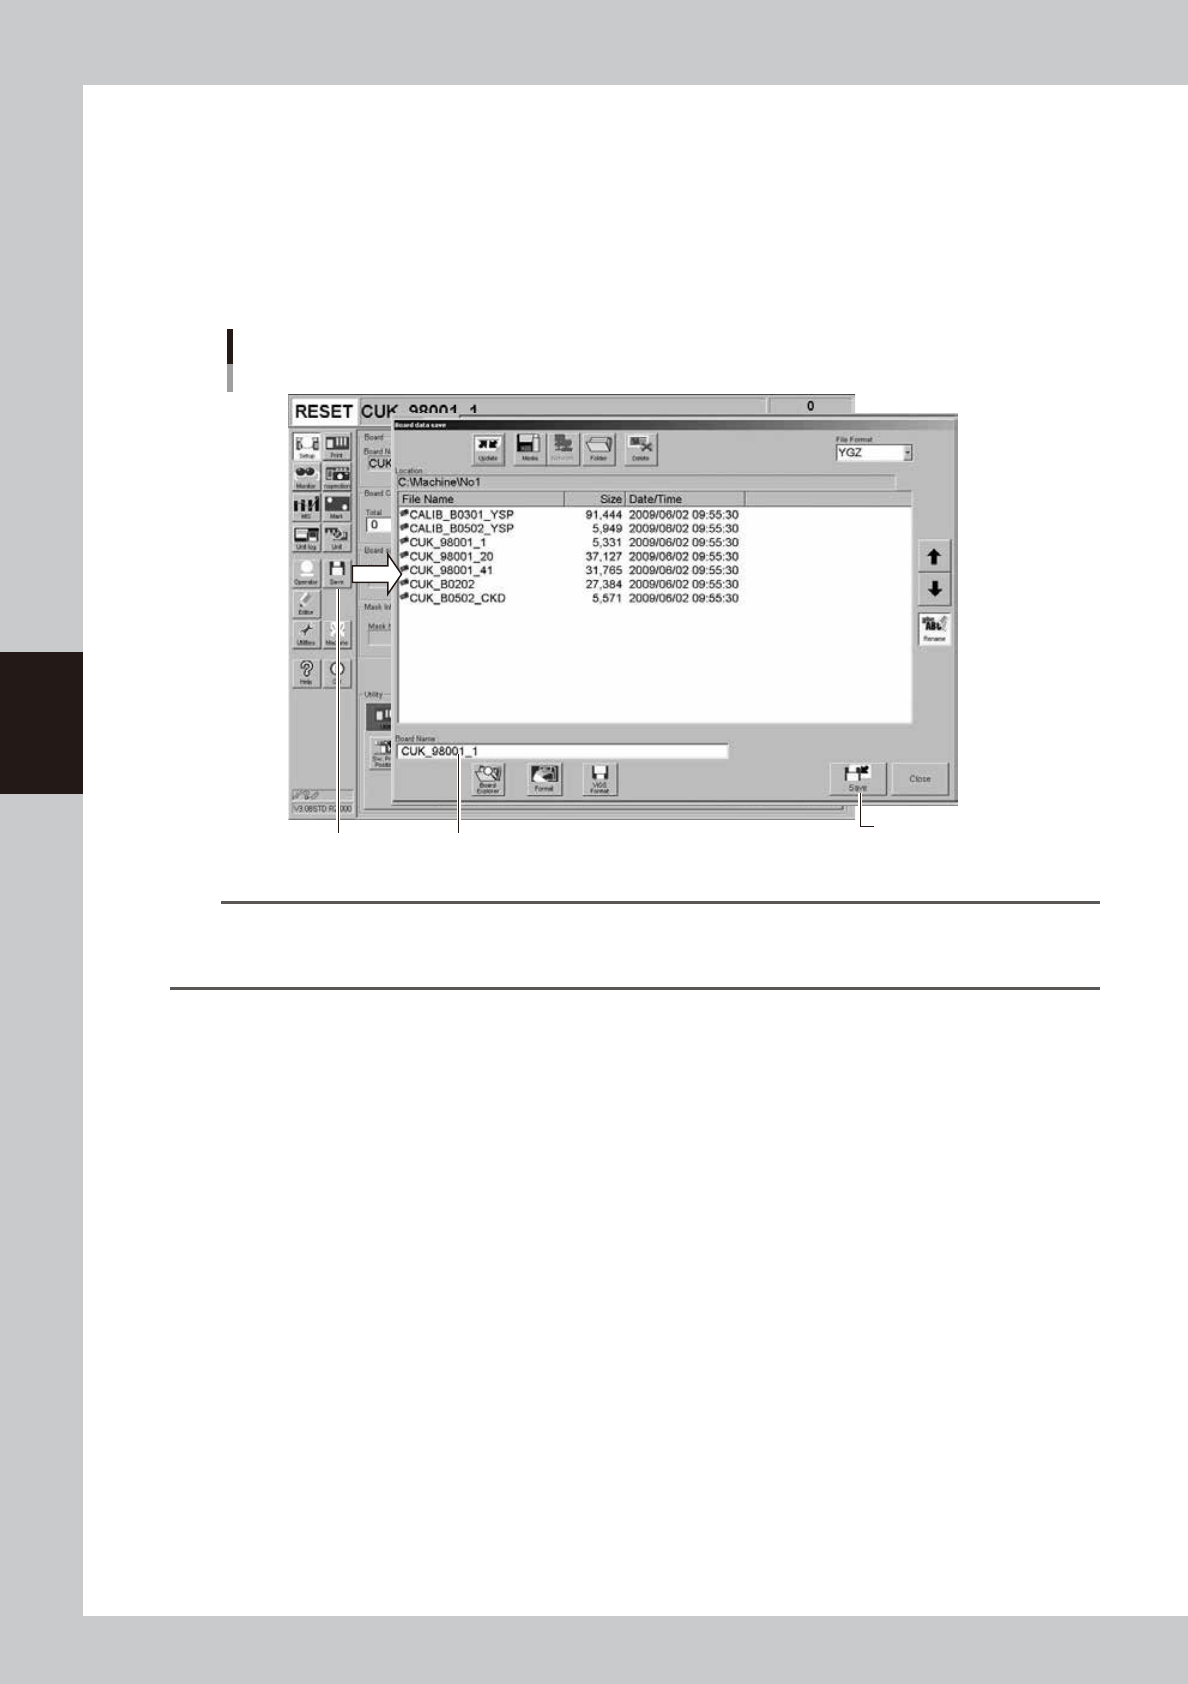
Save the new board data.
1. Press the [Save] button in the main menu button area.
The "Board data save" dialog box appears showing the board list.
2. Check the drive and folder to save the board data and press [Save] button.
[Save] button
Saving the PCB data
[Save] button
Check that the PCB name to be saved is displayed here.
64403-L3-00
TIP
If you press the [Off] button to quit the software before storing the board data, a confirmation dialog box appears
asking you to save the board data. Pressing the [Yes] button in this dialog box opens the Board Data Save dialog as
shown above.