YSP_Users_E.pdf - 第106页
4-3 4 Creating and setting the data 2. Basic data setting As you have set the parameters on the [Basics] tab screen, you can start the nor mal printing. Each parameter is linked with normally used parameters provided on …
4-2
4
Creating and setting the data
4
Create necessary data.
Default values are preset for the newly registered board data. Create or edit necessary data while
referring to the descriptions and guidelines in subsequent sections "2 to 7" in this chapter.
5
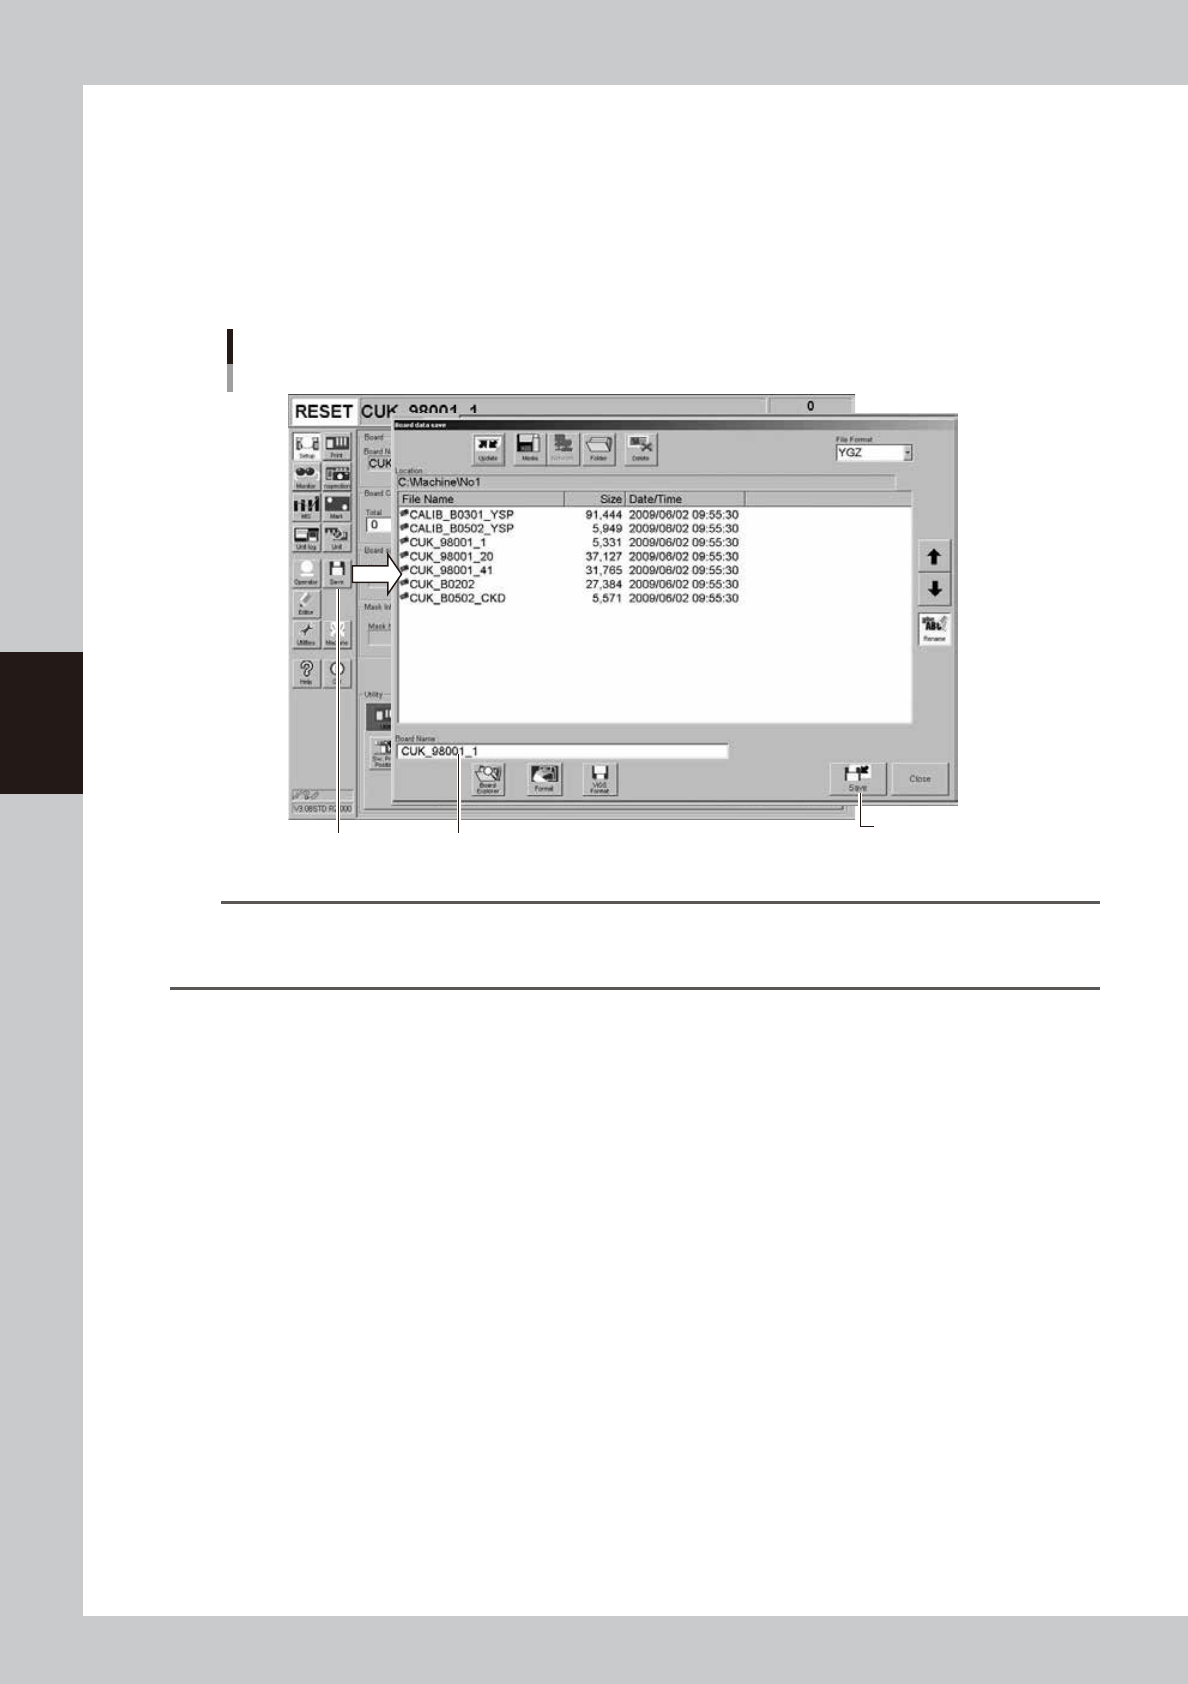
Save the new board data.
1. Press the [Save] button in the main menu button area.
The "Board data save" dialog box appears showing the board list.
2. Check the drive and folder to save the board data and press [Save] button.
[Save] button
Saving the PCB data
[Save] button
Check that the PCB name to be saved is displayed here.
64403-L3-00
TIP
If you press the [Off] button to quit the software before storing the board data, a confirmation dialog box appears
asking you to save the board data. Pressing the [Yes] button in this dialog box opens the Board Data Save dialog as
shown above.
4-3
4
Creating and setting the data
2. Basic data setting
As you have set the parameters on the [Basics] tab screen, you can start the normal printing.
Each parameter is linked with normally used parameters provided on the [Board], [Mask], [Squeegee] and
[Cleaner] tab screens. If you want to make the detailed setting, you must select relevant tab and set data
directly.
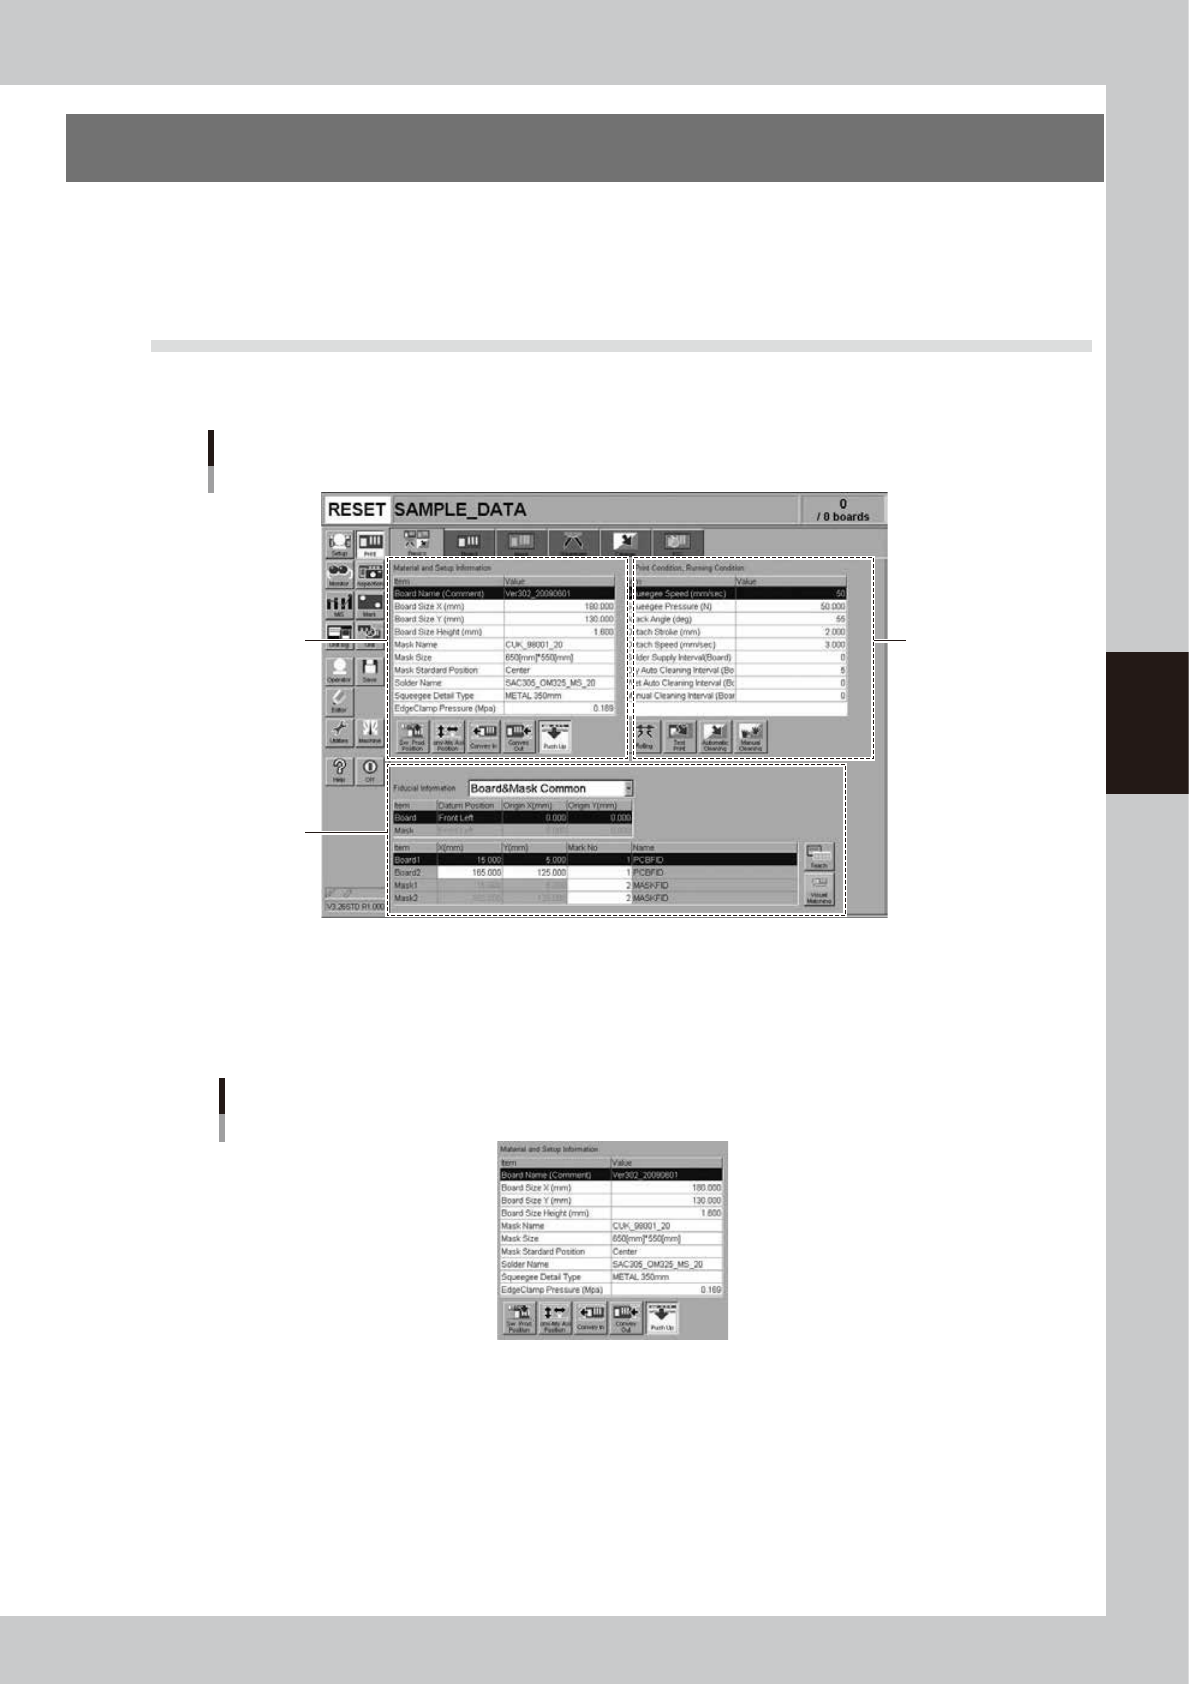
2.1 Configuration of [Basics] tab screen
The [Basics] tab screen is mainly classified into three areas. Additionally, operation buttons on this tab screen
are intended to directly perform the manual operation necessary for the setup or other work.
[Basics] tab
2
1
3
64404-L3-10
1. “Material and Setup Information” area
The parameters mainly related to the setup work are extracted from those provided on the [Board], [Mask], and
[Squeegee] tab screens.
Material and Setup Information area
64405-L3-10
• Board Name, Board Size XY, Board Height, Solder Name, Edge Clamp Pressure
For more details, see items A to E and N of “3. Board data setting” in a later part.
• Mask Name, Mask Size, Mask Standard Position
For more details, see items A to E of “4. Mask data setting” in a later part.
• Squeegee Detail Type
For more details, see item A of “5. Squeegee data setting” in a later part.
4-4
4
Creating and setting the data
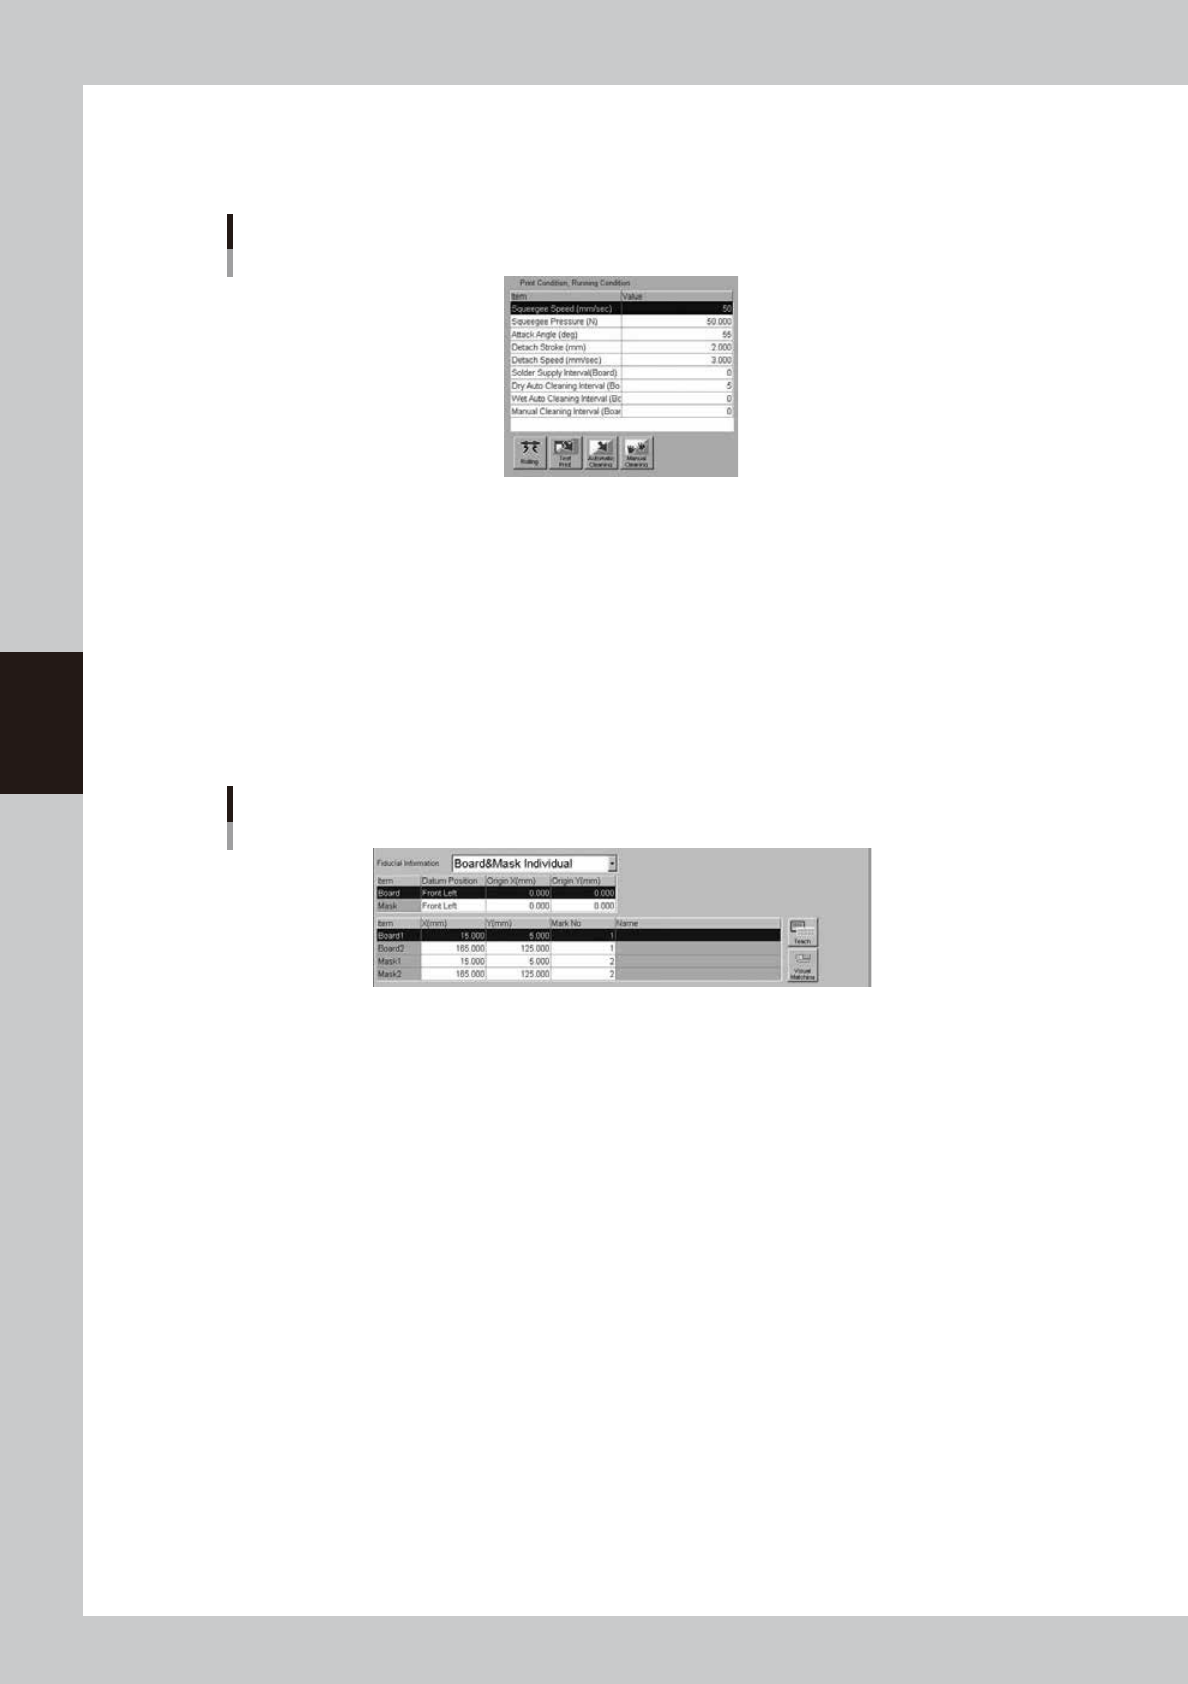
2. “Print Condition, Running Condition” area
The parameters mainly related to the print condition setting are extracted from those provided on the [Squeegee] and
[Cleaner] tab screens.
Print Condition, Running Condition area
64406-L3-10
• Squeegee Speed, Squeegee Pressure, Solder Supply Interval, Attack Angle
For more details, see items E, F, J, and B of “5. Squeegee data setting” in a later part.
• Detach Stroke, Detach Speed
For more details, see “5.1 Squeegee detail setting” in a later part.
• Dry Auto Cleaning Interval, Wet Auto Cleaning Interval, Manual Cleaning Interval
For more details, see items C, F, and I of “6. Cleaner data setting” in a later part.
3. “Fiducial Information” area
You can directly enter the board and mask fiducial information in this area.
Fiducial Information area
64407-L3-00
• Board-Datum Position, Origin XY
For more details, see items F, G, and H of “3. Board data setting” in a later part.
• Mask-Datum Position, Origin XY
For more details, see items F, G, and H of “4. Mask data setting” in a later part.
• Fiducial coordinates
For more details, see items 4 and 5 of “3. Board data setting” in a later part.