YSP_Users_E.pdf - 第98页
3-18 3 Daily operation l Monitor: Feedback On the [Monitor]-[F eedback] tab screen, you can chec k the recognition results and distortion components measured by using the mask fiducial, board fiducial and local fiducial …
3-17
3
Daily operation
Max. Output (boards/h)
This is the number of boards that can be produced in an hour.
[Reset] button
Resets all the counts shown on the [Detail] tab. The counts on the [Monitor]-[Main] tab are also reset.
l
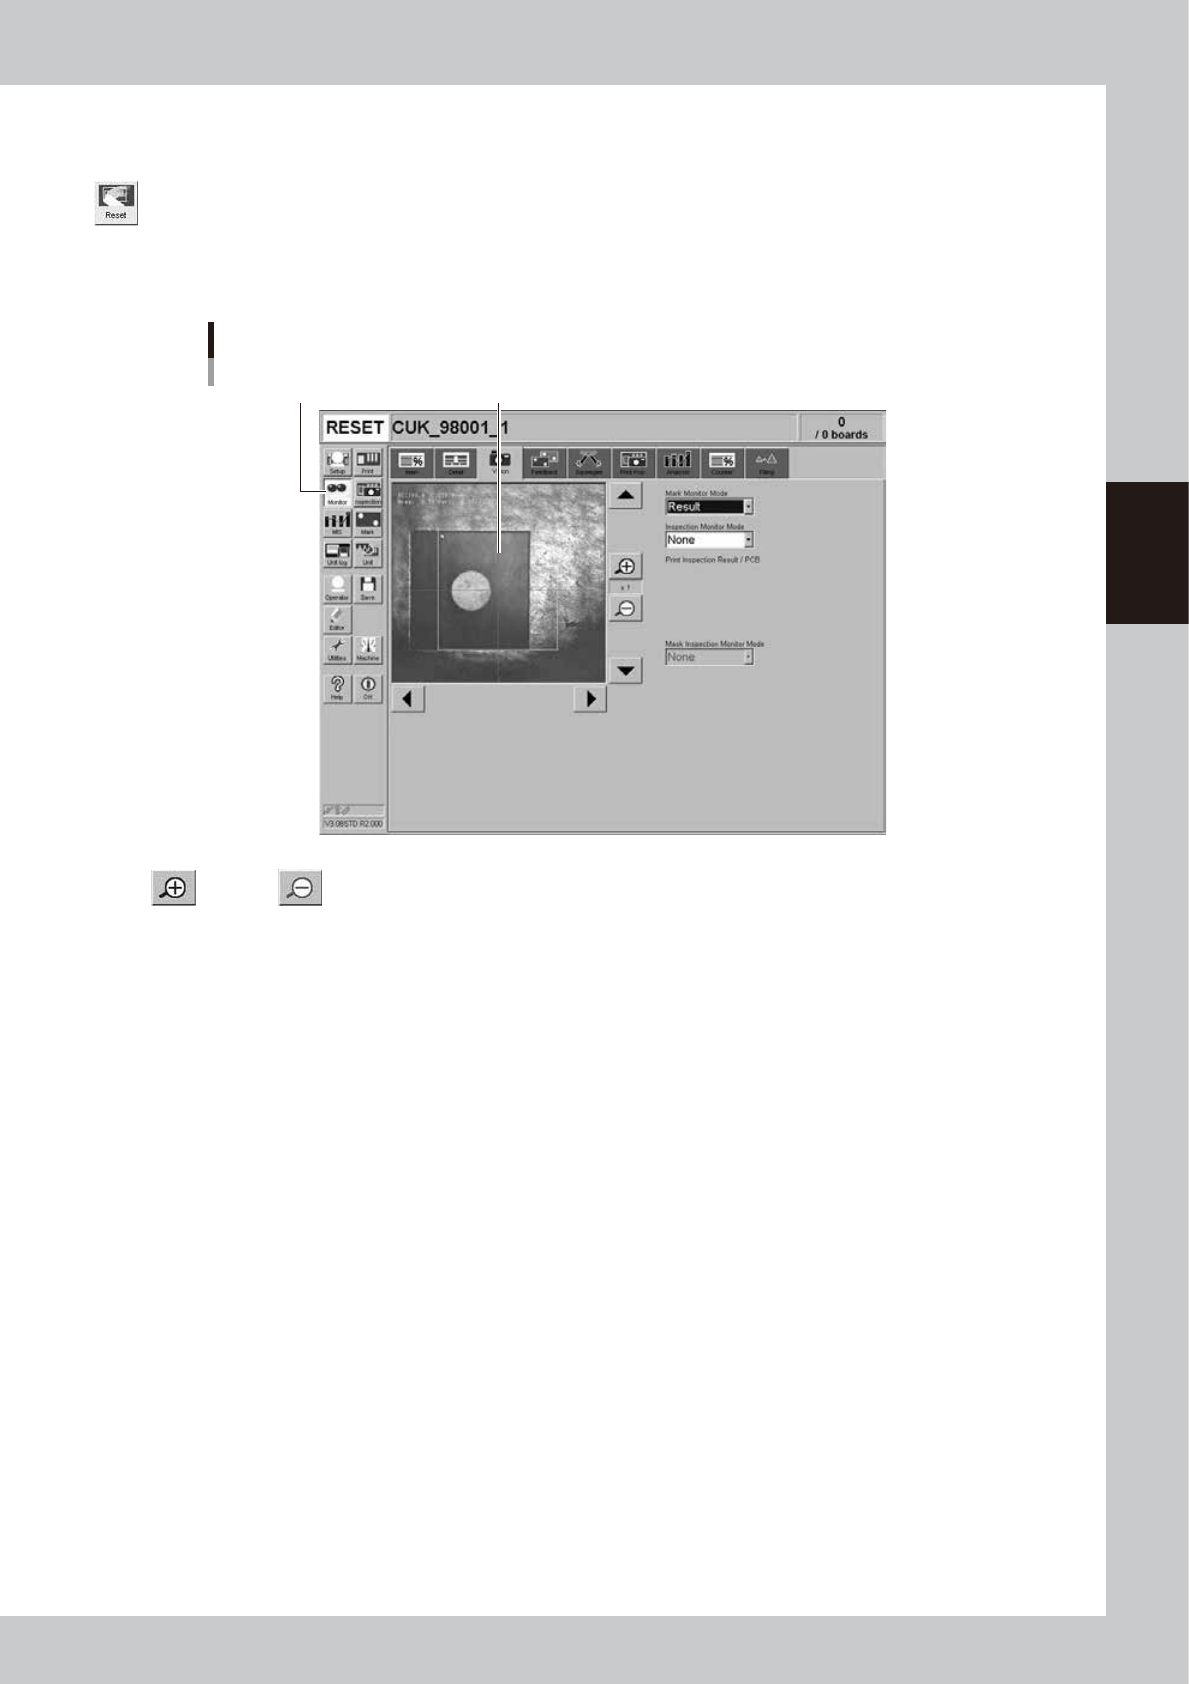
Monitor: Vision
Shows the image of a fiducial mark when it was recognized with the vision camera during automatic operation.
[Monitor]-[Vision] tab
[Monitor] button
Mark recognized with the vision camera is displayed.
64317-L3-00
Enlarge, reduce buttons
The recognition results image can be enlarged from 1 to 16 times by pressing the enlarge [+] button. The image can be
reduced to 1/16 by pressing the reduce [-] button.
Mark Monitor Mode
This specifies the mode for displaying the fiducial marks on the screen during vision recognition. Depending on the
selected item, the recognition results and detection range window will appear on the image. This monitor mode can also
be changed during operation.
"None" Displays the image taken by the camera. The recognition result values are not displayed.
"Result" Displays the center position coordinates (pixels) of the detected mark.
"Binary Image" Displays the image taken by the vision camera as a binary image.
"Grey Image" Displays the grey image after processing the image taken by the vision camera.
"Search Result" Draws a line to make an approximate circle around the mark.
"Datum Circle" Draws a mark of the specified diameter from the center of the detected mark. (Can only be used in
specific recognition modes.)
"Tangent Circle" Draws an inscribed circle and circumscribed circle from the center of the detected mark. (Can only be
used in specific recognition modes.)
"Error Image" Displays the error image. (Can only be used in specific recognition modes.)
"Individual data" Displays the individual data when multiple objects are detected. (Can only be used in specific
recognition modes.)
Inspection Monitor Mode
The solder-print inspection results and inspection areas can be displayed if the machine has the optional solder-print
inspection function. For more information, refer to the separate option manual "Solder print inspection".
Image Select
Mask Inspection Monitor Mode
3-18
3
Daily operation
l
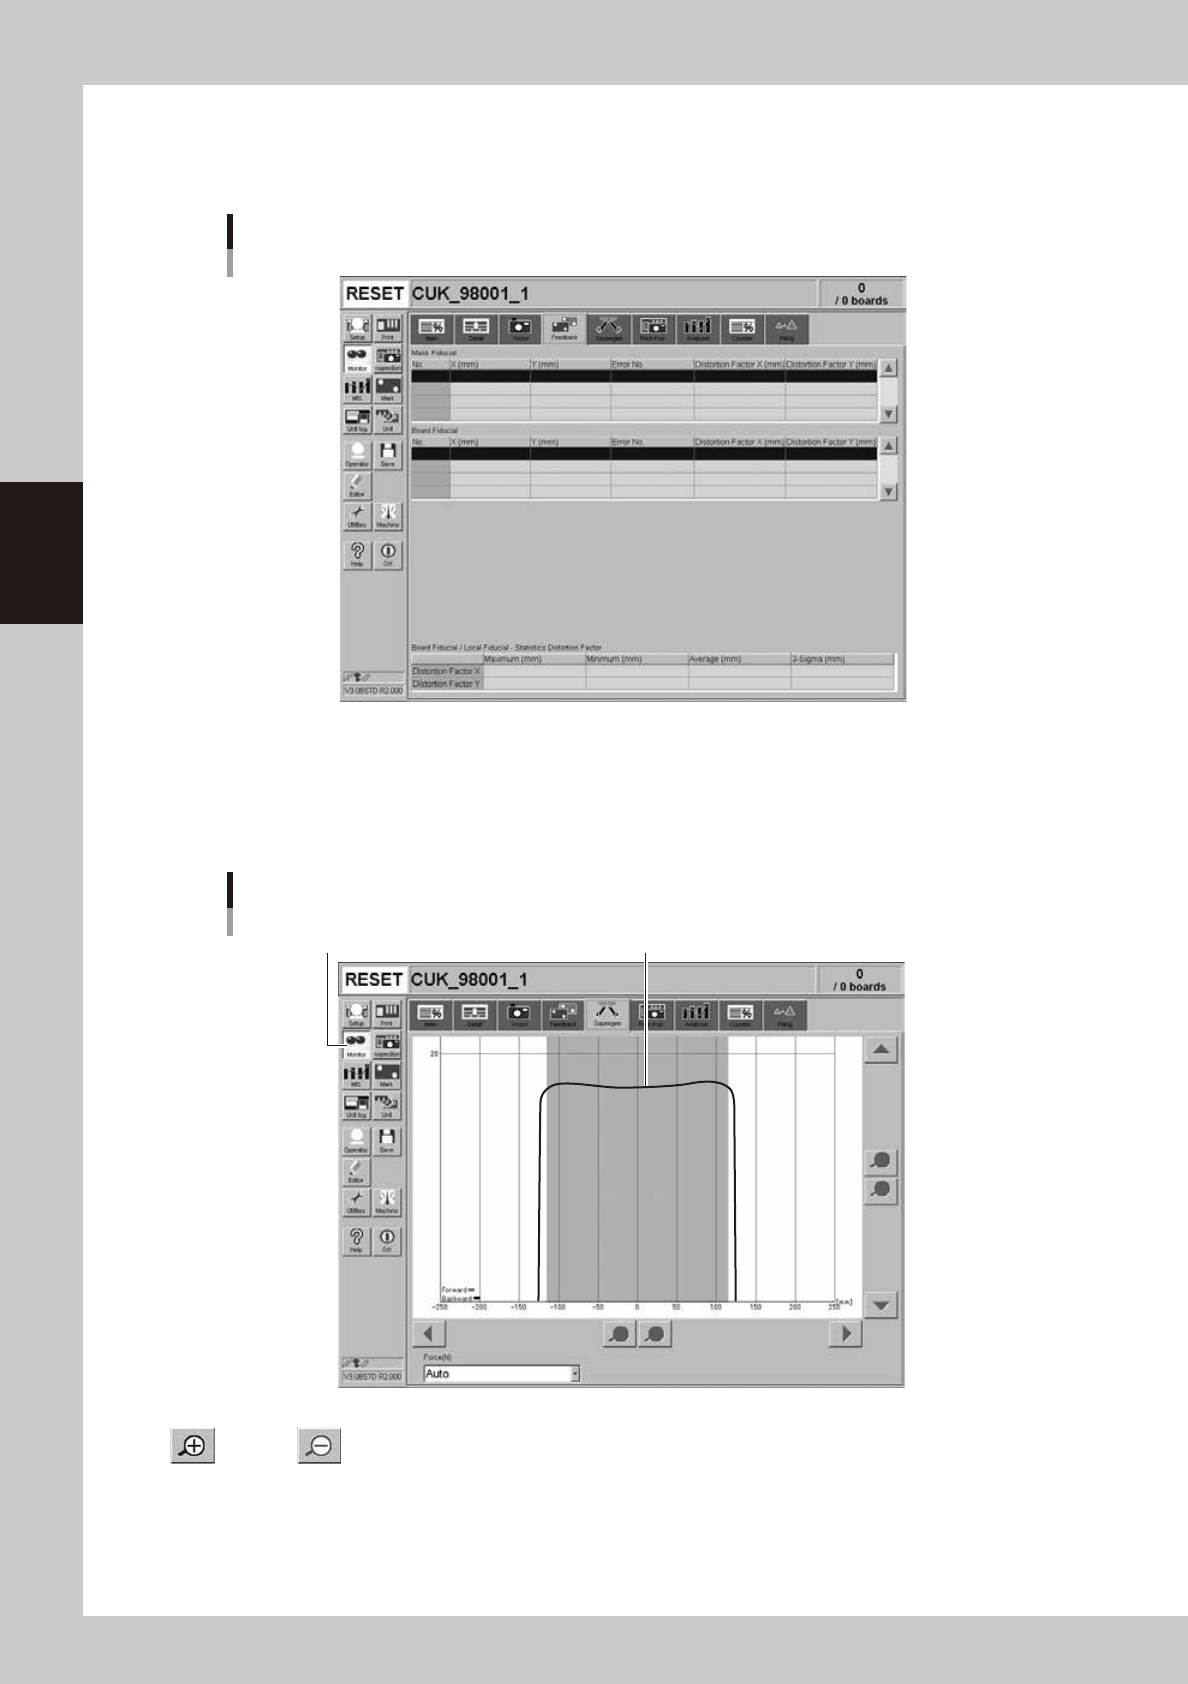
Monitor: Feedback
On the [Monitor]-[Feedback] tab screen, you can check the recognition results and distortion components measured by
using the mask fiducial, board fiducial and local fiducial functions.
[Monitor]-[Feedback] tab
64318-L3-00
l
Monitor: Squeegee
Graphically displays the squeegee pressure during automatic operation.
The horizontal axis indicates the distance (mm) along the board width and the vertical axis indicates the squeegee
pressure (N). If the squeegee pressure varies abnormally, check the board clamping or surface condition.
[Monitor]-[Squeegee] tab
[Monitor] button Squeegee pressure is graphically displayed.
64319-L3-00
Enlarge, reduce buttons
Enlarges or reduces the horizontal or vertical scale of the graph.
Force (N)
Set the maximum scale of the vertical axis on the graph. Set to "Auto" in most cases.
3-19
3
Daily operation
l
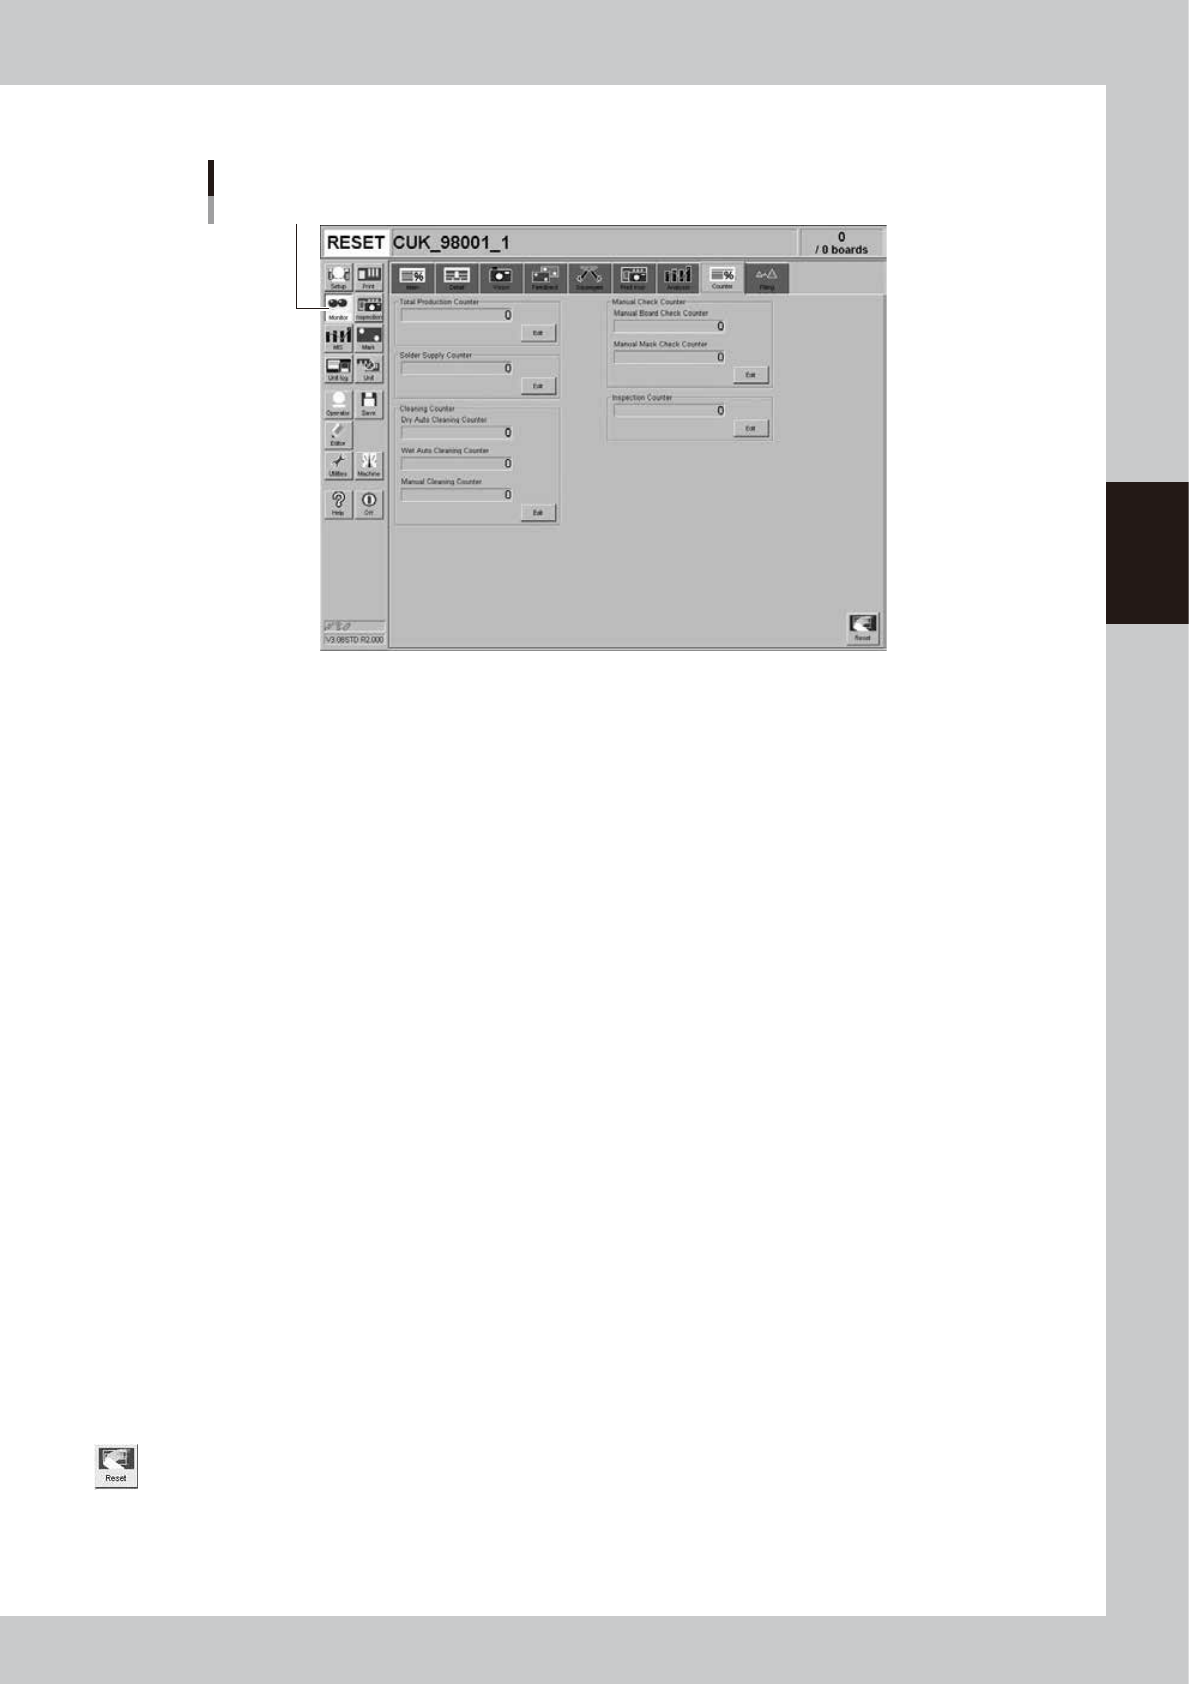
Monitor: Counter
[Monitor]-[Counter] tab
[Monitor] button
64320-L3-00
Total Production Counter
Total number of boards that have been produced. (This is not reset even when board data is changed.) The count start
number can be changed with the [Edit] button.
Solder Supply Counter
Counts up each time a board is printed. The machine stops for solder supply when this counter reaches the number of
boards set for "Solder Supply Interval (board)" on the [Print]-[Squeegee] tab. Press the [Edit] button when changing the
count to start. The count start number can be changed with the [Edit] button.
Dry Auto Cleaning Counter
Counts up each time a board is printed. The machine automatically carries out "dry" cleaning when this counter reaches
the number of boards set for "Dry Auto Interval (board)" on the [Print]-[Cleaner] tab. The count start number can be
changed with the [Edit] button.
Wet Auto Cleaning Counter
Counts up each time a board is printed. The machine automatically carries out "wet" cleaning when this counter reaches
the number of boards set for "Wet Auto Interval (Board)" on the [Print]-[Cleaner] tab. The count start number can be
changed with the [Edit] button.
Manual Cleaning Counter
Counts up each time a board is printed. The machine temporarily stops for manual cleaning when this counter reaches
the number of boards set for "Manual Interval (Board)" on the [Print]-[Cleaner] tab. The count start number can be
changed with the [Edit] button.
Manual Board Check Counter
Counts up each time a board is printed. The machine temporarily stops for visual inspection when this counter reaches
the number of boards set for "Manual Board Check Timing" on the [Print]-[Mask]-[Detail] screen. The count start number
can be changed with the [Edit] button.
Manual Mask Check Counter
Counts up each time a board is printed. The machine temporarily stops for visual inspection when this counter reaches
the number of boards set for "Manual Mask Check Timing" on the [Print]-[Mask]-[Detail] screen. The count start number
can be changed with the [Edit] button.
[Reset] button
Resets all information on the [Counter] tab.