YSP_Users_E.pdf - 第196页
6-12 6 Other functions 6 Set the board on the conv ey or and clamp it. T o clamp the board, press the [Convey In] button and follow the message that appears. When setting pattern data on a mask, clamp the mask on the pri…
6-11
6
Other functions
4
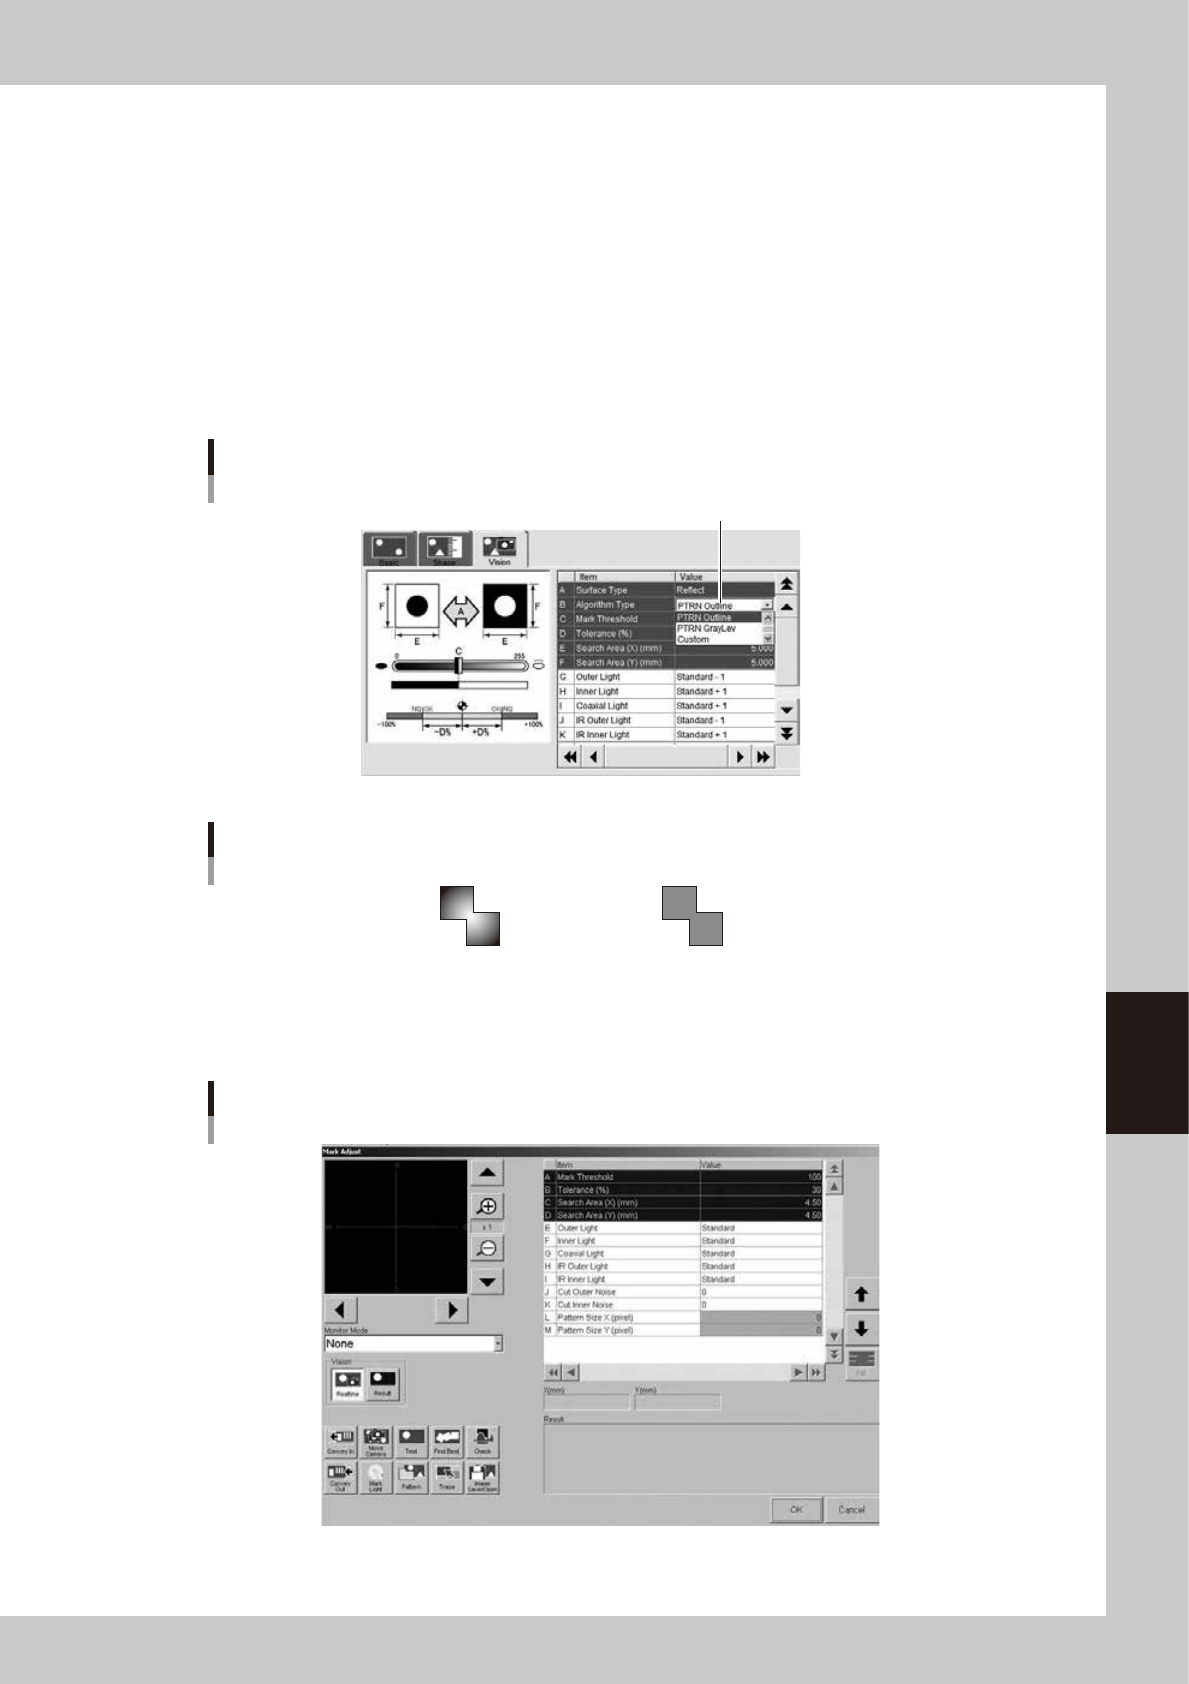
Set "Algorithm Type" on the [Vision] tab.
Set "Algorithm Type" to "PTRN Outline" or "PTRN GrayLev".
PTRN Outline : In most cases, select this parameter for pattern matching. When the outline is definite,
the pattern can be recognized even if uneven brightness portions are present inside the
pattern.
PTRN GrayLev : Selecting this parameter is more effective in recognizing a pattern whose brightness is
uniform inside the pattern. This parameter setting requires a longer time to recognize a
pattern than the "PTRN Outline" setting and also data size will also be larger.
PTRN Whole : This parameter is effective when you want to acquire a pattern including its details.
Since the entire pattern is recognized at a lower compression ratio, this parameter
setting requires a longer recognition time than in the "PTRN GrayLev" setting and also
the data size will be even larger.
"Algorithm Type" setting
Set to "PTRN Outline" or "PTRN GrayLev" or "PTRN Whole".
64610-L3-00
Pattern recognition types
PTRN outline PTRN Graylev
(Uneven brigtness) (Uniform brighness)
63604-L3-00
5
Press the [Adjust] button to open the Mark Adjust screen.
Mark Adjust screen
64611-L3-00
6-12
6
Other functions
6
Set the board on the conveyor and clamp it.
To clamp the board, press the [Convey In] button and follow the message that appears.
When setting pattern data on a mask, clamp the mask on the printing table.
7
Move the camera so the pattern is shown in the center of the vision monitor.
Use the [Move Camera] button on the Mark Adjust screen to move the camera unit. When positioned,
press the [OK] button to return to the Mark Adjust screen.
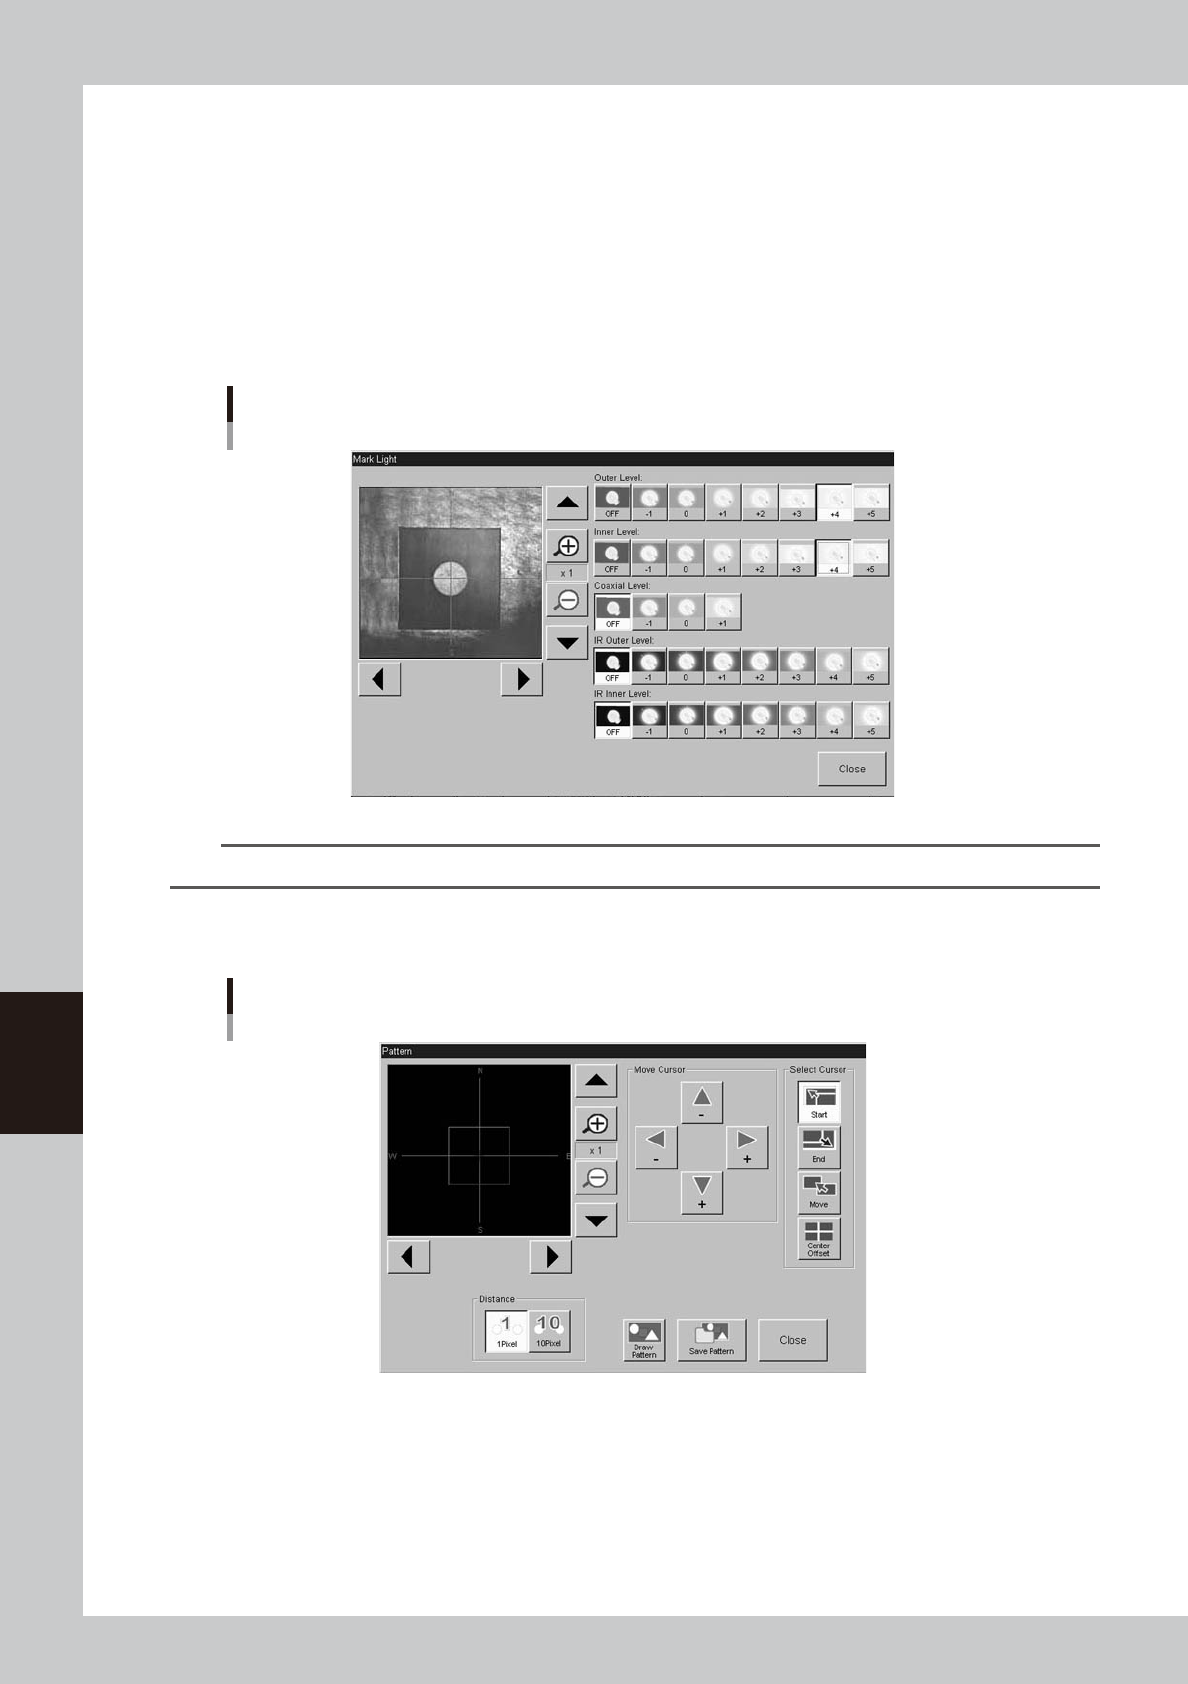
8
Adjust the light levels.
Press the [Light] button to open the light level adjustment screen, and adjust the light level in each
lighting zone so that the pattern can be most clearly viewed on the vision monitor.
Light level adjustment
64612-L3-00
TIP
Refer to step 6 in "7.5 Mark Adjust mode" of Chapter 4 for a general guide to find optimum light levels.
9
Press the [Pattern] button.
The Pattern registration screen appears as shown below.
Pattern registration screen
64613-L3-00
6-13
6
Other functions
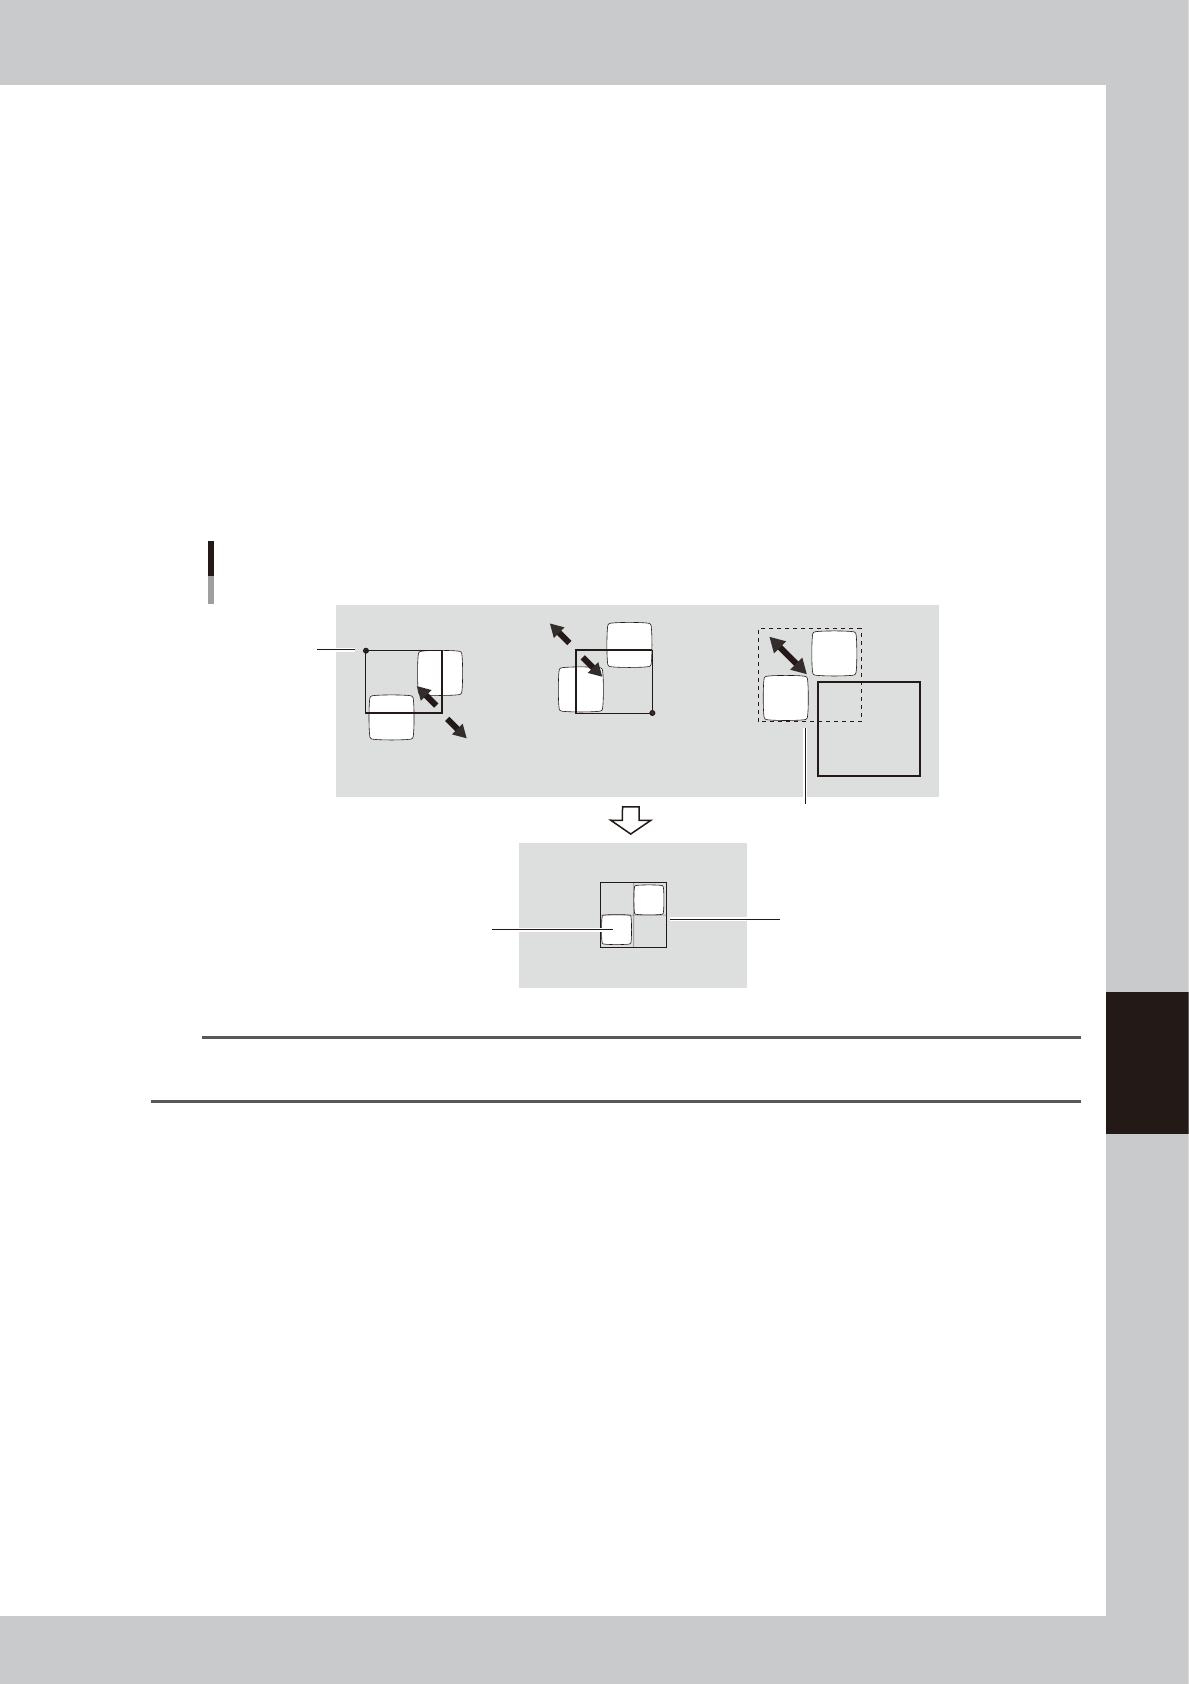
0
Decide on the pattern size.
By using the cursor selection buttons and arrow buttons, adjust the window size and position to enclose
the entire pattern. The function of each button is as follows.
[Start] button
The window can be enlarged or reduced with the arrow keys, using the lower right corner of the
window as a start point.
[End] button
The window can be enlarged or reduced with the arrow keys, using the upper left corner of the
window as a start point.
[Move] button
The entire window moves with the arrow keys.
[Center Offset] button
Press this button when you want to shift the reference position from the center of the window. (The
reference position is displayed as a pink cross cursor.)
[1 Pixel / 10 Pixel] buttons
Press these buttons to switch the distance that the window moves each time you press an arrow
button.
Window size adjustment and movement
Pattern
Enclose the pattern.
Stationary
point
Entire window moves
[End] button [Start] button [Move] button
63605-L3-00
TIP
When you place the mouse pointer in the teach window or on the teach window frame, the mouse pointer changes
to a four-way pointer or two-way pointer, allowing you to adjust the window position and size by dragging the mouse.
q
Set the reference position in the pattern.
If the reference position in the pattern is shifted from the center of the pattern, press the [Center Offset]
button, and drag and move the cross cursor (pink) to the center of the pattern.
w
Save the pattern data as a template.
Check that the center of the pattern is at the center of the window and then press the [Save Pattern]
button.
e
Check the pattern image.
Pressing the [Draw Pattern] button displays the pattern image that has been obtained, so check the
shape.
r
Return to the Mark Adjust screen.
Press the [Close] button to return to the Mark Adjust screen.