YSP_Users_E.pdf - 第215页
7-6 7 Replacing the consumable parts 3. Replacing the cleaning gauze roll If the cleaning gauze roll is wound up completely or if the gauze roll with a different size needs to be used during the setup work, follow the st…
7-5
7
Replacing the consumable parts
n
Double squeegee (Squeegee scraper) *Option
Squeegee scraper Part No. Part name Q'ty Notes
Standard METAL W-SQG
KHT-M71C3-00X METAL SQG.,530 1 530mm
KGY-M71R3-01X METAL SQG.,440 1 440mm
KGJ-M7183-03X METAL SQG.,400 1 400mm
KGJ-M7173-03X METAL SQG.,350 1 350mm
KGJ-M71A3-01X METAL SQG.,300 1 300mm
KGJ-M7193-01X METAL SQG.,250 1 250mm
For half-etching METAL
W-SQG
KHT-M71C3-10X METAL SQG.(S),530 1 530mm
KGY-M71R3-10X METAL SQG.(S),440 1 440mm
KGJ-M7183-10X METAL SQG.(S),400 1 400mm
KGJ-M7173-10X METAL SQG.(S),350 1 350mm
KGJ-M71A3-10X METAL SQG.(S),300 1 300mm
KGJ-M7193-10X METAL SQG.(S),250 1 250mm
URETHANE W-SQG
KHT-M71E3-00X URETHANE SQG.,530 1 530mm
KGY-M71W3-00X URETHANE SQG.,440 1 440mm
KGJ-M710C-E0X SQUEEGEE,400 1 400mm
KW3-M7126-00X SQUEEGEE,M 1 350mm
KGJ-M71C3-00X URETHANE SQG.,300 1 300mm
KGJ-M71B3-00X URETHANE SQG.,250 1 250mm
c
CAUTION
The part Nos. given in this manual are the original part Nos. which were assigned to the parts when this manual was
issued. Because these part Nos. may be changed without prior notice, be sure to verify the latest part Nos. before
ordering parts.
7-6
7
Replacing the consumable parts
3. Replacing the cleaning gauze roll
If the cleaning gauze roll is wound up completely or if the gauze roll with a different size needs to be used
during the setup work, follow the steps below to replace the cleaning gauze roll.
c
CAUTION
For a new gauze roll, use YAMAHA genuine spare parts listed in the table below to prevent any trouble.
n
Gauze roll part No.
Part No. Part name Notes
KHT-M3660-00X BENCOT,ROLL 530 Roll sheet width, 530 mm
KGY-M3660-A0X BENCOT,ROLL 440 Roll sheet width, 440 mm
KGY-M3660-B0X BENCOT,ROLL 360 Roll sheet width, 360 mm
KGY-M3660-C0X BENCOT,ROLL 260 Roll sheet width, 260 mm
c
CAUTION
Select a gauze roll width that matches the squeegee head size. Using the wrong gauze roll width might damage the
squeegee head and mask.
c
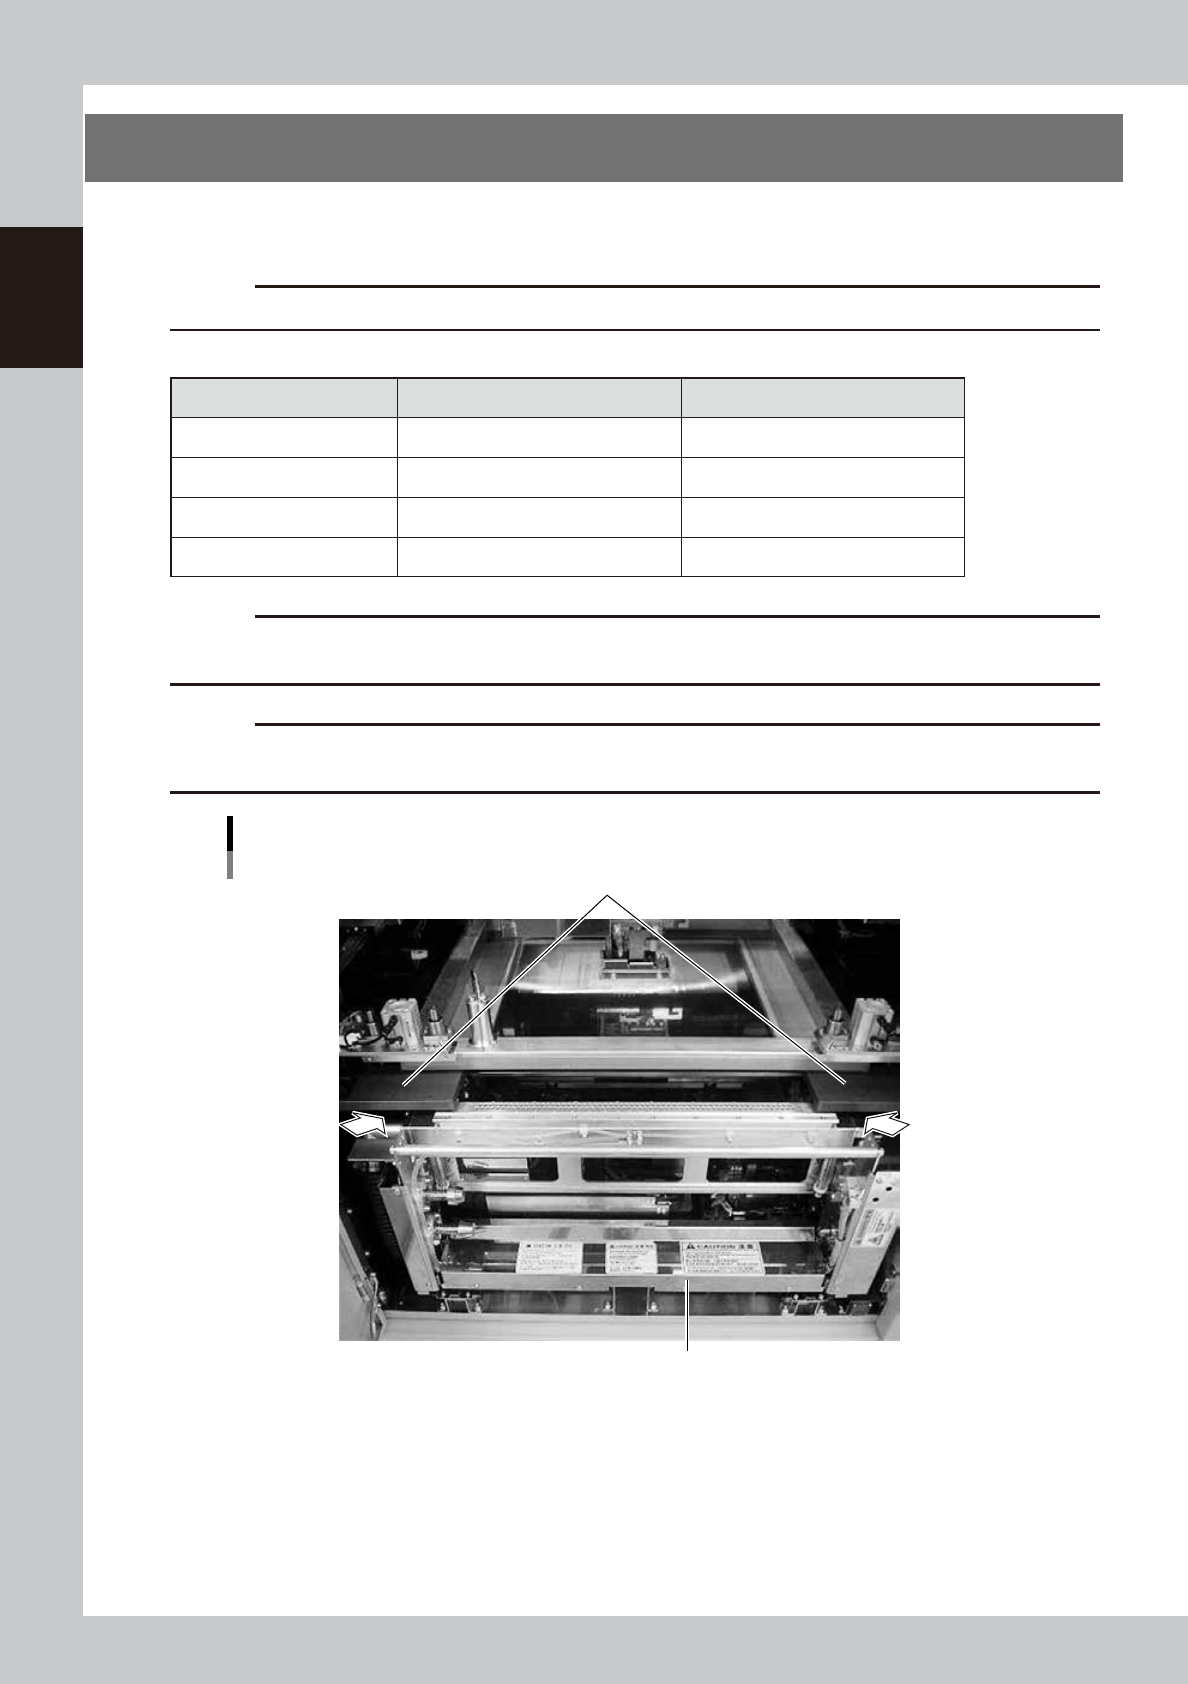
CAUTION
When moving the cleaning unit by hand, be careful not to get your hand pinched in the gap (shown by the arrow
below) under the mask plate.
Cleaning unit
Mask plate
Cleaning unit
63725-L3-00
7-7
7
Replacing the consumable parts
3.1 Using the same roll size
1
Press the emergency stop button and open the safety cover at the lower portion of
the front panel.
2
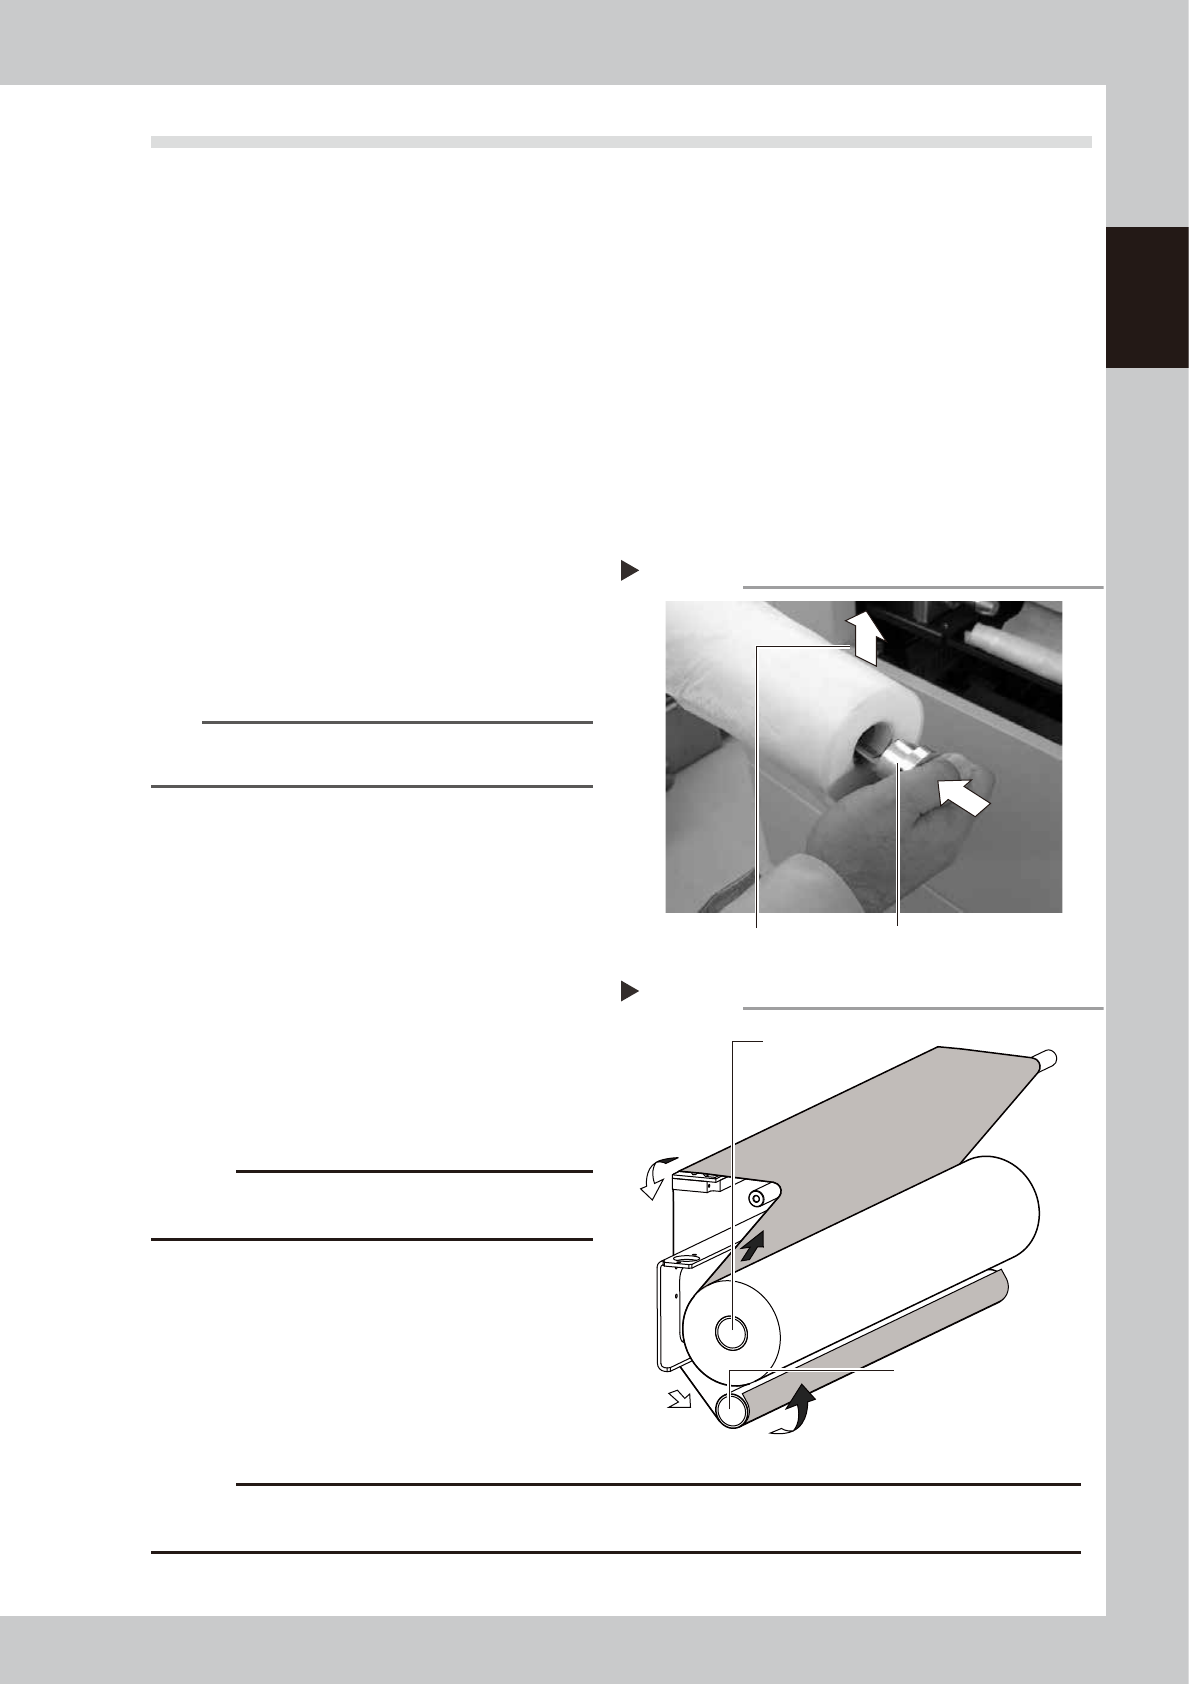
Remove the used up gauze roll from the take-up shaft.
With the used up gauze roll kept pushed leftward, remove it from the take-up shaft (lower shaft) along
with the shaft holder fit into the right end of the used up gauze roll.
3
Fit the roll core remaining on the
upper roll shaft onto the take-up
roll shaft.
Remove the empty roll core by pushing it to
the left along with the shaft holder fit into
the right end.
Then, press-fit the empty roll core into the
take-up shaft (lower shaft).
4
Insert the shaft holder into a new
gauze roll.
Remove the shaft holder inserted into the
right end of the used up gauze roll and insert
it into the right end of a new gauze roll.
63703-L3-00
n
NOTE
Pay special attention to the gauze roll feed direction
when inserting the shaft holder into a new gauze roll.
5
Fit the new gauze roll onto the
upper roll shaft.
While pushing the gauze roll to the left, fit it
onto the upper roll shaft. Make sure that the
guide on the shaft holder is engaged
securely.
6
Feed the gauze roll through the
guides.
While keeping the parallelism between the
left and right, feed the gauze roll through
the guides as shown in the figure on the
right.
63706-L3-00
c
CAUTION
Do not attempt to use the backside of the used up
gauze roll.
7
Attach the top end of the new
gauze roll onto the roll core
inserted onto the take-up shaft.
Fasten the top end of the new gauze roll
with an adhesive tape or similar item so that
both ends feed in parallel with each other.
After that, turn the take-up shaft 2 or 3
rotations to wind up the gauze roll.
c
CAUTION
Make sure to wind up the gauze roll. If the gauze roll is loosen and operate the machine, it will interfere with each part
and the machine may be damaged.
8
Close the safety cover and cancel the emergency stop.
Inserting the shaft holder.
Step 4
Shaft holder
Gauze roll feed direction
Feeding the gauze roll through the guides.
Step 6
Take-up shaft
New gauze roll