YSP_Users_E.pdf - 第190页
6-6 6 Other functions 1.4 Cursor teaching In cursor teaching, a teac hing window of an y desired size is display ed on the vision monitor , and the position data at the center of the window is input as the teac hing posi…
6-5
6
Other functions
l
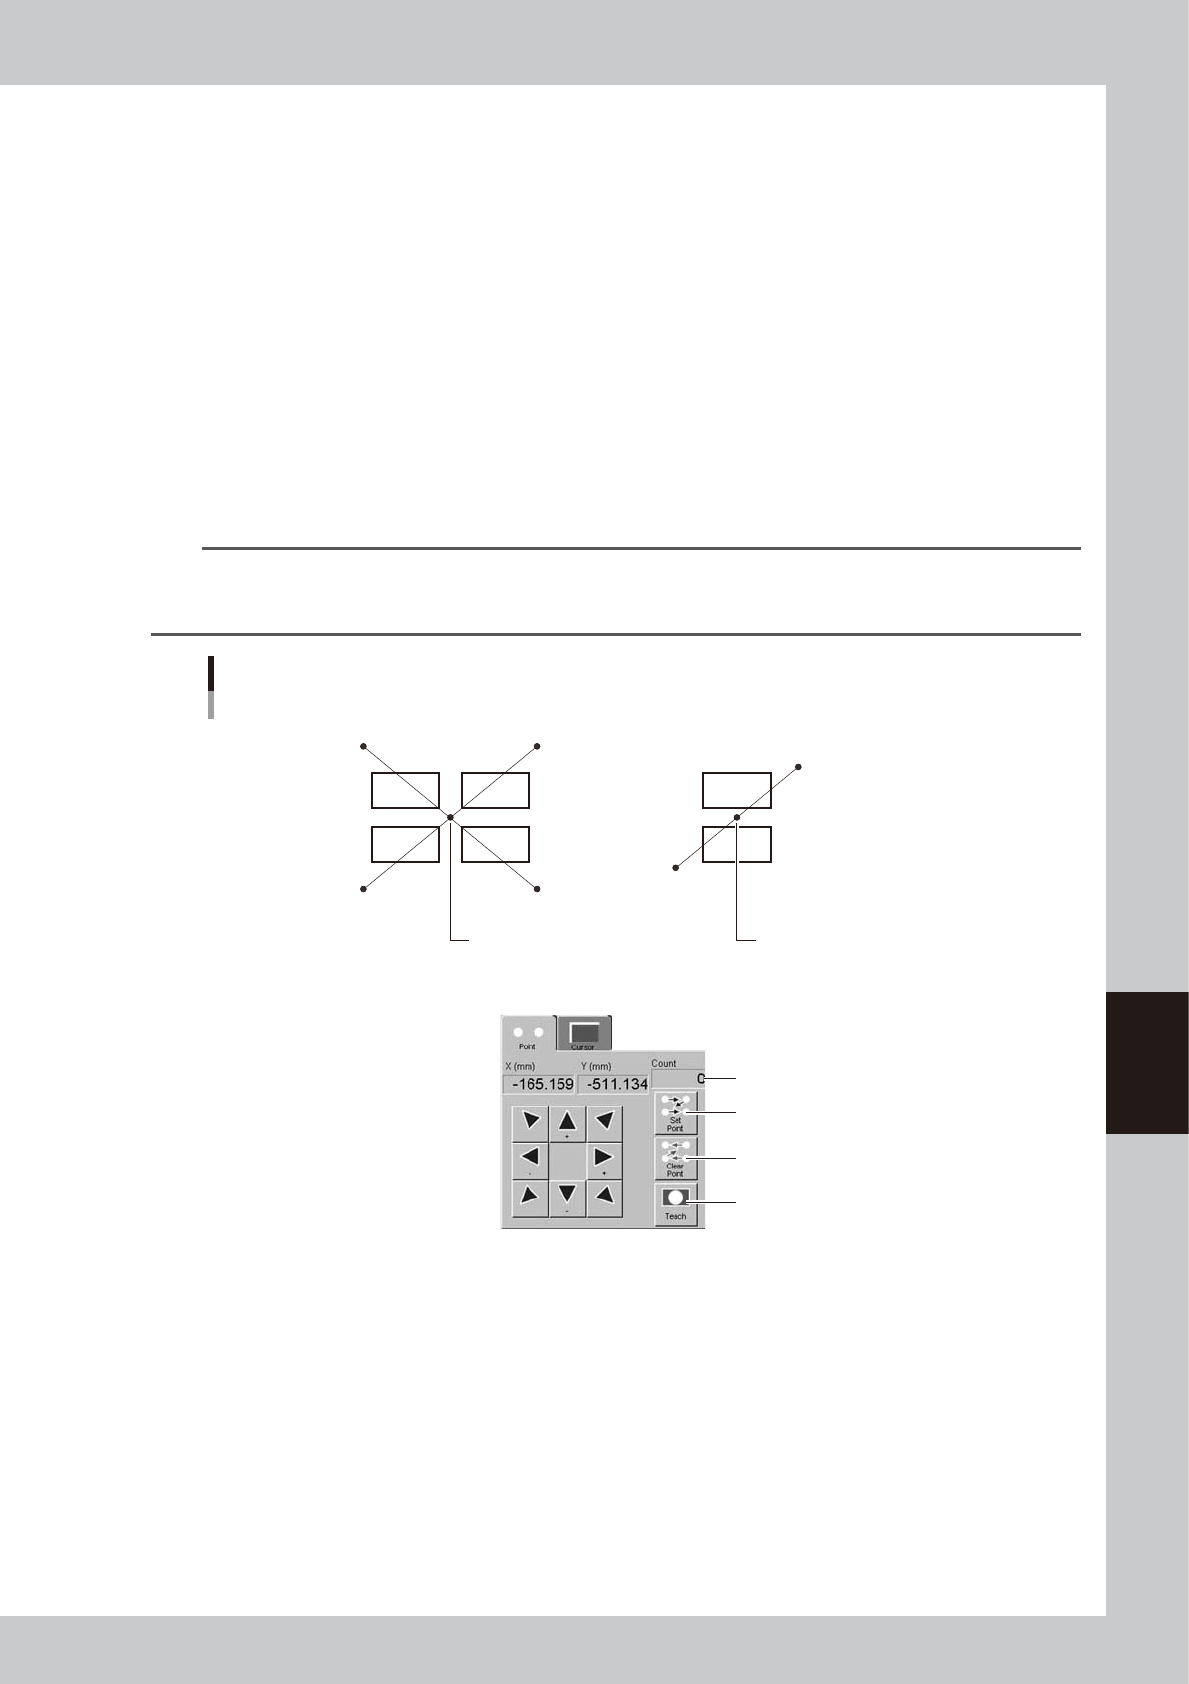
Multi-point input
The following steps explain the teaching method when the [Click Move] button is pressed. (If not using click movement,
use the [Axis movement] buttons to move the teaching unit to each target point.)
1. Click the mouse button at the first point.
The teaching unit moves to the first point and the first point is displayed at the center of the vision monitor.
2. Press the [Set Point] button.
3. Click the mouse button at the second point.
The teaching unit moves to the second point and the second point is displayed at the center of the vision monitor.
4. Press the [Set Point] button.
5. Click the mouse button at the third point.
The teaching unit moves to the third point and the third point is displayed at the center of the vision monitor.
6. Press the [Set Point] button.
7. Click the mouse button at the fourth point.
The teaching unit moves to the fourth point and the fourth point is displayed at the center of the vision monitor.
8. Press the [Teach] button.
The center position of the four points is input as the teaching position.
TIP
For two-point input, perform teaching at two points as shown below. The center coordinates of the two points are
input as the teaching position. The number of teaching points (2 in this case) is shown in the "Count" box. To cancel
the previous point, press the [Clear Point] button.
Multi-point teaching
Center coordinates of
4 points are input.
4th point 3rd point
1st point
4-point input teaching 2-point input teaching
Center coordinates of
2 points are input.
Number of input points
[Set Point] button
[Clear Point] button
[Teach] button
2nd point
1st point
2nd point
63601-L3-00
6-6
6
Other functions
1.4 Cursor teaching
In cursor teaching, a teaching window of any desired size is displayed on the vision monitor, and the position
data at the center of the window is input as the teaching position. The cursor teaching allows obtaining a more
accurate value than with normal teaching. Note that this function cannot be used unless the marks and patterns
fit in the vision monitor.
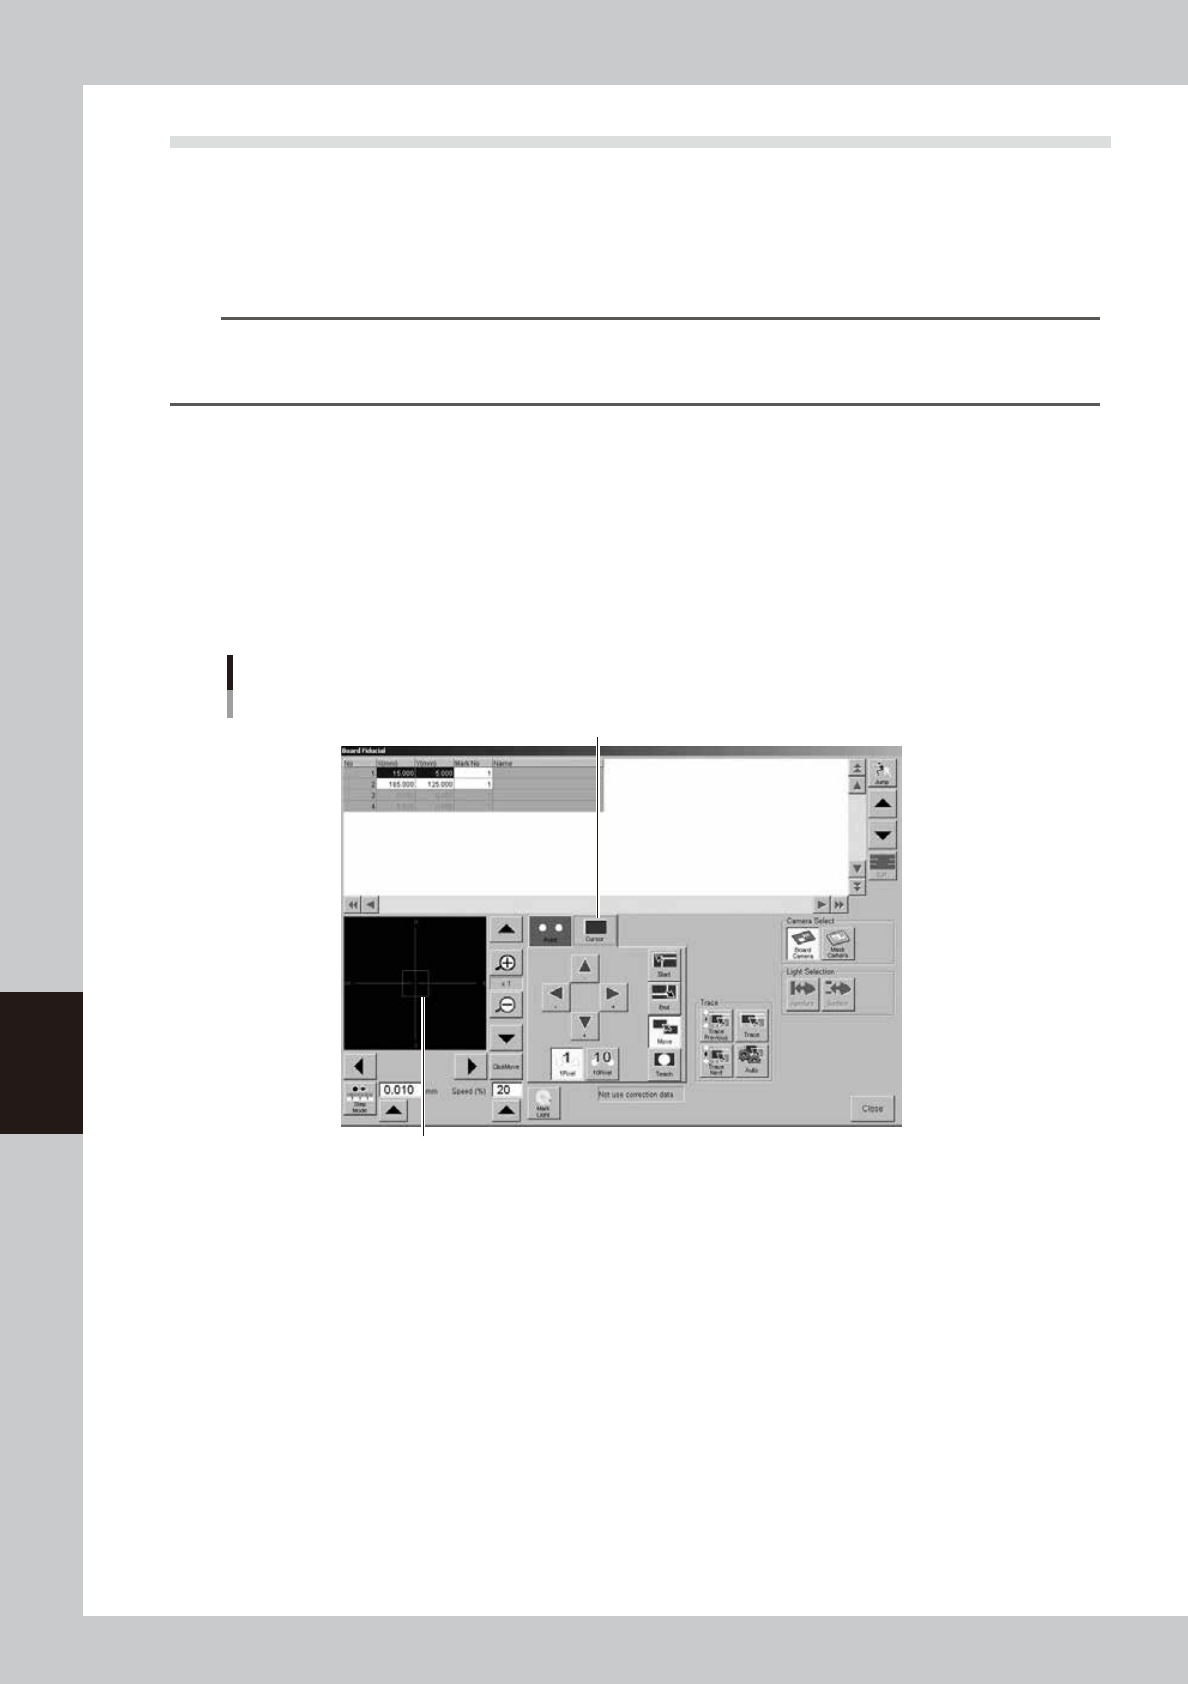
1
Press the [Teach] button to open the Teach screen.
TIP
When you perform teaching on a board and the board is not yet clamped on the conveyor, a check dialog box
appears asking you to load a board. Follow the message on the screen to load a board on the conveyor.
When you perform teaching on a mask, clamp the mask on the printing table.
2
Move the teaching unit to the target position.
Follow steps 2 to 6 for point teaching.
3
Adjust the lighting levels as needed.
If the target image is not clearly displayed on the vision monitor, press the [Light] button to adjust the
lighting levels just as with point teaching.
4
Open the [Cursor] tab.
A window (red frame) appears on the vision monitor for cursor teaching.
[Teach] screen
[Cursor] tab
Cursor teach window (red frame)
64606-L3-00
6-7
6
Other functions
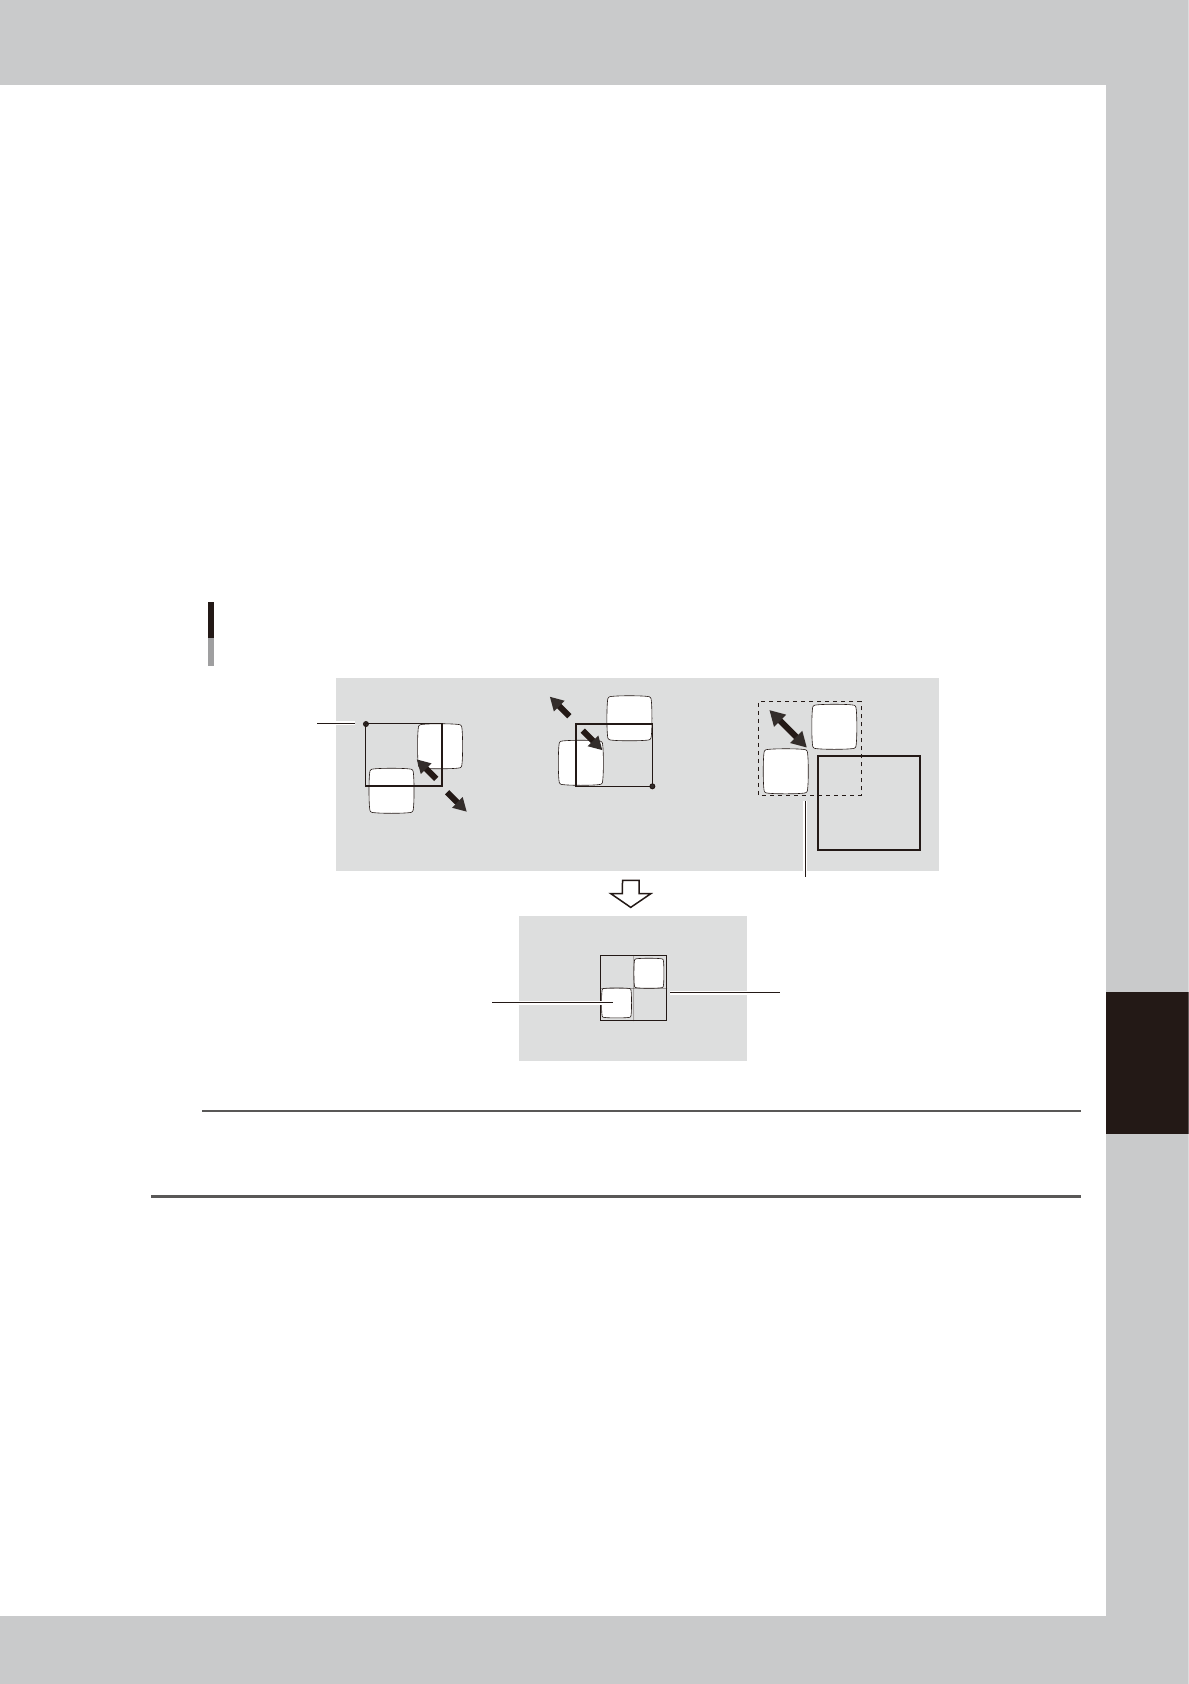
5
Adjust the cursor teach window.
By using the buttons on the [Cursor] tab, adjust the window size and position to enclose the entire
object. The function of each button is as follows.
[Start] button
Enlarges or reduces the window with the arrow keys, using the lower right corner of the window as a
start point.
[End] button
Enlarges or reduces the window with the arrow keys, using the upper left corner of the window as a start
point.
[Move] button
The entire window moves with the arrow keys.
[Teach] button
Executes teaching.
Arrow buttons
Changes the window size and position according to the movement selected by the [Start], [End] or
[Move] button.
[1 Pixel / 10 Pixel] buttons
Press these buttons to switch the distance that the window moves each time you press an arrow button.
Window size adjustment and movement
Pattern
Enclose the pattern.
Stationary
point
Entire window moves
[End] button [Start] button [Move] button
63602-L3-00
TIP
When you place the mouse pointer in the cursor teach window or on the teach window frame, the mouse pointer
changes to a four-way pointer or two-way pointer, allowing you to adjust the window position and size by dragging
the mouse.
6
Press the [Teach] button.
The center coordinates of the teach window are input as the teaching position.