YSP_Users_E.pdf - 第184页
Chapter 6 Other functions Contents 1. T each and trace 6-1 1.1 [T each] button 6-1 1.2 T each screen 6-2 1.3 Point teaching 6-3 1.4 Cursor teaching 6-6 1.5 T race 6-8 2. Pattern matching 6-9 2.1 Pattern registration 6-10…
5-27
5
Managing the data
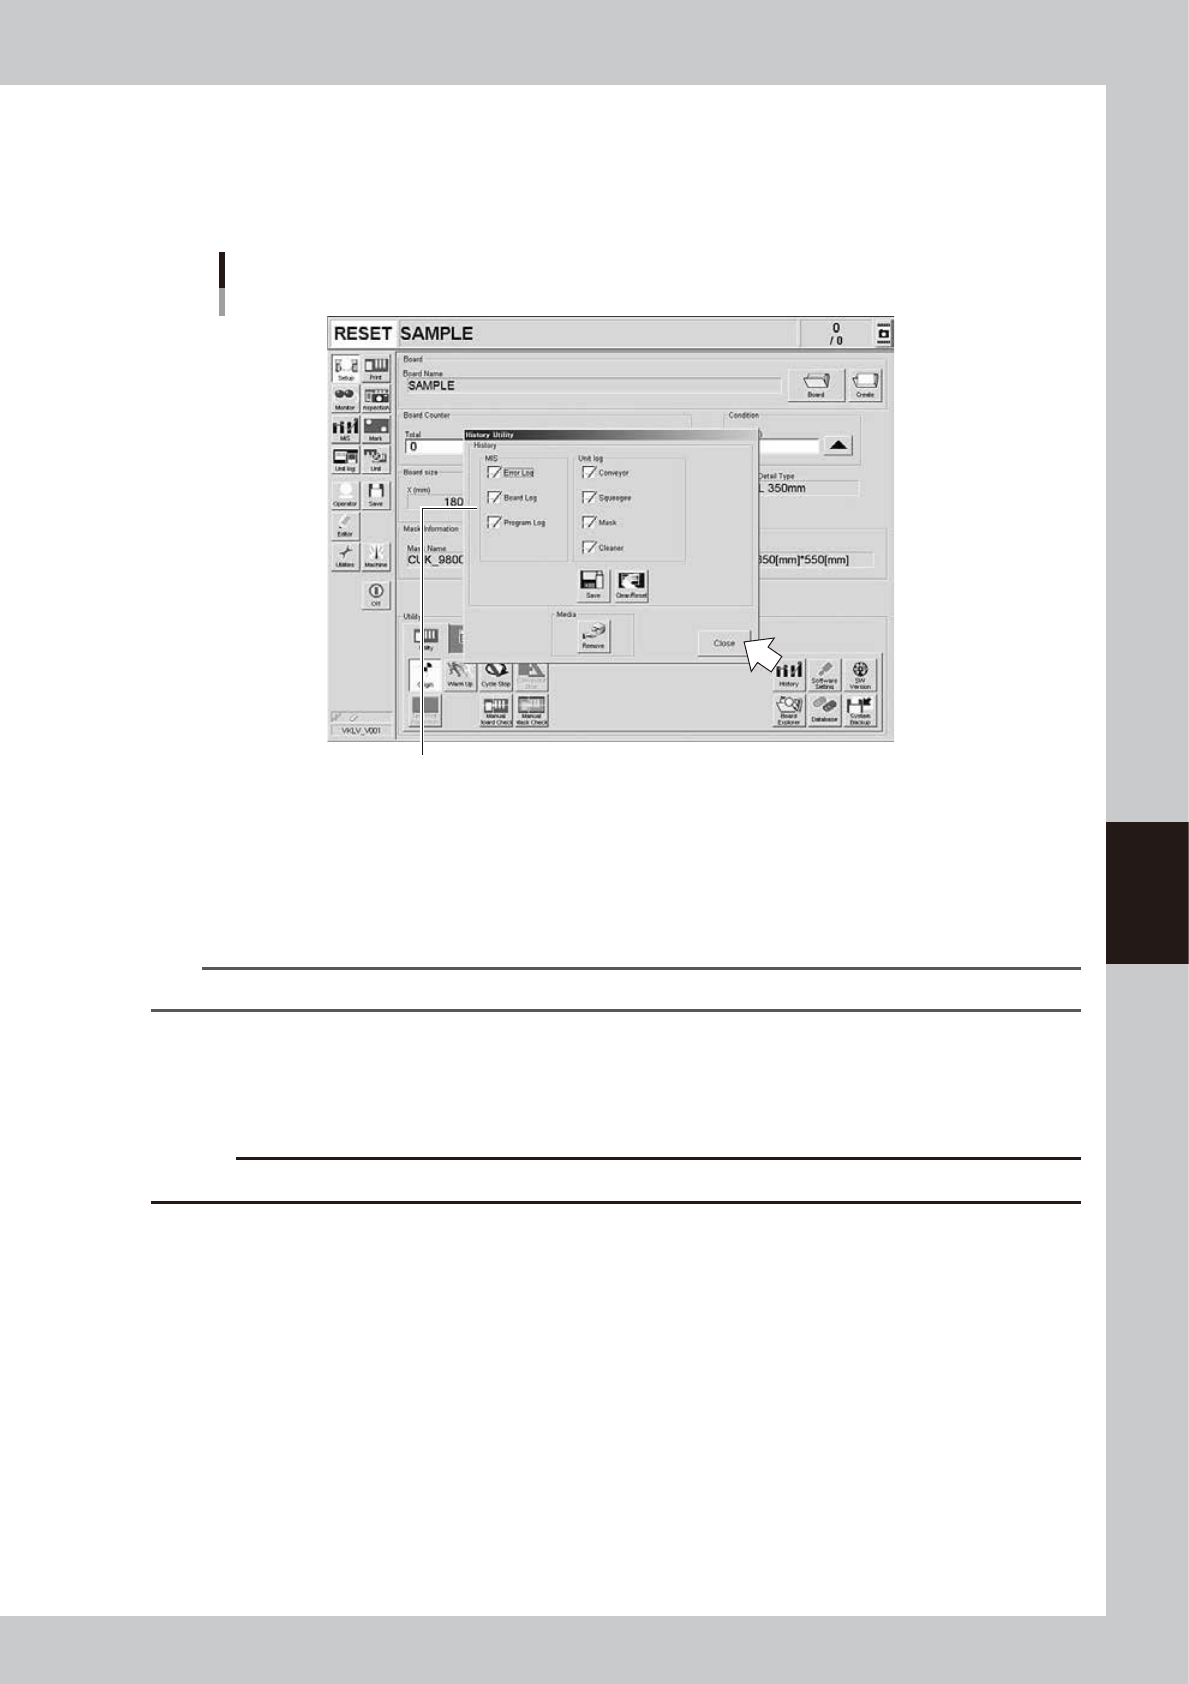
3.2.2 History Utility
The History Utility allows you to save production logs to an external storage medium at one time or clear/reset
them at one time.
On the Setup screen, pressing the [History] button opens the "History Utility" screen as shown below.
History Utility
Check the necessary items.
64560-L3-00
To save logs at one time:
1. Check the check boxes next to the items you want to save, and press the [Save] button.
2. When the "Media Select" screen appears, check or select the storage medium and press the [OK] button.
3. A confirmation dialog appears. Press the [Yes] button to save the selected items.
4. Another dialog appears when the selected items have been saved. Press the [OK] button to close the dialog box.
TIP
Production logs are saved in a folder named "My History" in the external storage medium.
To clear/reset logs at one time:
1. Check the check boxes next to the items (MIS) you want to clear or the items (Unit log) you want to reset, and press the
[Clear/Reset] button.
2. A confirmation dialog appears. Press the [Yes] button to clear/reset the selected items.
c
CAUT ION
Deleted data cannot be restored, so be careful.

Chapter 6 Other functions
Contents
1. Teach and trace 6-1
1.1 [Teach] button 6-1
1.2 Teach screen 6-2
1.3 Point teaching 6-3
1.4 Cursor teaching 6-6
1.5 Trace 6-8
2. Pattern matching 6-9
2.1 Pattern registration 6-10
2.2 Using the pattern matching 6-15
3. Matrix pin arrangement 6-16
4. Manual operation 6-17
4.1 "Move Axis" screen 6-18
4.2 [Unit] - [Conveyor] tab screen 6-20
4.3 [Unit] - [Mask] tab screen 6-21
4.4 [Unit] - [Squeegee] tab screen 6-22
4.5 [Unit] - [Cleaner] tab screen 6-23
4.6 [Unit] - [I/O] tab screen 6-24
6-1
6
Other functions
1. Teach and trace
1.1 [Teach] button
The teaching function is used to teach the machine position such as XY coordinate values using a teaching unit
such as a vision camera. To perform teaching, use the [Teach] button to open the Teach screen. There are five
[Teach] buttons at the following locations. Select a [Teach] button suitable for your purpose.
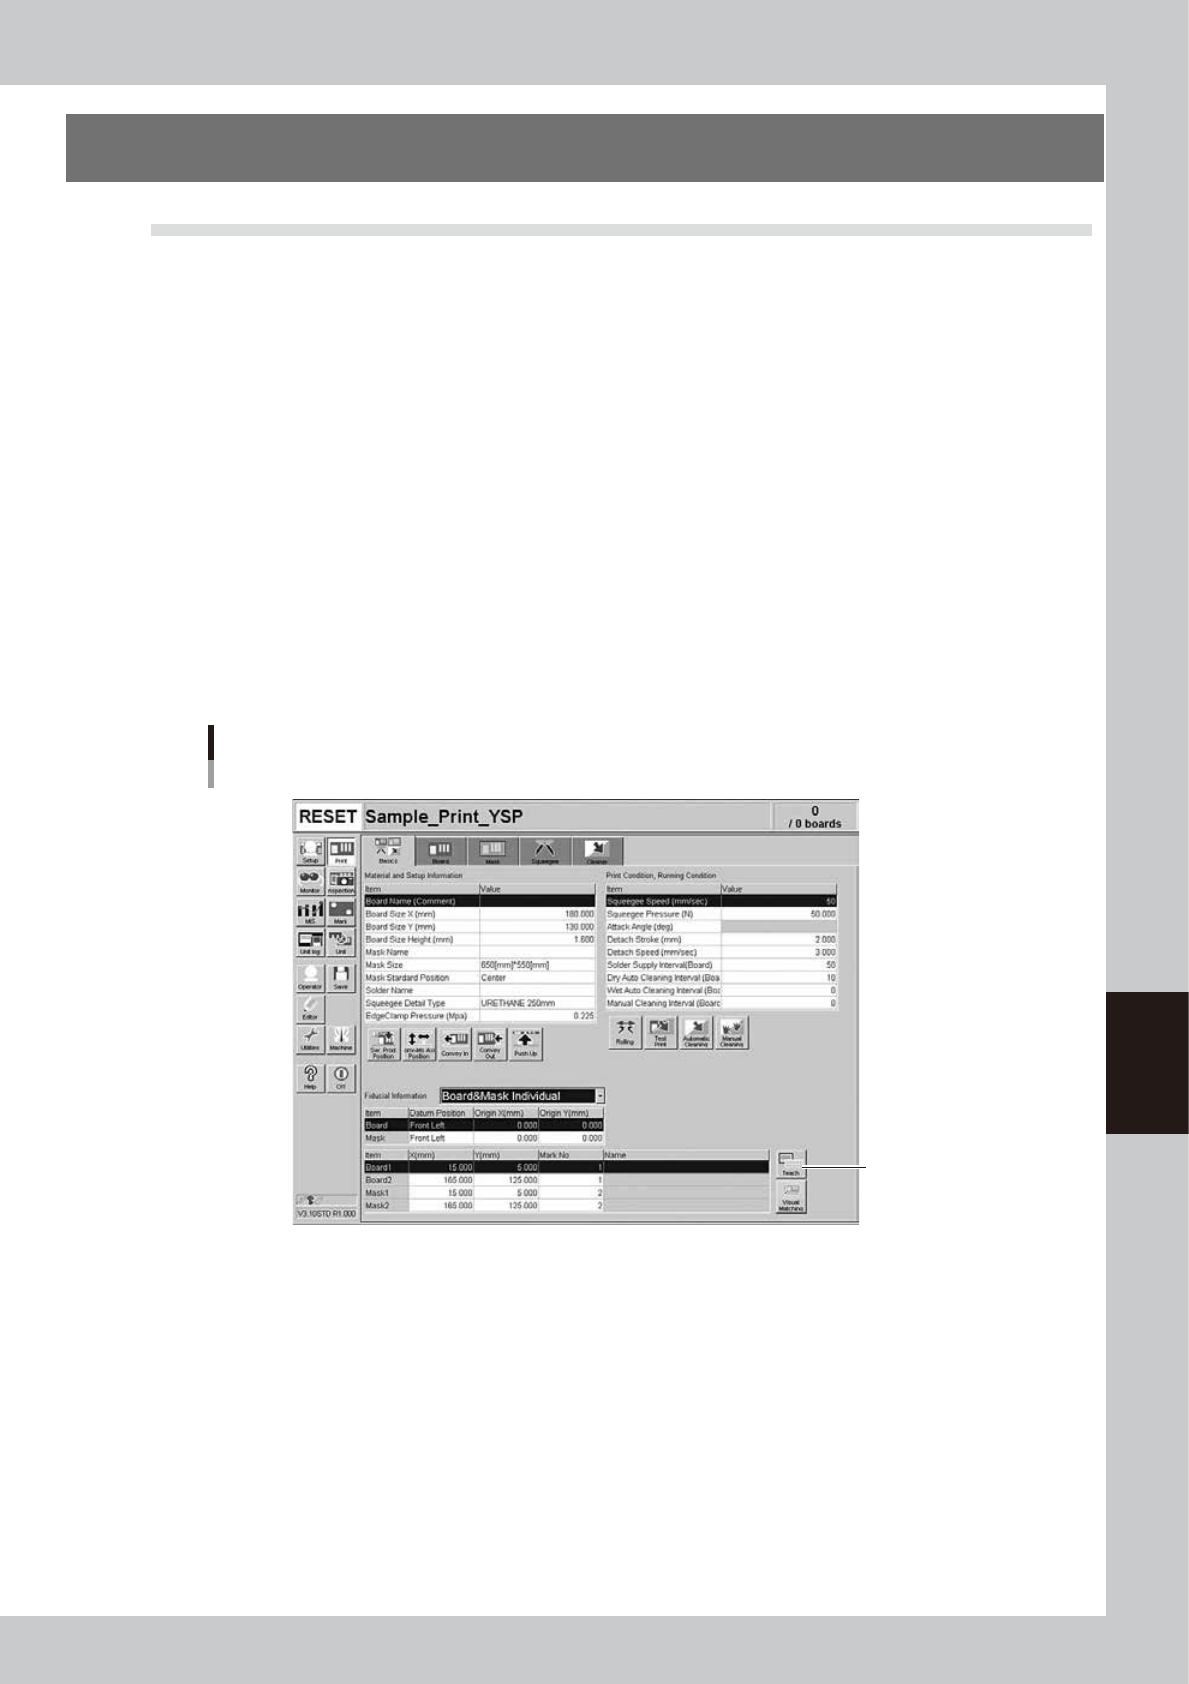
1. [Print] - [Basics] tab:
Press this [Teach] button to perform teaching on the board coordinates.
2. [Print] - [Board] tab:
Press this [Teach] button to perform teaching on the board coordinates.
3. Board inspection coordinate dialog box:
This dialog box appears when the [Detail Condition] button on the [Print] - [Board] tab screen is pressed.
Use the [Teach] button in this dialog box to teach the machine a board inspection position or move the machine to a
specified position.
4. [Print] - [Mask] tab:
Press this [Teach] button to teach the machine the mask coordinates.
5. Mask inspection coordinate dialog box:
This dialog box appears when the [Detail] button on the [Print] - [Mask] tab is pressed. Use the [Teach] button in this
dialog box to teach the machine a mask inspection position or move the machine to a specified position.
[Teach] button
Example of [Basics] tab
[Teach] button
64601-L3-10