YSP_Users_E.pdf - 第182页
5-26 5 Managing the data • "Same Board Name taking over LotPar tsLog" check box When this check box is checked on, the current production boar d, lot log, and production log are succeeded as the board data wi…
5-25
5
Managing the data
n
File names automatically saved
Item Display item File name example
MIS
Error log ErrLog20140310.csv
Board log PcbLog20140310.csv
Program log LotLog20140310.csv
Unit log
Conveyor YvpConv20140310.csv
Mask YvpMask20140310.csv
Squeegee YvpSqueegee20140310.csv
Cleaner YvpCleaner20140310.csv
TIP
Each file is automatically named when saved. It consists a predetermined log name (ErrLog, PcbLog, etc.) followed
by a number representing the date such as "20140310" (March 10, 2014).
A new file is created each day.
4
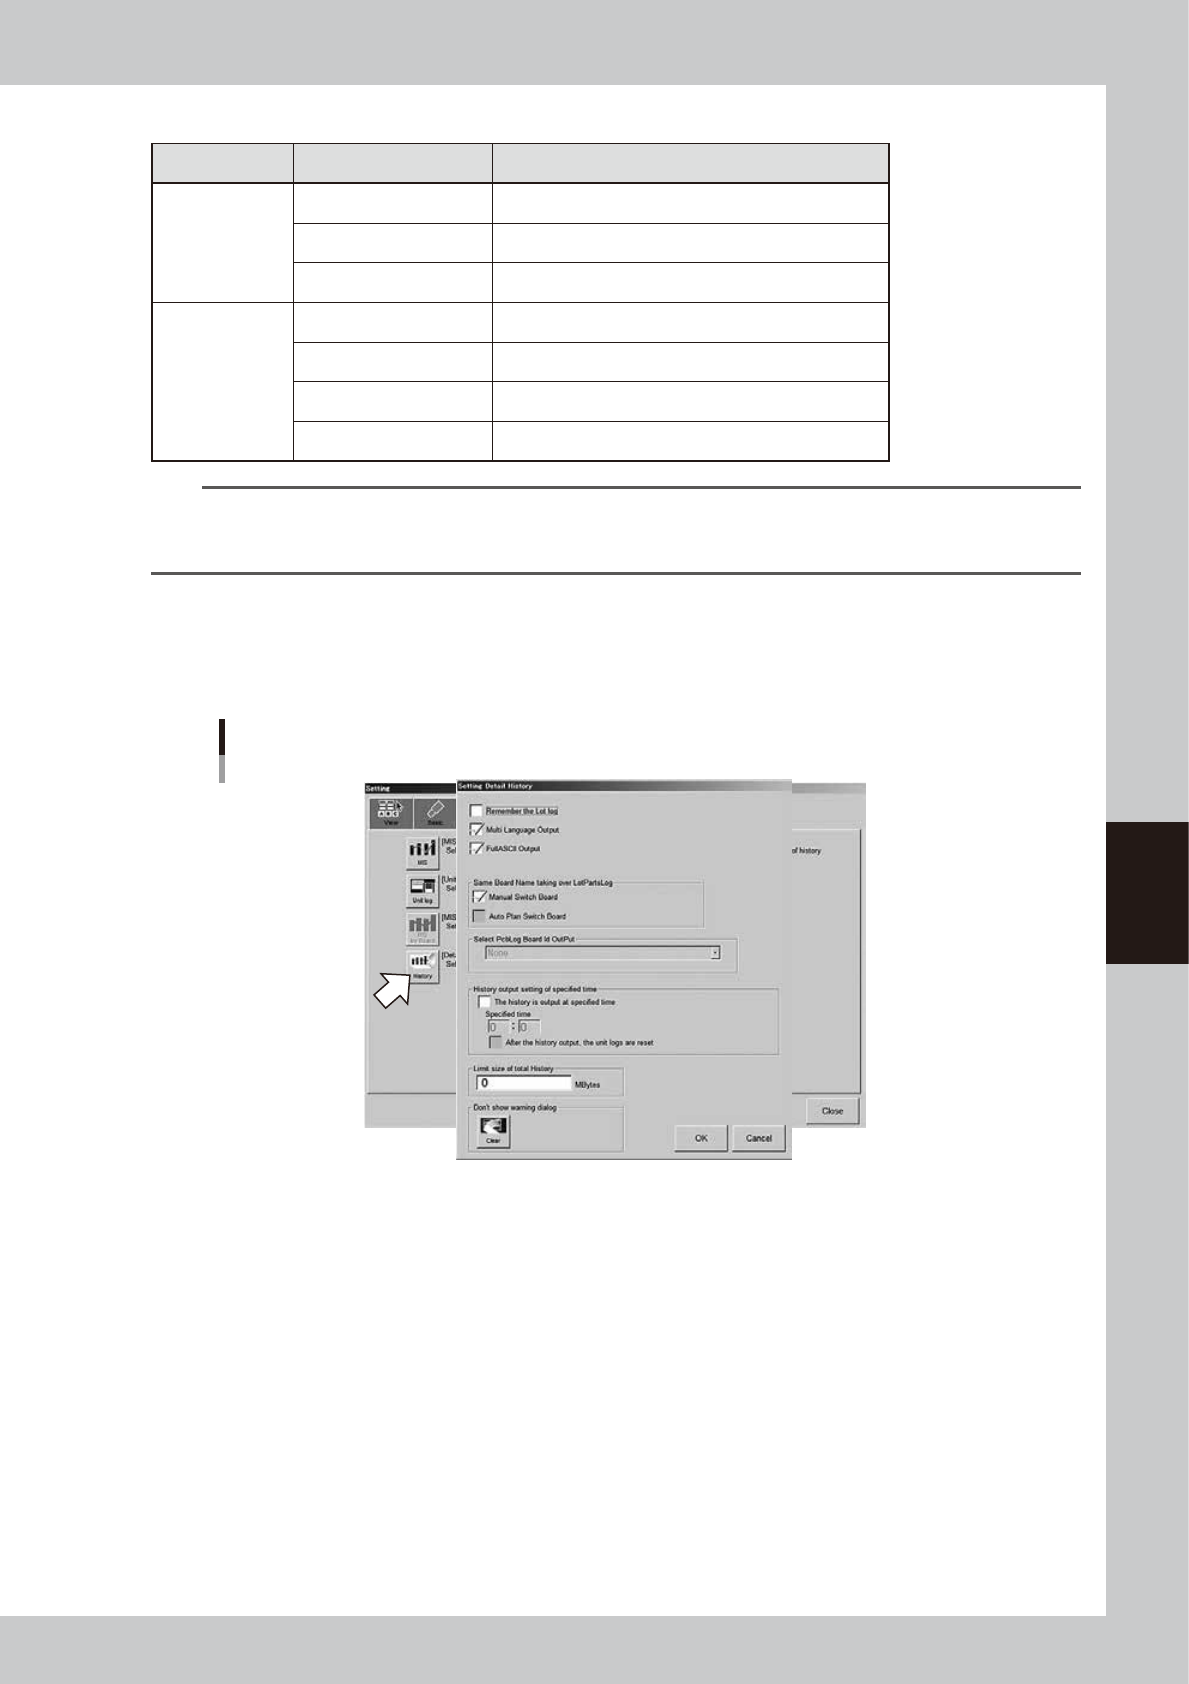
Press the [History] button on the “Setting” screen.
The “Setting Detail History” dialog box then appears.
5
Select the check boxes as needed.
“Setting Detail History” dialog box
64559-L3-00
• "Remember the lot log" check box
When this check box is selected, the board data that was in use when the machine power was
turned off will be loaded again the next time the power is turned on, in order to take over its
operation history data.
• "Multi Language Output" check box
When this check box is selected, the operation history data can be saved or loaded in multi-
language mode.
• "FullASCII Output" check box
When this check box is selected, characters not applicable to this machine (illegal characters) are
converted automatically in the file read process.
Illegal characters (example): !#$%&@*<>?/, etc.

5-26
5
Managing the data
• "Same Board Name taking over LotPartsLog" check box
When this check box is checked on, the current production board, lot log, and production log are
succeeded as the board data with the same name as the name of the board data that is currently
loaded is selected when the board is changed.
n
NOTE
This function is enabled only when selecting the board data by pressing the [Board] button on the Setup screen.
This function is disabled when changing the board using "automatic setup function" of IT Option and "remote control
function" of YFact.
• "History output setting of specified time" check box
Select this check box when you want to specify the time to output the operation history data.
After selecting this check box, enter the time in military time (24-hour clock format) in the “Specified
time” box. By making this setting, the machine automatically outputs and saves the operation history
data at the specified time every day.
When the “After the history output, the unit logs are reset” check box is selected, the “Unit log” data
will be reset after the production history data is output.
• "Limit size of total history" box
When you want to set a limit on the total amount of operation history data to be saved, enter it
here. An alarm will occur when the free space of the destination approaches the limit size specified
here. No limit will be placed when set to "0".
6
When finished setting, press the [OK] button.
The display returns to the “Setting” screen, and press the [Close] button to close it.
5-27
5
Managing the data
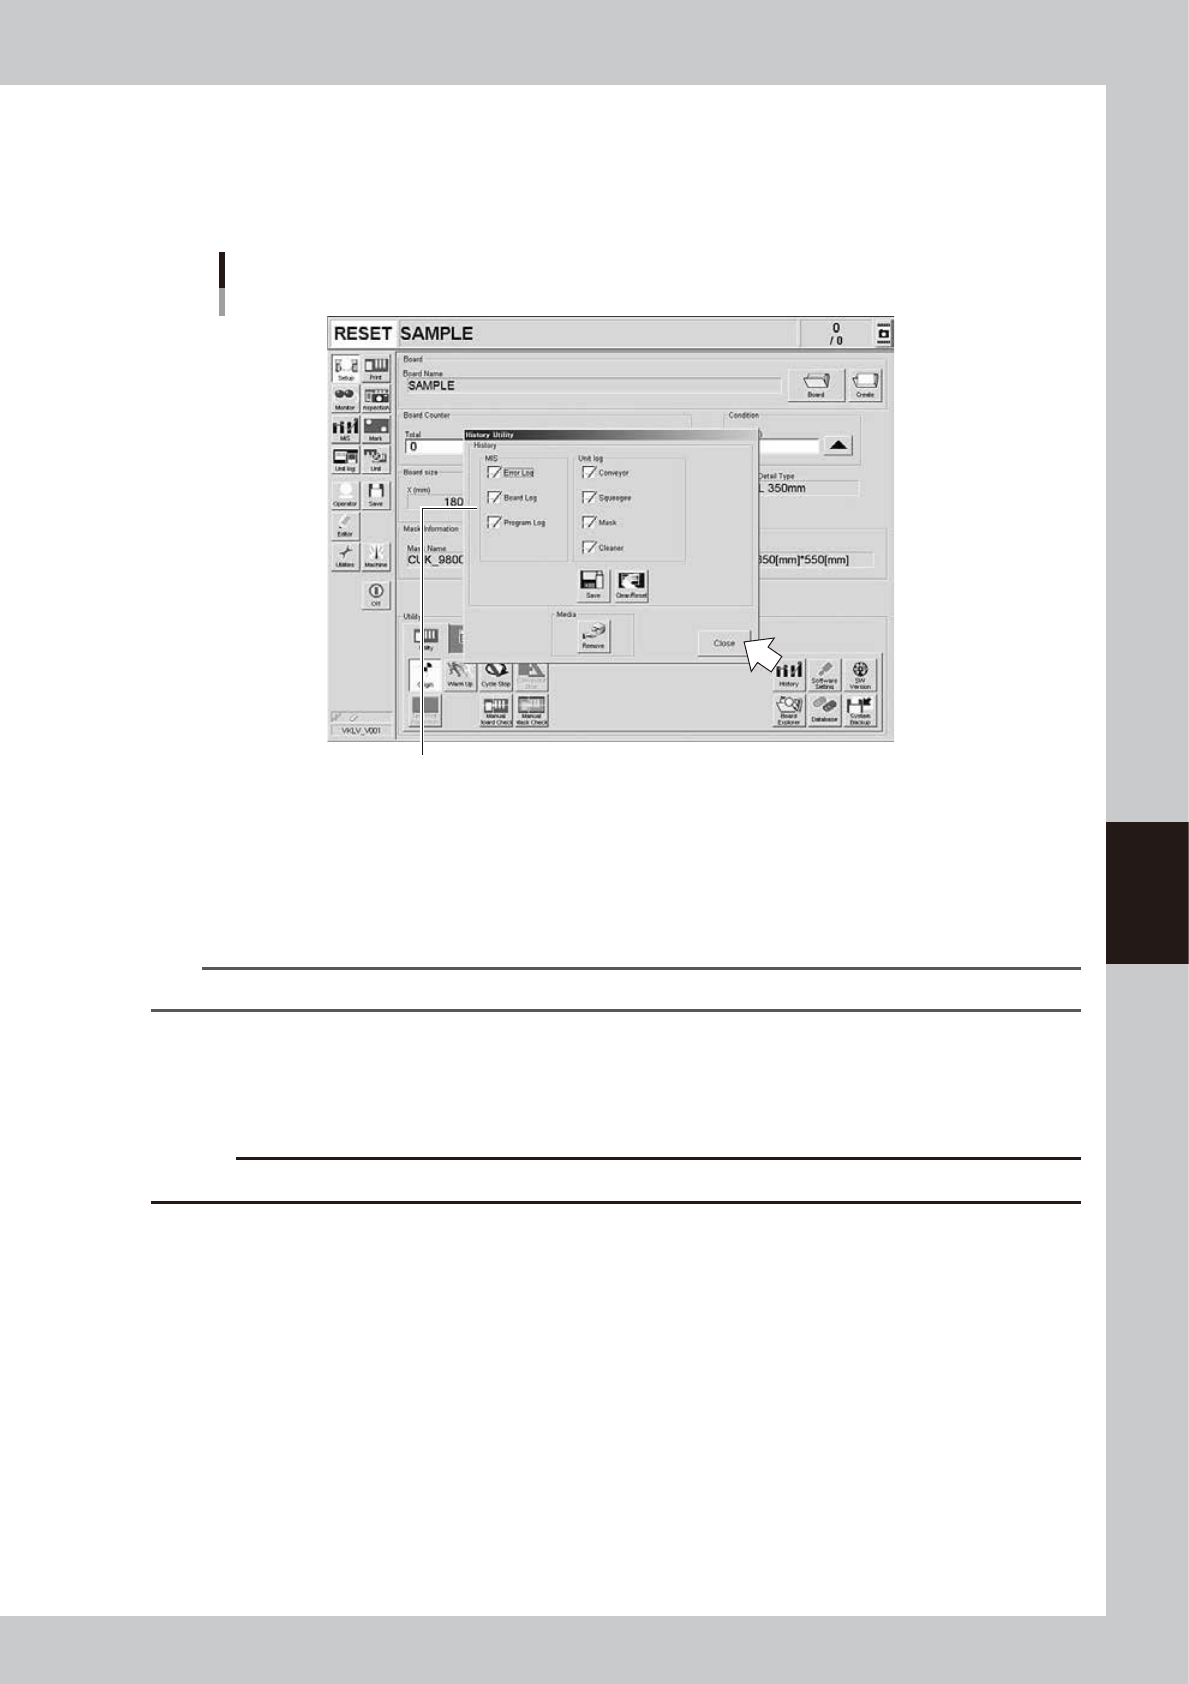
3.2.2 History Utility
The History Utility allows you to save production logs to an external storage medium at one time or clear/reset
them at one time.
On the Setup screen, pressing the [History] button opens the "History Utility" screen as shown below.
History Utility
Check the necessary items.
64560-L3-00
To save logs at one time:
1. Check the check boxes next to the items you want to save, and press the [Save] button.
2. When the "Media Select" screen appears, check or select the storage medium and press the [OK] button.
3. A confirmation dialog appears. Press the [Yes] button to save the selected items.
4. Another dialog appears when the selected items have been saved. Press the [OK] button to close the dialog box.
TIP
Production logs are saved in a folder named "My History" in the external storage medium.
To clear/reset logs at one time:
1. Check the check boxes next to the items (MIS) you want to clear or the items (Unit log) you want to reset, and press the
[Clear/Reset] button.
2. A confirmation dialog appears. Press the [Yes] button to clear/reset the selected items.
c
CAUT ION
Deleted data cannot be restored, so be careful.