YSP_Users_E.pdf - 第200页
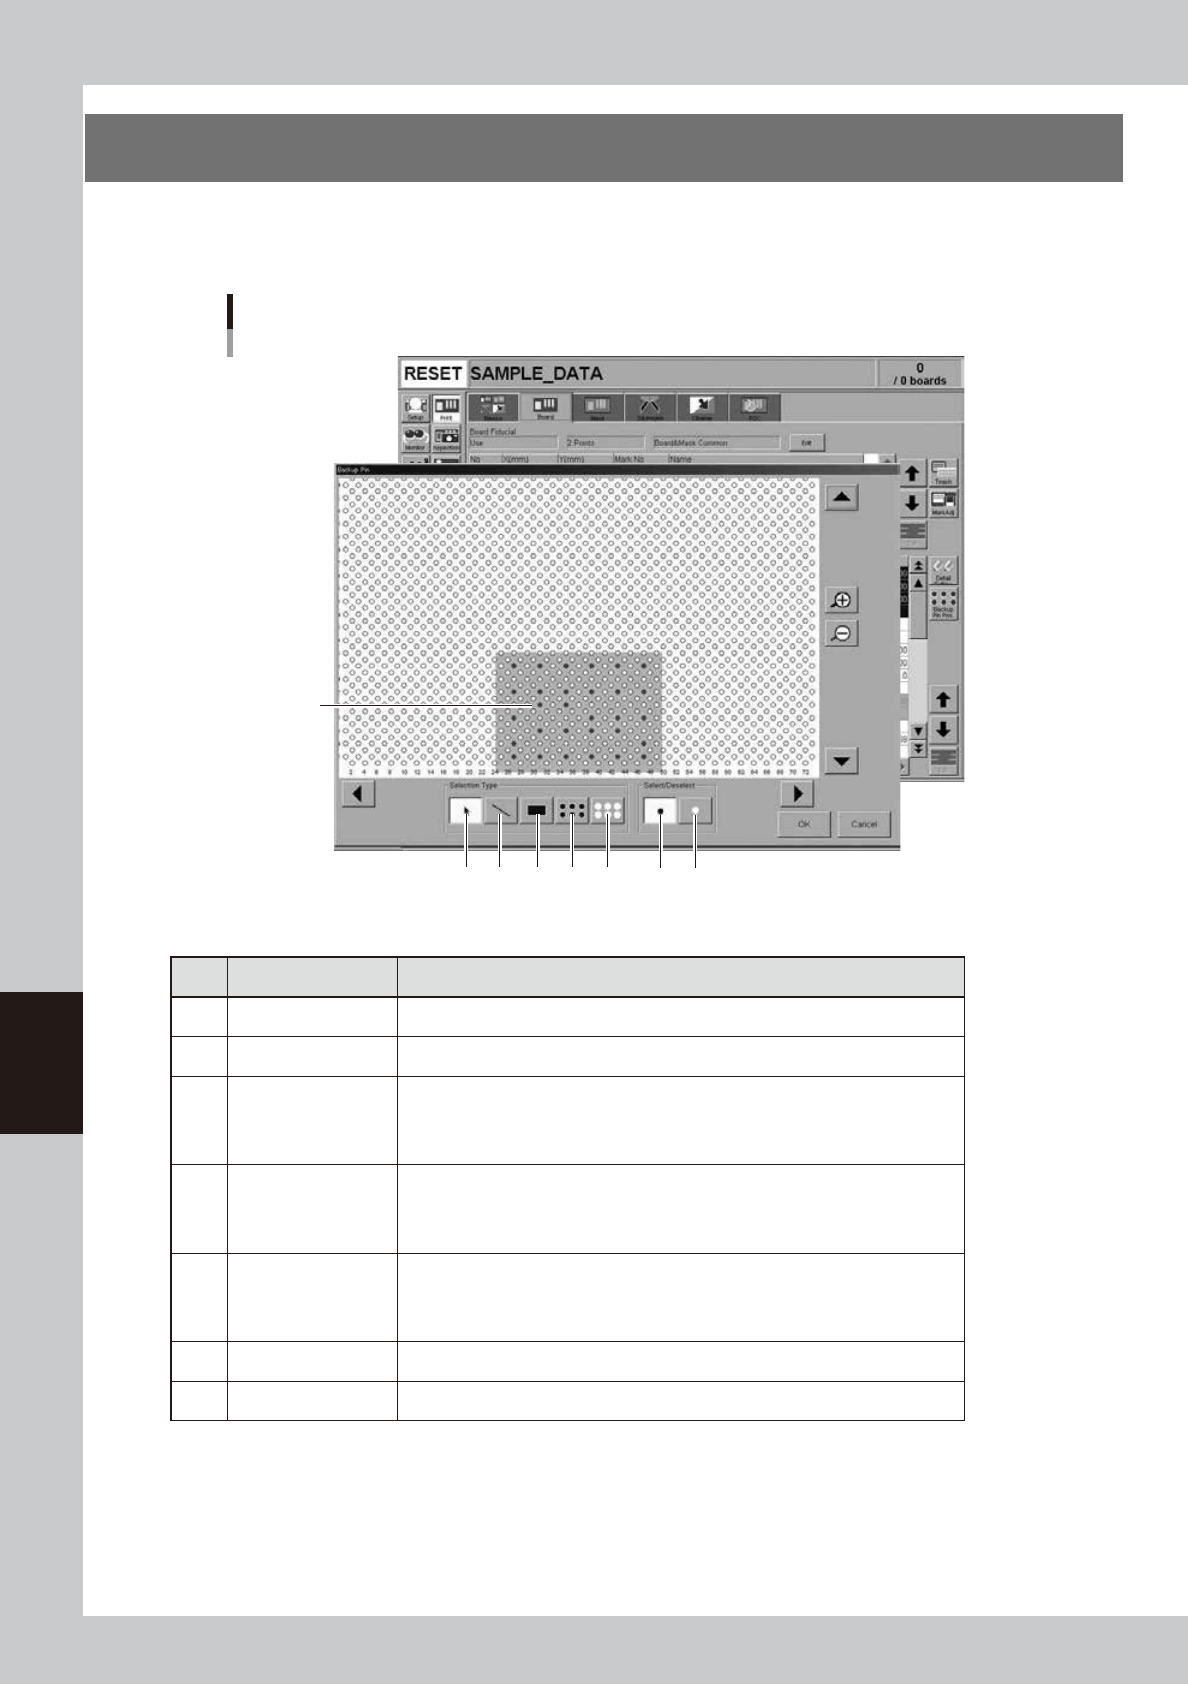
6-16 6 Other functions 3. Matrix pin arrangement When you press the [Backup Pin Pos.] button on the [Print] - [Board] tab screen, the "Backup Pin" dialog box appears. On the graphic view in this dialog box, you…
6-15
6
Other functions
2.2 Using the pattern matching
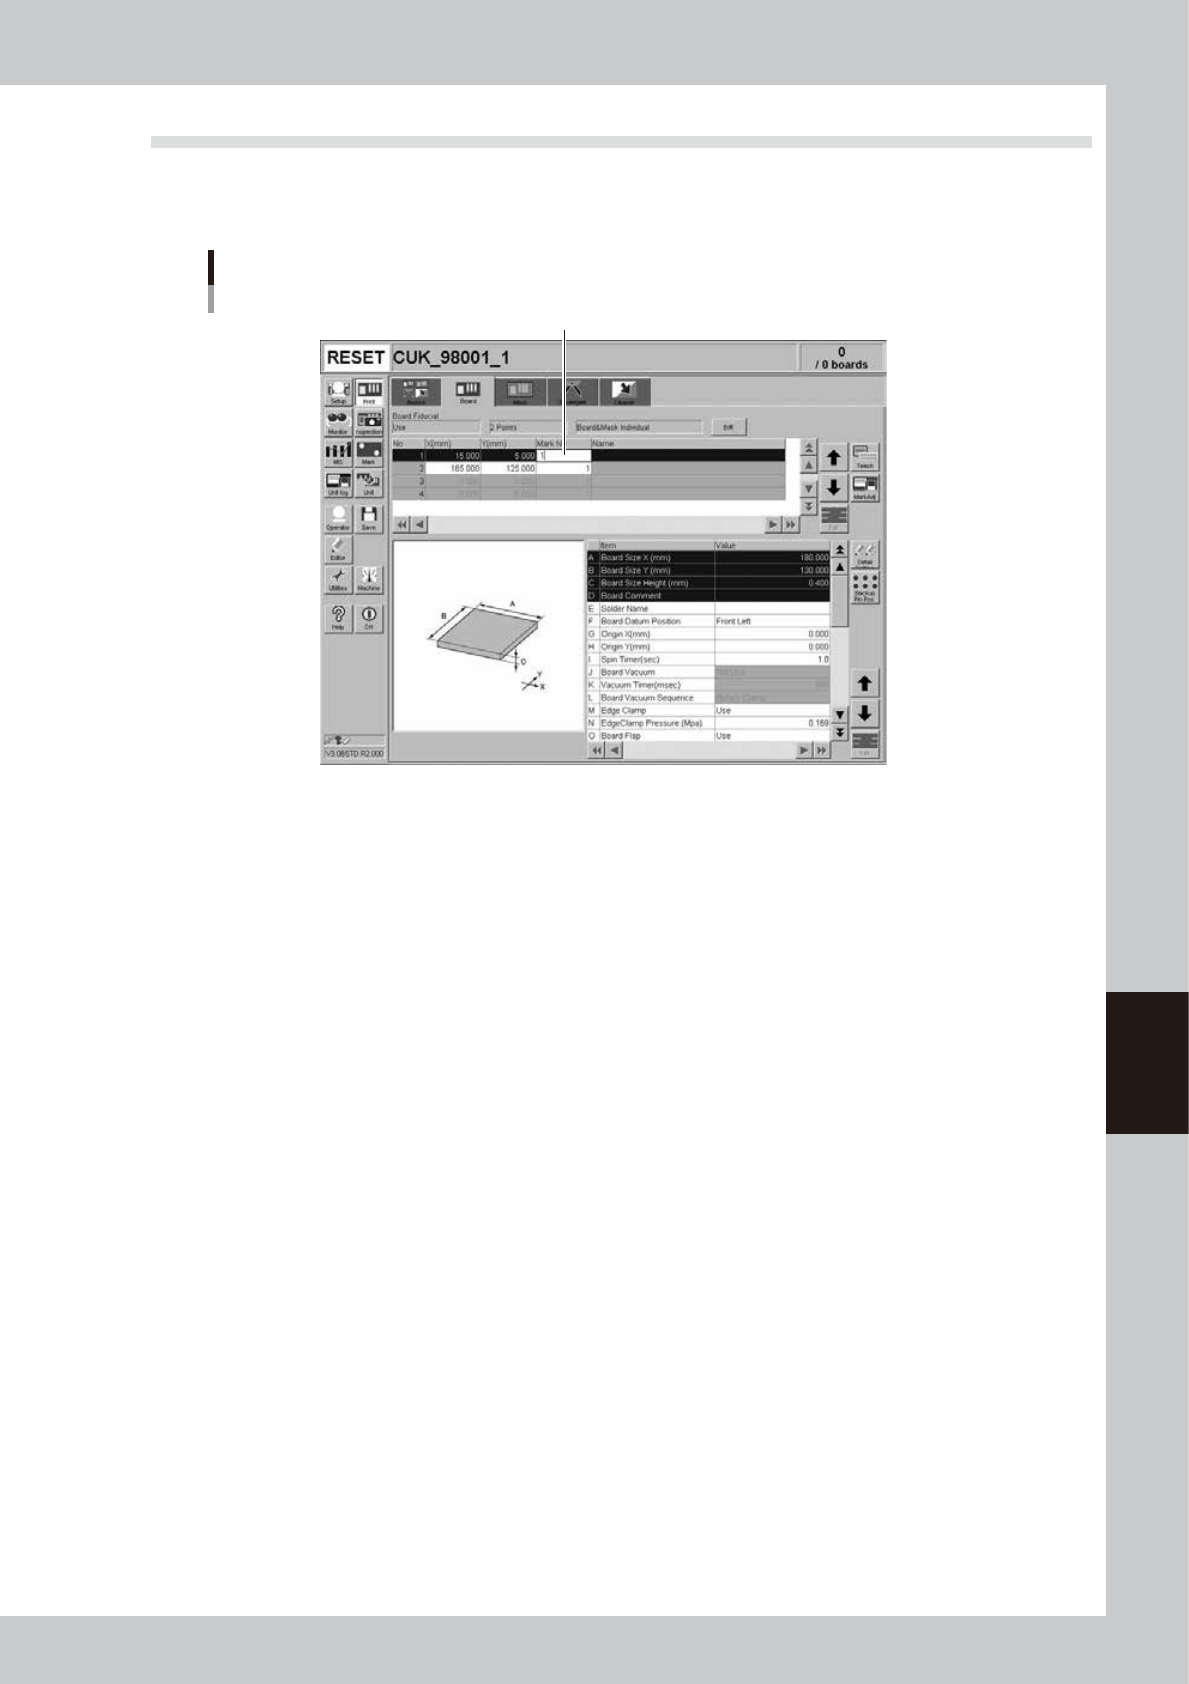
Pattern matching can be used in the same way as the fiducial marks. In this case, specify the pattern mark No.
in the data list on the [Print] - [Board] tab or [Print] - [Mask] tab. (The figure below shows an example when
using pattern matching as board fiducial marks.
Example of using pattern matching
Specify the mark No. registered as pattern.
64614-L3-00
6-16
6
Other functions
3. Matrix pin arrangement
When you press the [Backup Pin Pos.] button on the [Print] - [Board] tab screen, the "Backup Pin" dialog box
appears. On the graphic view in this dialog box, you can register the matrix pin arrangement according to
the board size.
"Backup Pin" dialog box
Shaded area
shows board
size.
23 4 5 6 7 1
64615-L3-10
n
Operation buttons
Button name Function
1 Select Press this button when selecting pins on the graphic view.
2 Deselect Press this button when canceling the pin selection made on the graphic view.
3 Pointer
By pressing this button with the [Select] button depressed, you can select pins
by clicking or dragging the mouse.
By pressing this button with the [Deselect] button depressed, you can cancel the
pin selection by clicking or dragging the mouse.
4 Draw Line
By pressing this button with the [Select] button depressed, you can select pins
by drawing a line (dragging the mouse).
By pressing this button with the [Deselect] button depressed, you can cancel the
pin selection by drawing a line (dragging the mouse).
5 Draw Rectangle
By pressing this button with the [Select] button depressed, you can select pins
by drawing a rectangle (dragging the mouse).
By pressing this button with the [Deselect] button depressed, you can cancel the
pin selection by drawing a rectangle (dragging the mouse).
6 Select All Pins Click this button to select all pins on the graphic view.
7 Deselect All Pin Click this button to cancel all pins you selected on the graphic view.
6-17
6
Other functions
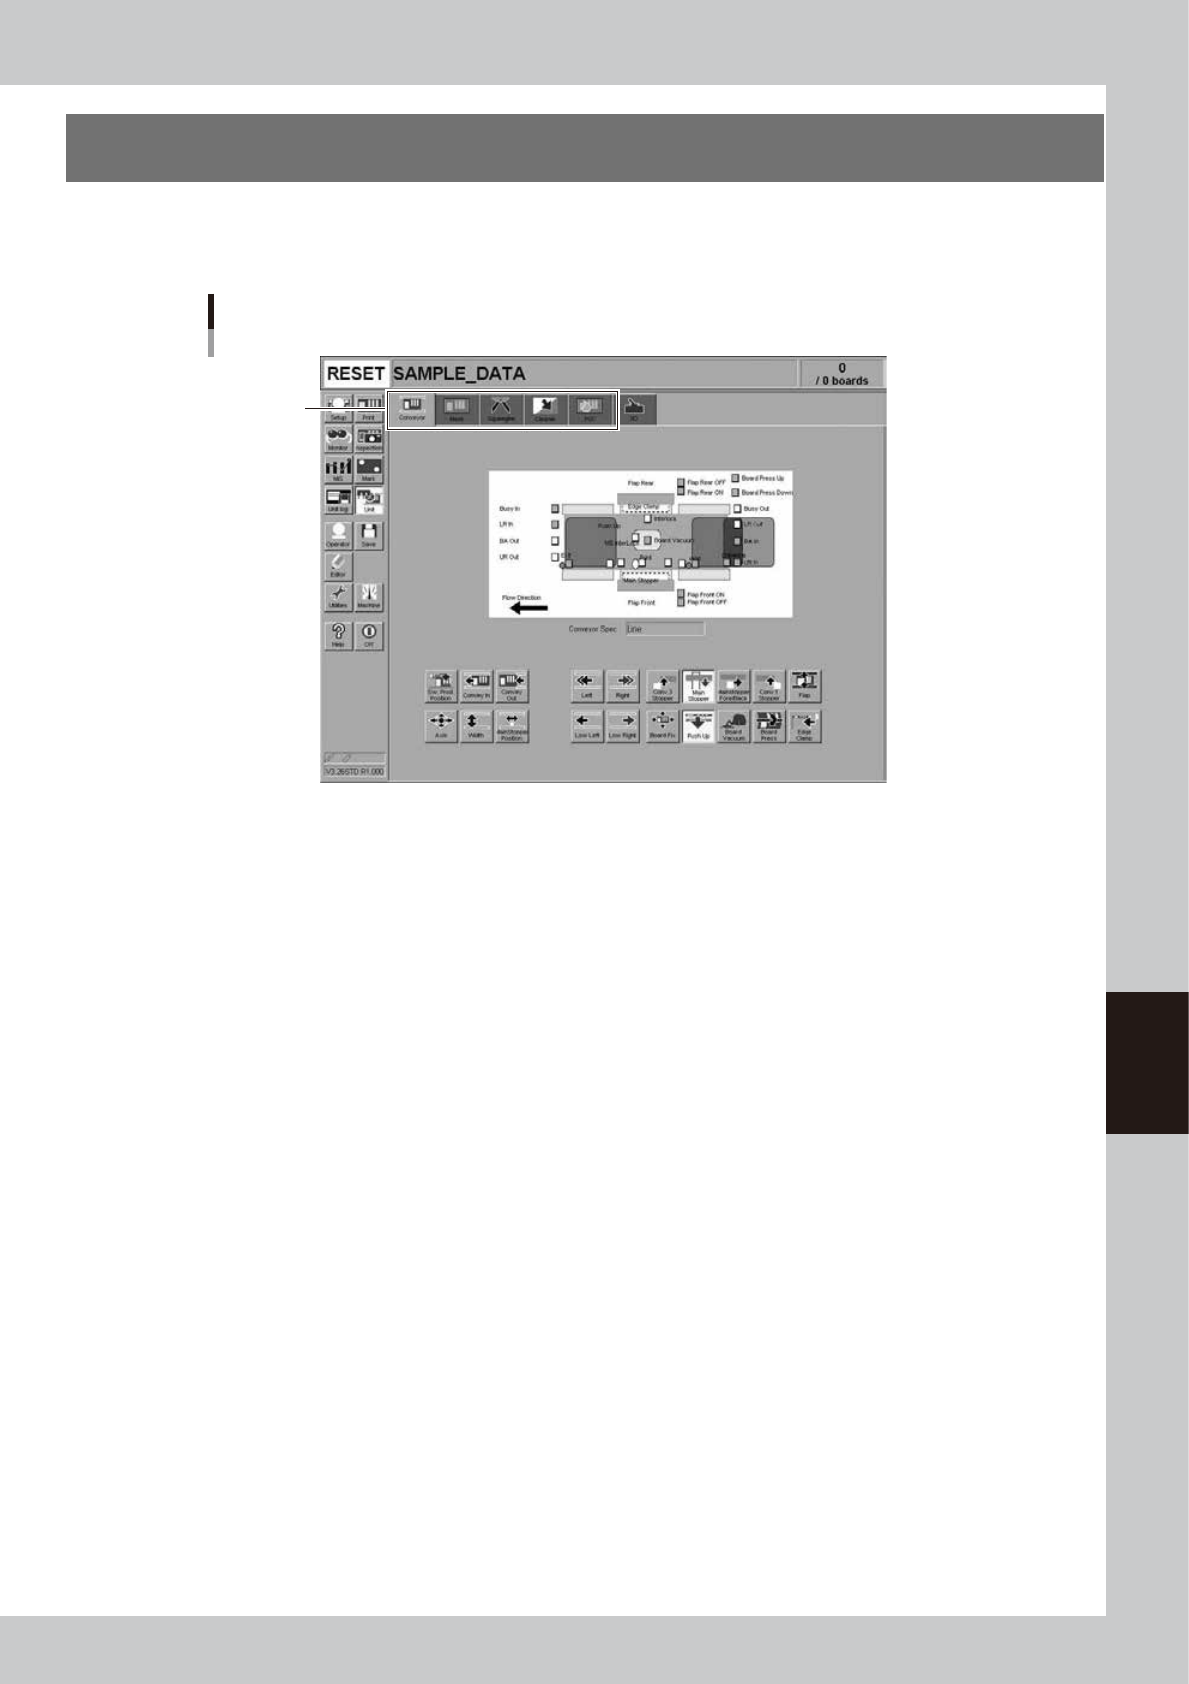
4. Manual operation
When you press the [Unit] button, the following screen appears. This screen is divided by several tabs such
as [Conveyor], [Mask], [Squeegee] and [Cleaner] to allow manually operating the servo-controlled units. You
can also check the status of each sensor and I/O signal on the [I/O] tab screen.
Unit screen
Selection tab
64616-L3-10