YSP_Users_E.pdf - 第95页
3-15 3 Daily operation 3 Displa y the oper ation monitor as required. When you want to confirm the operation status during production, press the [Monitor] button in the main menu button area. Different types of productio…
3-14
3
Daily operation
7. Starting board production
When solder rolling is finished, start production as follows.
1
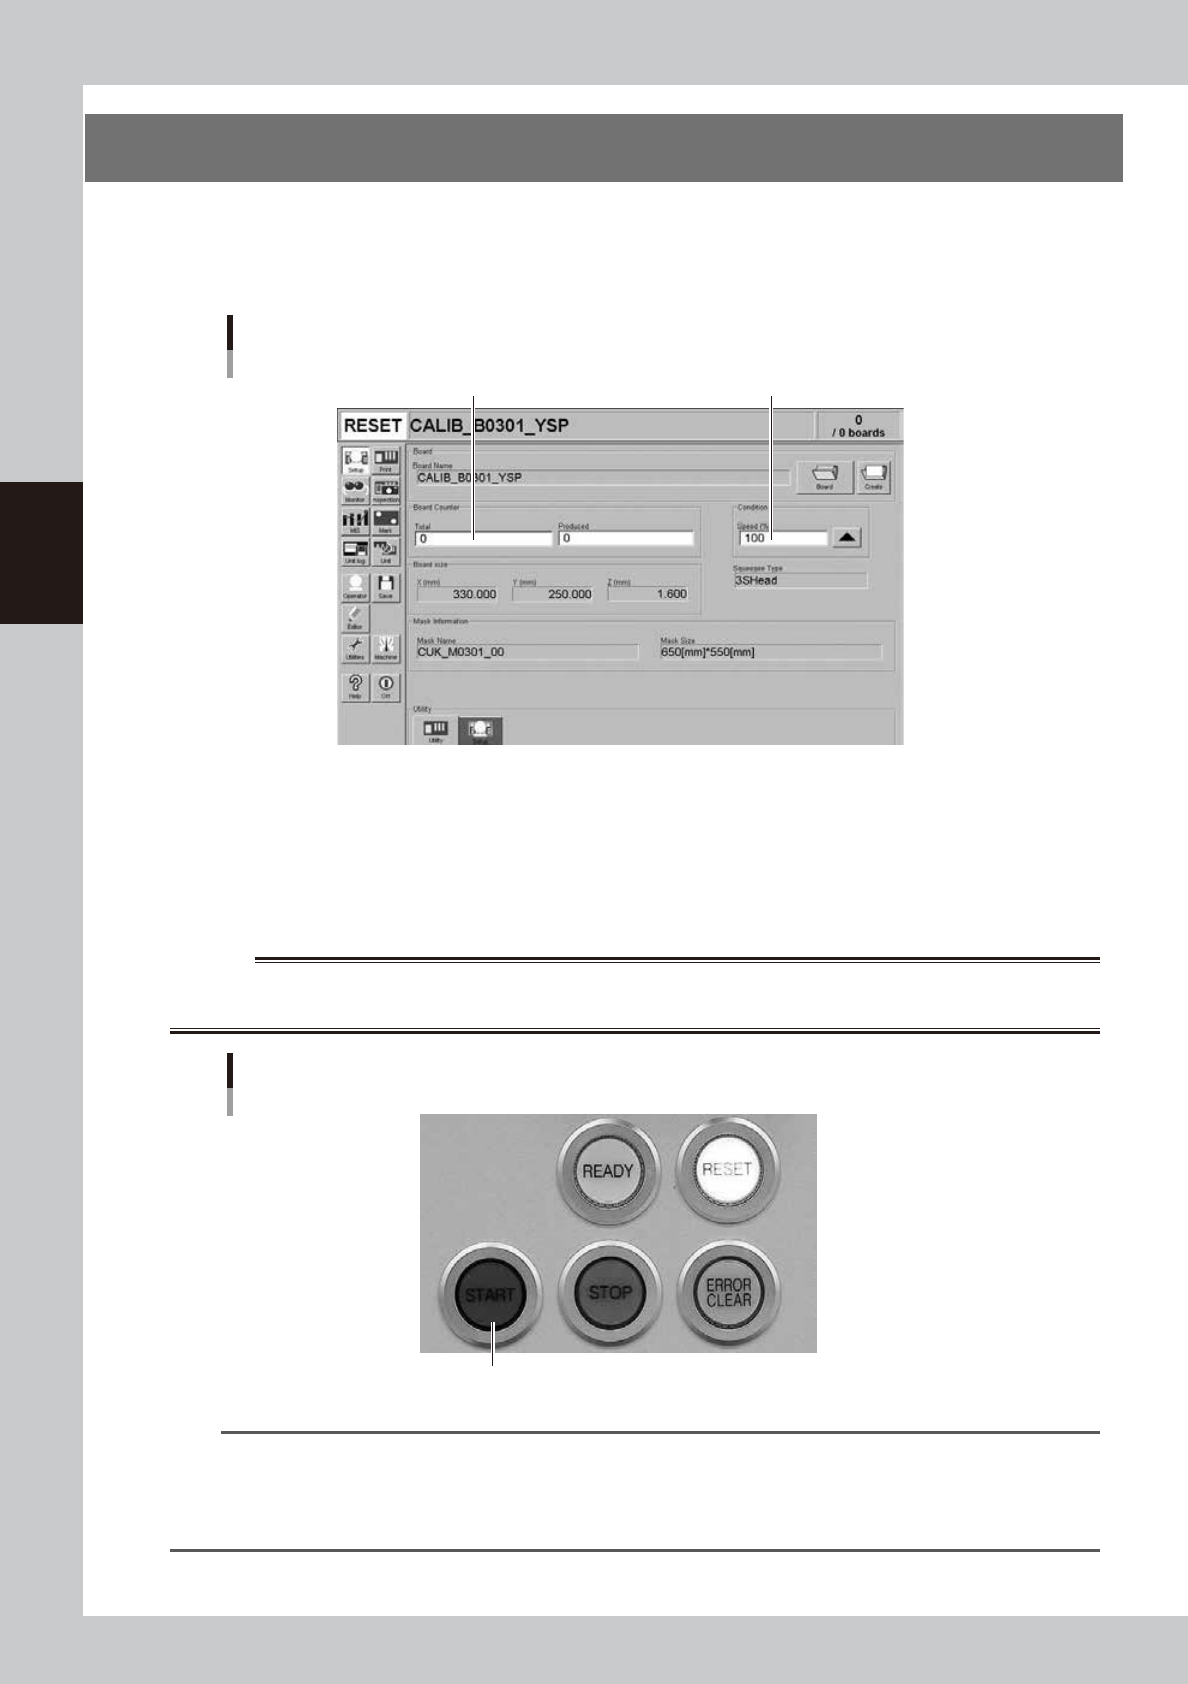
Open the Setup screen and set the operating conditions.
Set the total number of boards to be produced and the operation speed.
Setup screen
Set the operation speed (%).
Set the total number of boards to be produced.
64314-L3-00
2
Start operation.
1. Release the emergency stop button, and press the [READY] button on the operation panel.
2. Check that the surrounding area is safe and then press the [START] button on the operation panel.
3. When the entrance sensor detects the board, the conveyor belt will start rotating. The board will
then be transferred to the printing position and solder printing will start.
w
WARNING
KEEP THE UPPER DOOR (SAFETY COVER) CLOSED AND NEVER TOUCH ANY MOVING PART IN THE MACHINE WHILE THE
GREEN SIGNAL LAMP IS ON (DURING AUTOMATIC OPERATION).
Operation panel
[START] button
63308-L3-B0
TIP
When the "Cleaning Method" parameter (on the [Print]-[Cleaner] tab) is set to "Auto", the mask is automatically
cleaned every time that the specified number of boards has been produced (or at specified time intervals). To stop
production during automatic operation, press the [STOP] key on the operation panel. If you want to stop production
after printing and unloading the current board, press the [Convey-out Stop] button on the Setup screen. (See "8.
Finishing board production" in this chapter.)
3-15
3
Daily operation
3
Display the operation monitor as required.
When you want to confirm the operation status during production, press the [Monitor] button in the
main menu button area.
Different types of production information can be confirmed by selecting the [Main], [Vision], [Squeegee
Pressure], [Counter] tabs, etc.
l
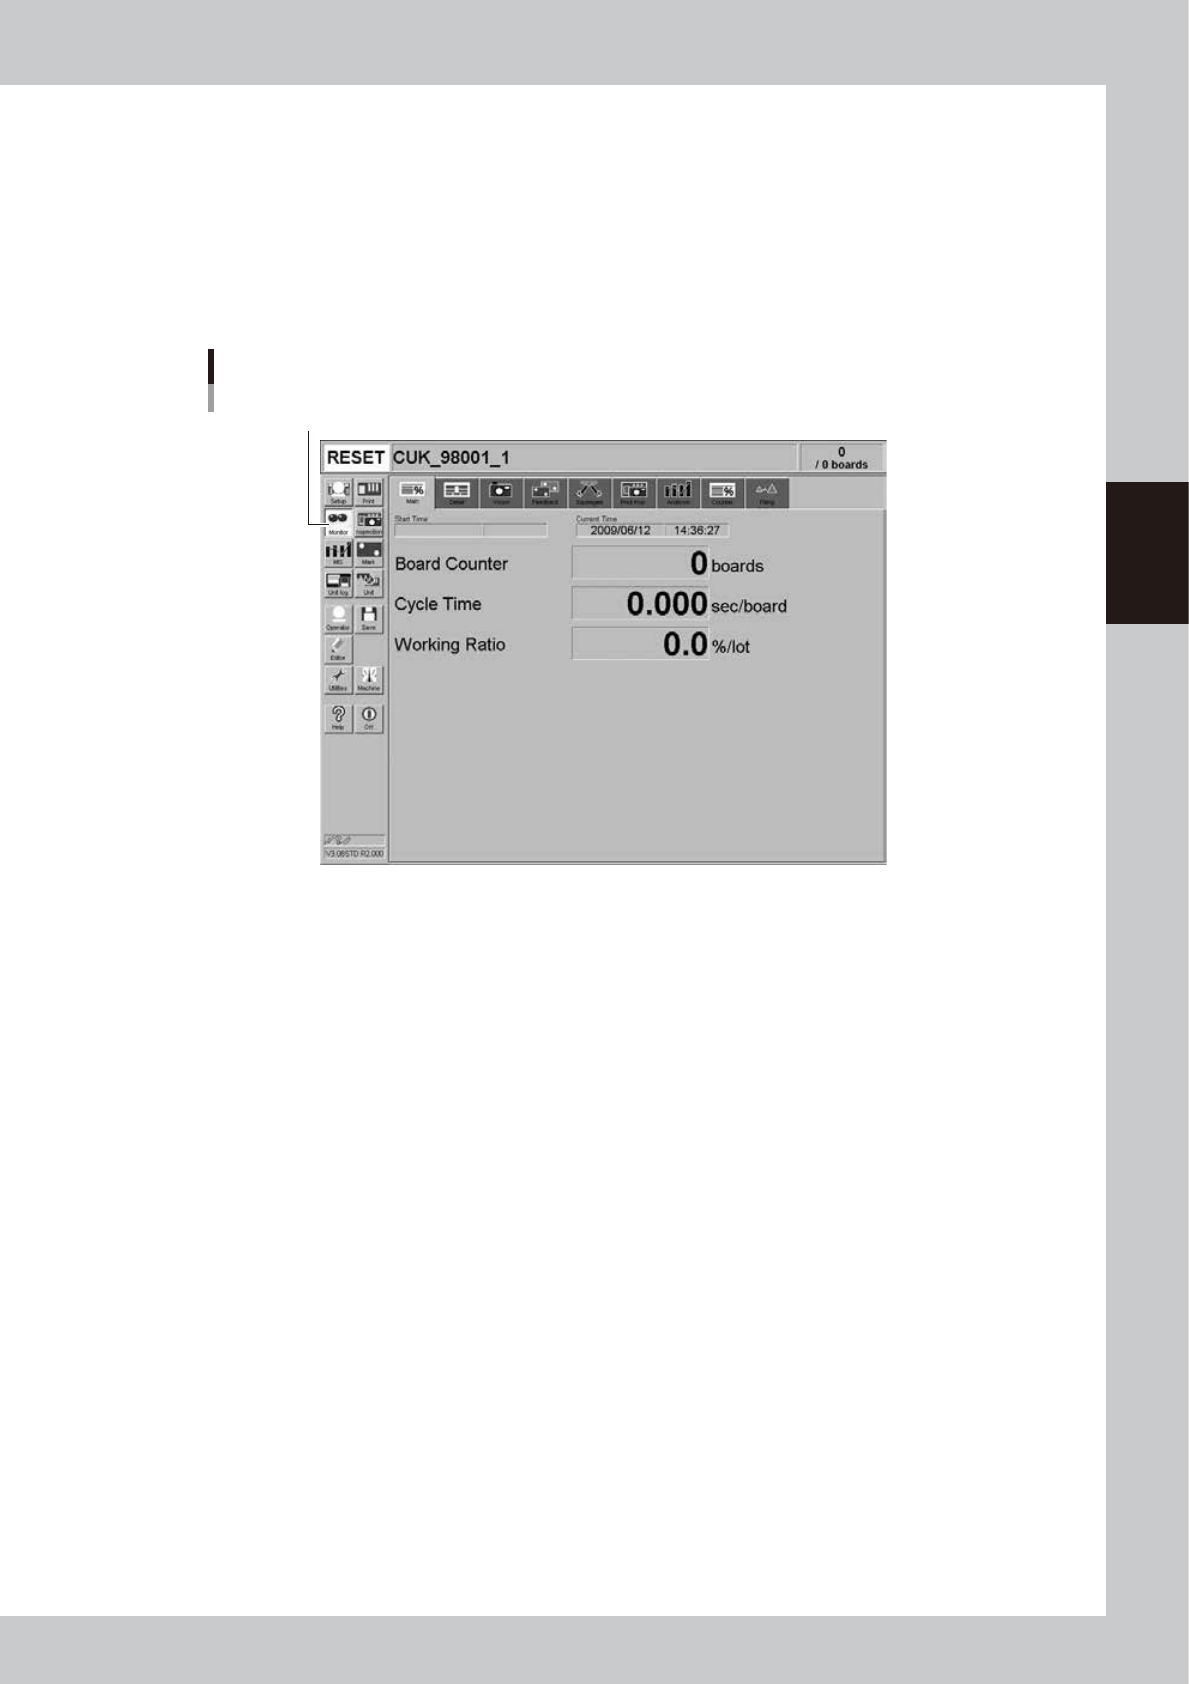
Monitor: Main
The [Monitor]-[Main] tab screen shows you the real-time production status such as the board count and cycle time.
Displaying this screen during production is handy. All information will be cleared when the board type is changed.
[Monitor]-[Main] tab
[Monitor] button
64315-L3-00
Start Time
Shows the date and time that the board data currently being produced was changed.
Current Time
Shows the current date and time (system clock time in the machine).
Board Counter
Displays the number of boards produced after changing to the current board data.
Cycle Time
Shows the average (seconds/board) of the solder printing time per board. This data is updated when solder printing is
completed. The cycle time includes the fiducial mark recognition time when used. The board transfer time and stop time
(time stopped with error or [STOP] button) are not included.
Working Ratio
This is the machine unit's working ratio. This ratio is not affected by the status of the upstream and downstream
machines, and is calculated with the following expression.
(Cumulative printing time + cumulative board transfer time)
÷
[(production completion time - setup completion time) -
cumulative standby time]
×
100 = working ratio (%)
Cumulative printing time: Total time that machine is operating
Cumulative board transfer time: Total board transfer time (loading/unloading)
Cumulative standby time: Total time that the upstream or downstream machine stands by
Production completion time: Time when changed to next production board or time power was turned off
Setup completion time: Time that the [START] button was pressed and operation started
3-16
3
Daily operation
l
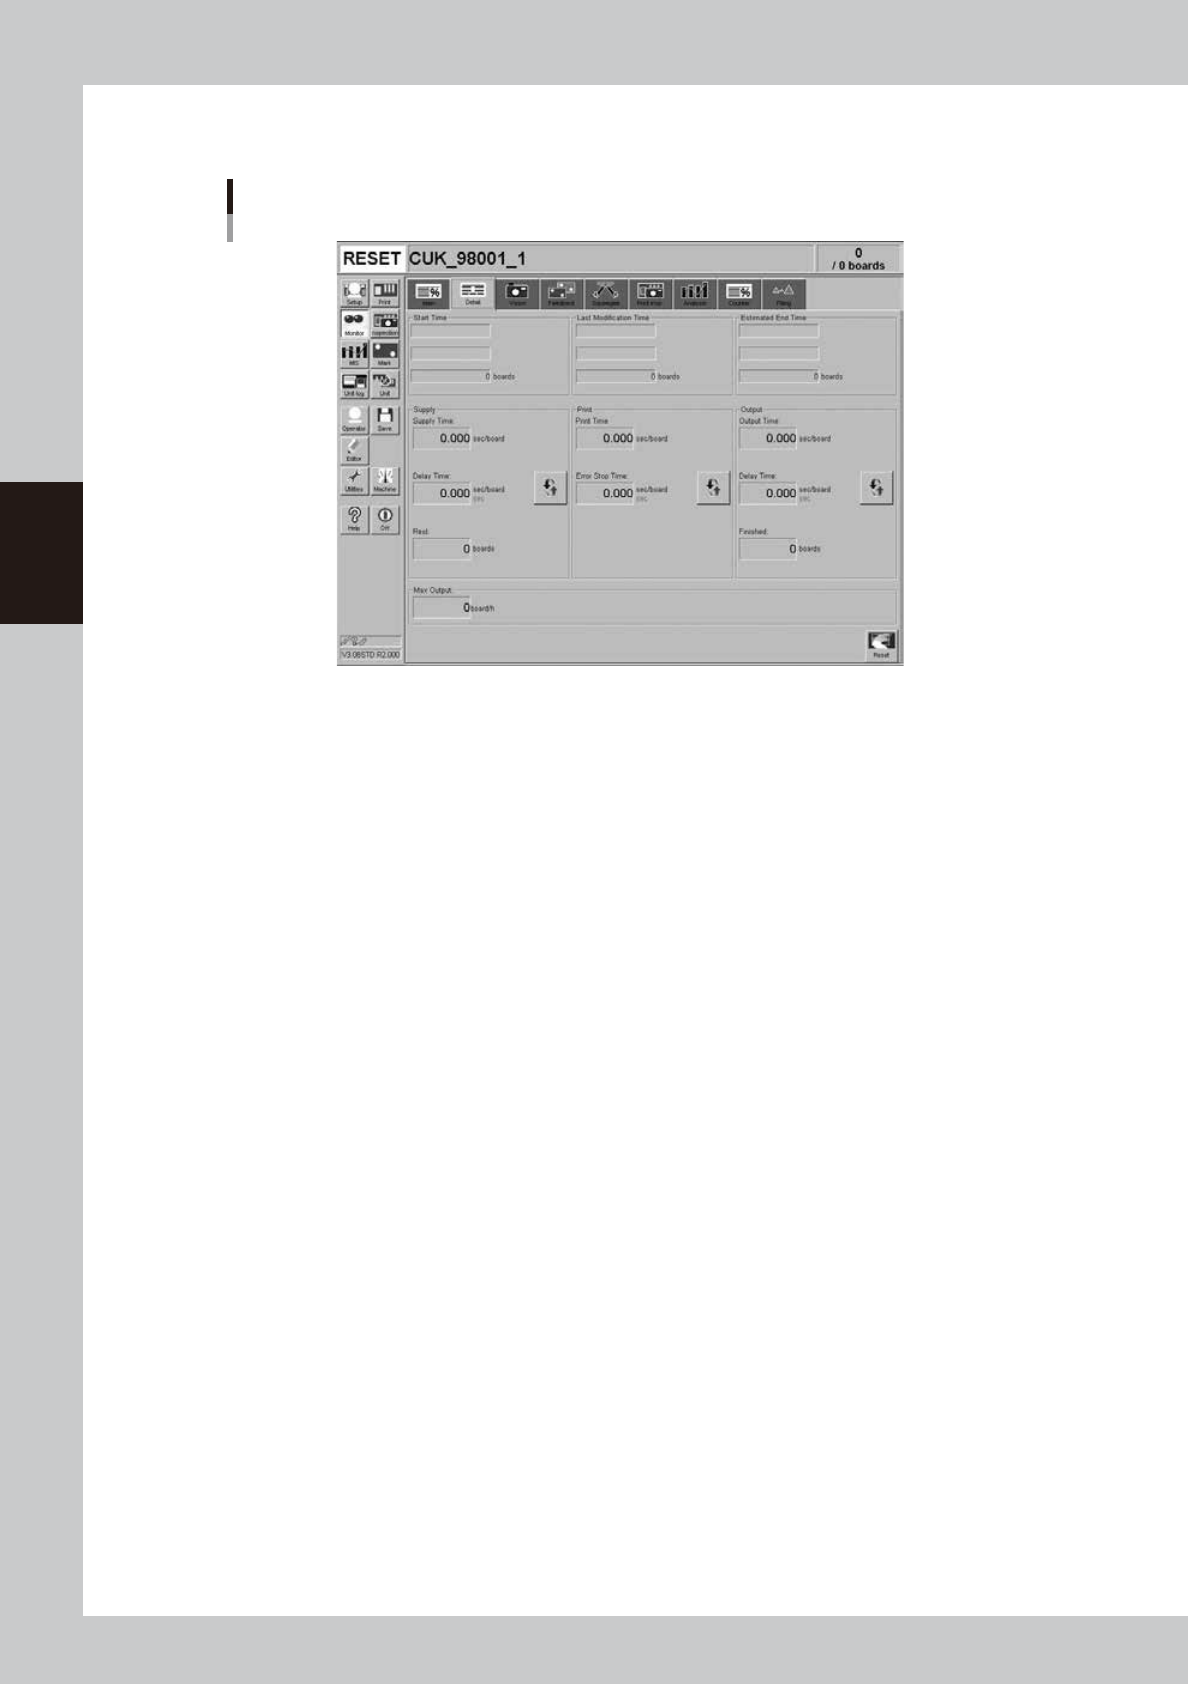
Monitor: Detail
The [Monitor] - [Detail] tab screen shows the detailed production status of the current production board data.
Monitor: Detail
64316-L3-00
Start Time
Shows the time that production was started. The quantity at the start time is normally zero boards.
Last Production Time
Shows the display data update time (this is updated each time one board has been printed. The number of boards
produced up to the last update time is shown in the "boards" box.
Estimated End Time
Shows the estimated production end time. The number shown in the "boards" box is the scheduled production quantity
you entered on the Setup screen.
Supply Time (sec/board)
Shows the average loading time per board.
Delay Time (sec/board or sec)
Shows the time that the machine has waited for board loading. The average delay time per board (sec per board) or the
cumulative delay time (sec) can be displayed by pressing the unit change button on the right.
Rest (boards)
This is the value obtained by subtracting the production completed board quantity from the scheduled production
quantity.
Print Time (sec/board or sec)
Shows the average time needed for printing solder on one board. This time includes the fiducial mark recognition, mask
cleaning, solder-print inspection (when the inspection function is used).
Error Stop Time (sec/board or sec)
Shows the time that the machine has been stopped with an error, and is the total time from when the error occurs to
when the [CLEAR] button is pressed.
The average error stop time per board (sec per board) or the cumulative error stop time (sec) can be displayed by pressing
the by pressing the unit change button on the right.
Output Time (sec/board)
Shows the average unloading time per board.
Delay Time (sec/board or seconds)
Shows the time that the machine has waited for board unloading. The average unloading delay time per board (sec per
board) or the cumulative unloading delay time (sec) can be displayed by pressing the unit change button on the right.
Finished (boards)
Shows the quantity of finished boards.