YSP_Users_E.pdf - 第108页
4-5 4 Creating and setting the data 3. Board data setting The following parameter items can be checked and edited on the [Print]-[Board] tab. 3.1 Board marks and parameter setting [Print]-[Board] tab [Edit] button 1 4 5 …
4-4
4
Creating and setting the data
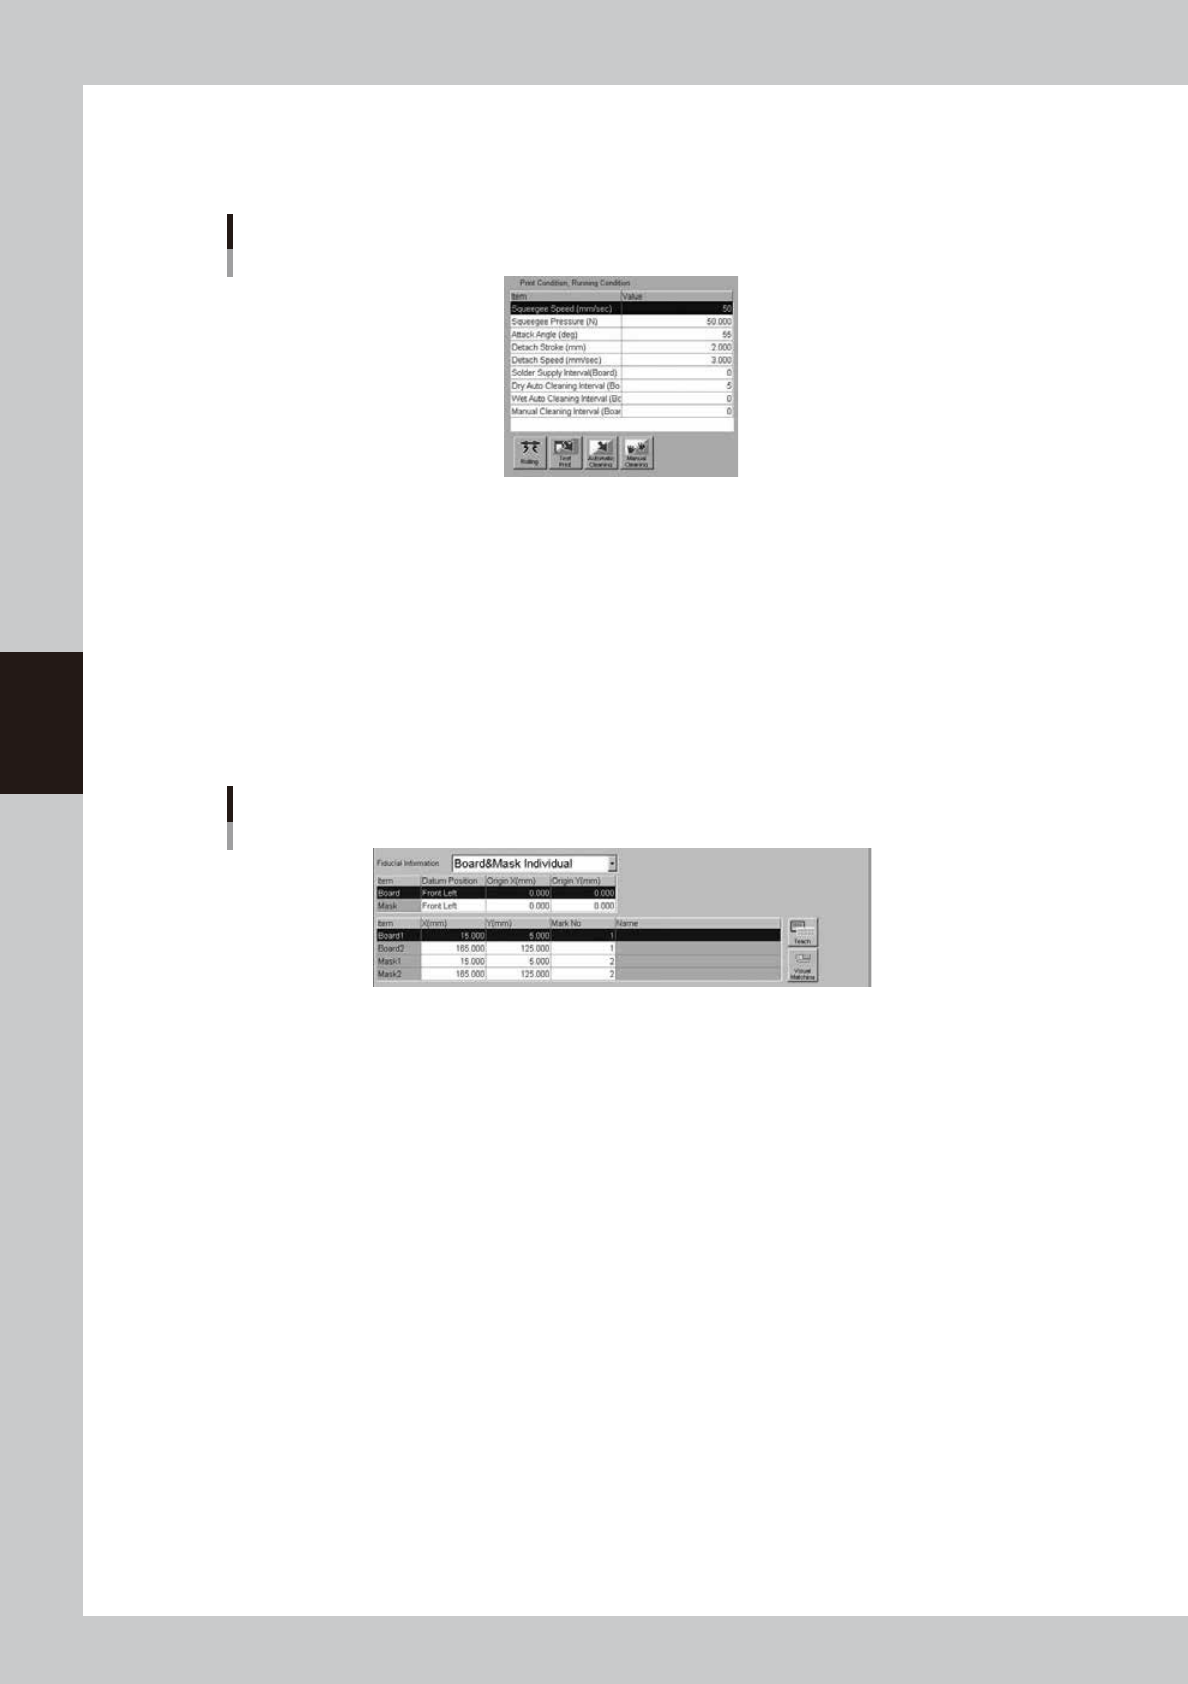
2. “Print Condition, Running Condition” area
The parameters mainly related to the print condition setting are extracted from those provided on the [Squeegee] and
[Cleaner] tab screens.
Print Condition, Running Condition area
64406-L3-10
• Squeegee Speed, Squeegee Pressure, Solder Supply Interval, Attack Angle
For more details, see items E, F, J, and B of “5. Squeegee data setting” in a later part.
• Detach Stroke, Detach Speed
For more details, see “5.1 Squeegee detail setting” in a later part.
• Dry Auto Cleaning Interval, Wet Auto Cleaning Interval, Manual Cleaning Interval
For more details, see items C, F, and I of “6. Cleaner data setting” in a later part.
3. “Fiducial Information” area
You can directly enter the board and mask fiducial information in this area.
Fiducial Information area
64407-L3-00
• Board-Datum Position, Origin XY
For more details, see items F, G, and H of “3. Board data setting” in a later part.
• Mask-Datum Position, Origin XY
For more details, see items F, G, and H of “4. Mask data setting” in a later part.
• Fiducial coordinates
For more details, see items 4 and 5 of “3. Board data setting” in a later part.
4-5
4
Creating and setting the data
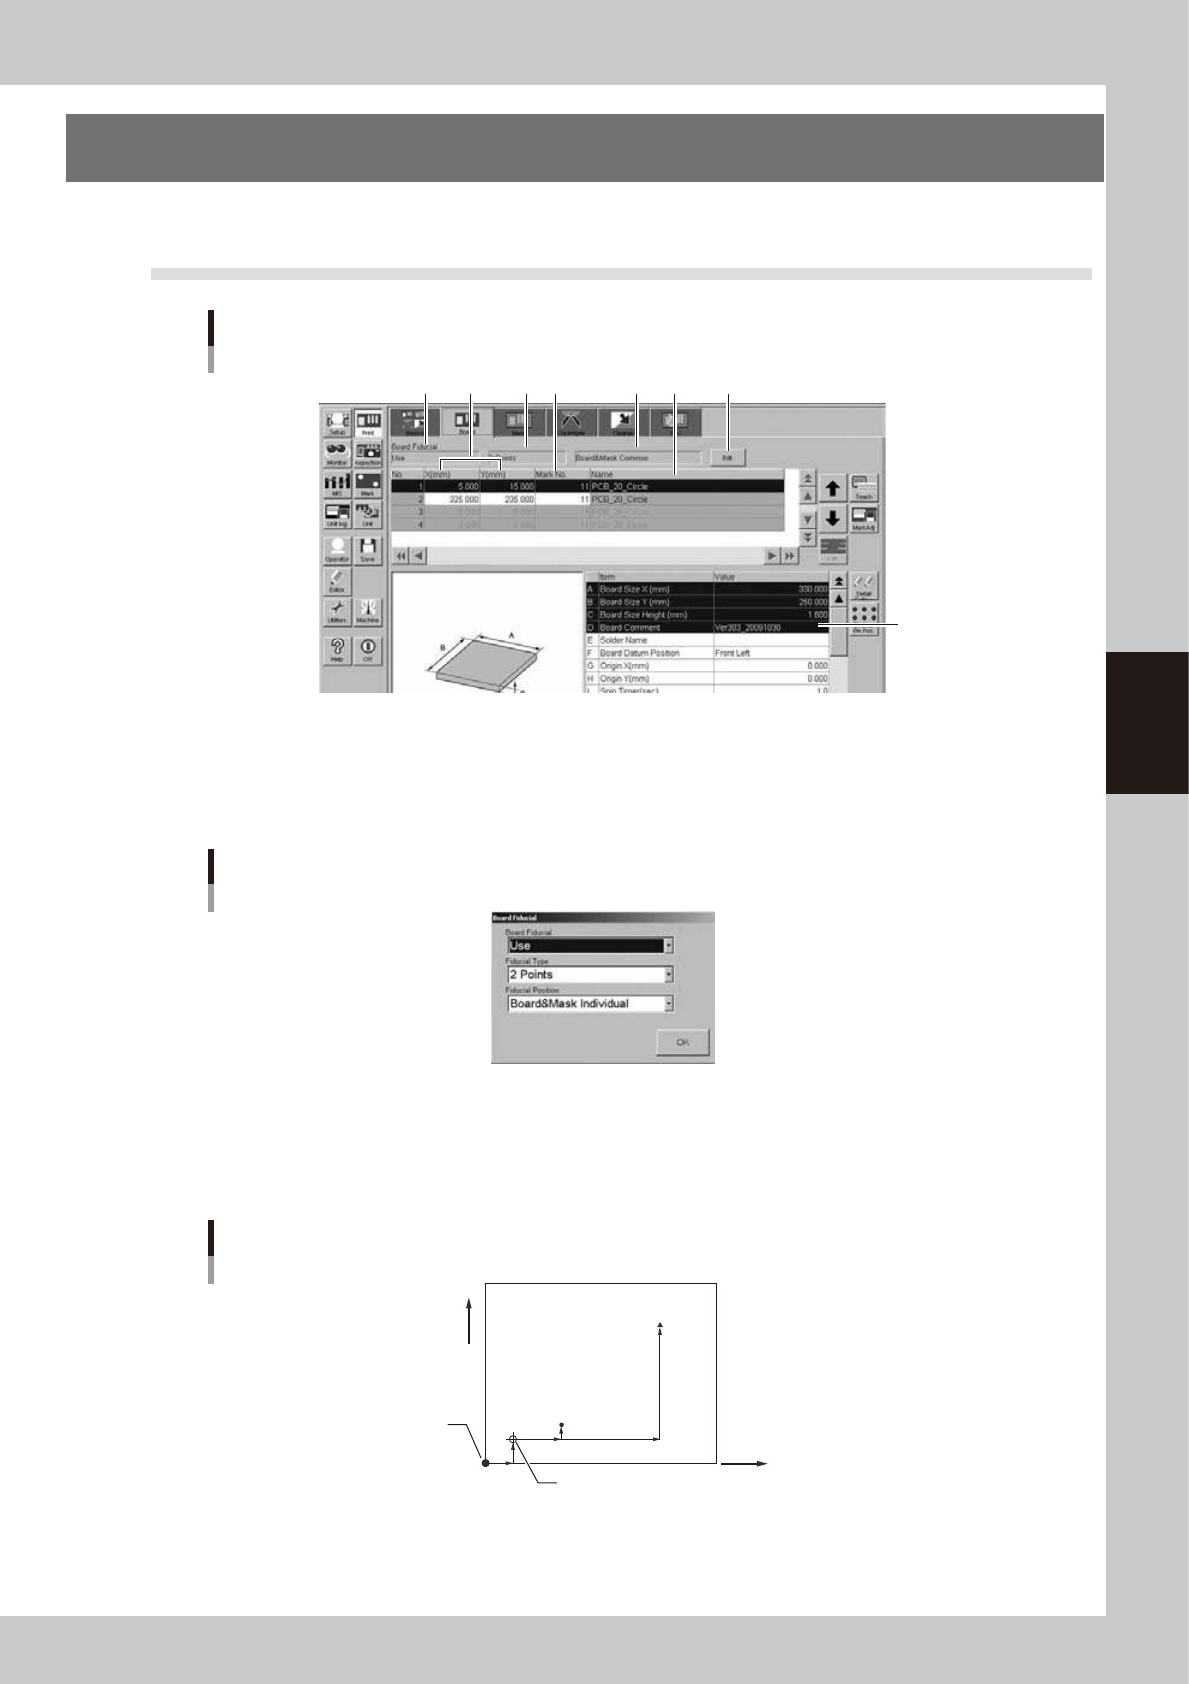
3. Board data setting
The following parameter items can be checked and edited on the [Print]-[Board] tab.
3.1 Board marks and parameter setting
[Print]-[Board] tab
[Edit] button
1 4 5 62 3
7
64408-L3-10
1: Board Fiducial
Set this parameter to "Use" when using fiducial marks on the board for position alignment by vision recognition. If not
using vision recognition then set to "NotUse". Pressing the [Edit] button at the upper right displays the dialog box shown
below. Select the desired item from the Board Fiducial drop-down list.
Board fiducial mark setting dialog box
64409-L3-00
2: Fiducial Type
When "Board Fiducial" is set to "Use", select the fiducial type (number of fiducial marks to be recognized) from among "
1 Point" to "4 Points". These marks can be different in shape and size from each other. Pressing the [Edit] button at the
upper right displays the dialog box shown above. Select the desired item from the Fiducial Type drop-down list.
Fiducial Type example (2 points)
(0, 0)
Board origin (when different from Board Datum Position)
Mark 2
(X, Y)
Mark 1
(X, Y)
+X
+Y
Board Datum Position
63401-L3-10
4-6
4
Creating and setting the data
3: Fiducial Position
This parameter sets whether to share the local fiducial mark position with the board and the mask. Pressing the [Edit]
button at the upper right displays the dialog box shown above. Select "Board&Mask Individual" or "Board&Mask
Common" from the Fiducial Position drop-down list.
When "Board&Mask Individual" is selected, the Fiducial Position, Fiducial Type and Standard Position parameters can be
set separately on the board and the mask.
When "Board&Mask Common" is selected, the Fiducial Position, Fiducial Type and Standard Position parameters are
jointly shared by the board and mask. A confirmation message box appears when you select "Board&Mask Common".
Pressing the [OK] button in the message box will copy the board fiducial mark setting (Fiducial Position, Fiducial Type
and Standard Position parameters) into the mask fiducial mark setting.
n
NOTE
If the Fiducial Position, Fiducial Type and/or Standard Position parameter are changed on the [Board] tab or [Mask]
tab by editing or teaching, the change is automatically applied to the other items.
4: X, Y (mm)
Enter the XY coordinates of each fiducial mark relative to the board origin in millimeters. You can perform teaching with
the [Teach] button. Enter the center coordinates in the case of circular, square and triangular marks.
TIP
For details on teaching, see "1. Teach and trace" in chapter 6.
5: Mark No.
Enter the mark No. of each fiducial mark. (Mark No. should be registered in advance on the Mark screen.)
6: Name
When the mark No. is entered, the corresponding name automatically appears here. (Mark name should be registered in
advance on the Mark screen.)
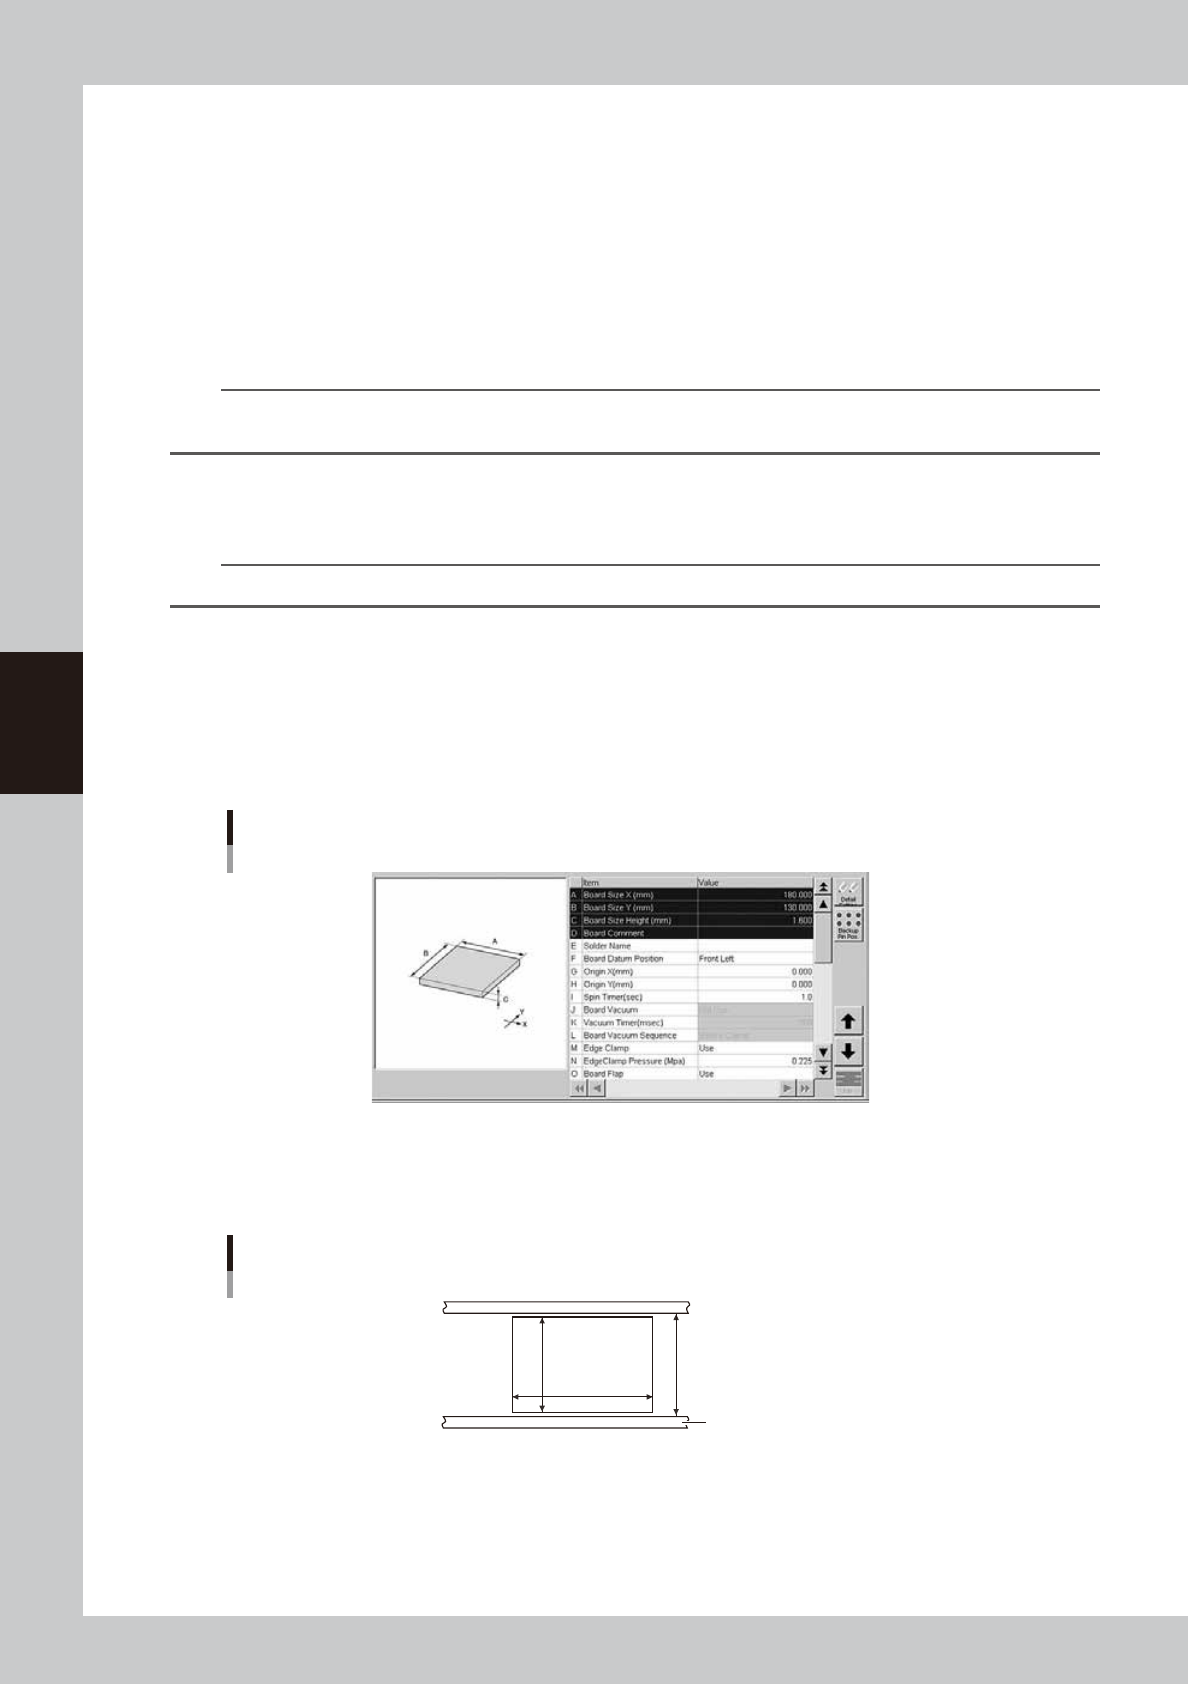
7: Board parameters
Board parameters (1)
64410-L3-10
A, B: Board Size X, Y (mm)
Enter the board size (mm) in the X direction (board transport direction) and in the Y direction. The conveyor width
(W-axis) is adjusted to the Y dimension + 0.5mm when the board is clamped during automatic operation.
Board Size X, Y
Board
Conveyor rail
X [mm]
W=(Y+0.5mm)
Y [mm]
63402-L3-00