YSP_Users_E.pdf - 第195页
6-11 6 Other functions 4 Set "Algorithm T ype" on the [Vision] tab. Set "Algorithm Type" to "PTRN Outline" or "PTRN GrayLev". PTRN Outline : In most cases, select this parameter fo…
6-10
6
Other functions
2.1 Pattern registration
To utilize pattern matching, you must register the reference pattern in the template.
1
Decide on the pattern.
Decide which pattern you want to use for pattern matching. Select a pair of patterns that meet the
conditions explained previously.
2
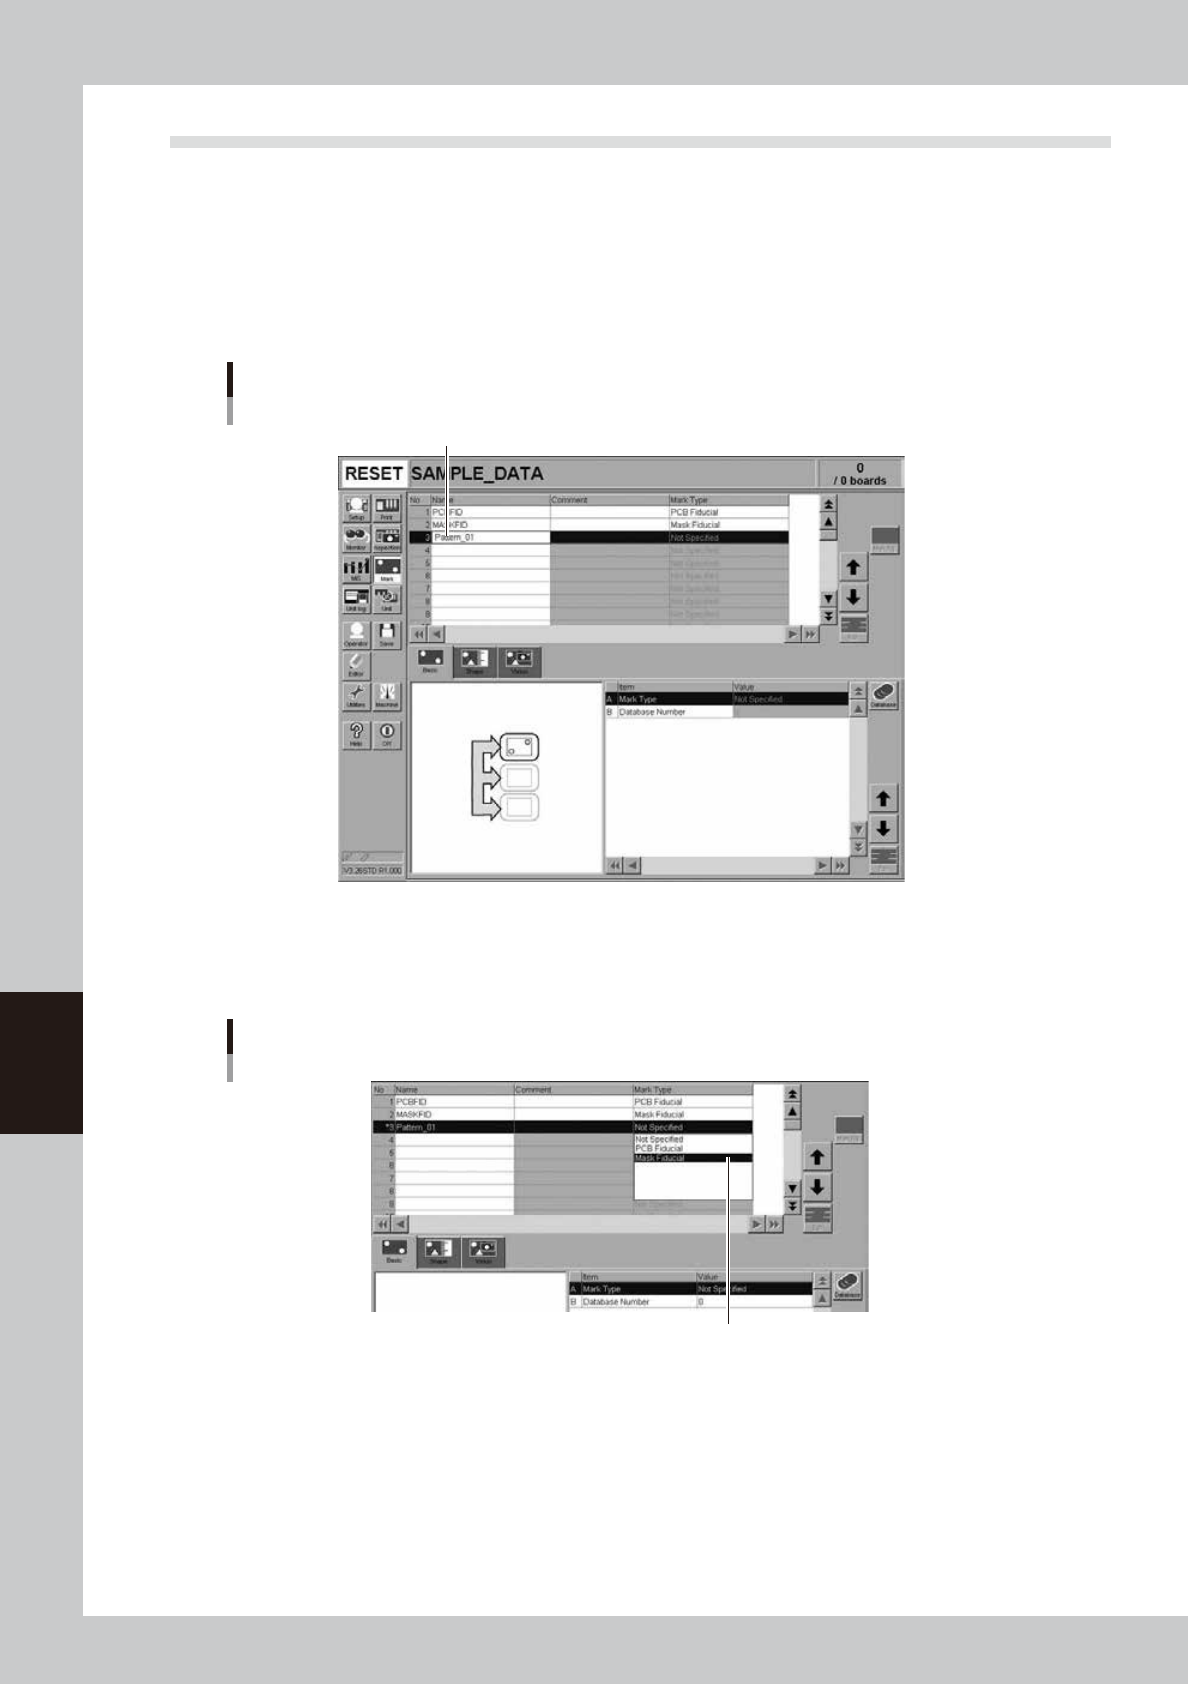
Open the Mark screen and enter the pattern name.
In the Mark Name column, enter the name that you can easily identify as a pattern.
Entering the pattern name
Enter the pattern name.
64608-L3-10
3
Set "Mark Type" on the [Basic] tab.
Set "Mark Type" to "Board Fiducial" when creating pattern data on a board, or set to "Mask Fiducial"
when creating pattern data on a mask.
"Mark Type" setting
Set "Mark Type".
64609-L3-10
6-11
6
Other functions
4
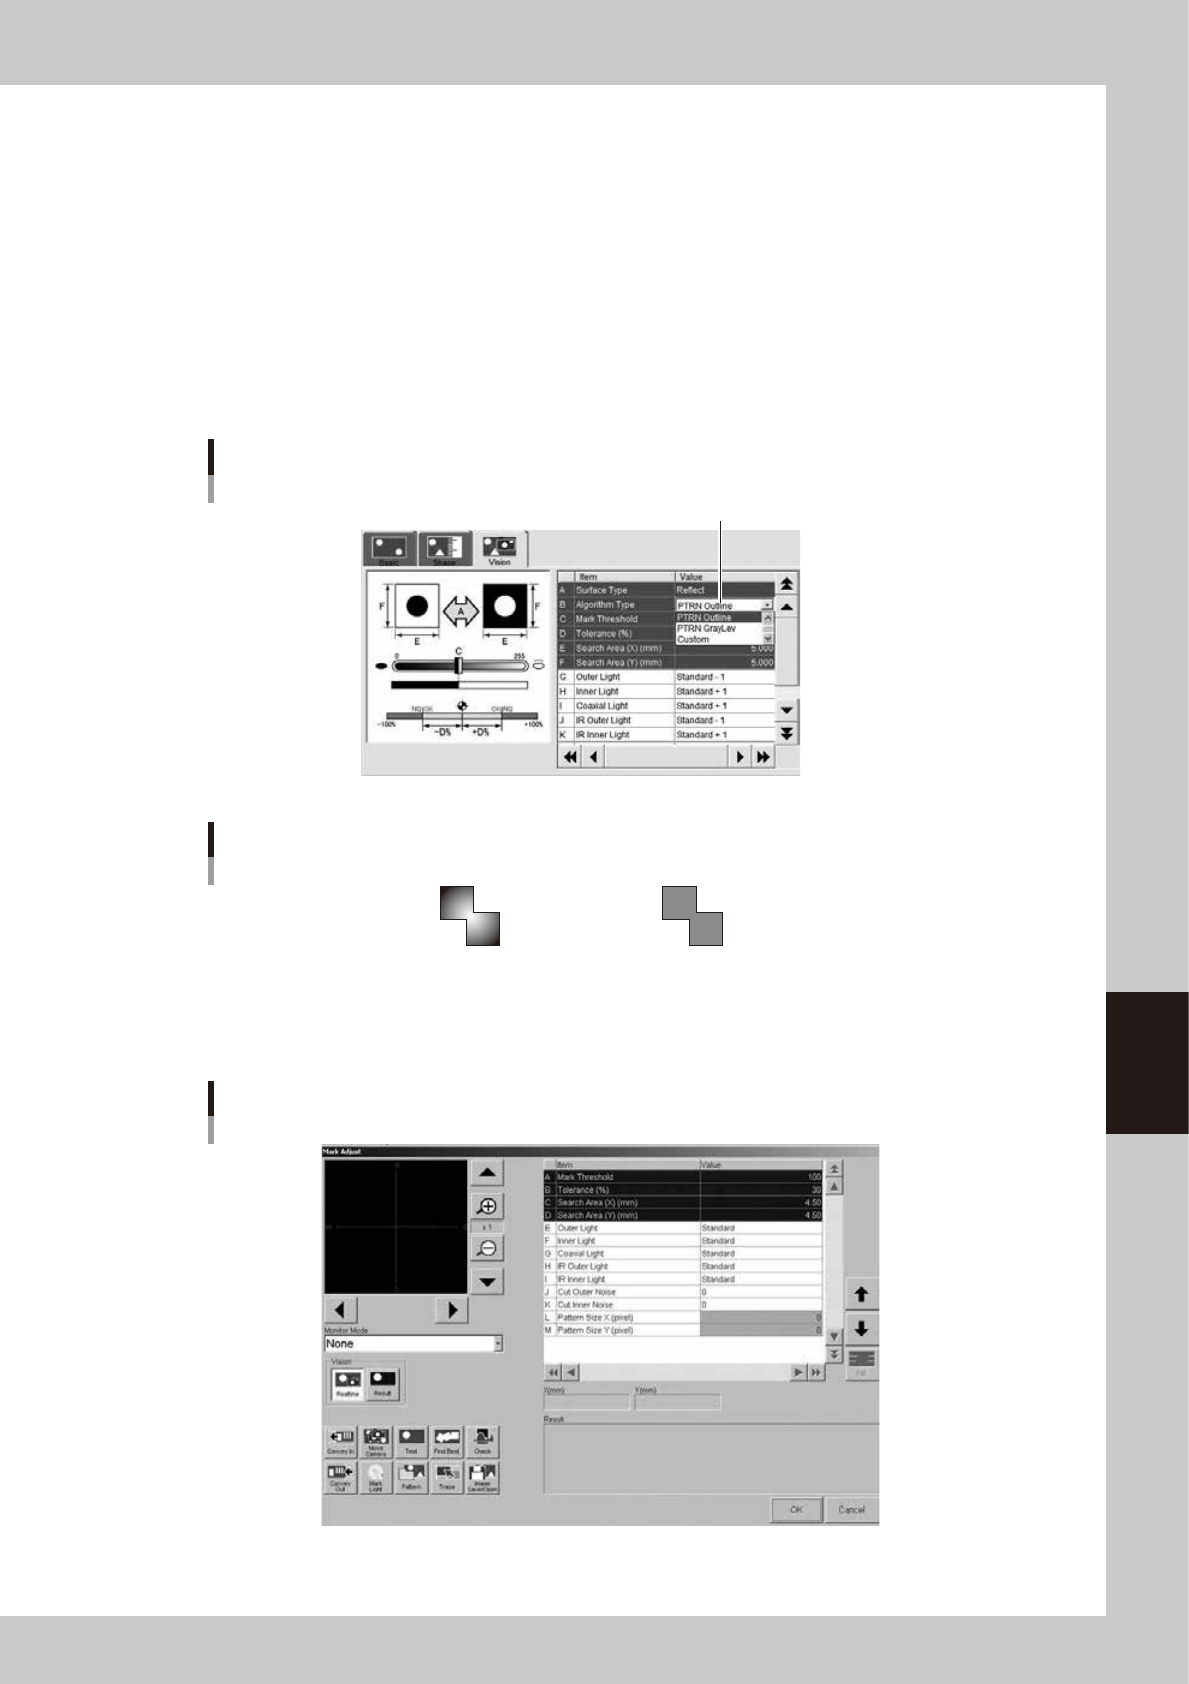
Set "Algorithm Type" on the [Vision] tab.
Set "Algorithm Type" to "PTRN Outline" or "PTRN GrayLev".
PTRN Outline : In most cases, select this parameter for pattern matching. When the outline is definite,
the pattern can be recognized even if uneven brightness portions are present inside the
pattern.
PTRN GrayLev : Selecting this parameter is more effective in recognizing a pattern whose brightness is
uniform inside the pattern. This parameter setting requires a longer time to recognize a
pattern than the "PTRN Outline" setting and also data size will also be larger.
PTRN Whole : This parameter is effective when you want to acquire a pattern including its details.
Since the entire pattern is recognized at a lower compression ratio, this parameter
setting requires a longer recognition time than in the "PTRN GrayLev" setting and also
the data size will be even larger.
"Algorithm Type" setting
Set to "PTRN Outline" or "PTRN GrayLev" or "PTRN Whole".
64610-L3-00
Pattern recognition types
PTRN outline PTRN Graylev
(Uneven brigtness) (Uniform brighness)
63604-L3-00
5
Press the [Adjust] button to open the Mark Adjust screen.
Mark Adjust screen
64611-L3-00
6-12
6
Other functions
6
Set the board on the conveyor and clamp it.
To clamp the board, press the [Convey In] button and follow the message that appears.
When setting pattern data on a mask, clamp the mask on the printing table.
7
Move the camera so the pattern is shown in the center of the vision monitor.
Use the [Move Camera] button on the Mark Adjust screen to move the camera unit. When positioned,
press the [OK] button to return to the Mark Adjust screen.
8
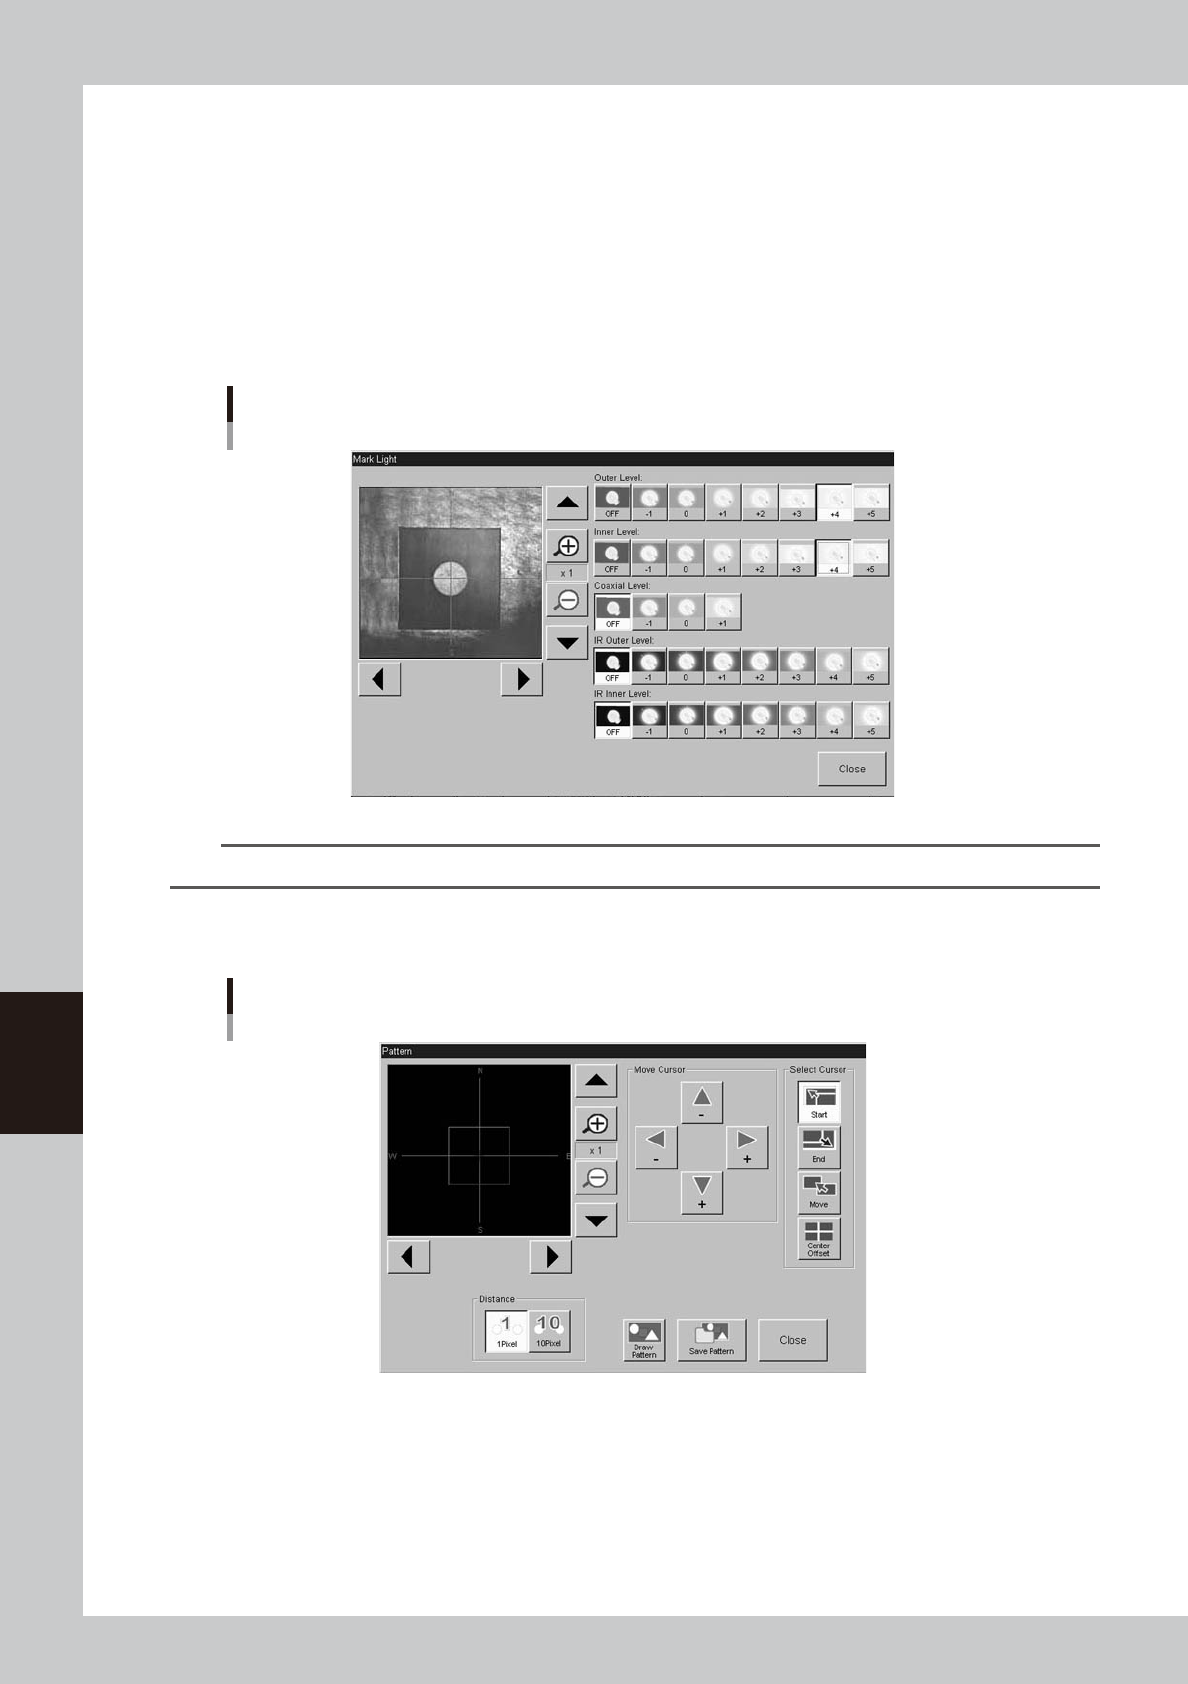
Adjust the light levels.
Press the [Light] button to open the light level adjustment screen, and adjust the light level in each
lighting zone so that the pattern can be most clearly viewed on the vision monitor.
Light level adjustment
64612-L3-00
TIP
Refer to step 6 in "7.5 Mark Adjust mode" of Chapter 4 for a general guide to find optimum light levels.
9
Press the [Pattern] button.
The Pattern registration screen appears as shown below.
Pattern registration screen
64613-L3-00