YSP_Users_E.pdf - 第228页
7-19 7 Replacing the consumable parts 7 Clean the guides and pulley s. 1. Use a vacuum assembly (option) to suction the belt wear debris on the belt guides and sensors, etc. 2. Use a plastic spatula or similar tool to re…
7-18
7
Replacing the consumable parts
4
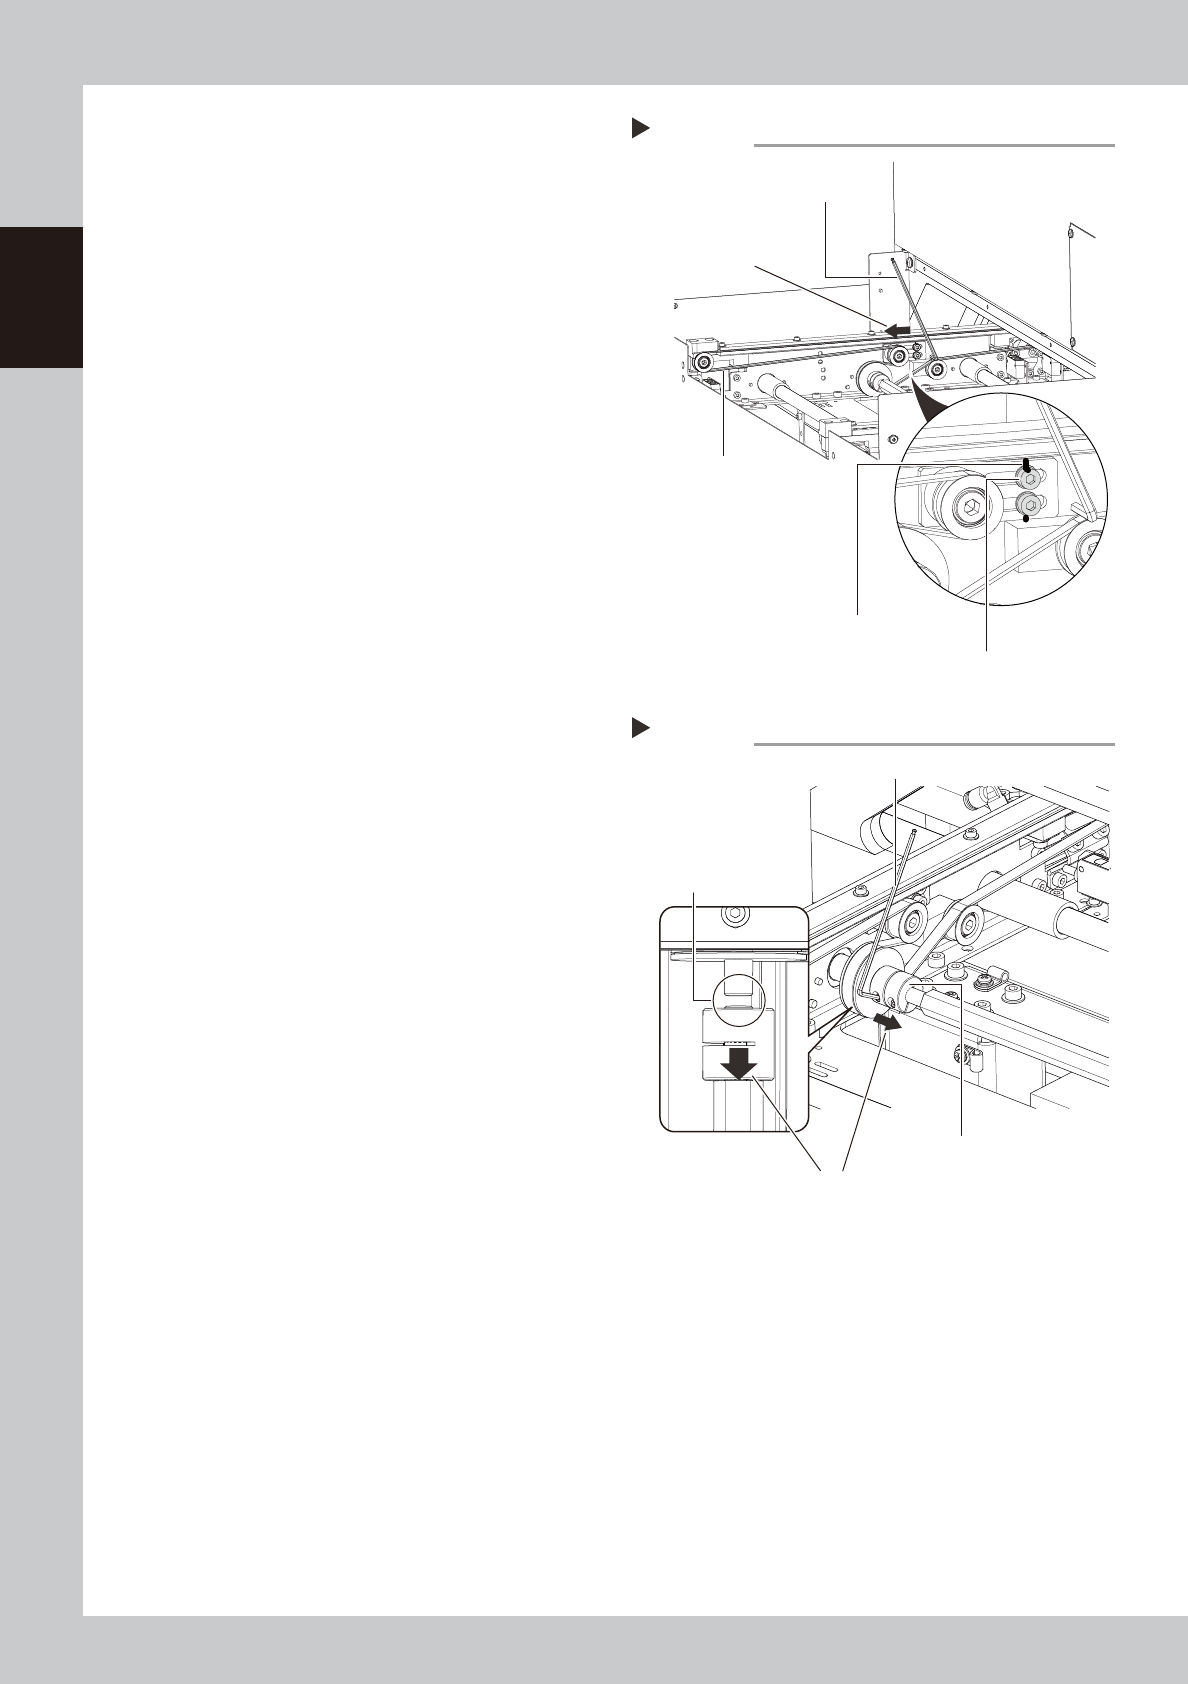
Put a mark at the tensioner
position.
Before loosening the belt tension, put a mark
to indicate the positions of the mounting
bolts of the tensioner (pulley bracket) using
an oil-based permanent marker.
63727-L3-00
5
Loosen the belt.
1. Use the hex wrench (3mm) to Loosen the
two mounting bolts of the tensioner
(Pulley bracket) so that the tensioner can
move. It doesn't need to remove the
bolts.
2. Move the belt tensioners (pulley bracket)
to the end of the tension adjusting slots
(in the loosening direction).
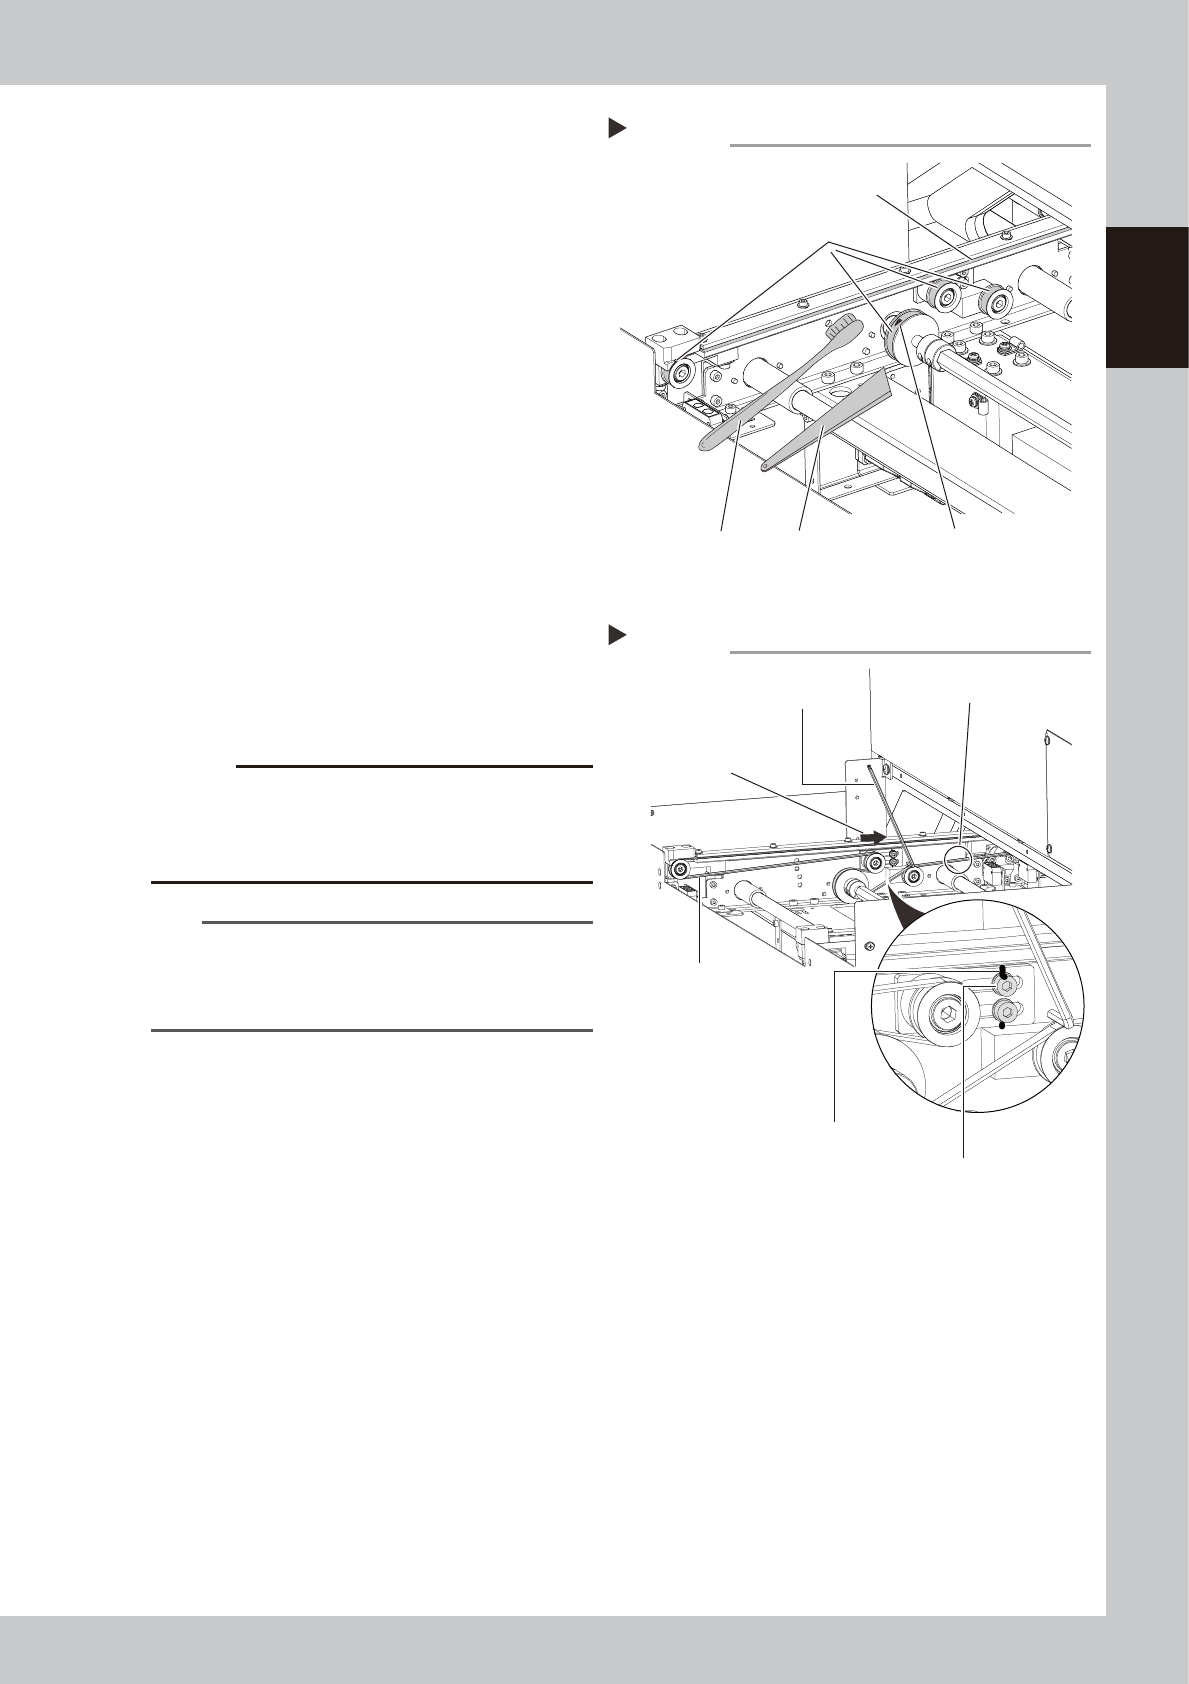
6
Detach the belt.
1. Use the hex wrench (2mm) to loosen the
mounting bolt of the coupling and slide
the coupling to the rear side of the
machine.
2. Detach the belt from the pulley and take
it out through the space between the
pulley and the shaft.
63728-L3-00
Step 4,5
Marking and slackening the belt
Hex wrench (3mm)
Conveyor belt
Slide direction
Tensioner (Pulley bracket)
mounting bolt
Mark with oil-based
permanent marker.
Step 6
Detaching the conveyor belt
Hex wrench (2mm)
Coupling
Slide to the rear side of the machine.
Remove the belt through
this clearance.
7-19
7
Replacing the consumable parts
7
Clean the guides and pulleys.
1. Use a vacuum assembly (option) to
suction the belt wear debris on the belt
guides and sensors, etc.
2. Use a plastic spatula or similar tool to
remove the belt wear debris adhering to
the outer peripheral surface of the
pulleys.
3. Use a brush or similar tool to remove the
belt wear debris caught in the belt
guides.
63729-L3-00
8
Attach a new belt.
1. Temporarily fit a new belt onto the pulley.
2. Return the coupling to its original position
and tighten the bolt.
3. Move the tensioner (pulley) to the
position that has been marked and then
tighten the bolts.
4. If looseness of the belt is found, adjust
the position of the tensioner (pulley) to
apply necessary tension.
63730-L3-00
c
CAUTION
Tighten the mounting bolts of the pulley and pulley
bracket to the following torques:
• Pulley mounting bolt : 5.5N•m.
Be careful not to tighten the bolts excessively.
n
NOTE
The specification of the conveyor belt tension is in the
following. Use the tension meter to adjust as needed.
• Conveyor : 184 to 197Hz
• Extension conveyor : 102 to 109 Hz
9
Check the belt rotating condition.
1. Cancel emergency stop.
2. Press the [Conveyor Drive Allow] buttons
on the [Unit] - [Conveyor] screen to turn
on the conveyor motor and check the
belt rotation.
3. If the slip of the motor pulley, the belt
rotation fluctuation and the deflection
are excessive, adjust the tensioner
(pulley) position and transfer a board
again and check the condition.
0
Reattach the conveyor cover.
Tighten the four screws on the plate with
pushing the plate upward to reattach the
conveyor cover.
Step 7
Cleaning the guide and pulleys
Brush
Belt guides
Belt wear debris
sticking to pulley
Spatula
(made of plastic)
Outer peripheral surface of pulley
Step 8
Add belt tension.
Hex wrench (3mm)
Conveyor belt
Tensioner (Pulley blacket)
mounting bolt
Align with the marking
position.
Tension measurement positions
Slide direction
7-20
7
Replacing the consumable parts
6.2 Board clamp unit (board clamp table)
n
Required tools
• Hex wrench (2mm, 3mm, 4mm, 5mm)
• Phillips screwdriver
• Oil-based permanent marker
• Brush
• Spatula (Plastic)
• Replacement conveyor belt (refer to "2.2.1 Parts to be replaced during periodic replacement" in chapter 8.)
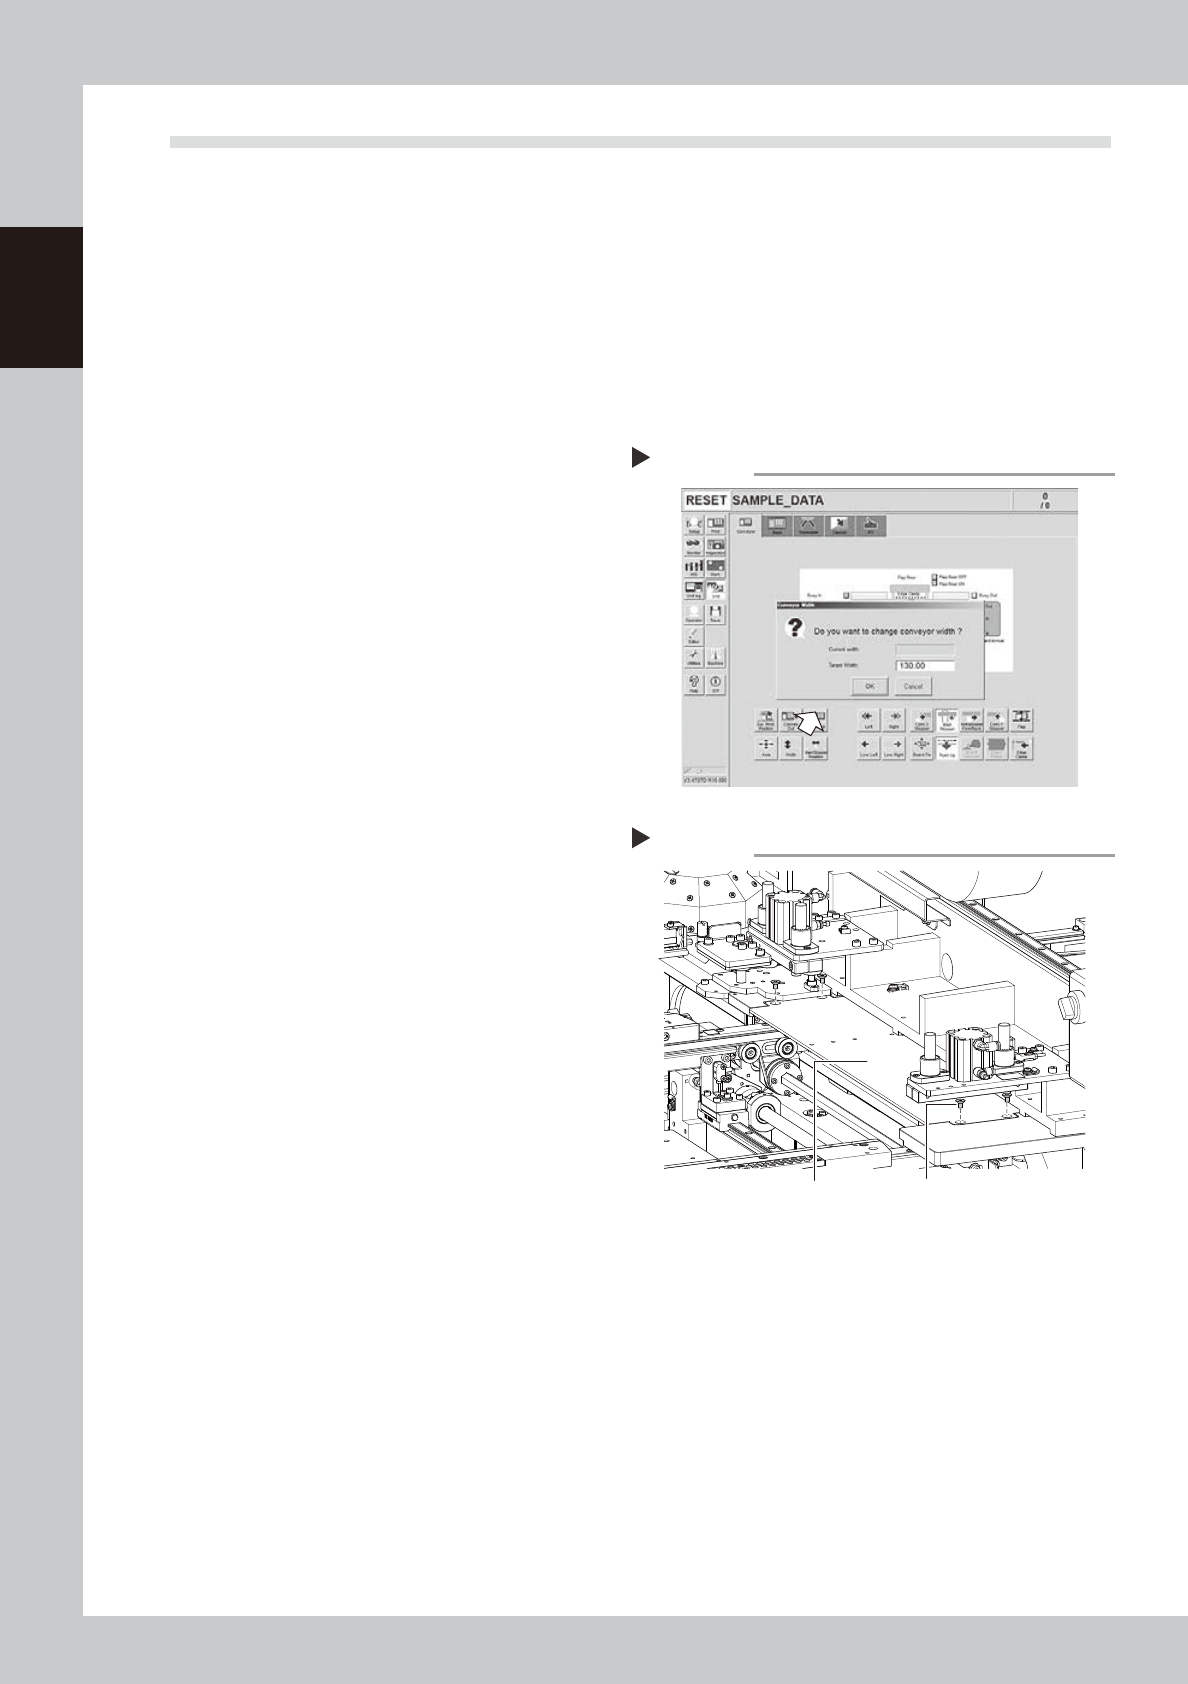
1
Change the conveyor width to a
convenient width for maintenance
work.
1. Press the [Width] button to display the
"Conveyor Width" dialog.
2. In the "Target Width" box, enter a width
large enough for maintenance work
(about 200mm) and press [OK].
The conveyor is changed to the width
that was just entered.
64703-L3-00
e
2
Press the emergency stop button
and open the upper door.
The machine must be in emergency stop to
ensure safety during work.
3
Remove the mask guide plates.
Remove the mask guide plates on the left
and right of the mask clamp. Remove the
mask guide plate on the right. Remove bolts
(4 pcs.) with a hex wrench (3mm) to detach
the mask guide plate. Remove the mask
guide plate on the left with the same
procedure.
63731-L3-00
Changing the conveyor width
Step 1
Step 3
Removing the mask guide plate
Mask guide plate Bolt