YSP_Users_E.pdf - 第207页
6-23 6 Other functions 4.5 [Unit] - [Cleaner] tab screen T he [Unit] - [Cleaner] tab screen allows you to manually operate the cleaner unit and c heck the status of the cleaner unit sensors on the graphic view . T he fun…

6-22
6
Other functions
4.4 [Unit] - [Squeegee] tab screen
The [Unit] - [Squeegee] tab screen allows you to manually operate the squeegee head and check the status of
the squeegee sensors on the graphic view. The function of each button is described below.
[Unit]-[Squeegee] tab screen
<3S squeegee>
<Double squeegee>
5
4
2
3
1
64621-L3-00
n
Operation buttons
Button name Function
1 Move Squeegee
Moves the squeegee head to the squeegee attach/detach position (front side) or
to the escape position (rear side).
2 Axis Opens the "Move Axis" screen. (See "4.1" in this chapter.)
3 Squeegee Direction
Switches the squeegee printing direction.
The squeegee printing direction is from front to rear just after board data is
loaded or the [RESET] button is pressed. Then, the printing direction will be
switched alternately.
4
Squeegee 1 Down
Squeegee 2 Down
(Only for double-squeegee type)
Moves up and down the squeegee 1 or 2.
6-23
6
Other functions
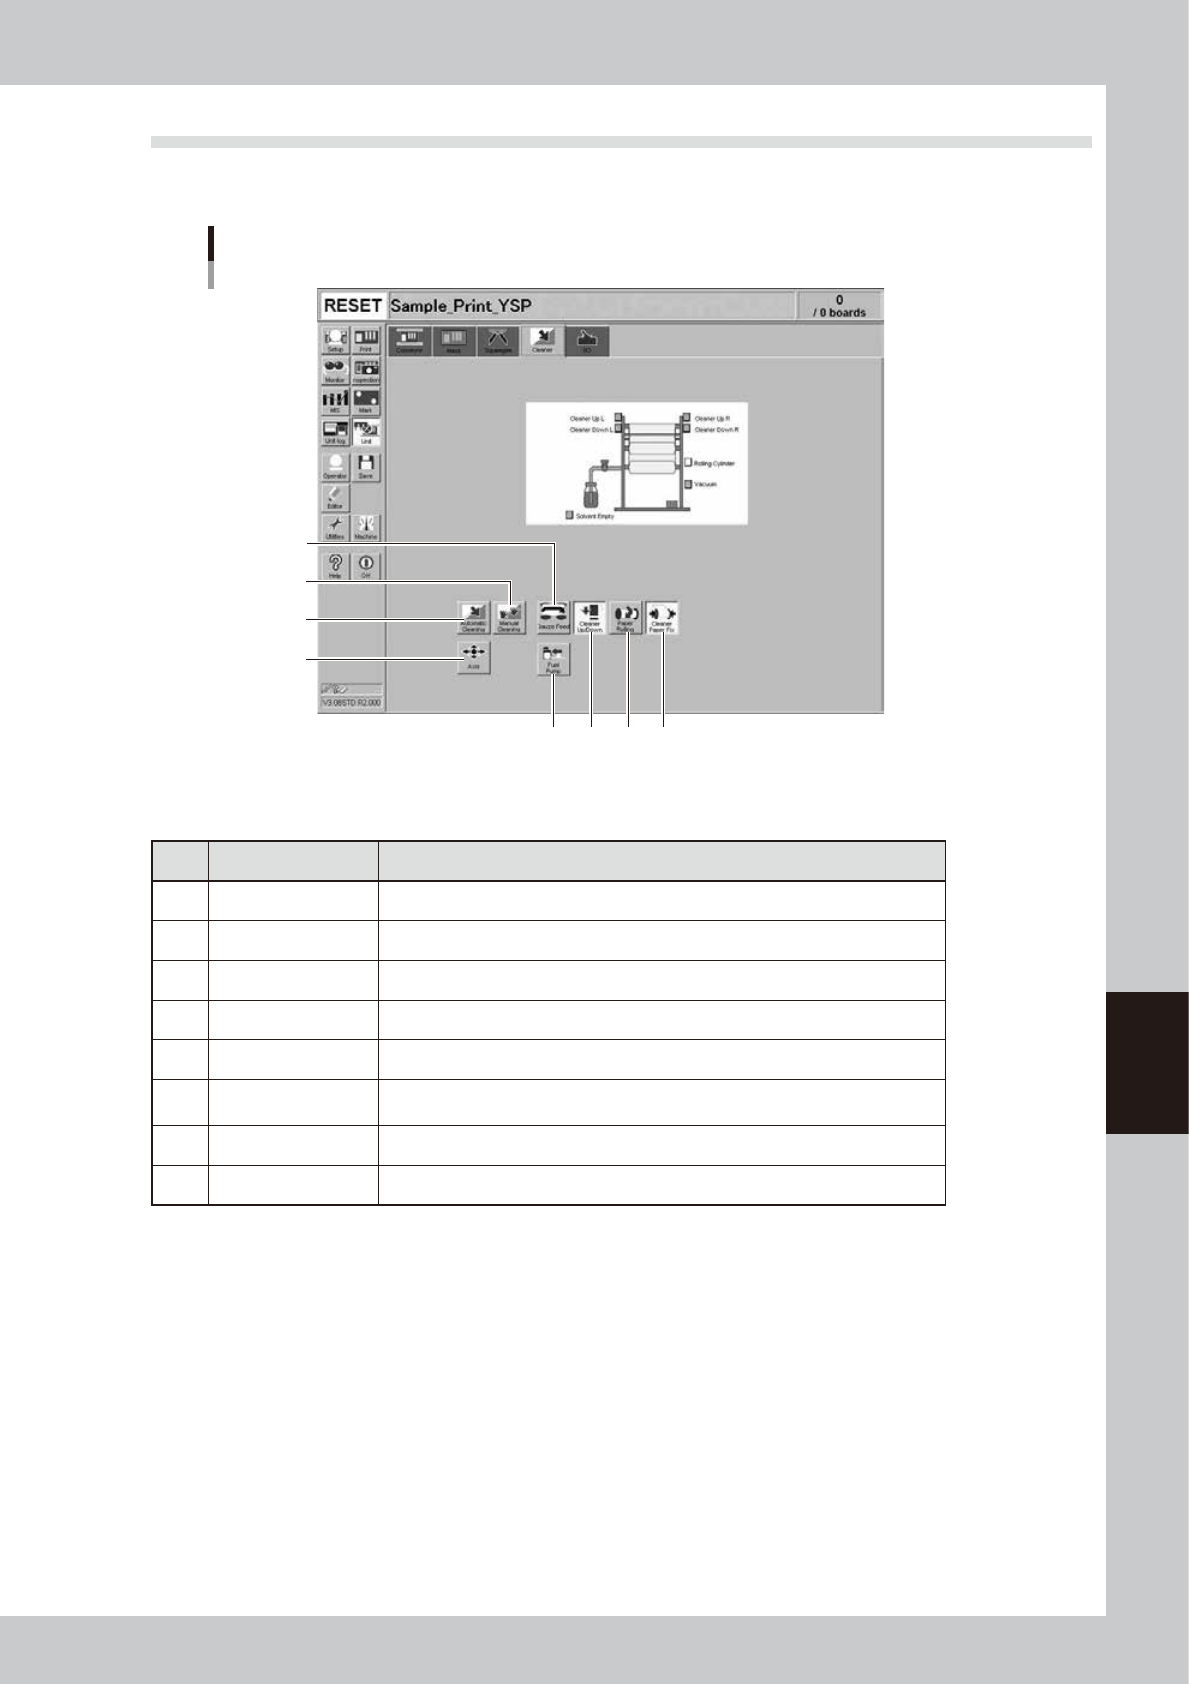
4.5 [Unit] - [Cleaner] tab screen
The [Unit] - [Cleaner] tab screen allows you to manually operate the cleaner unit and check the status of the
cleaner unit sensors on the graphic view. The function of each button is described below.
[Unit]-[Cleaner] tab screen
4 56 7
3
8
2
1
64622-L3-00
n
Operation buttons
Button name Function
1 Axis Opens the "Move Axis" screen. (See "4.1" in this chapter.)
2 Automatic Cleaning Press this button to automatically clean the backside of the mask.
3 Manual Cleaning Press this button when you want to manually clean the mask.
4 Cleaner Up/Down Moves the cleaner unit up or down.
5 Paper Rolling Winds up the gauze roll (lower roll) at a specified pitch.
6 Cleaner Paper Fix
Releases the gauze roll take-up shaft coupling. Pressing this button again,
engages the take-up shaft coupling.
7 Fuel Pump Discharges a specified amount of cleaning solvent onto the gauze roll.
8 Cleaner Connect Connects or releases the cleaning unit and conveyor unit.
6-24
6
Other functions
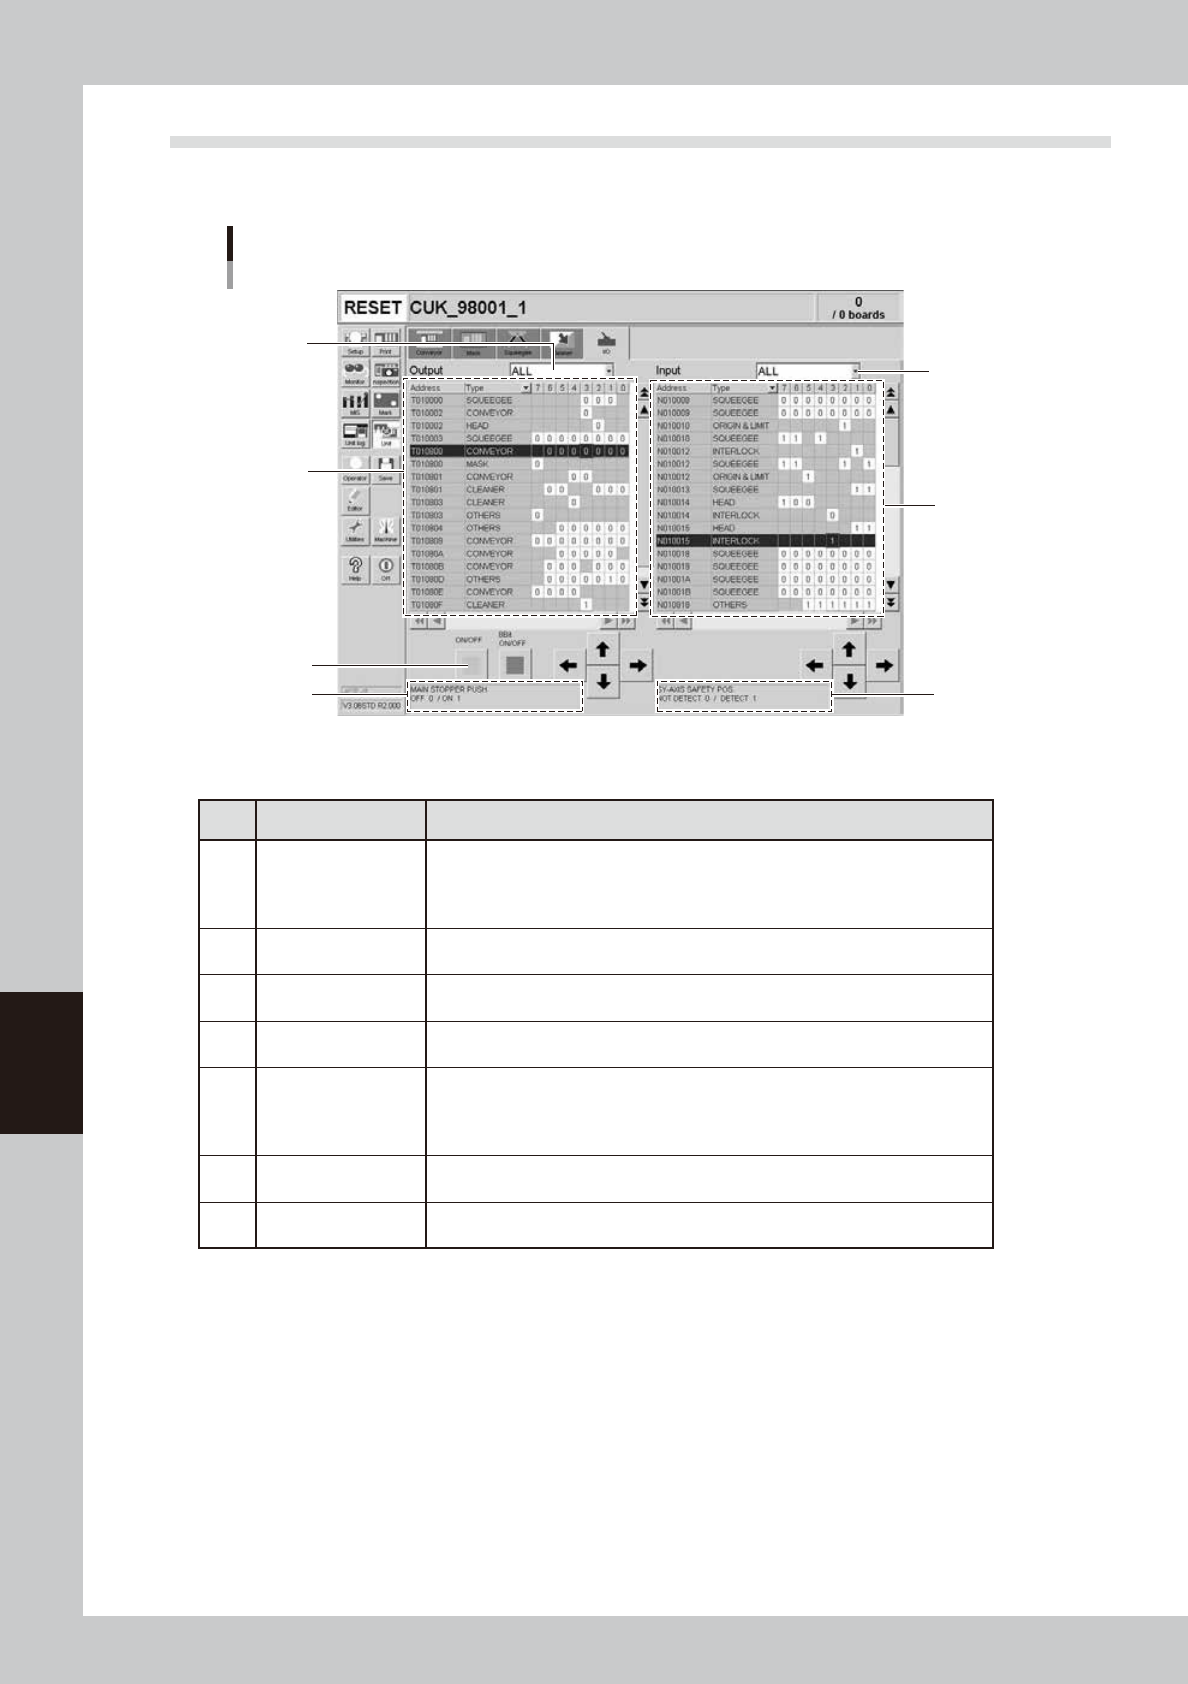
4.6 [Unit] - [I/O] tab screen
The [Unit] - [I/O] tab screen allows you to check the I/O signal status and switch each output signal on or off.
How to read this [I/O] tab screen is described below.
[Unit] - [I/O] tab screen
3
1
7
5
2
6
4
64623-L3-00
n
Items/Operation buttons
Item/button name Function
1 Output signal status
The status of each digital output signal is expressed in binary digits (1 and 0).
Each signal is identified by a code name consisting of an alphabet letter and
numbers such as "T00275". To select each signal, click on it in the grid or click
the up/down and right/left arrow buttons to move the cursor there.
2
Output signal
description box
Shows the name of the currently selected output signal and a description of what
"0" and "1" mean.
3
Unit selection
drop-down list
Select a unit from this drop-down list whose output signal status you want to
display.
4 ON/OFF
Clicking this button turns the currently selected signal on or off. (The [8bit ON/
OFF] button is not currently used.)
5 Input signal status
The status of each digital input signal is expressed in binary digits (1 and 0).
Each signal is identified by a code name consisting of an alphabet letter and
numbers such as "N005E0". To select each signal, click on it in the grid or click
the up/down and right/left arrow buttons to move the cursor there.
6
Input signal
description box
Shows the name of the currently selected input signal and a description of what
"0" and "1" mean.
7
Unit selection
drop-down list
Select a unit from this drop-down list whose input signal status you want to
display.