JANETS_INM.pdf - 第171页
JaNets In structio n Manual 5. Shopflo or Setu p 5- 51 Layou t scr een for e ach machin e model Some mode ls have two or more A TC units, and the A TC cylinder hole pos ition varies depe nding on the machin e model. When…
JaNets Instruction Manual 5. Shopfloor Setup
5-50
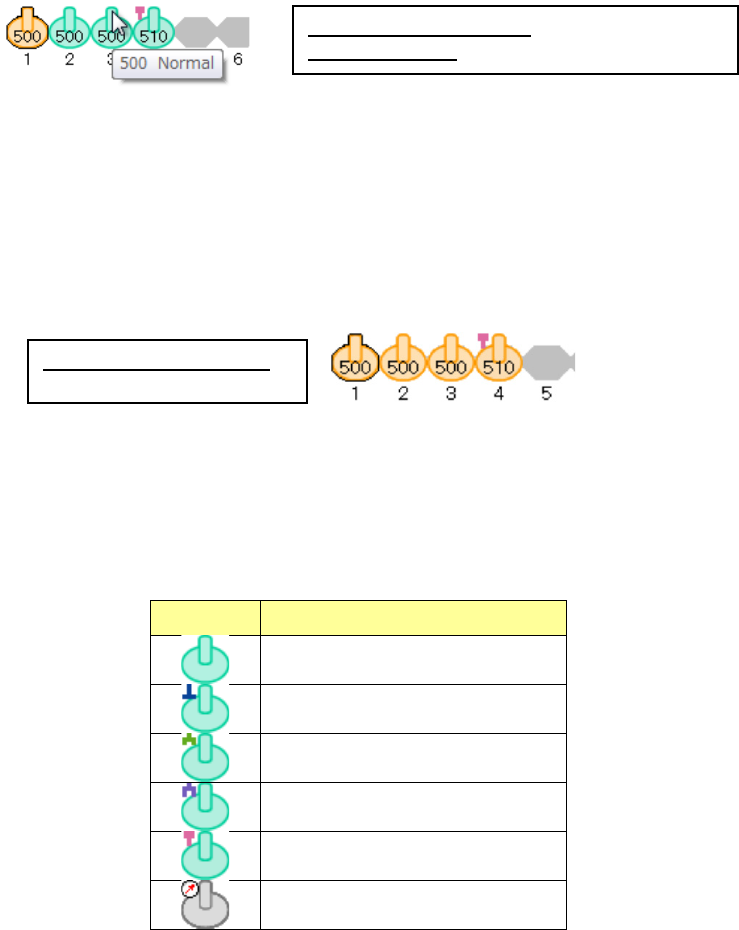
When you move the mouse cursor over the nozzle icon, the “nozzle number” and the “nozzle type”
are displayed on the tool chip menu.
Figure 5.8-8 When the focus is on the ATC number 1
(the nozzle is already assigned to this number)
You can select two or more nozzles at a time, and all nozzles except for the focused one are
displayed in orange only.
(When you drag the mouse cursor to surround two or more nozzles or select nozzles while holding
down the Ctrl key, you can select two or more nozzles.)
Figure 5.8-9 When two or more nozzles are selected
(the focus is on the ATC number 1)
The nozzle icon of each nozzle type is displayed as shown in the table below.
Table 5.8-2 Descriptions of the nozzle icons (on the layout screen)
Icon Nozzle type
Normal
Type T
Gripper (small)
Gripper (large)
Melf
Vacuum calibration unit
Nozzle already assigned: displayed in green
Focused nozzle: displayed in dark green/orange
When a nozzle is selected:
displayed in orange

JaNets Instruction Manual 5. Shopfloor Setup
5-51
Layout screen for each machine model
Some models have two or more ATC units, and the ATC cylinder hole position varies depending
on the machine model.
When you switch the machine currently set to another one, the size of the layout screen of each
machine model is enlarged or reduced.
Machine having two or more ATC units
The layout screen for a machine having two or more ATC units are shown below.
Figure 5.8-10 Layout screen (Model: RX-6 ATC Selection: Front)
Switching the layout screen for a machine having two or more ATC units
The <ATC Selection> button is displayed on the right side of the layout screen for a machine
having two or more ATC units.
Figure 5.8-11 Layout screen (Model: RX-6 ATC Selection: Rear)
* When the layout screen is displayed for the first time, the left-most ATC unit on the front side is
selected.
Select the <ATC Selection> button.
* The screen shown below indicates that
the front left ATC is selected.
JaNets Instruction Manual 5. Shopfloor Setup
5-52
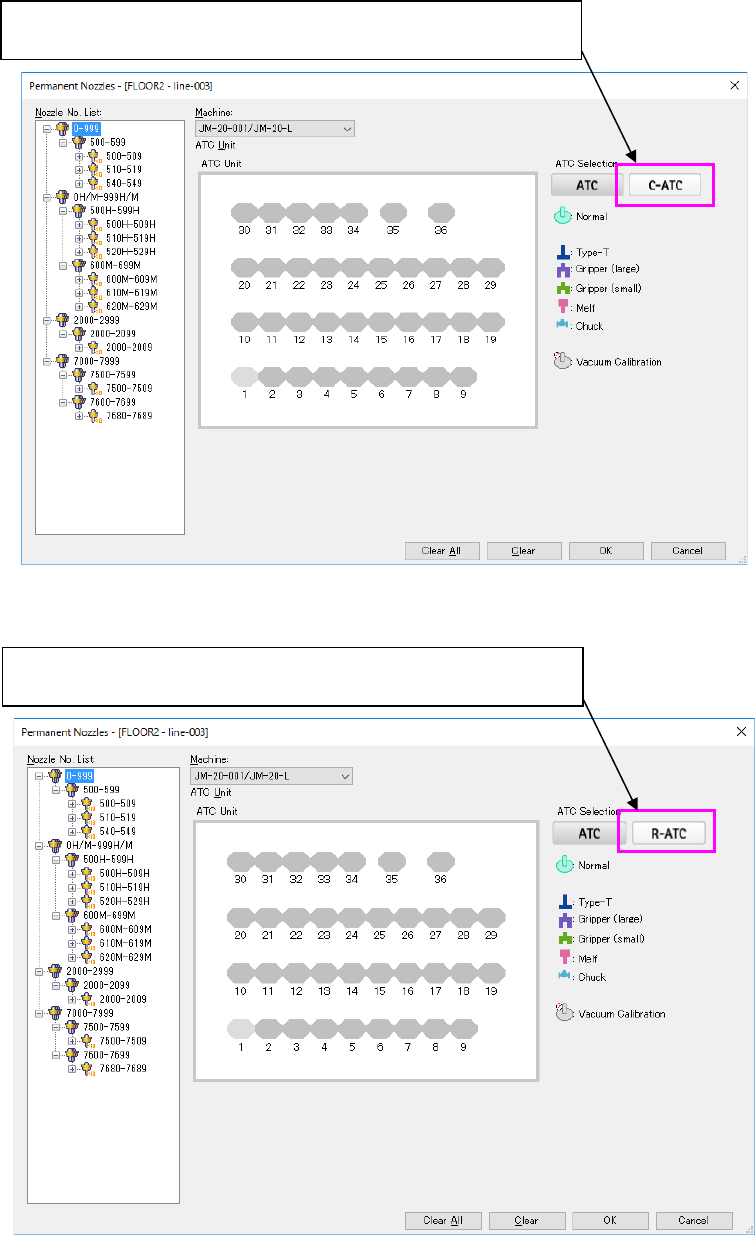
Figure 5.8-12 Layout screen (Machine: JM-20)
Figure 5.8-13 Layout screen (Machine: JM-20) when an R-ATC is attached on the machine
When a C-ATC is located in the right ATC unit, the <C-ATC> button is
displayed as the “ATC Selection” button.
When a R-ATC is located in the right ATC unit, the <R-ATC> button is
displayed as the “ATC Selection” button.