JANETS_INM.pdf - 第198页
JaNets In structio n Manual 5. Shopflo or Setu p 5- 78 Updati ng an e xist ing fe eder grou p 1. Enter t he name of a f eeder gr oup to be updat ed in the “Fee der Group Name” field on the “Permanent Feeder Setup” screen…
JaNets Instruction Manual 5. Shopfloor Setup
5-77
Setting a feeder group
Referring to a feeder group from a machine
To reference a feeder group (feeder assignment information) from the machine, follow the
instruction below. Or, select a feeder group in the “Feeder Group” list, and click the right button of a
mouse to display the pop-up menu. Select the [Load & Feeder Group] command. The selected
feeder group is loaded into the machine currently being displayed.
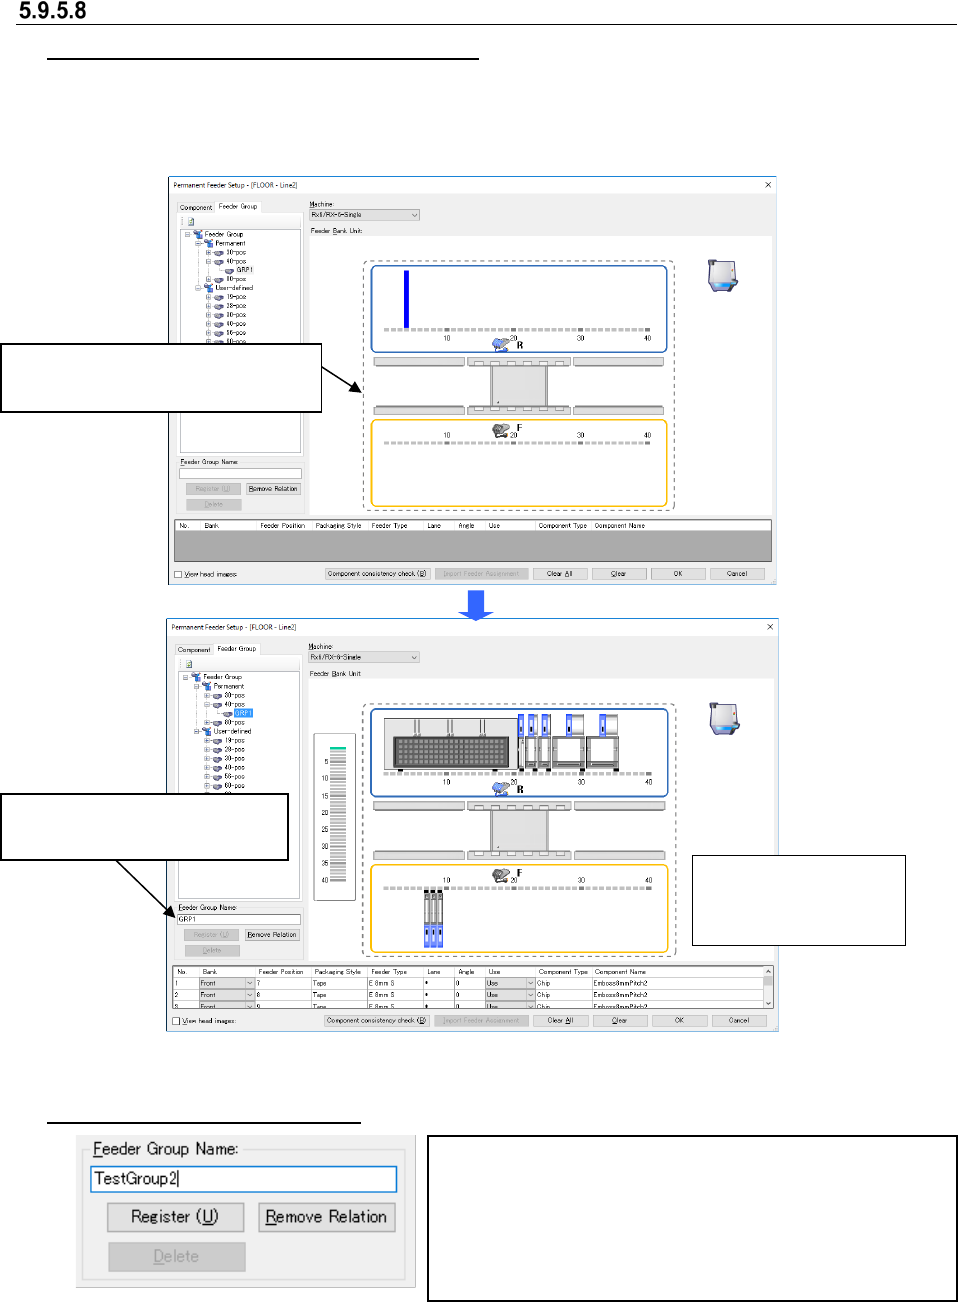
Figure 5.9-44 Before/after referring to a feeder group
Registering a new feeder group
Figure 5.9-45 Entering the name of a feeder group name
Enter the name of a feeder group to be registered (up to 20
half-width characters). When you enter it, the <Register>
button is enabled. When you select this <Register> button, the
confirmation message appears on the screen. When you
select the <Yes> button, the selected feeder group is
registered in the database.
Drag and drop a feeder group to be
referred to onto the layout screen.
The layout of the
dropped feeder group
is displayed.
The name of the referred feeder
group is displayed here.
JaNets Instruction Manual 5. Shopfloor Setup
5-78
Updating an existing feeder group
1. Enter the name of a feeder group to be updated in the “Feeder Group Name” field on the
“Permanent Feeder Setup” screen.
2. When you select the <Register> button, the confirmation message appears on the screen.
When you select the <Yes> button, the feeder group whose name is displayed in the
“Feeder Group Name” field is updated according to the assignment information on the
layout being displayed currently.
* If you enter a feeder group name that does not belong to the permanent feeder group, the
system performs the same process as that for registering a new feeder group.
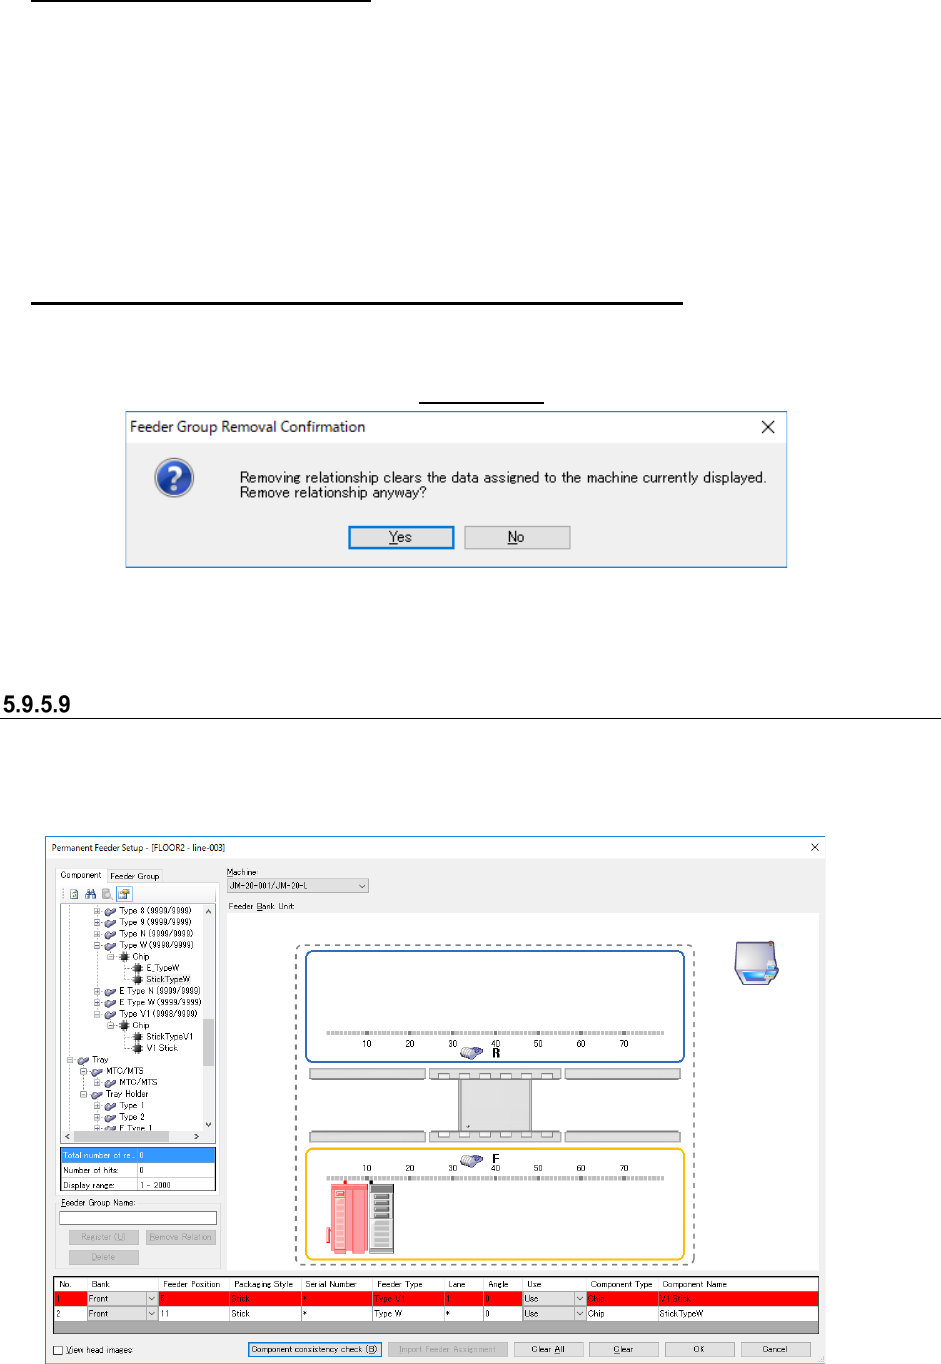
Canceling the association between a machine and a feeder group
1. Display the layout screen whose machine association is to be cancelled.
2. When a machine is associated with a feeder group, select the [Remove Relation]
command on the screen shown in Figure 5.9-45.
Figure 5.9-46 “Feeder Group Removal Confirmation” message
* When association is cancelled, data displayed in the “Feeder Group Name” field and the
information on the assigned feeder is all cleared.
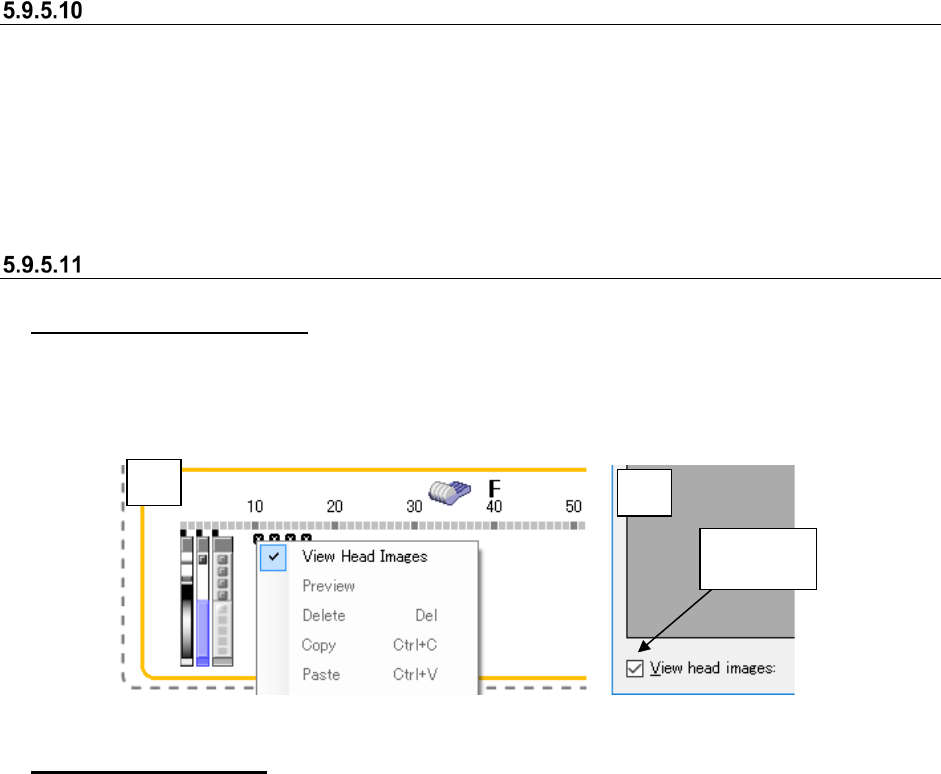
Component consistency check
This function checks to see if an assigned component supply device is consistent with a
component registered in the database.
A component supply device at which a consistency error occurred is displayed with a red icon and
a red line.
Figure 5.9-47 Display of a component consistency check error
JaNets Instruction Manual 5. Shopfloor Setup
5-79
Import Feeder Assignment
This function obtains the feeder assignment of the machine registered in IFS-NX under the same
machine name.
When you select the “Use” radio button of the “IFS-NX Setting” for the “Set Environments” of the
Launcher and select the “Use” radio button of the menu item “IFS-NX” of the Machine option
setting, the system can obtain the feeder assignment.
A feeder not consistent with the Component Database is indicated with the red icon and the red
line.
Displaying/hiding the head images
Displaying the head images
When you click the right button of a mouse on the feeder layout, the pop-up menu appears on
the screen. Select the [View Head Images] command from this pop-up menu ① or check the
check box “View head images” on the “Permanent Feeder Setup” screen ②.
Figure 5.9-48 Displaying the head images
Hiding the head images
Click the left button of a mouse on the feeder layout. Or, select the check box “View head
images” on the “Permanent Feeder Setup” screen or click the right button of a mouse to
display the pop-up menu and select the [View Head Images] command on this pop-up menu.
The check box “View head images” is deselected, or the check displayed on the left side to
the menu command disappears, and Head Image Display mode is terminated.
①
②
Check this
check box.