JANETS_INM.pdf - 第64页
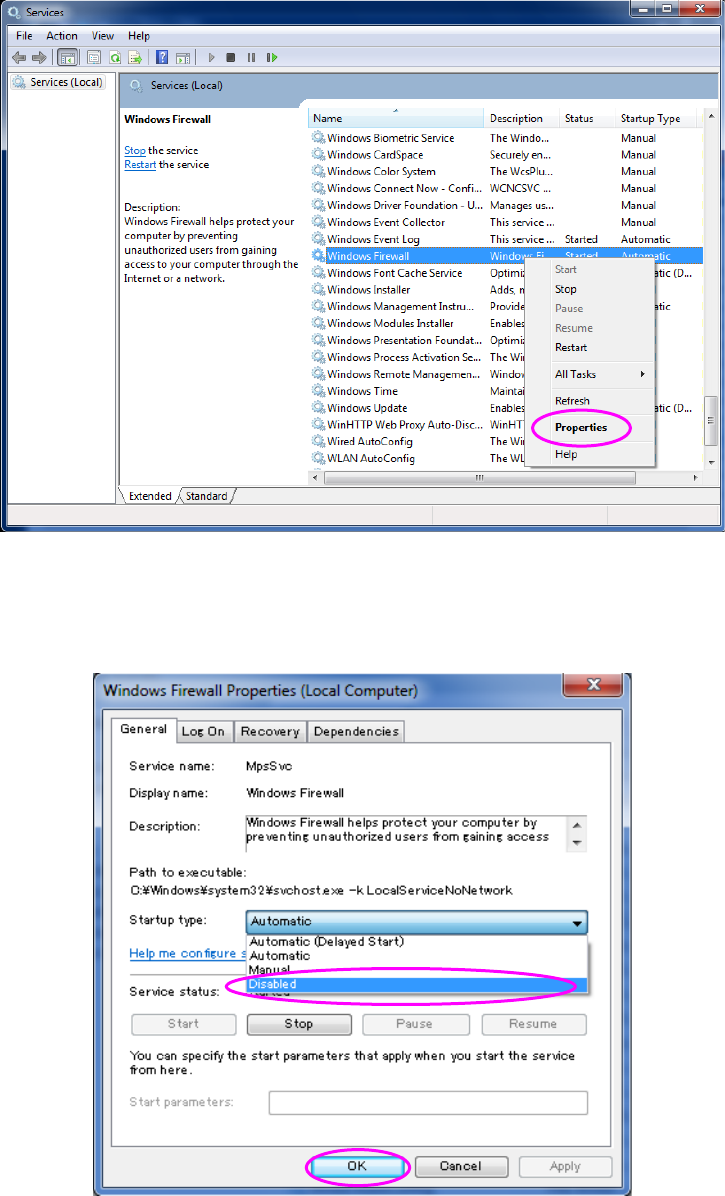
JaNets Instr ucti on Man ual 2. Install ation 2- 36 (3) If “Started” is displ ayed in the “St atus” c ell of th e “W indows Firewal l” on t he “Servic es” me nu, right - click it, and then c lick [ Propertie s] on the po…
JaNets Instruction Manual 2. Installation
2-35
2.5.1.2 Disabling the Firewall
Disable the Firewall. When the Firewall is enabled, the JaNets system cannot communicate with
any machine.
* Since an RX-7 series uses the different communication system, you do not have to make any
setting here.
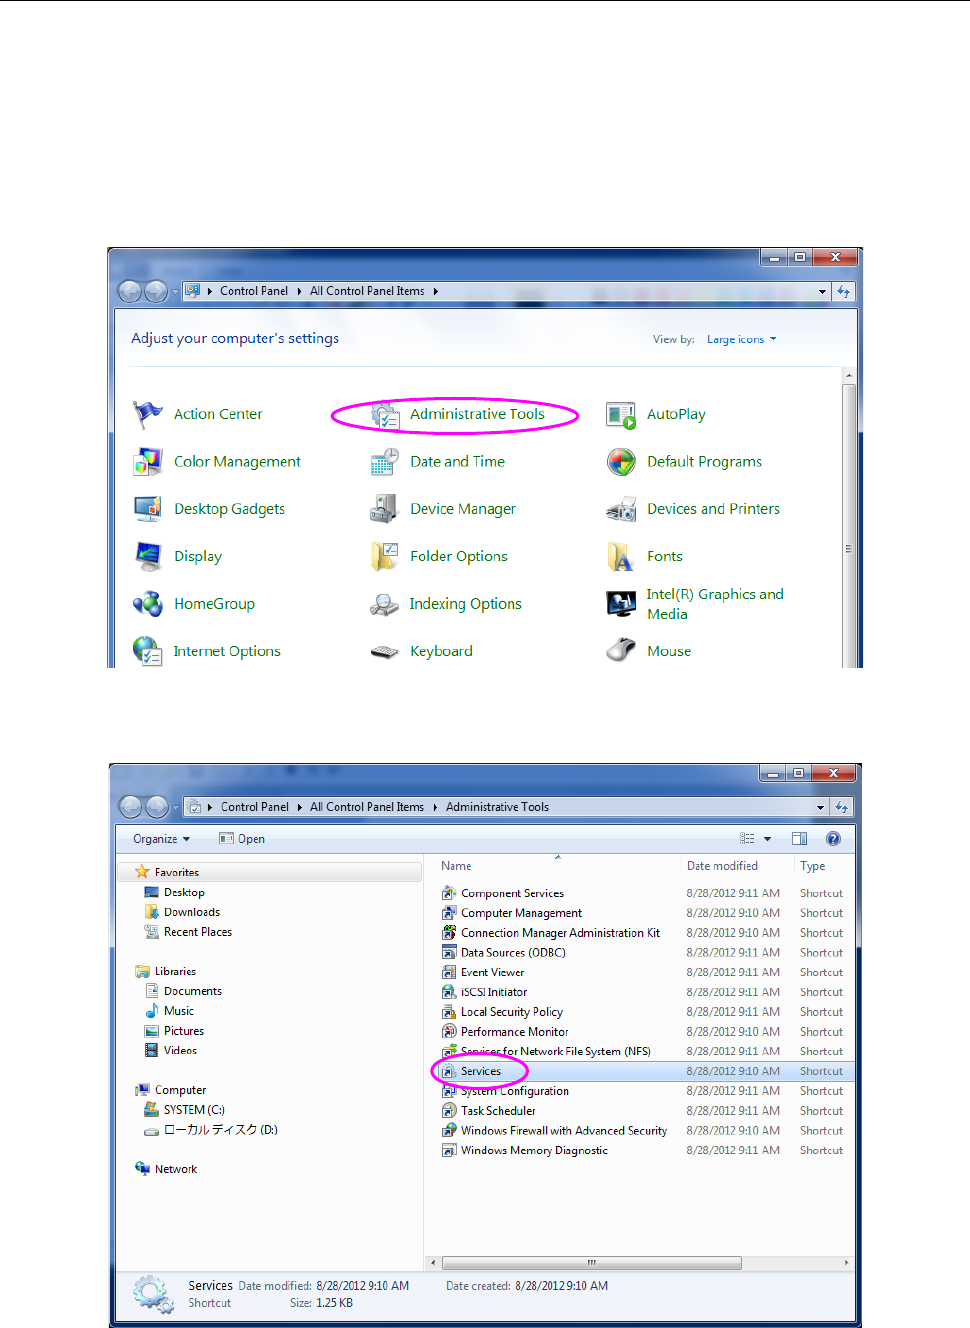
(1) Display the “Control Panel” displayed with a machine from the “Start” menu as shown in
Figure 2.5-8, and selects the “Administrative Tools” displayed with a machine.” The screen
shown in Figure 2.5-9.
Figure 2.5-8 “Control Panel” displayed with a machine
(2) Select the “Services” from the “Administrative Tools.”
Figure 2.5-9 “Administrative Tools” displayed with a machine
JaNets Instruction Manual 2. Installation
2-36
(3) If “Started” is displayed in the “Status” cell of the “Windows Firewall” on the “Services” menu,
right-click it, and then click [Properties] on the pop-up menu.
Figure 2.5-10 “Services” screen (displayed with a machine) 1
The Properties dialog box appears. On the General tab, set to “Disabled” for “Startup Type”,
and then the click <OK> button.
Figure 2.5-11 “Services” screen (displayed with a machine) 2
You have finished disabling the Firewall at this point.
JaNets Instruction Manual 2. Installation
2-37
2.5.1.3 Setting a shared folder
In order to download a production program from the Program Downloader, the shared folder which
has a shared name of "Prg" on the machine side is required. (This setup is unnecessary for an
RX-7 series.)
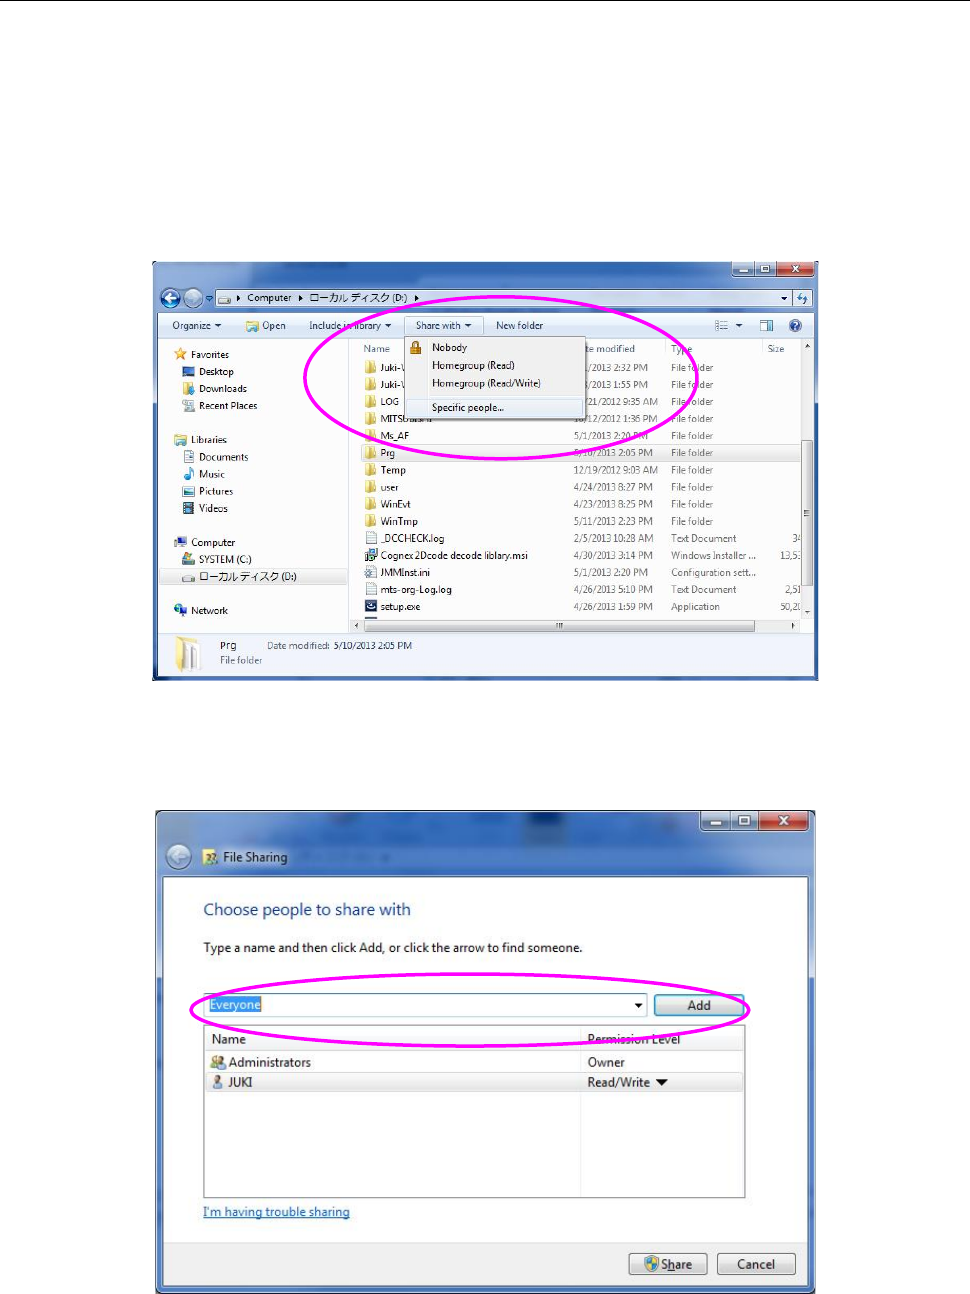
(1) Start up the Explorer and create a Prg folder through new document in the arbitrary places of
a drive D.
(2) In a state where your select the created Prg folder, select the "Share with" command from the
menu bar, and then the "Specific people" command from the Share with menu.
Figure 2.5-12 Shared folder setting (Windows 7)
(3) The "File Sharing" dialog box appears on the screen. Click the "Add" button in a state where
you select the "Everyone."
Figure 2.5-13 File Sharing dialog box (Windows 7)