JANETS_INM.pdf - 第403页
JaNets Instr ucti on Man ual 8. Job Optim izer 8- 18 Editing the Reservation lis t 8.3.9 .1 Cluster (Example of a r eservat ion f ile not optimi zed or a res ervation f ile whose c luster is not opt imize d) Figure 8.3 -…
JaNets Instruction Manual 8. Job Optimizer
8-17
8.3.8.2 Adding a production program from a database
Figure 8.3-25 Main screen (Adding a production program)
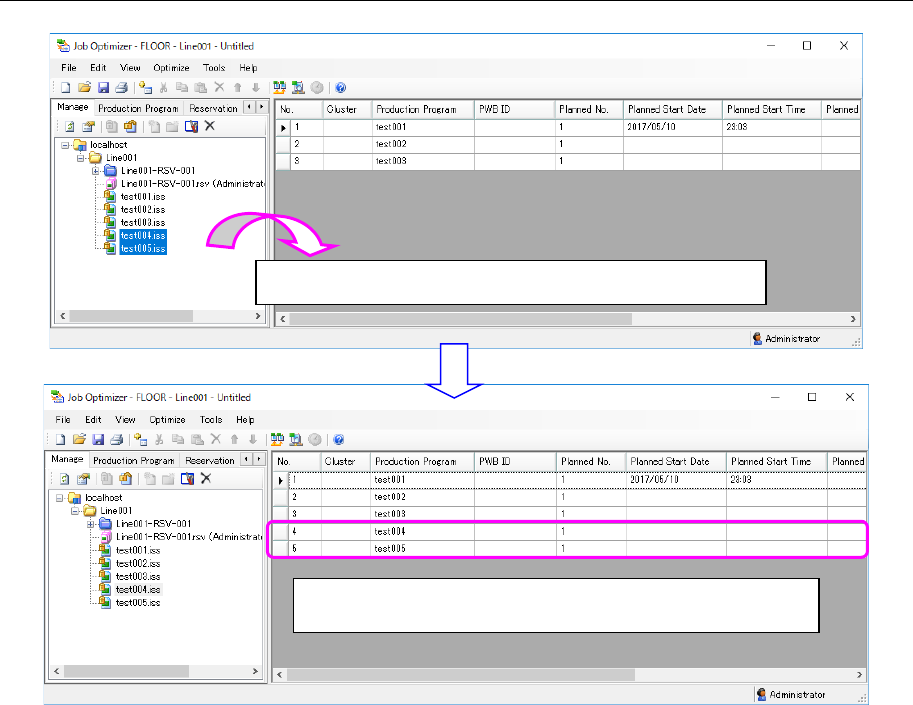
Drag & drop a production program from the Explorer area.
The production program you dragged & dropped is added to
the last line.
JaNets Instruction Manual 8. Job Optimizer
8-18
Editing the Reservation list
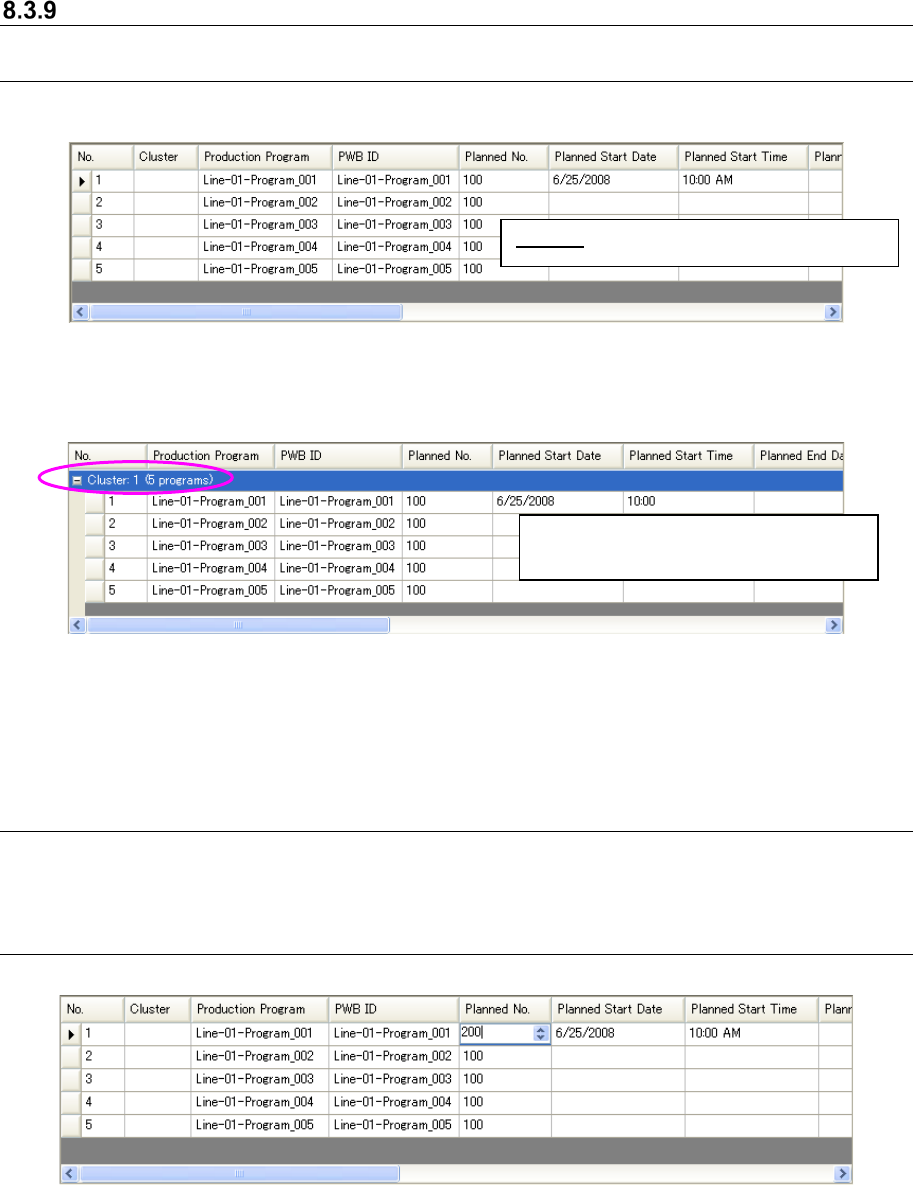
8.3.9.1 Cluster
(Example of a reservation file not optimized or a reservation file whose cluster is not optimized)
Figure 8.3-26 Main screen – Reservation list (Cluster)
(Example of a reservation file whose cluster is optimized)
Figure 8.3-27 Main screen – Reservation list
(grouped according to the cluster number)
* When you edit a Reservation list after it is displayed, the cluster numbers are cleared, and the
tree is hidden.
8.3.9.2 Production Program and PWB ID
When you add a production program to the Reservation list, the program name and the PWB ID of
the added production program are automatically displayed on the screen.
8.3.9.3 Planned No.
Figure 8.3-28 Main screen – Reservation list (Planed No.)
Cluster: Is displayed as a normal column
Five production programs exist (are
grouped) in the “Cluster 1.”

JaNets Instruction Manual 8. Job Optimizer
8-19
8.3.9.4 Planned Start Date, Planned Start Time, Planned End Date and Planned End
Time
When you add a production program to the beginning of the Reservation list, the added data and
time are automatically displayed on the screen. When you add one to the second or later line of
the Reservation list, such data is not displayed.
When you also enter the “Planned Start Date” and the “Planned Start Time” to the second or later
line, you can display the planning and its result with the “Result Summarizer” utility by comparing
them after PWB production. When you also enter the “Planned End data” and the “Planned End
Time,” you can compare the planning and its result with the “Result Summarizer.”
Figure 8.3-29 Main screen – Reservation list (Planned Start Date)
* When you double-click a cell whose “Planned Start Date,” “Planned End Date,” “Planned
Start Time” or “Planned End Time” is to be changed or when you press the [Enter] key after
selecting the cell, you can edit the cell.
Figure 8.3-30 Main screen – Reservation list (Planned Start Time)
How to edit: After selecting the cell to be changed, press the < > button or press the [↑] key or the [↓]
key. Or you can also enter a value directly in the selected cell. To delete a value from a cell, select the
cell and press the [Del] key.
You have to enter the “Planned Start Date” and the “Planned Start Time” of a production program in the first
line only. You can change these values (see the descriptions below), but cannot delete either of them.
How to edit: After selecting the cell to be changed, press the < > button or press the [↑] key or the [↓] key.
Or you can also enter a value directly in the selected cell. To delete a value from a cell, select the cell and
press the [Del] key.