JANETS_INM.pdf - 第188页
JaNets In structio n Manual 5. Shopflo or Setu p 5- 68 Operations ( Details s ettin g screen ) Assigning a f eeder (as a permanent feeder) Changi ng a f eeder assi gnm ent f rom the t ree s cr een (by draggi ng a nd drop…

JaNets Instruction Manual 5. Shopfloor Setup
5-67
Details setting screen
The detailed information on a feeder currently being selected is displayed here. You can change
settings of some items also.
Figure 5.9-16 Details setting screen
* When you select two or more feeders, they are selected on the Details setting screen too.
Feeder currently being selected
(Its detailed information is selected on the Details setting screen too.)
JaNets Instruction Manual 5. Shopfloor Setup
5-68
Operations(Details setting screen)
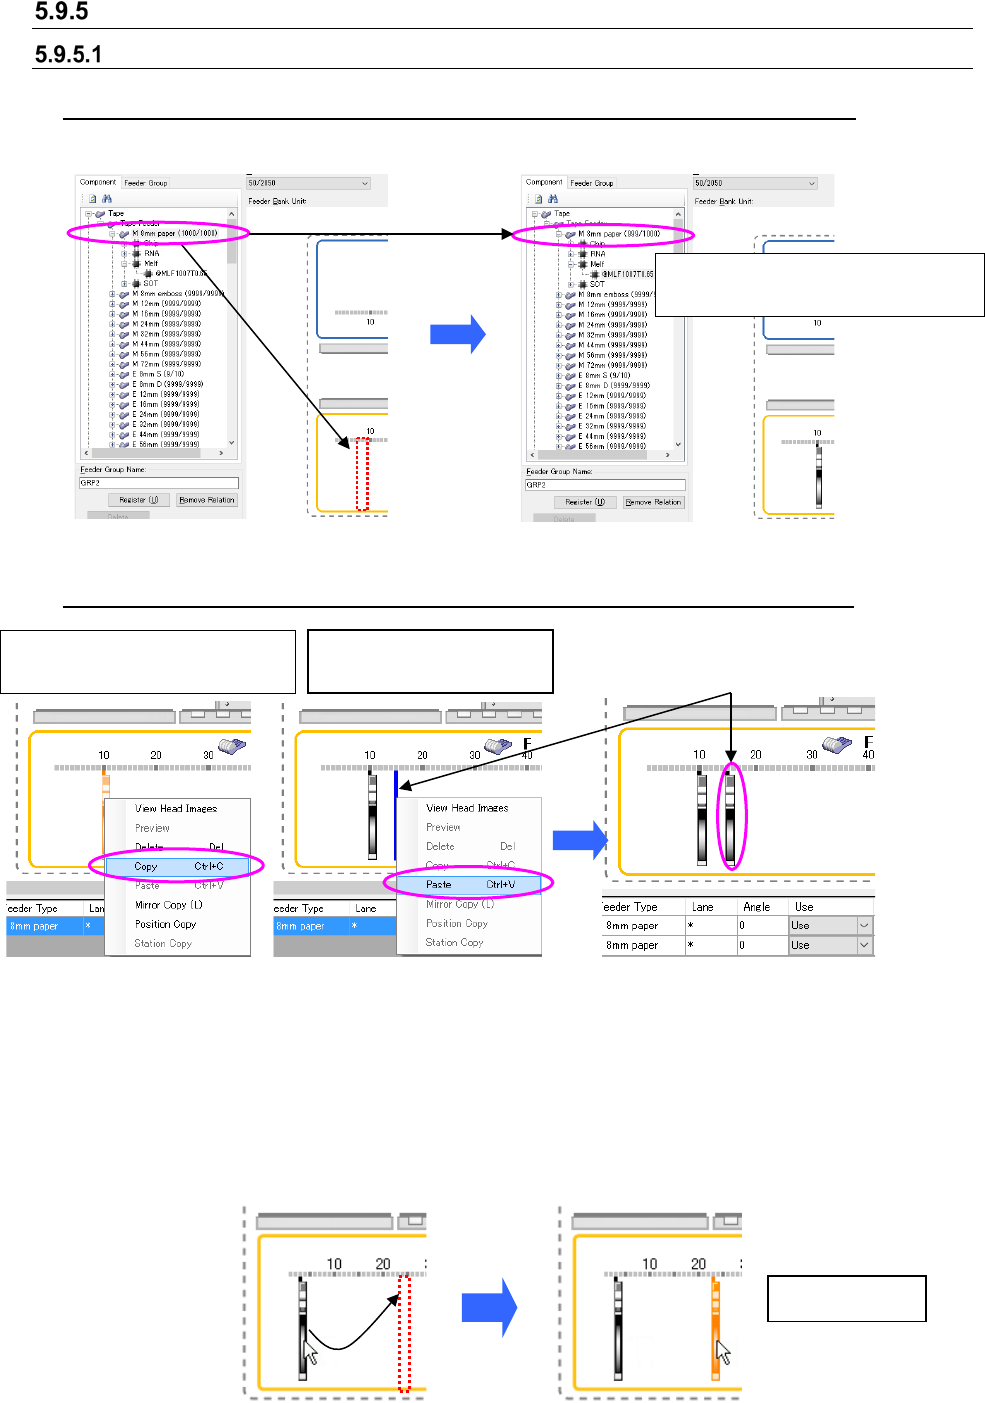
Assigning a feeder (as a permanent feeder)
Changing a feeder assignment from the tree screen (by dragging and dropping)
When the mechanical feeder has been assigned the mechanical bank
Figure 5.9-17 Feeder assignment (Dragging)
Figure 5.9-18 Feeder assignment (Dropping)
Changing a feeder assignment from the layout screen (by copying and pasting)
Figure 5.9-19Feeder assignment (Copying)
Figure 5.9-20 Feeder assignment
(Pasting)
* When you select two or more feeders to copy them, they are pasted in the order you copied
them.
* You can paste a feeder by switching a machine selected in the “Machine” field also.
You can copy a feeder as described below too.
While holding down the Ctrl key, select a feeder already assigned, and move the cursor. The
selected feeder is copied.
Figure 5.9-21 Copying a feeder to the same type of bank (Ctrl key + Dragging and dropping)
“1” is subtracted from the number of
the feeder resources.
Copied feeder
Paste the copied feeder at
the desired position.
Copy a feeder, which you want to
change the assignment.
Paste it onto the focused
position
JaNets Instruction Manual 5. Shopfloor Setup
5-69
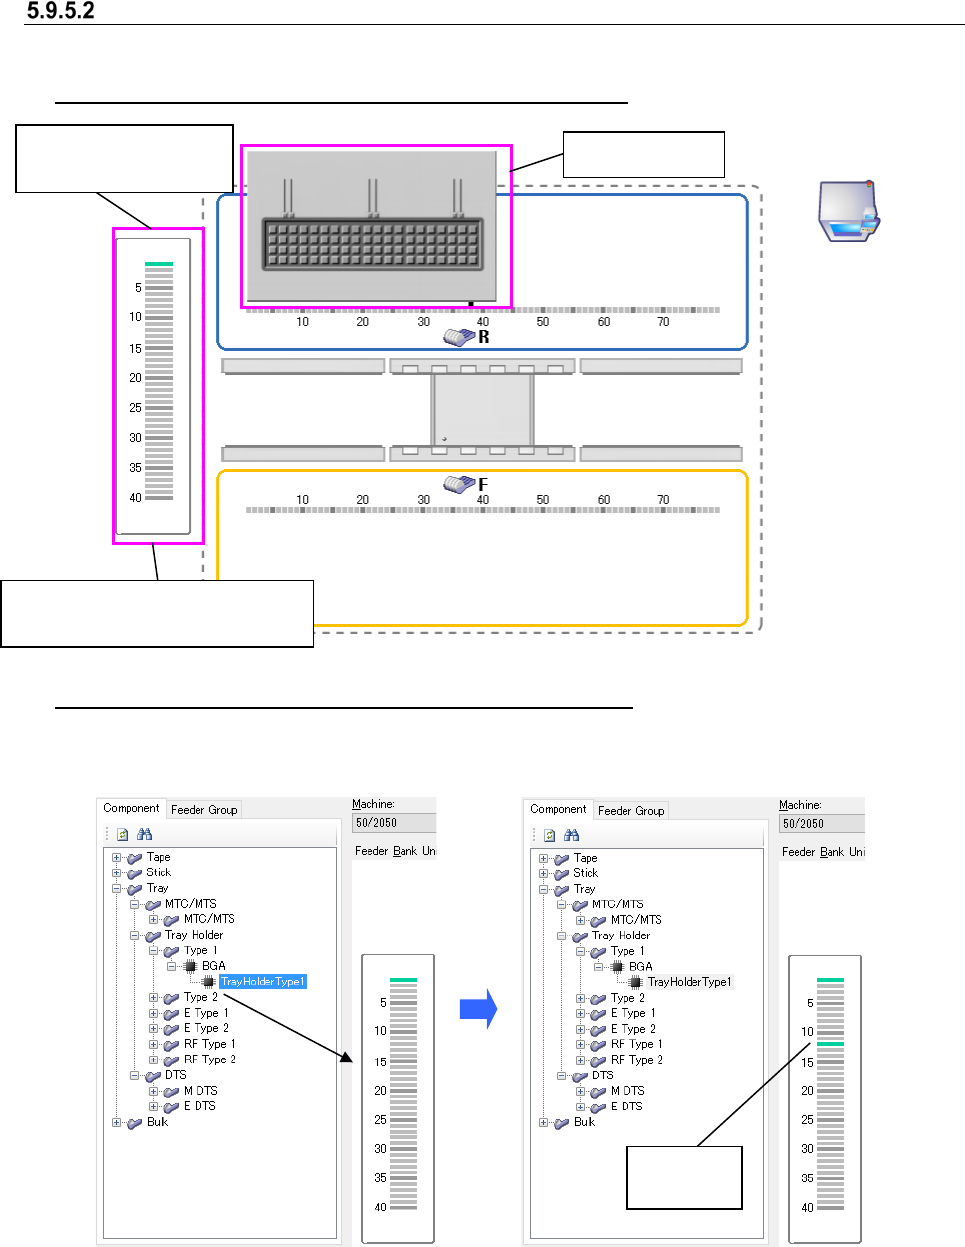
Assigning a tray
In the same manner as other feeder types, assign a tray component on the feeder bank to be set.
When you assign a tray to a tray holder (not attached yet)
Figure 5.9-22 Tray assignment
When you assign a tray to a tray holder (already attached)
Assign a tray type of component to the desired position of the image on the Tray assignment
screen.
Figure 5.9-23 Setting a tray level
(before setting)
Figure 5.9-24 Setting a tray level
(after setting)
* The number of tray components that can be assigned on the Tray assignment screen is up to
40 for one machine.
Tray holder icon
Tray assignment screen (displayed
when you set a tray holder)
A tray is placed on the
first level by default.
A tray is
set here.