JANETS_INM.pdf - 第329页
JaNets In structio n Manual 7. Program Editor 7- 122 (2) Replacement contents (P ackagin g Style) Set the data on the p ack aging st yle to be update d on t he followin g screen. Figure 7.6 -6 “ Replacement contents (P a…
JaNets Instruction Manual 7. Program Editor
7-121
Replacing component data
You can replace component data that satisfies the specified condition(s) with the data specified on
the “Replacement” screen. Select the [Edit] command from the menu bar, and then the [Replace]
command.
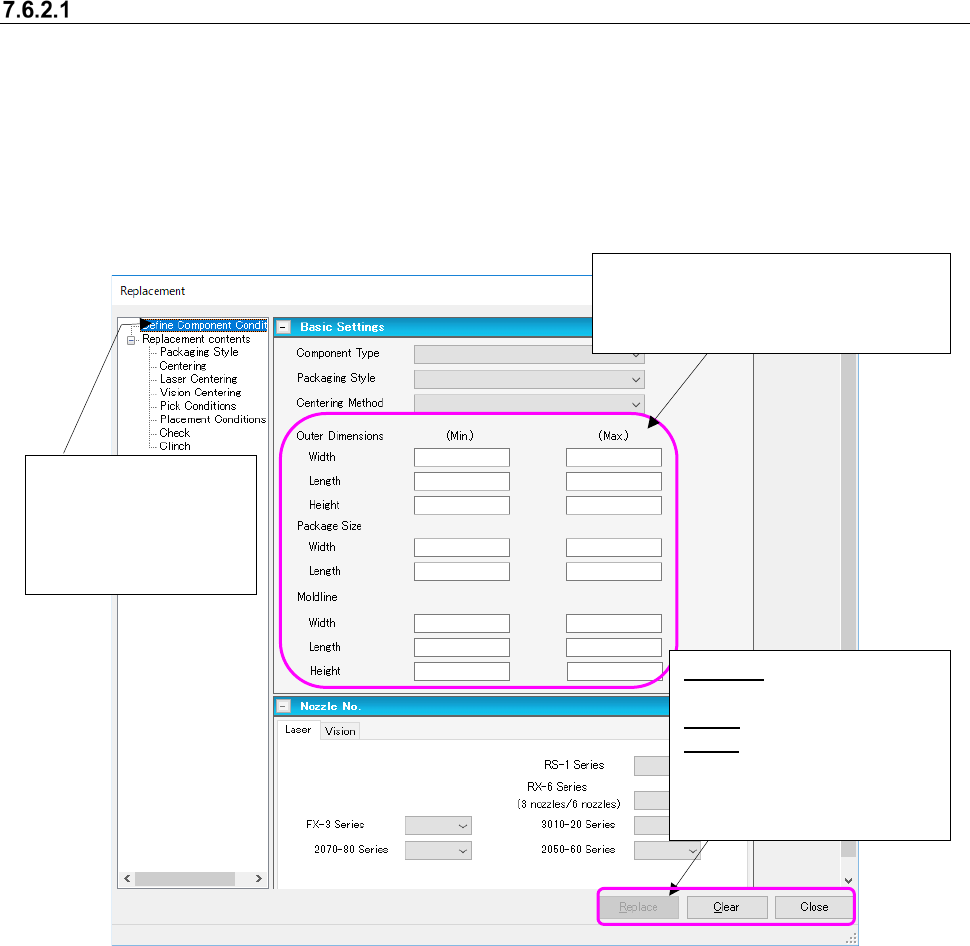
(1) Setting the replacement conditions
Set the conditions for extracting components to be replaced on the following “Replacement”
screen.
Figure 7.6-5 Screen for setting the replacement conditions
Select the “Define Com-
ponent Conditions” from
the tree view to display
the screen shown on the
left side.
Enter each of the minimum and maxi-
mum values to be replaced in the “Outer
Dimensions” fields, the “Package Size”
fields and the “Mold line” fields.
Replace: Starts replacing
component data.
Clear: Clears your settings.
Close: Stops replacement.
* These buttons function in
the same way on the
screens shown below too.
JaNets Instruction Manual 7. Program Editor
7-122
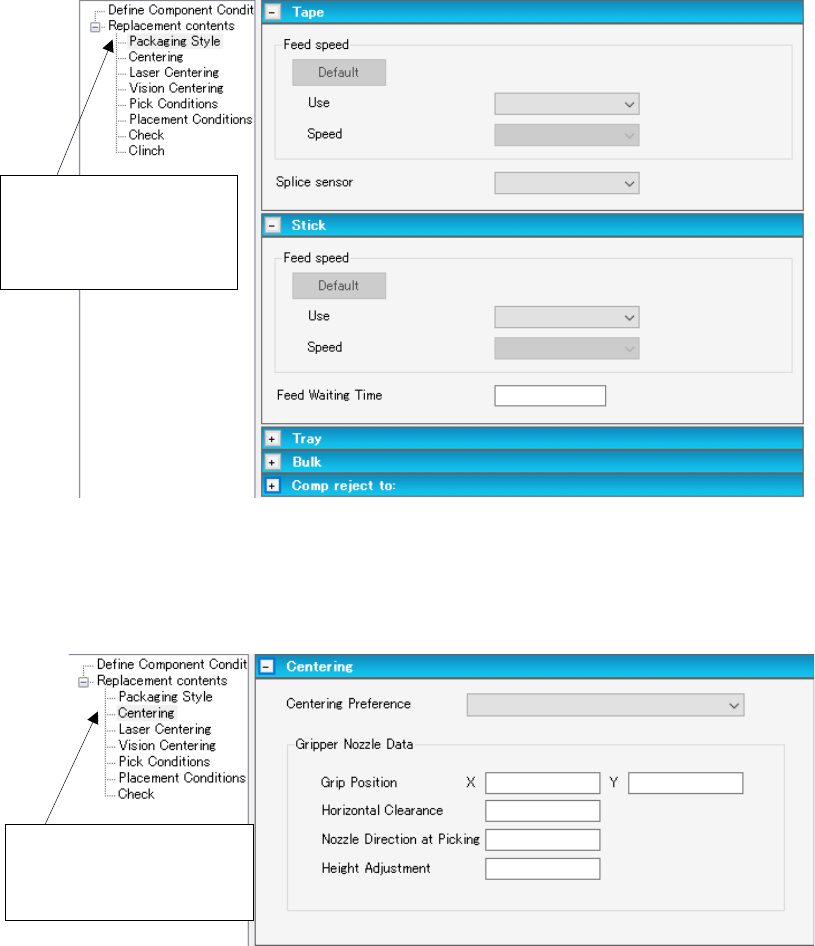
(2) Replacement contents (Packaging Style)
Set the data on the packaging style to be updated on the following screen.
Figure 7.6-6 “Replacement contents (Packaging Style)” screen
(3) Replacement contents (Centering)
Set the data on the centering method to be replaced on the following screen.
Figure 7.6-7 “Replacement contents (Centering)” screen
Select “Centering” from the
tree view to display the
“Centering” screen.
Select “Packaging Style”
from the tree view to dis-
play the “MTC/MTS/DTS”
screen.
JaNets Instruction Manual 7. Program Editor
7-123
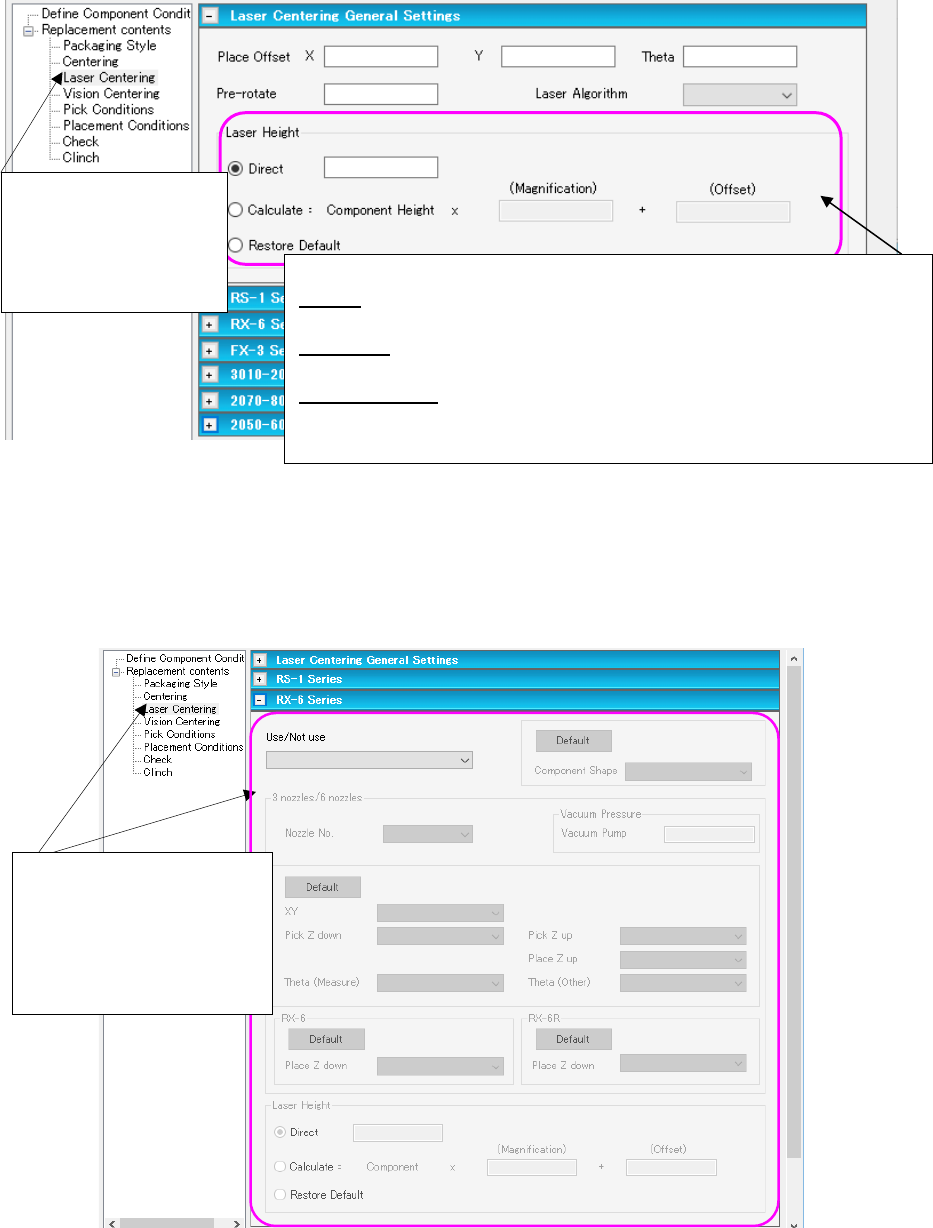
(4) Replacement contents (Laser Centering (Laser Centering General Settings))
Set the data on the laser centering method to be replaced on the following “Laser Centering
General Settings” screen.
Figure 7.6-8 “Replacement contents (Laser Centering
(Laser Centering General Settings))” screen
(5) Replacement contents (Laser Centering) for an RX-6 series
This section describes data to be replaced that is set on the “Laser Centering (RX-6 series)”
screen as a typical example.
Figure 7.6-9 “Replacement contents (Laser Centering (RX-6 Series))” screen
Select “Laser Centering”
from the tree view to
display the “Laser Cen-
tering General Settings”
screen.
<Laser Height>
Direct: Enter an offset value from the top side of a component to the laser
surface.
Calculate: Enter a scaling factor in the “Magnification” field and an offset
value in the “Offset” field for the component height.
Restore Default: This radio button returns the entered value to the default
value.
* Enter these fields in the same manner on the screens shown below too.
Select “Laser Centering”
from the tree view to display
the “Laser Centering Gen-
eral Settings” screen.
Then, open the RX-6 series
screen on the right side.