JANETS_INM.pdf - 第218页
JaNets In structio n Manual 7. Program Editor 7- 11 * Mark sha pe The kind s of ma rk shape w hich an RX - 7 s eries can define di ff er from t hose of machine types oth er than an RX - 7 ser ies . Set up the def inition…
JaNets Instruction Manual 7. Program Editor
7-10
Item
Contents
Copy to BOC mark 3
The contents of currently displayed BOC mark setting are copied to BOC mark 3 of the
currently displayed machine. However, if the BOC mark 3 position and mark name of
the circuit setting are not set or BOC mark 3 is a user ten-plate mark, this item cannot be
selected.
Copy to the second BOC
mark 1
The contents of currently displayed BOC mark setting are copied to the second BOC
mark 1 of the currently displayed machine. However, if the second BOC mark 1 posi-
tion and mark name of the circuit setting are not set or the second BOC mark 1 is a user
ten-plate mark, this item cannot be selected.
Copy to the second BOC
mark 2
The contents of currently displayed BOC mark setting are copied to the second BOC
mark 2 of the currently displayed machine. However, if the second BOC mark 2 posi-
tion and mark name of the circuit setting are not set or the second BOC mark 2 is a user
ten-plate mark, this item cannot be selected.
Copy to the second BOC
mark 3
The contents of currently displayed BOC mark setting are copied to the second BOC
mark 3 of the currently displayed machine. However, if the second BOC mark 3 posi-
tion and mark name of the circuit setting are not set or the second BOC mark 3 is a user
ten-plate mark, this item cannot be selected.
Execute (G) button
The specified copy is executed. After execution, the dialog is closed. If no copy is
specified, the Execute button is disabled.
Cancel
No copy is executed and the dialog is closed.
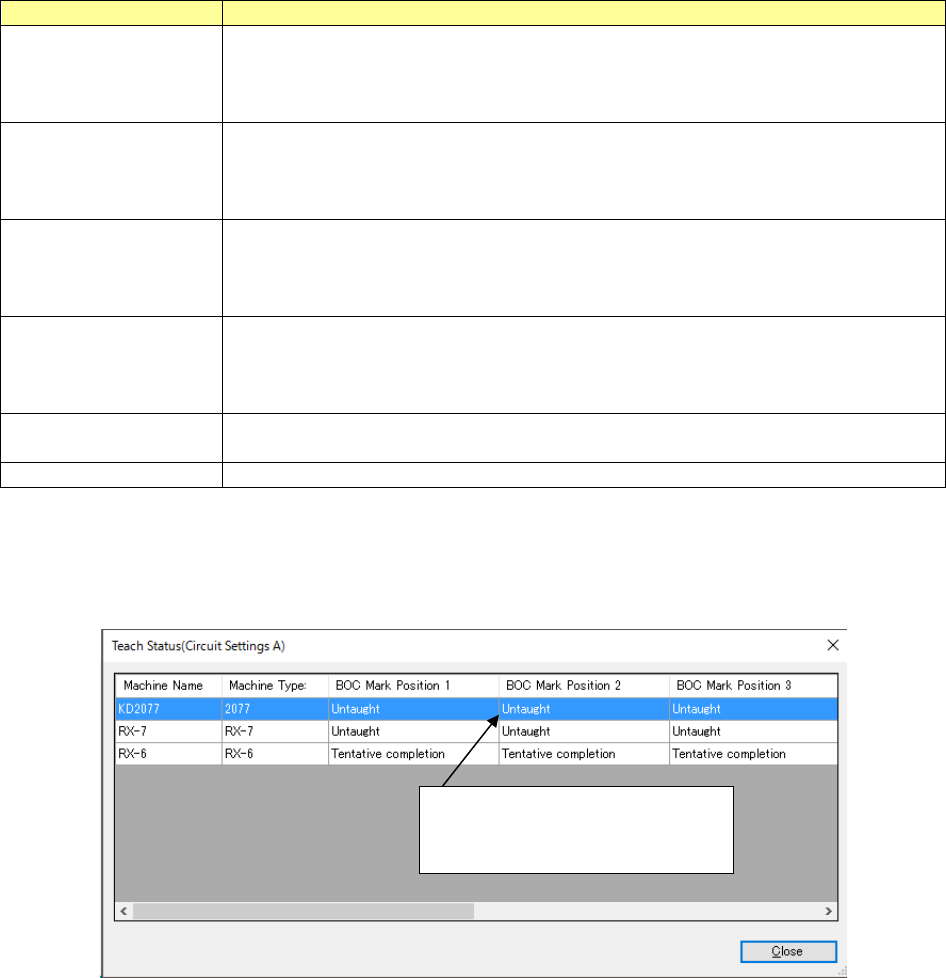
When you click the “Teach Status” button, the “Teach Status” dialog box appears displaying the
statuses of the marks of each machine in the line.
If the BOC mark is not used, this dialog box does not appear.
Figure 7.4-7 “Teach Status” dialog box
Taught: Mark data is set.
Untaught: Mark data is not set.
Not use: This position is not used.
JaNets Instruction Manual 7. Program Editor
7-11
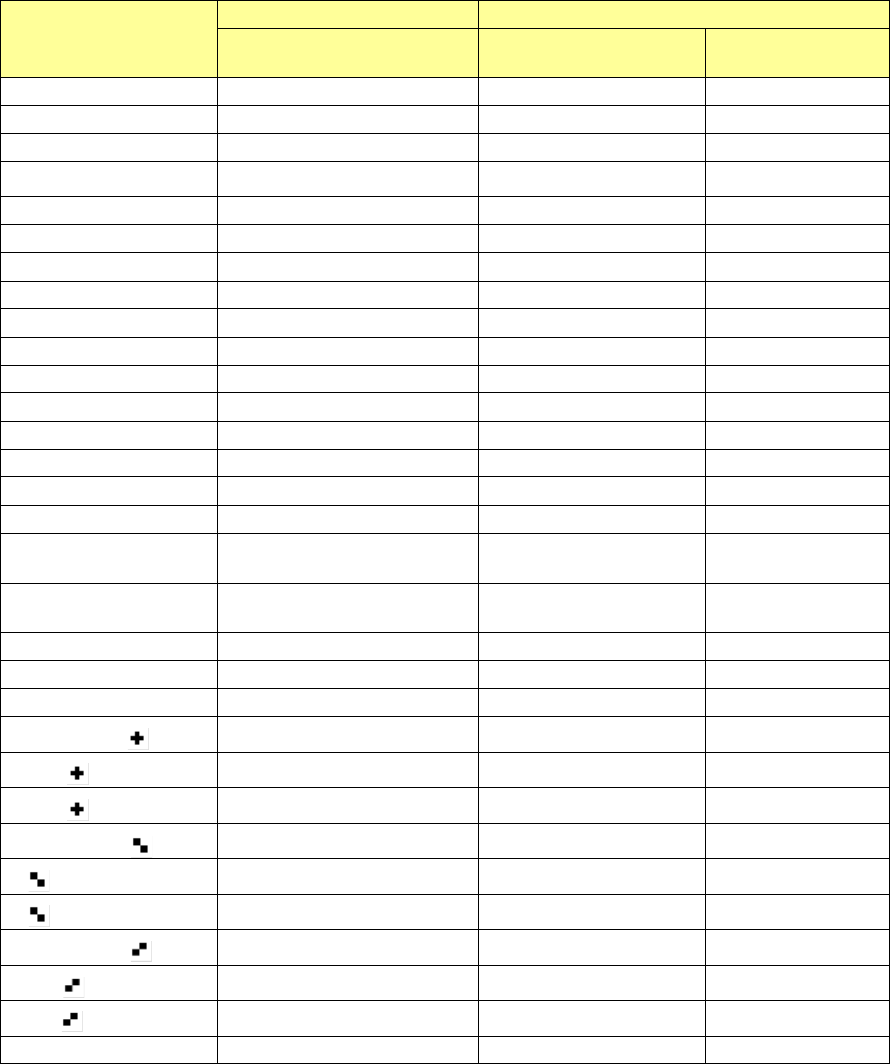
* Mark shape
The kinds of mark shape which an RX-7 series can define differ from those of machine types other
than an RX-7 series.
Set up the definition about a mark with an RX-7 series machine and "●" by default for the
JaNets.
Shape
Other than RX-7 series
RX-7 series
Existence or non-existence
shape
Existence or
non-existence of shape
Direction
●
Existence
Existence
-
○
Existence
Existence
-
○
(with outline)
Non-existence
Existence
-
■ Existence Existence -
□
Existence
Existence
-
□
(with outline)
Non-existence
Existence
-
▲
Existence
Existence
Upper
□
Existence
Existence
Upper
▼
Existence
Existence
Lower
□
Existence
Existence
Lower
▲
(To the right)
Existence
Existence
Right
△
(To the right)
Existence
Existence
Right
▲
(To the right)
Existence
Existence
Left
□
(To the Left)
Existence
Existence
Left
△
(with outline)
Non-existence
Existence
Upper
▽
(with outline)
Non-existence
Existence
Lower
△
(with outline,
to the right)
Non-existence Existence Right
△
(with outline,
to the left)
Non-existence Existence Left
◆
Existence
Existence
-
◇
Existence
Existence
-
◇
(with outline)
Existence
Existence
-
Existence Existence -
(white)
Non-existence Existence -
(with outline)
Non-existence Existence -
Existence Existence Upper
(white)
Non-existence Existence Upper
(with outline)
Non-existence Existence Upper
Existence Existence Lower
(white)
Non-existence Existence Lower
(with outline)
Non-existence Existence Lower
Template
Existence
Non-existence
-

JaNets Instruction Manual 7. Program Editor
7-12
RX-7 Series bad mark information
When you press the <RX-7 series Option> button, the screen like one shown below appears.
Figure 7.4-8 RX-7 series bad mark information screen
The “RX-7 Series bad mark information” screen allows you to make settings for recognizing a bad
mark with the RX-7 series.
Table 7.4-5 Setting items to RX-7 series bad mark information
Item
Contents
Mark
Bad mark type ID
Set an ID of a bad mark type to be used.
Coordinates of bad
mark XY
Set coordinates for recognizing a bad mark.
The input range is-999.99 to999.99.
Window size
XY
Set the size of the window for recognizing a bad mark.
The input range is0.00 to999.99.
window offset
dX,dY
Set offset viewed from the coordinates for recognizing a bad mark.
The input range is-999.99 to999.99.
Mark type
Bad mark type ID
ID of a mark type
Recognizing
Set the bad mark recognition method, either “Illumination” or “Shape.”
When you click this item with the right button, the pop-up menu is displayed
on the screen.
Recognized color
Set the brightness of a bad mark.
You can set this item only when you select “Illumination” for the menu item
“Recognizing.”
□: The mark is bright as compared with the board.
■
: The mark is dark as compared with the board.
Lighting level
Set the light turning on method.
When you double-click this item, the screen for setting the light turning on
method opens.
Mark Shape
Set the mark shape.
You can set this item only when you select “Shape” for the menu item
“Recognizing.”
When you double-click this item, the screen for setting the light turning on
method opens.
Direction of mark
shape
Set the mark direction.
You can set the mark direction only when you select a shape having orien-
tations for the menu item “Mark Shape.”
Width/outer diameter
Set the mark width.
The When mark shape of ○、● ◎ Enter the outer diameter of the circle.
The input range is0.00 to999.99.