4OM-1603-007_w.pdf - 第111页
4OM-1603 1-56 4. Maintenance Method : Chap.1 1202-002 4.3 Nozzle Filter Removal Procedure Push out the nozzle lter using the lter removal jig as shown in the following gure. Filter Removing Jig Vacuum Nozzle Push Push…
4OM-1603
1-55
4. Maintenance Method : Chap.1
4.2 Method of detaching vacuum nozzle
•
Store the nozzle in the nozzle stocker (housing) through window
navigations and take out the nozzle stocker (housing).
Notice
(a) Do not take out a nozzle from the head by hand. Otherwise, the
nozzle does not conform to the nozzle data.
(b) When the ultrasonic cleaning operation is to be performed
underwater,removethenozzlelter.
Do not use anything other than water for the cleaning.
(c) Demagnetize the vacuum nozzle after the detachment.
Keeptheheadsectionfreeofanymagneticeld.
As an example,
•
Do not bring a magnet close to the head section.
•
Do not bring any demagnetizer to the head section.
Demagnetize the vacuum nozzle each unit.
Reference
Refer to "5. Nozzle Change Window" in "Chapter 6 (Vol. 2)" for the
procedure of nozzle storage.
1202-003
4OM-1603
1-56
4. Maintenance Method : Chap.1
1202-002
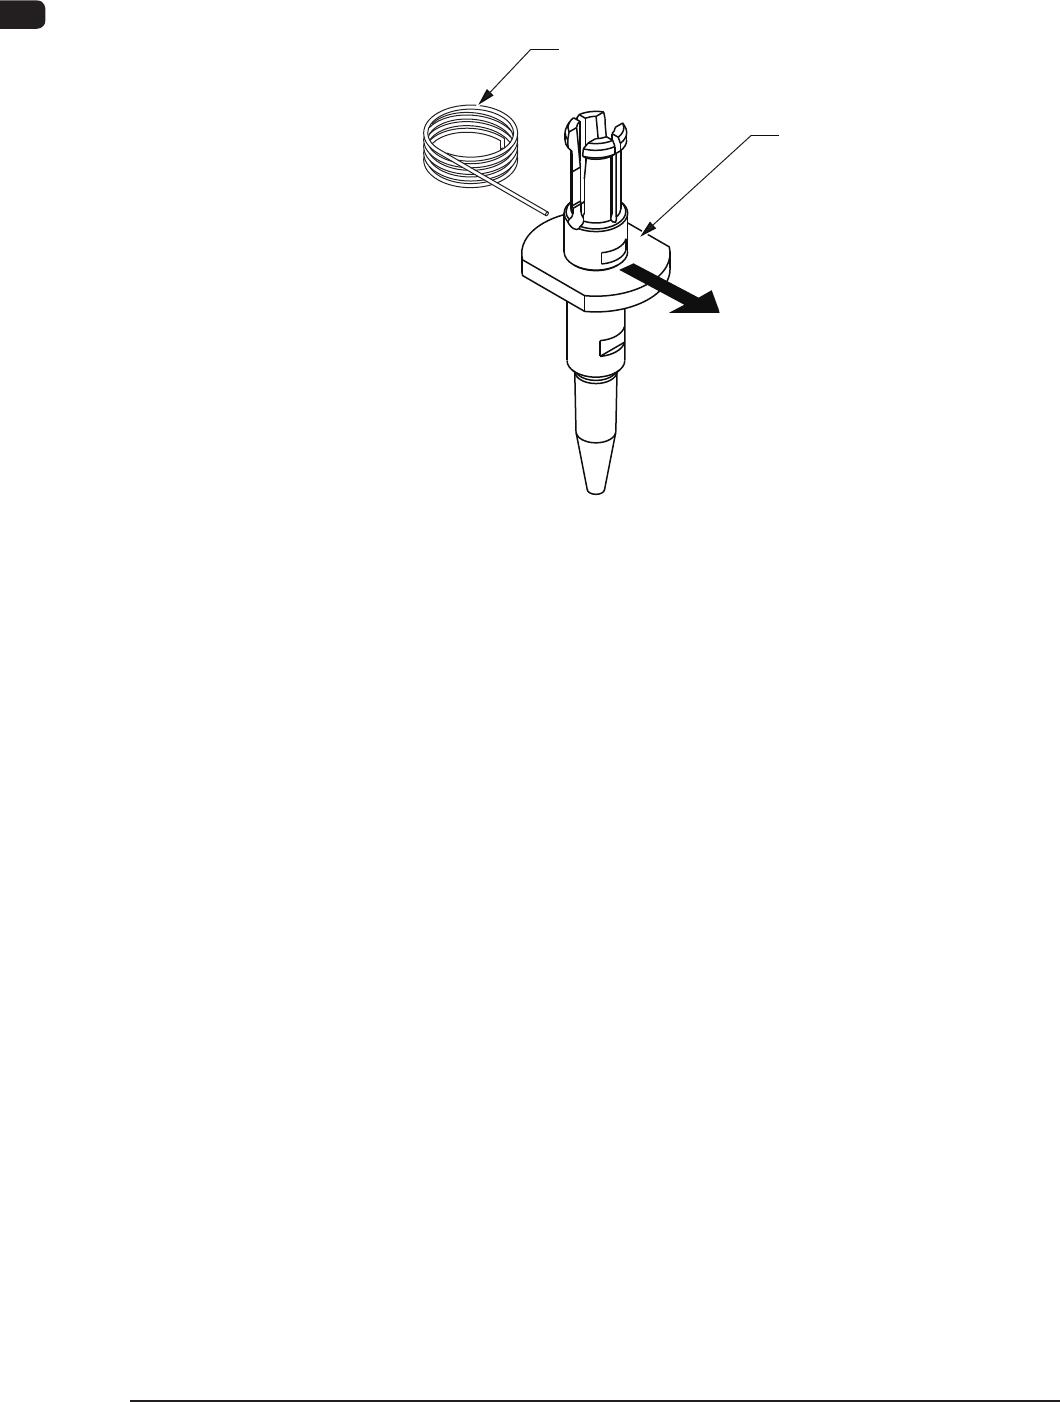
4.3 Nozzle Filter Removal Procedure
Push out the nozzle lter using the lter removal jig as shown in the following
gure.
Filter Removing Jig
Vacuum Nozzle
Push
Pushing out the nozzle filter.
F4A39-3

4OM-1603
1-57
4. Maintenance Method : Chap.1
4.4 Method of Blow air
•
Remove dust and dirt etc.
Remove slight dust and dirt by blow air or wiping off.
Clean the tapered area of the vacuum nozzle with a lens cleaning cloth.
Notice
Use clean, dry, and non-lubricated air for blow air.
F4A39-14
NOTICE
Blow air to the head when blow air to the nozzle.
There is a possibility that the clamp jaw breaks when
the air blow is done from the direction of the clamp
jaw to the nozzle.
1202-001