4OM-1603-007_w.pdf - 第73页
4OM-1603 1-18 3. Maintenance Spots : Chap.1 0908-002 3.2 Inspection, Cleaning, and Lubrication Spots The following describes about the maintenance tasks required for each individual units. Reference Refer to "2. Mai…
4OM-1603
1-17
3. Maintenance Spots : Chap.1
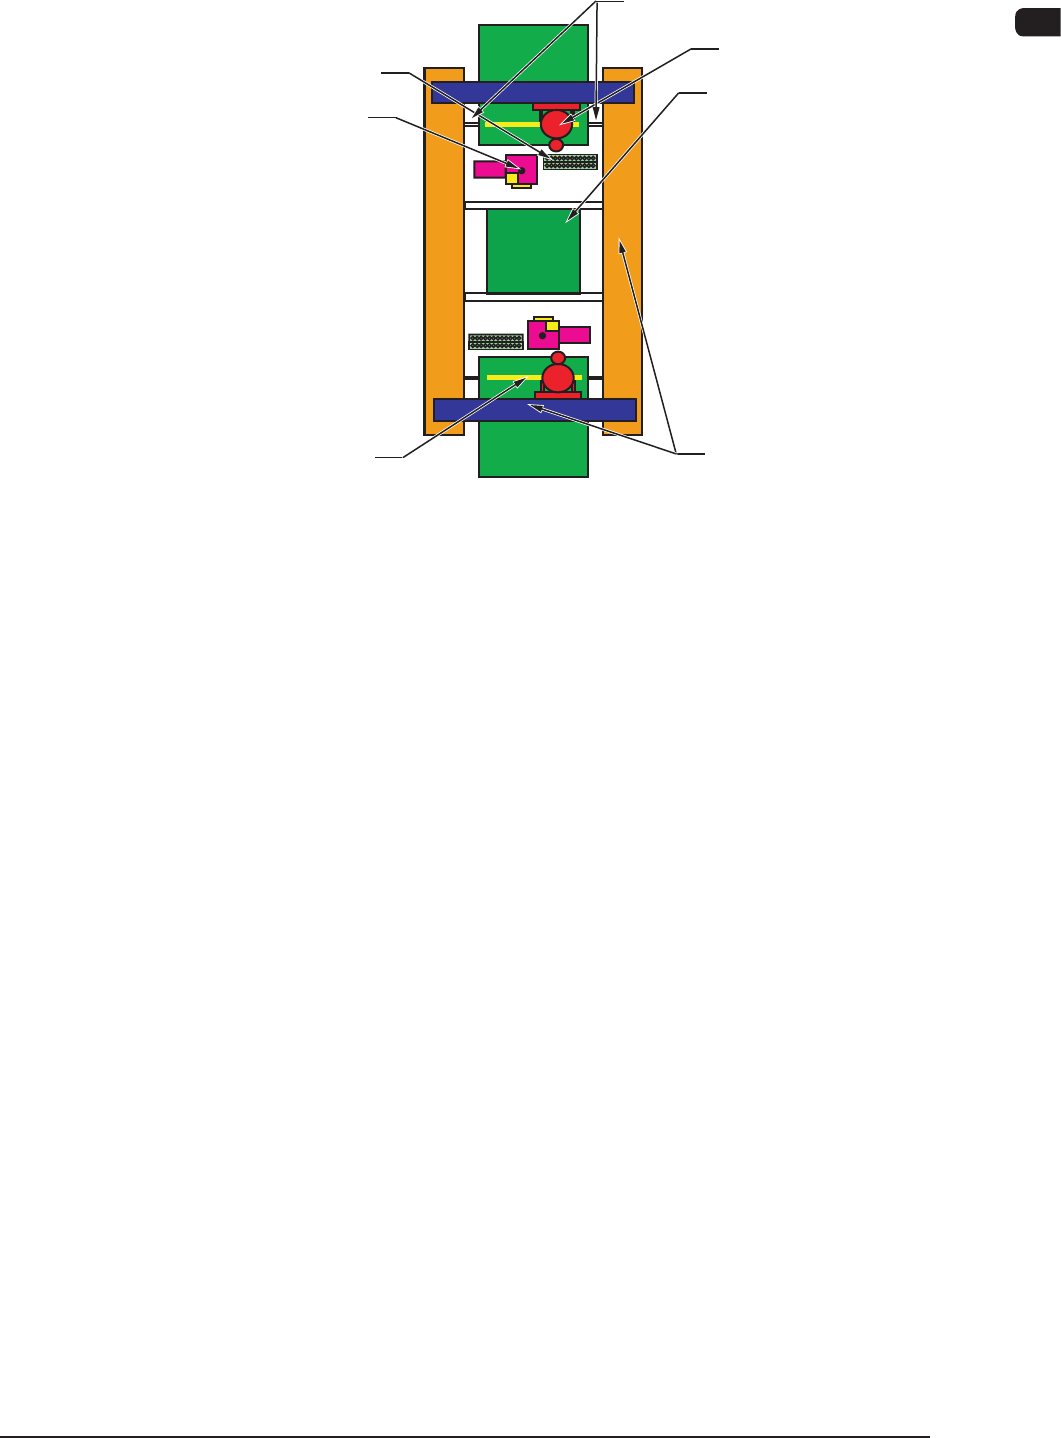
(Front Side of Machine)
(Rear Side of Machine)
Nozzle Stocker Section
PCB Positioning Section
Head Section
XY Beam Section
Component Recognition
Camera Section
Cutter Section
Feeder Base Driving Section
F4A7
0908-002
4OM-1603
1-18
3. Maintenance Spots : Chap.1
0908-002
3.2 Inspection, Cleaning, and Lubrication Spots
The following describes about the maintenance tasks required for each individual
units.
Reference
Refer to "2. Maintenance Check List" in "Chapter 1" for the maintenance items
classied based on frequency.
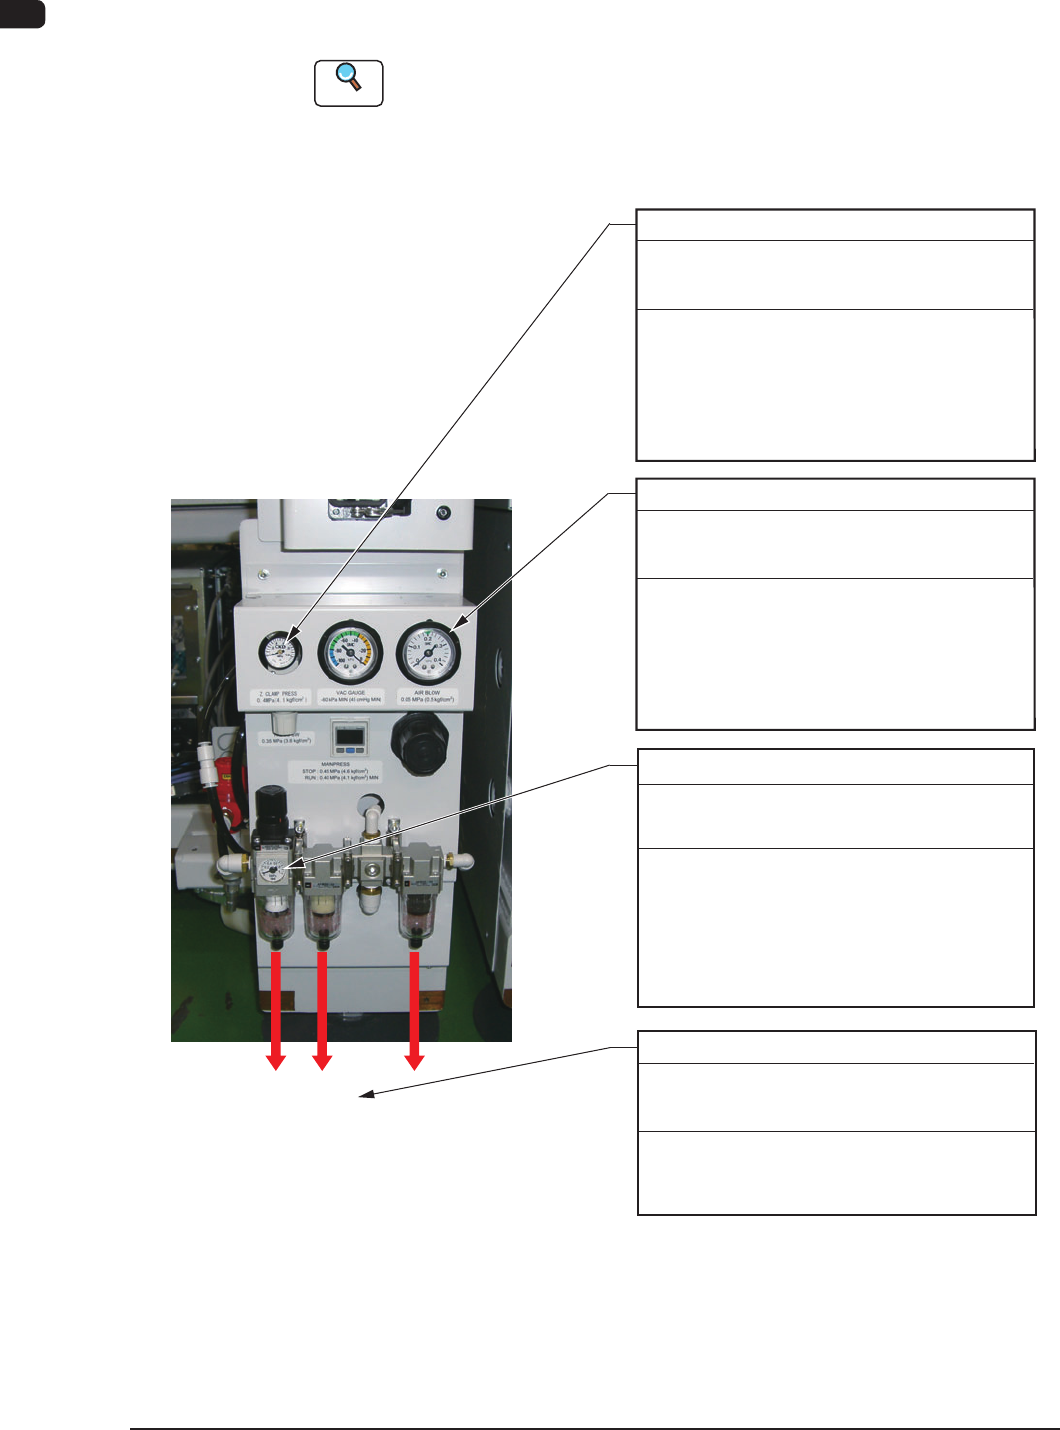
3.2.1 Air Source
Main Air Pressure
2
)
Every Day Inspection
Required Time: 1 minute
Set Air Pressure 0.45 MPa (4.6 kgf/cm
Check to see that the air pressure is
"Min. 0.4 MPa (4.1 kgf/cm
2
)" while the
machine is running.
If not, adjust the air pressure.
Air Blowing Pressure
Every Day Inspection
Required Time: 1 minute
Check to see that the pressure gauge reads
the initial setting (0.05 MPa (0.5 kgf/cm
2
)).
Do not change the pressure unless
necessary. The pressure is factory-adjusted
upon shipment of the machine.
Z Clamp Pressure
Every Day Inspection
Required Time: 1 minute
Check to see that the pressure gauge reads
the initial setting (0.4 MPa (4.1 kgf/cm
2
)).
Do not change the pressure unless
necessary. The pressure is factory-adjusted
upon shipment of the machine.
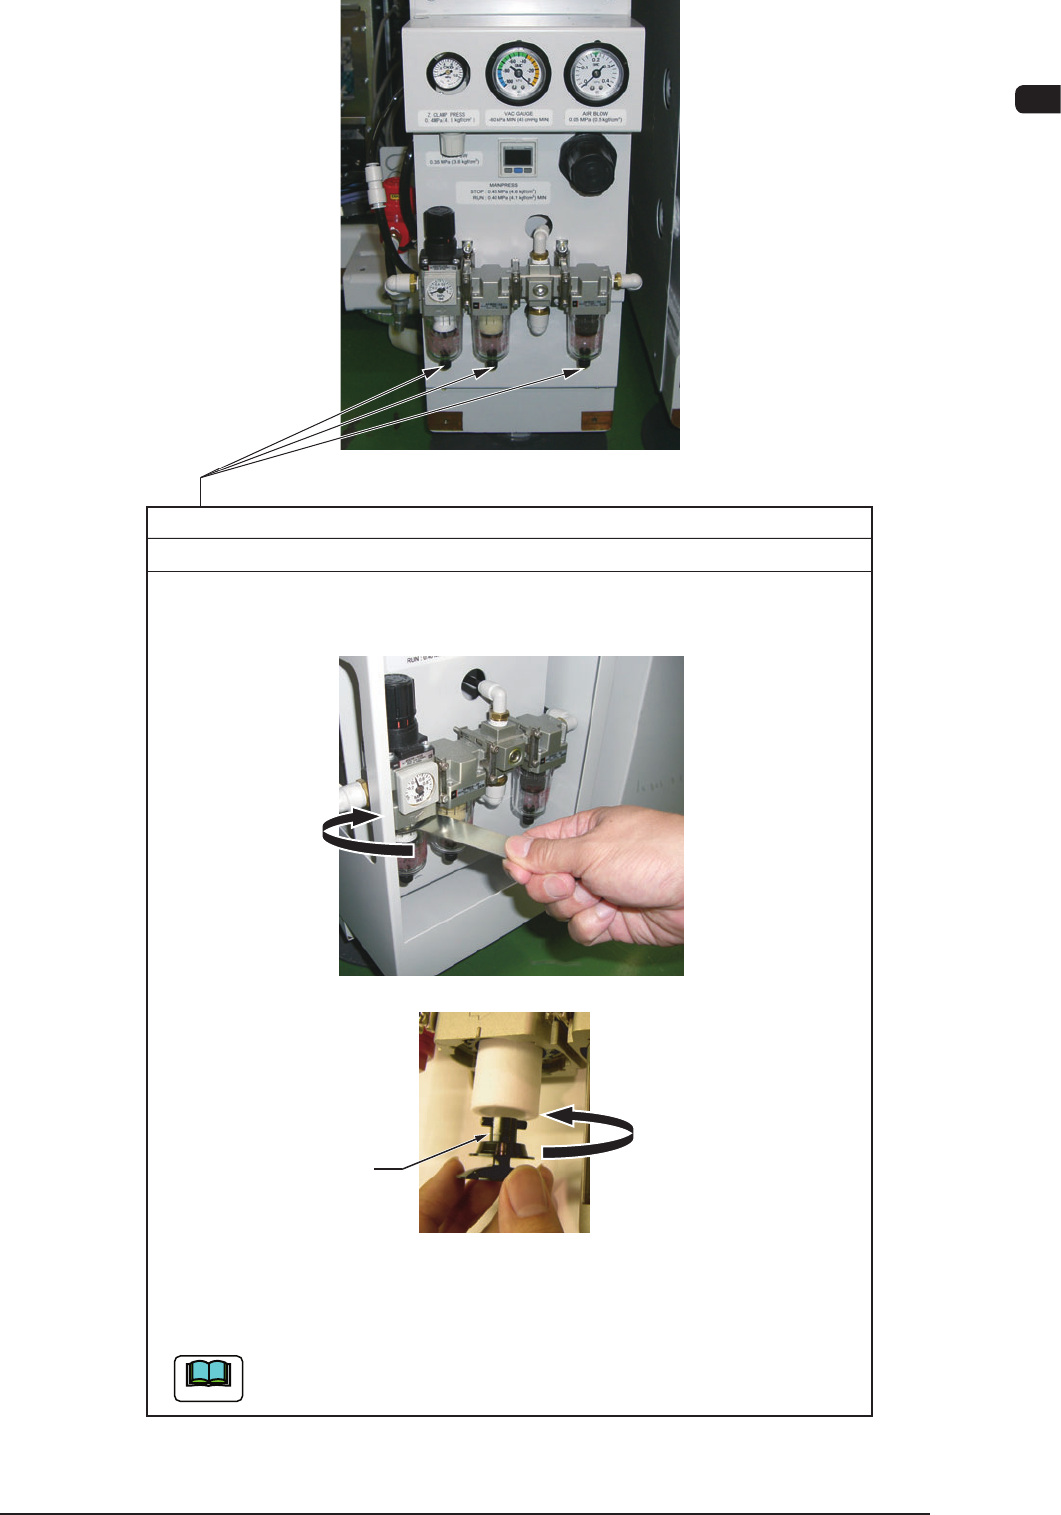
Drain
Drain
Every Week Cleaning
Required Time: 5 minutes
Prepare a container and pull down the
black cap each on the filter case lower
section to drain.
F4A8
4OM-1603
1-19
3. Maintenance Spots : Chap.1
1012-004
Filter
Every 3 Months Cleaning
(1) Detach the air filter.
Turn the cover unit in the direction shown in the figure, using the air-filter case
removing jig to remove the cover.
(2) While rotating the filter holder counterclockwise, pull it out.
(3) Pull out the filter and blow air to it for cleaning.
(4) Insert the filter back in place and turn the filter holder clockwise to attach.
(5) Attach the filter cover.
When the filter has become defective, replace it with a new one.
Filter Holder
Note
Required Time: 5 minutes
F4A9