2OM-1064-002.pdf - 第130页
4.6 PLACEMENT DA T A (P) Display (1) Press the [PLACEMENT DA T A U01] key at the “P A TTERN PROGRAM EDIT” display . The following display appears on the screen. Pressing the [SCREENS] key at this display opens another “P…
4. PATTERN PROGRAM Display
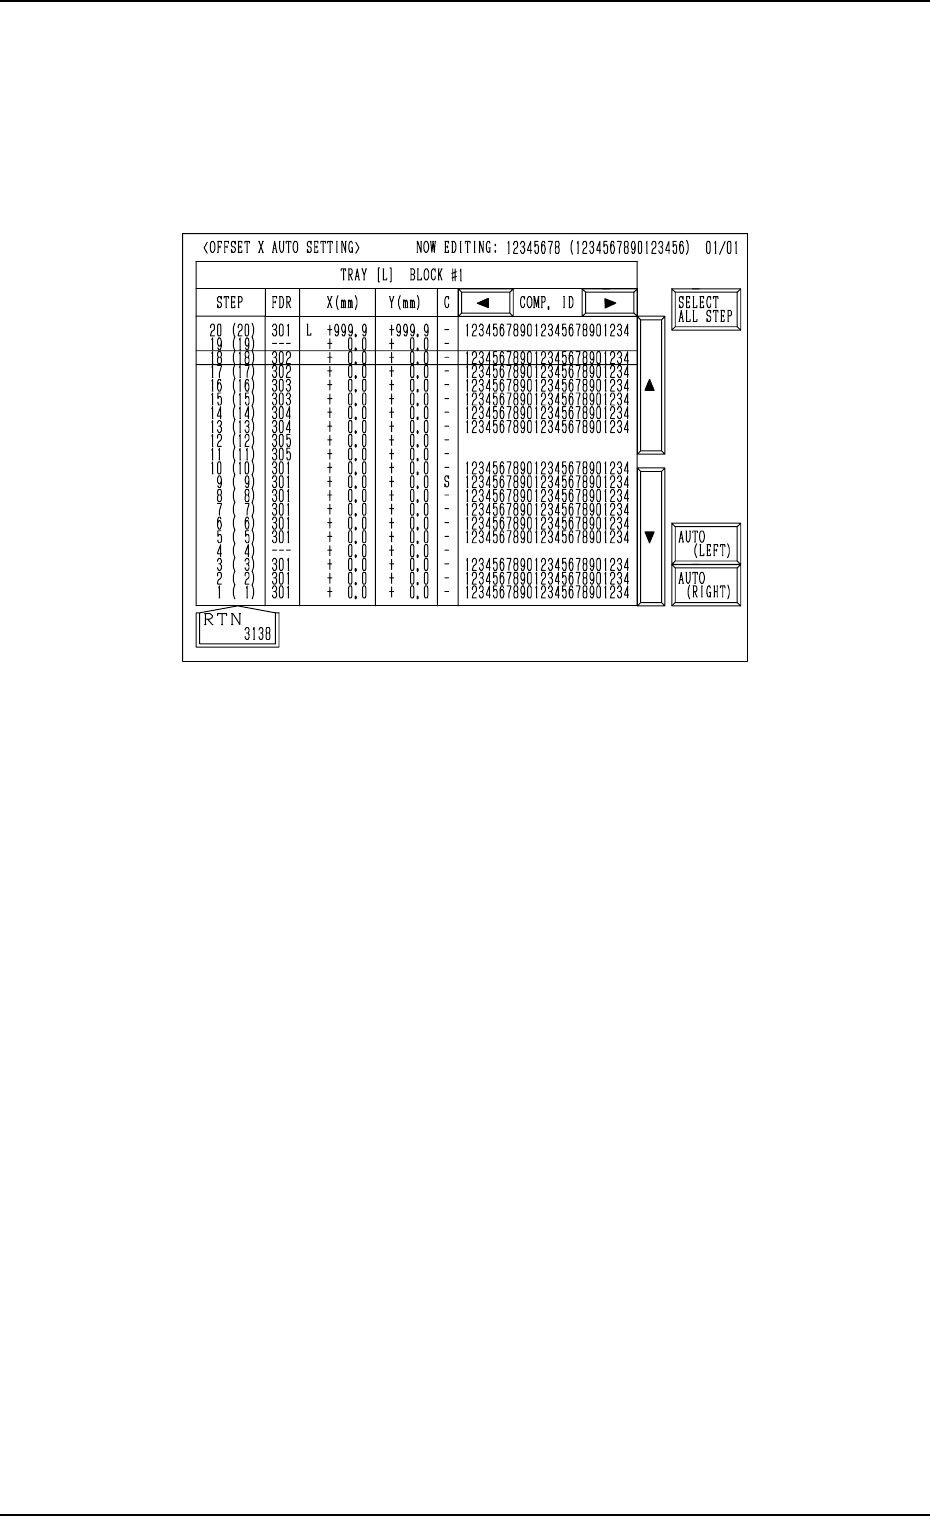
4.5.5 OFFSET X AUTO SETTING Display (Option)
Press the [OFFSET X AUTO SET] key at the “TRAY (L) STEPS INFORMA-
TION” display (Fig. 2.107). The following display appears on the screen.
When the [OFFSET X AUTO SET] key is pressed at the “TRAY (R) STEPS
INFORMATION” display, the “OFFSET X AUTO SETTING” display for Tray
R appears on the screen.
0004-002 2-117 Tg0247-PM-PM
Fig. 2.110
Operation Procedure
• Batch Setting
(1) Press the [SELECT ALL STEP] key.
All steps are selected and the background color turns blue.
(To cancel the selection of all steps, press the [SELECT ALL STEP]
key again.)
(2) Press the [AUTO (LEFT)] or the [AUTO (RIGHT)] key.
All X offset parameters are set at a time.
• Individual Selection
(1) Move the line cursor to the step No. for parameters to be set.
(2) Press the [AUTO (LEFT)] or the [AUTO (RIGHT)] key.
(3) X offset parameters are set for the step No. where the line cursor was
located.
After the above operation, “L” or “R” appears before the X offset parameter.
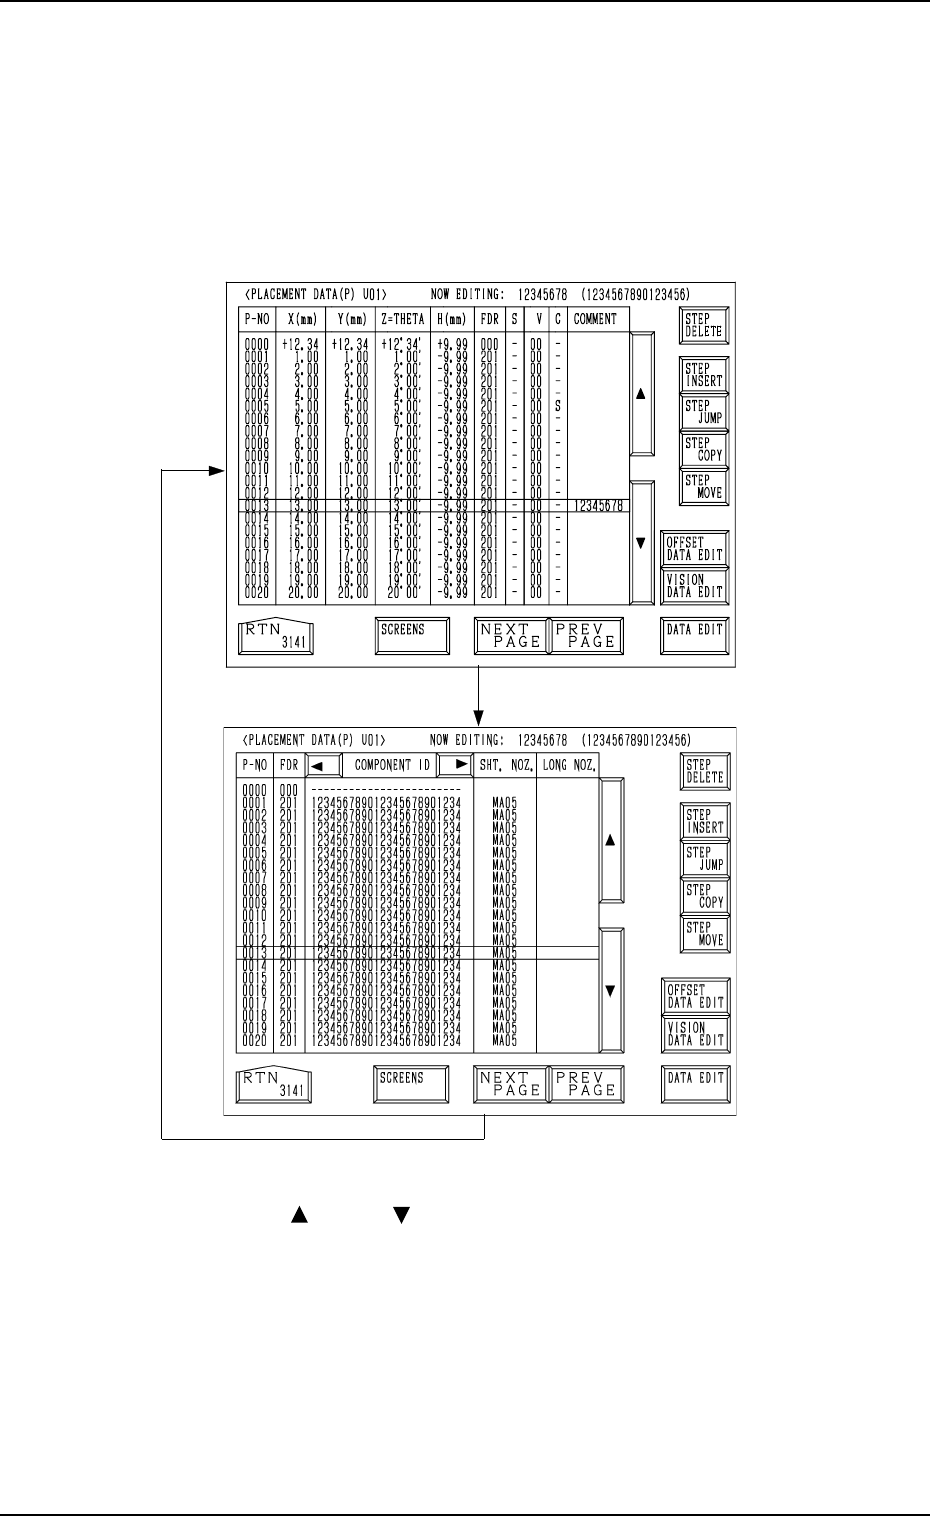
4.6 PLACEMENT DATA (P) Display
(1) Press the [PLACEMENT DATA U01] key at the “PATTERN PROGRAM
EDIT” display. The following display appears on the screen.
Pressing the [SCREENS] key at this display opens another “PLACEMENT
DATA (P) U01” display.
The “PLACEMENT DATA (P) U02” and the subsequent displays
look almost the same.
Fig. 2.111-1
Fig. 2.111-2
[SCREENS] Key
[SCREENS] Key
4. PATTERN PROGRAM Display
0004-002 2-118 Tg0247-PM-PM
(2) Move the line cursor to the step No. of the data to be edited.
(Use the [ ] or the [ ] key. )
(3) Press the key required for editing.
[OFFSET DATA EDIT] Key
[VISION DATA EDIT] Key
[DATA EDIT] Key
(4) Open the display required for your editing.
Ref.: Similar procedures can be followed for data editing at the “PLACE-
MENT DATA (O) U01” and “PLACEMENT DATA (V) U01” dis-
plays.
*1
0004-002 2-119 Tg0247-PM-PM
4.6.1 Special Operation (Step Delete) for Placement Data
(1) Move the line cursor to the step No. of the data to be deleted.
(2) Press the [STEP DELETE] key.
The data of the step No. at the line cursor is deleted.
The line at the line cursor position is deleted and the subsequent lines
scroll up.
4.6.2 Special Operation (Step Insert) for Placement Data
(1) Move the line cursor to the step No. of the data to be inserted.
(2) Press the [STEP INSERT] key.
A new step line (placement data) is inserted below the step No. at the
cursor position.
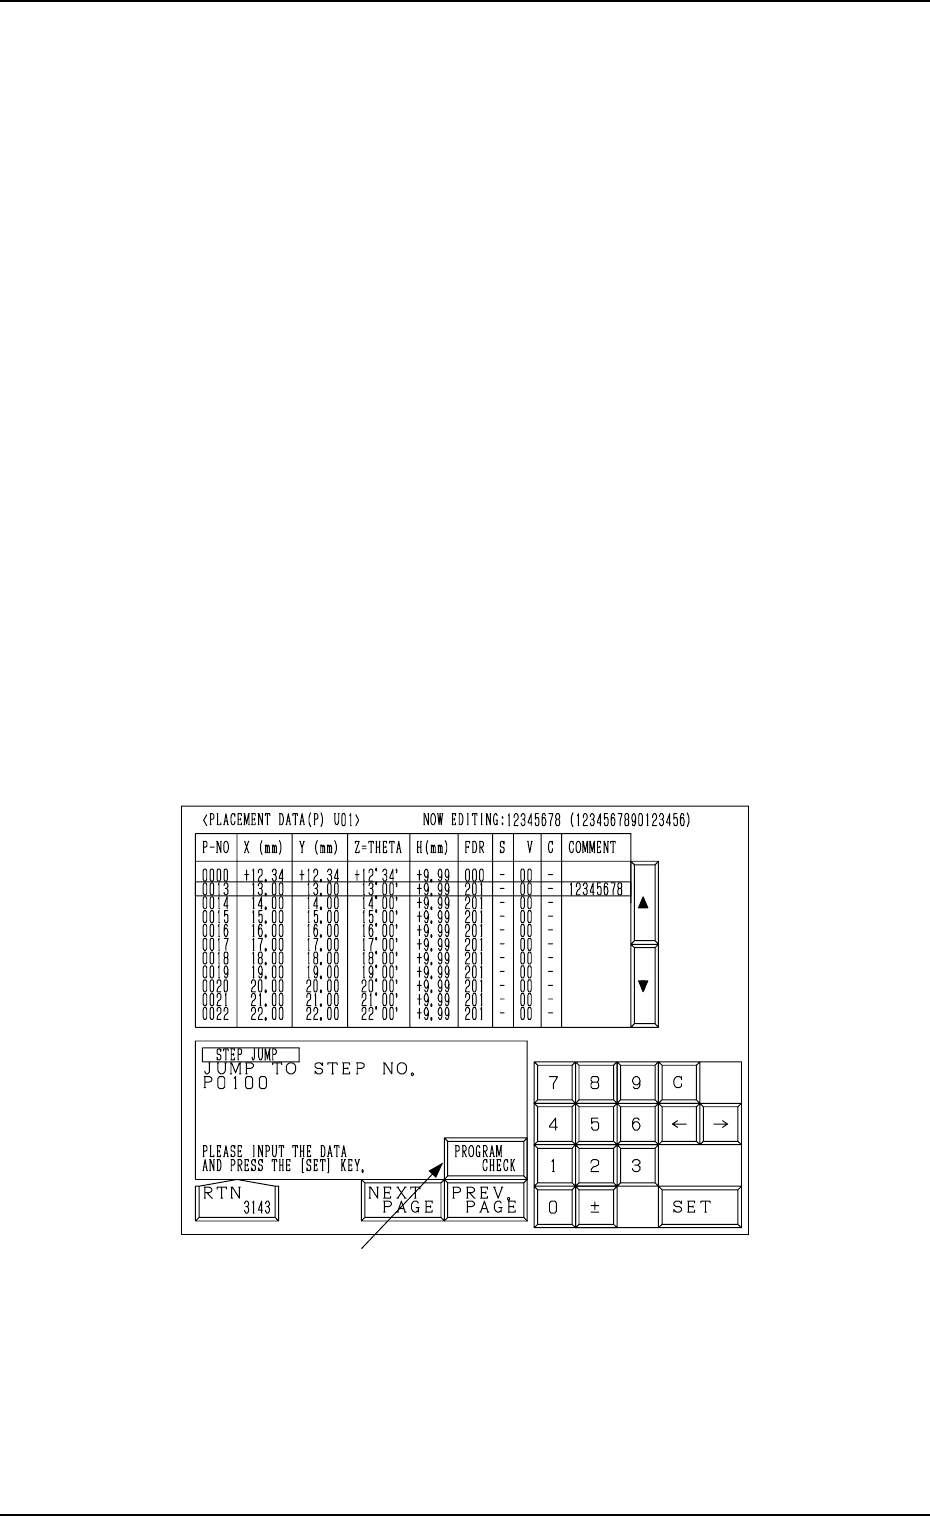
4.6.3 Special Operation (Step Jump) for Placement Data
(1) When the [STEP JUMP] key is pressed at the “PLACEMENT DATA (P)
U01” display (Fig. 2.111-1 or Fig. 2.111-2), the following display ap-
pears on the screen.
Pressing the [STEP JUMP] key at the “PLACEMENT DATA (O)
U01” or the “PLACEMENT DATA (V) U01” display follows the
similar hierarchical sequence.
4. PATTERN PROGRAM Display
Fig. 2.112-1
(2) Enter the step No. to jump to, using the ten-key pad and press the [SET]
key.