YSM20R_YSM20WR_Ope_E.pdf - 第100页
1-67 1 Unit names and functions 2 L oosen the ionizer mounting bolts. Loosen the mounting bolts on the right and left of the ionizer with a hex wrench ( 5). Loosening ionizer mounting bolt Ionizer mounting bolt 23135-KMK…
1-66
1
Unit names and functions
n
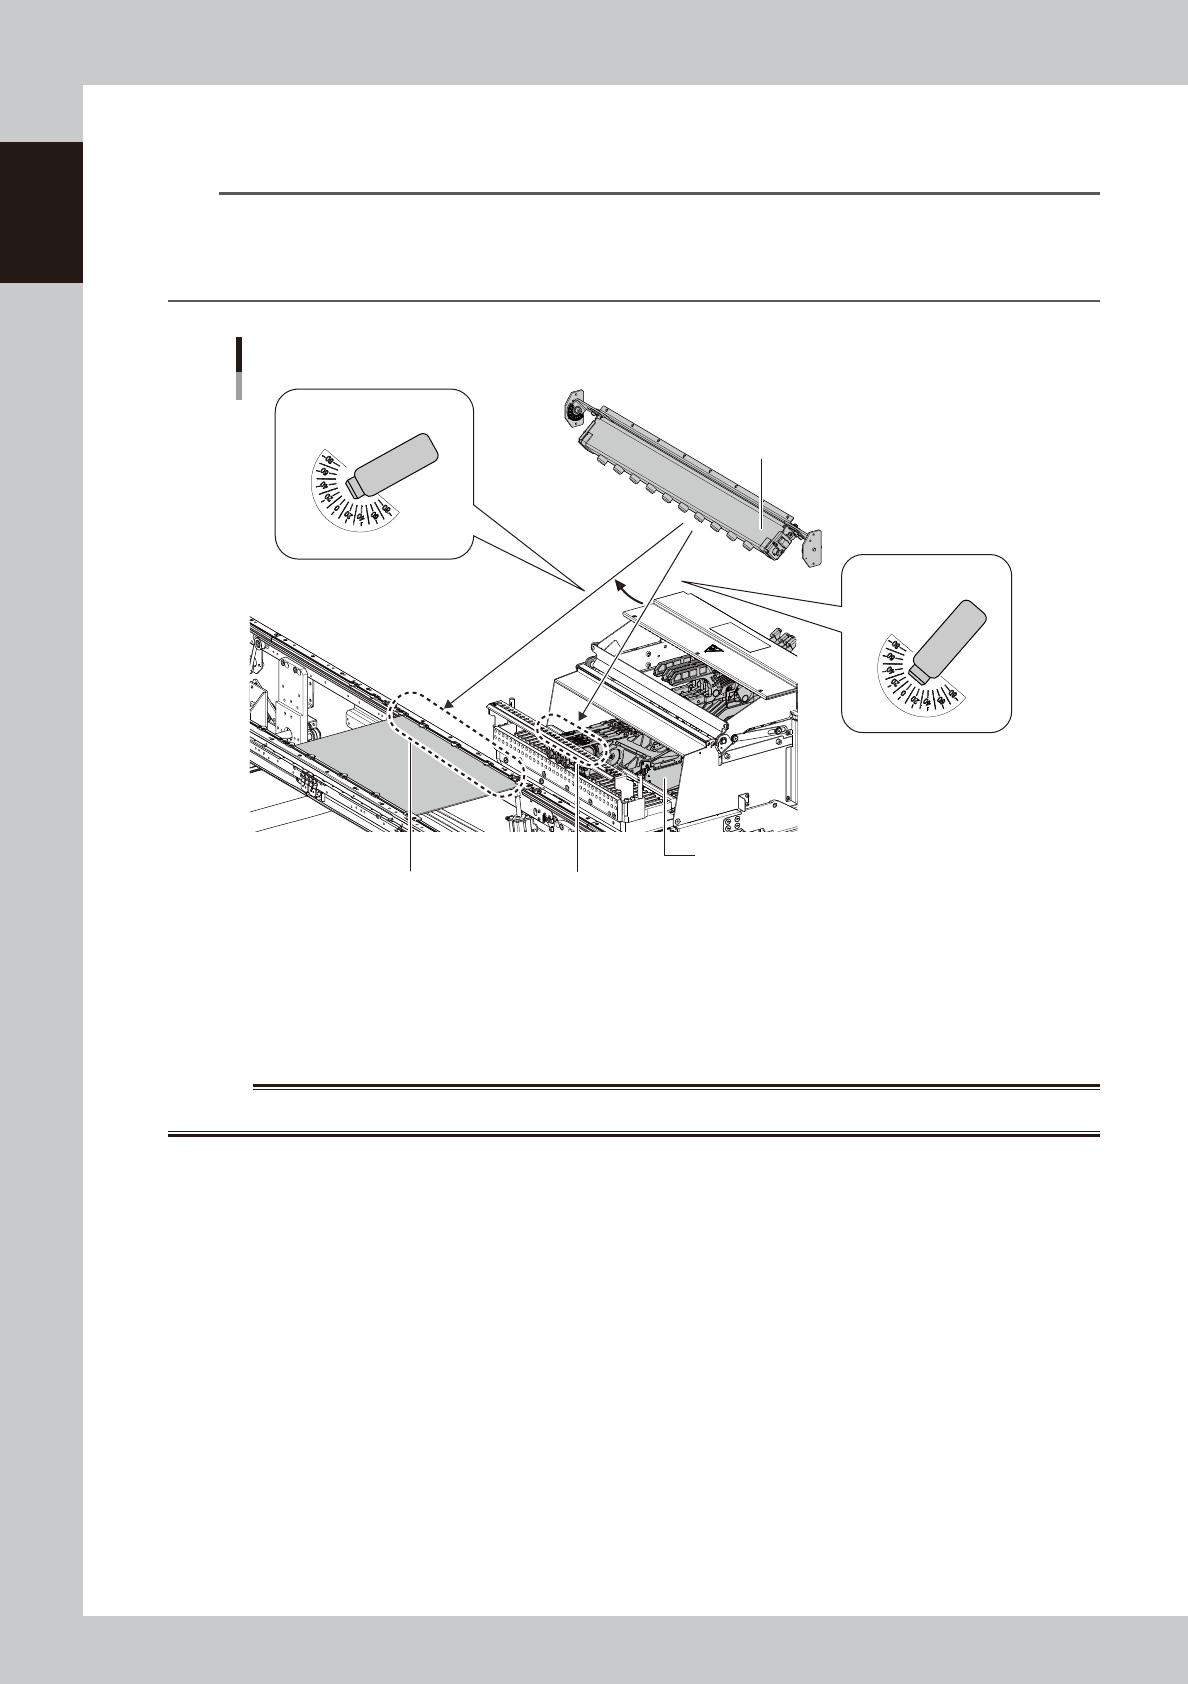
Procedure for changing ionizer installation angle
The ionizer installation angle can be changed with YSM20R.
TIP
Guideline for ionizer installation angle (in the case of the front ionizer)
0 degree : Near the feeder components pickup position
Upper 15 degrees : Near the conveyor frame on the side of operator at conveyor transfer position (for a machine
with the reference point on the operator side of the conveyor)
Ionizer installation angles
Ionizer
Tape feeder
15 degrees
Feeder component pick up positionConveyor frame (operator side)
Installation angle: 15 degrees
Installation angle: 0 degree
(when shipping)
23134-KMK-00
e
1
Power off the ionizer.
1. Press the emergency stop button and open the machine safety cover. This turns off the electrical
power supply to the ionizer.
2. Check that the green LED of “POWER” of the ionizer is off.
w
WARNING
DO NOT TOUCH THE IONIZER DISCHARGE METER.
1-67
1
Unit names and functions
2
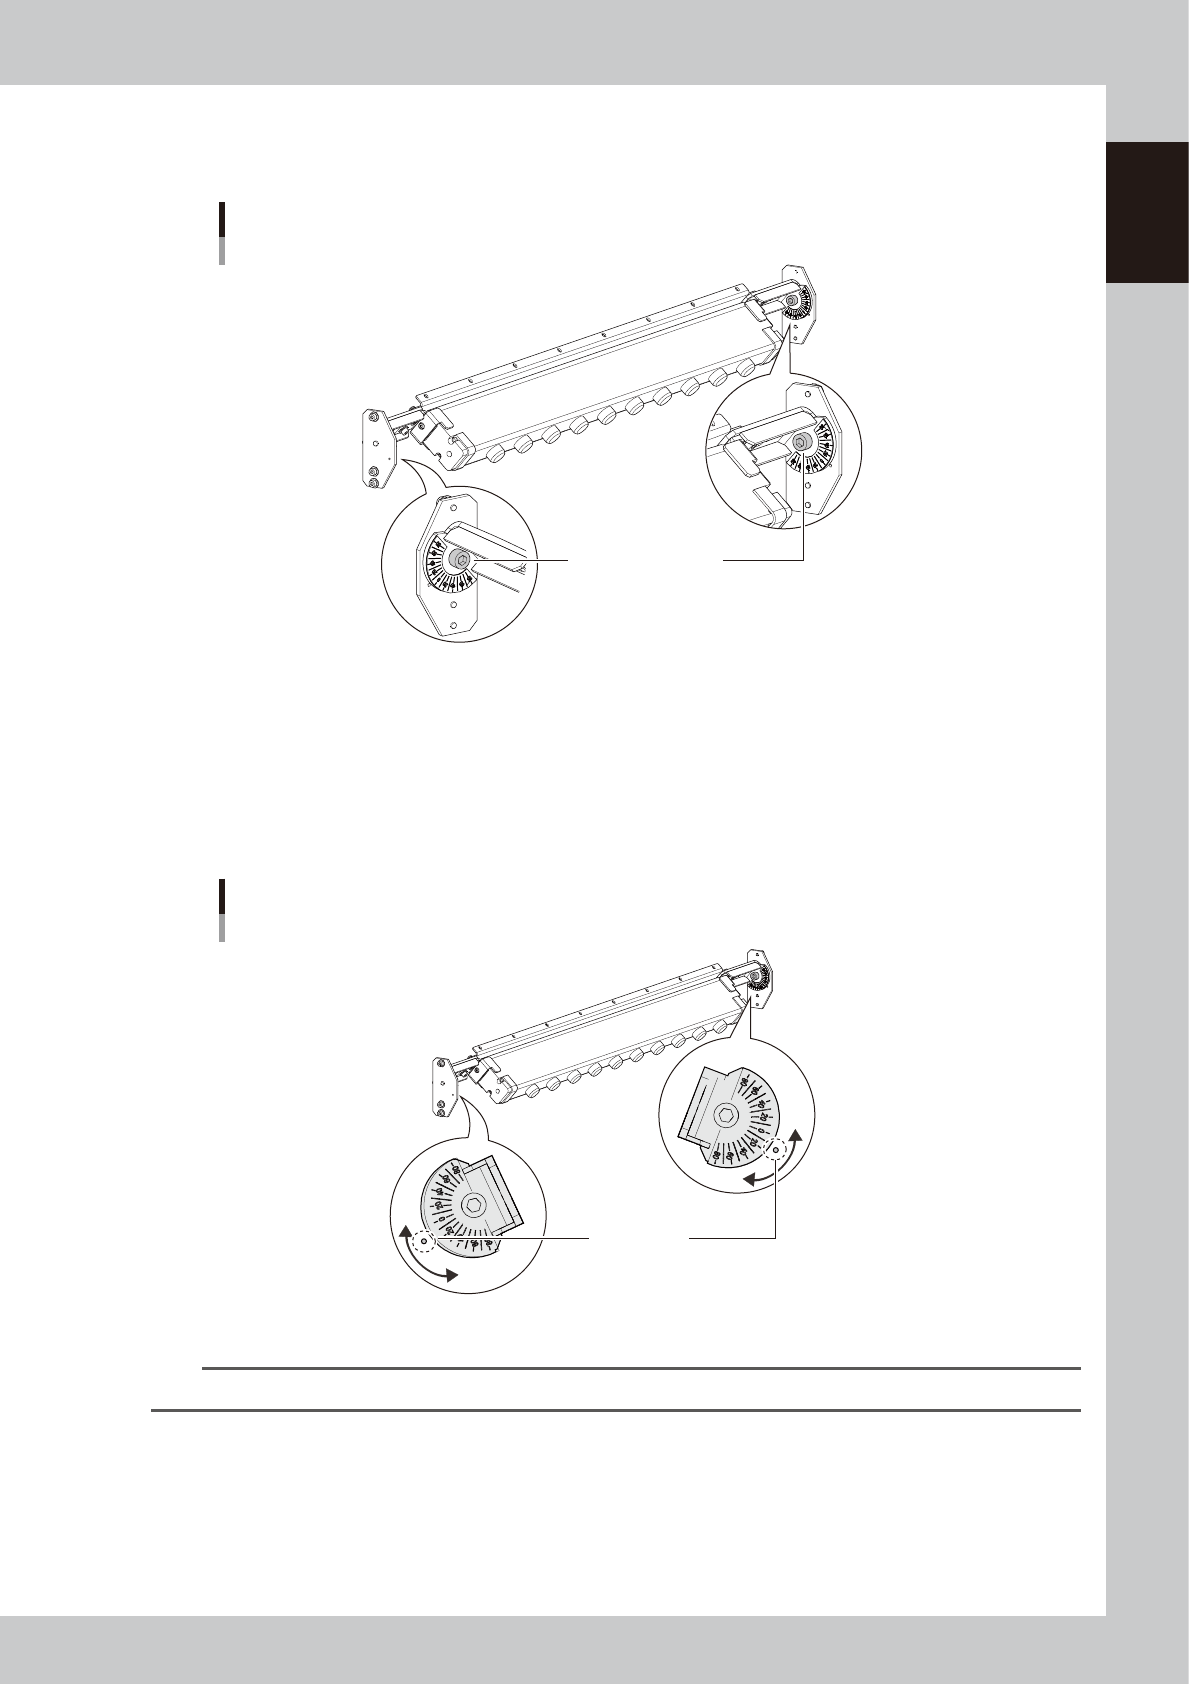
Loosen the ionizer mounting bolts.
Loosen the mounting bolts on the right and left of the ionizer with a hex wrench (5).
Loosening ionizer mounting bolt
Ionizer mounting bolt
23135-KMK-00
3
Adjust the ionizer installation angle.
1. Tilting the ionizer causes the right and left angle indicators to move simultaneously. Tilt the ionizer so
that the desired angle aligns with the target adjustment mark (o).
2. While holding the ionizer so as not to change the angle, tighten one of the two mounting bolts.
3. Check that the angles are the same on the right and left. Tighten the other mounting bolt.
Adjusting ionizer installation angle
Mark for angle
adjustment guideline
23136-KMK-00
n
NOTE
The ionizer installation angle can be changed between -8.5 and 15 degrees.
1-68
1
Unit names and functions
8.3 UPS (Uninterruptible Power Supply)
n
Purpose of UPS
1. Preventing data destruction
In the event of unexpected power shutdown such as power blackout, the user data including board data saved in the
machine may be damaged. A machine with a UPS (uninterruptible power supply), however, backs up the control power
supply to the control box and power supply to the monitor display at the time of power blackout. The machine can be
safely shut down without damaging the user data.
2. Resuming automatic operation without going through the restart procedure
A machine with a UPS can resume the automatic operation without going through the restart procedure in the event of a
power failure of short period of time such as momentarily power failure. If the UPS detects power shutdown, the UPS
continues to supply electrical power to the control box even if the machine gets into the state of emergency stop. Thus,
the machine resumes the automatic operation immediately after the power supply restores.
n
NOTE
The UPS can back up the power supply for a limited period of time. If the duration of power shutdown continues more
than 60 seconds, the machine automatically shuts itself down.
n
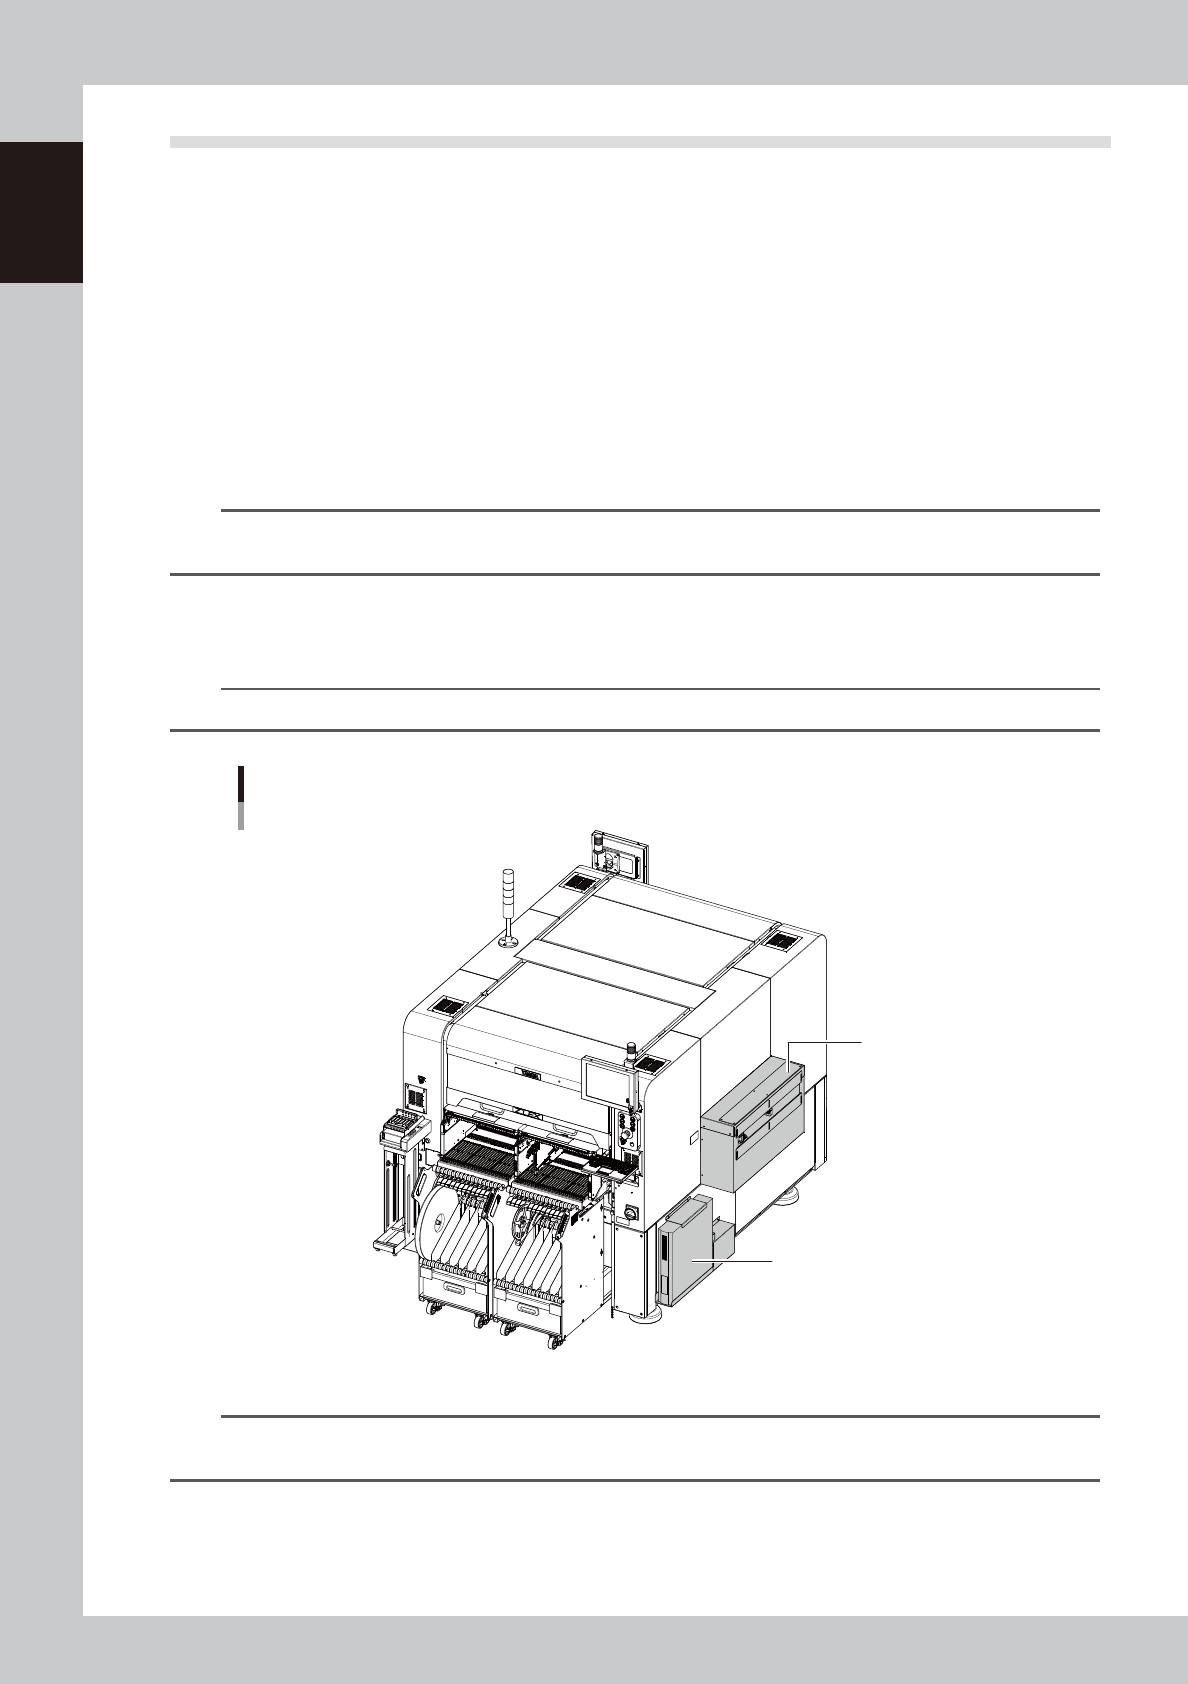
UPS installation location
The UPS is installed below the extension conveyor on the front right.
n
NOTE
UPS can be installed only on the machine that has an extension conveyor.
UPS
UPS
UPS installation position
Extension conveyor
23137-KMK-00
n
NOTE
For replacing the UPS battery, refer to the “YSM20R Maintenance Manual”. For more details about handling the UPS,
refer to the option manual “UPS (Uninterruptible power supply)” or the operation manual issued by the manufacturer.