YSM20R_YSM20WR_Ope_E.pdf - 第202页
3-14 3 Flow fr om starting up machine to production n Caution when arranging push-up pins for YSM20WR Dual-lane T he push-up pin for dual-lane is special shape that avoids the interference with the push-up unit. T herefo…
3-13
3
Flow from starting up machine to production
OK
OK
NG
OK
OK
NG
NG
OK
76mm
NG
NG
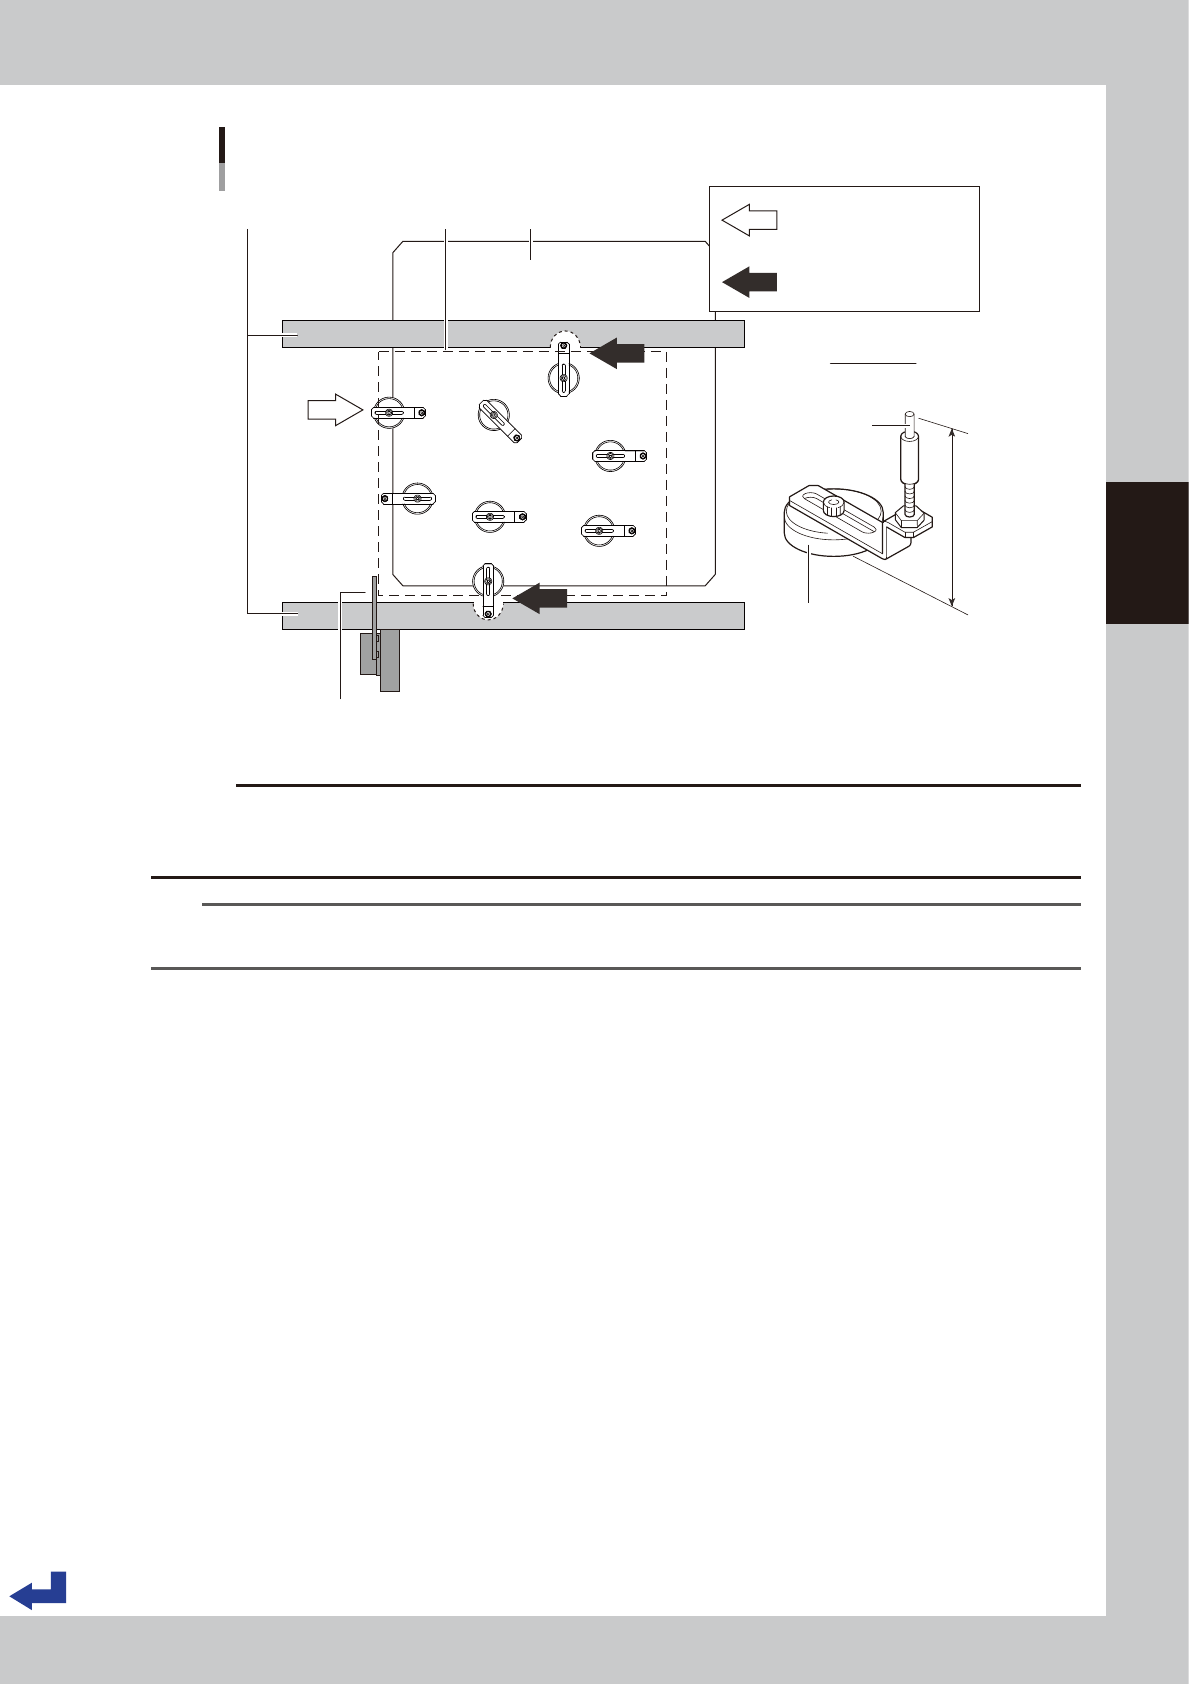
Layout of the push-up pins
Viewed from above
Push-up pin
Mounting board
Support pin
Magnet stand
Main stopper
Conveyor frame Push-up plate
(Fail) The magnet stand
comes out the push-up plate.
(Fail) A push-up pin is under
the conveyor frame.
23304-KMK-00
c
CAUTION
Lay out the push-up pins in a manner that when the push-up plate lifts, it does not come into collision with the
conveyor rail or other parts. Do not change the distance between the bottom face of the magnet stand and the tip of
the pin that is adjusted to 76 mm.
TIP
It may be convenient to mark the positions of the push-up pins on the push-up plate with stickers and an oil-based
marker pen and the like for each board type.
3-14
3
Flow from starting up machine to production
n
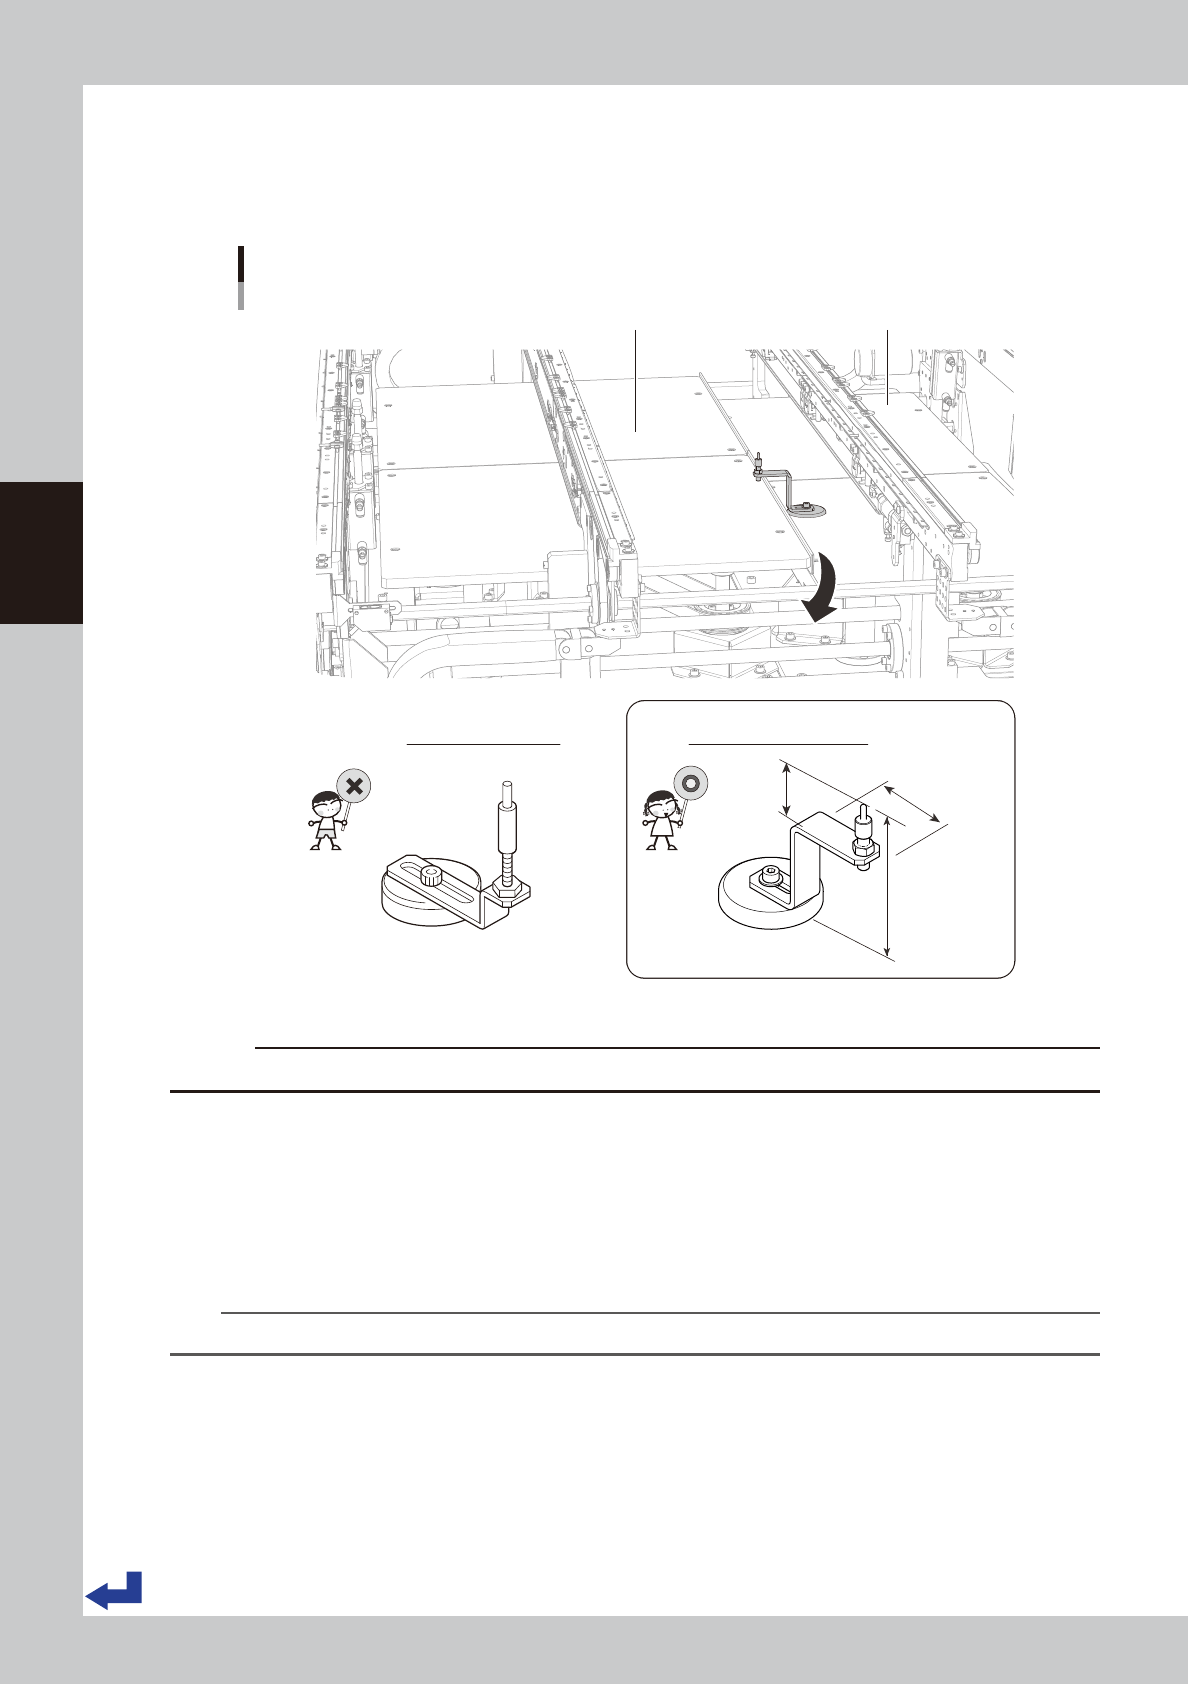
Caution when arranging push-up pins for YSM20WR Dual-lane
The push-up pin for dual-lane is special shape that avoids the interference with the push-up unit.
Therefore, care must be taken when transferring a board with components whose height is 20 mm or more from
board as push-up pins may interfere with components.
Lane2
Push-up pin
Arranging on Dual-lane
Lane1
Push-up pin for dual-lane
23.7 mm
41 mm
76 mm
Standard push-up pin
23307-KMK-00
c
CAUTION
Do not use standard push-up pins for other machines (YS series, YSM20R, etc.) on dual-lane type machines.
5
Release the emergency stop.
1. If the carriage type machine, attach the carriage.
2. Close the safety cover, and release [EMERGENCY STOP] button.
6
Reset the machine.
Press [RESET] button to reset the machine.
n
NOTE
Pressing [RESET] button makes the push-up stage move down and the conveyor move to the transfer position.
3-15
3
Flow from starting up machine to production
1.6.2 Adjusting board hold plate position
1
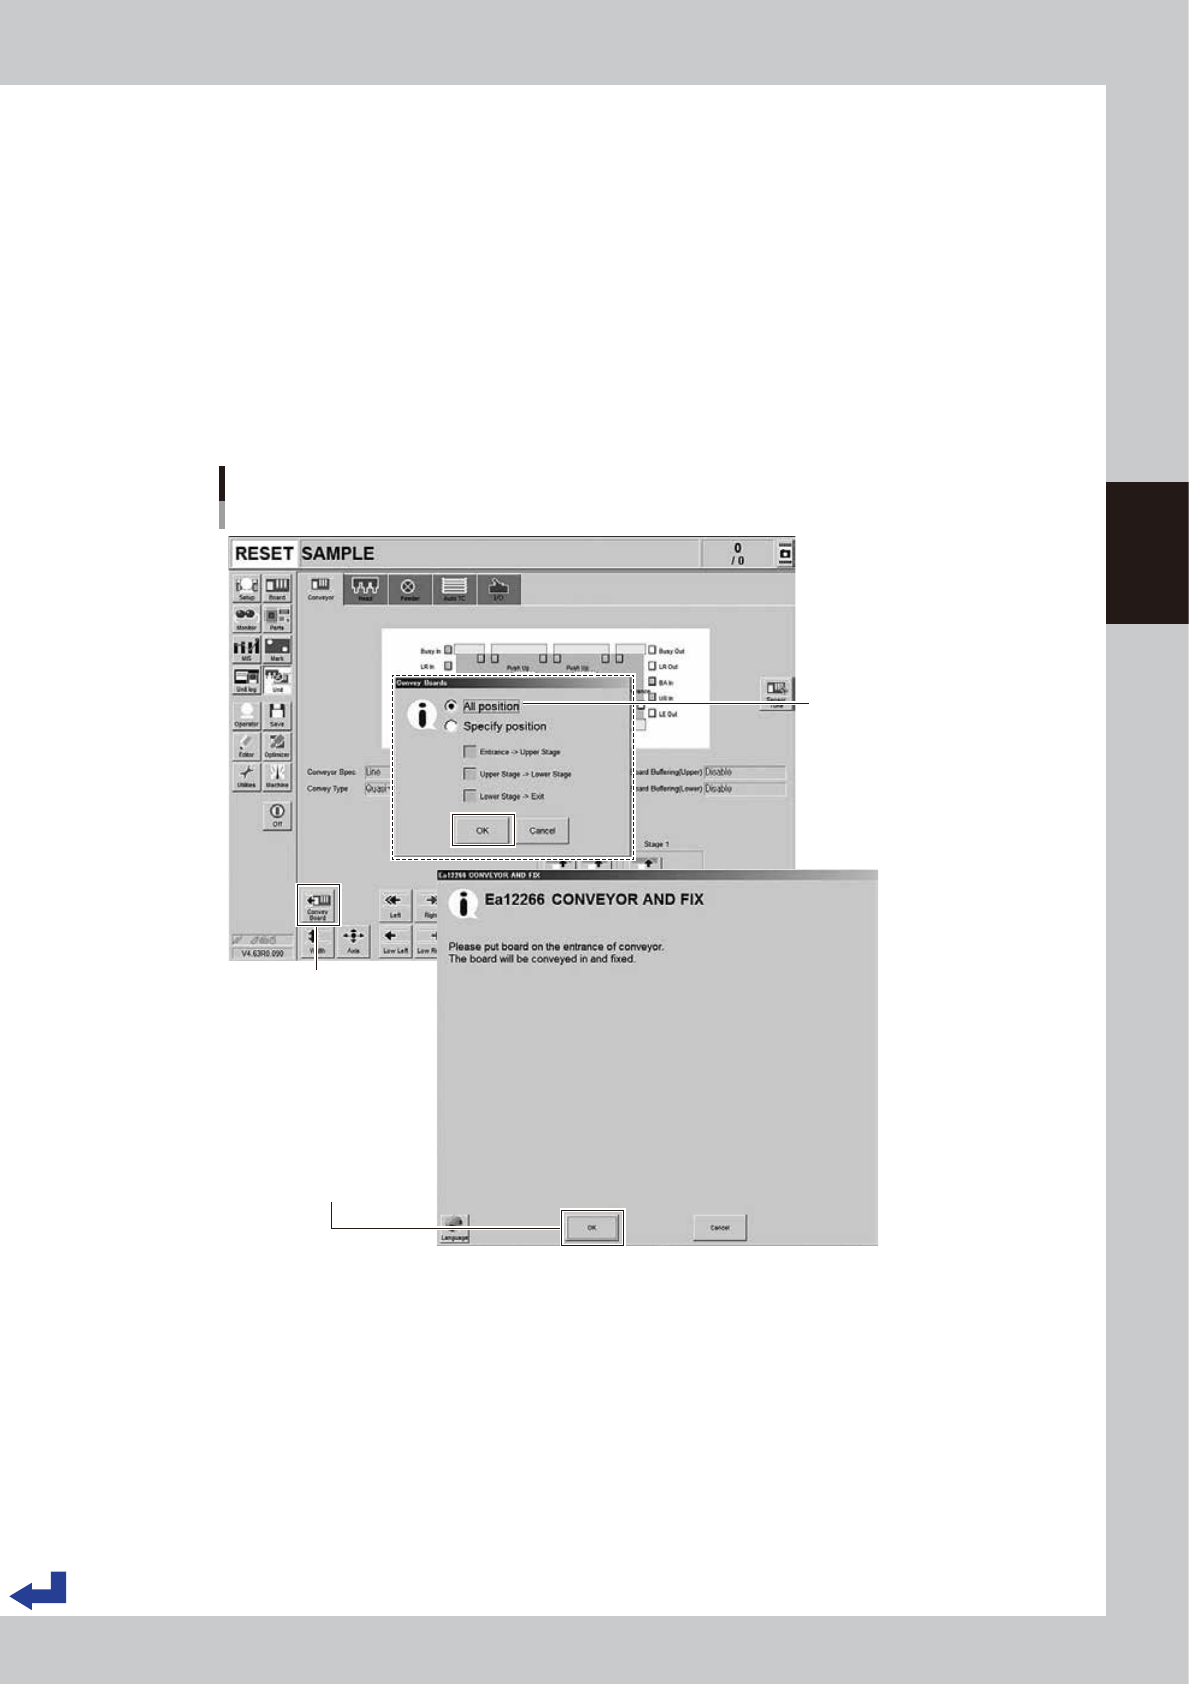
Enter the board.
1. (YSM20R Dual-stage type) Press the [Convey Board] button on [Unit] - [Conveyor] screen.
(YSM20R Single-lane / YSM20WR Dual-lane type) Press the [Convey In] button on [Unit] - [Conveyor]
screen.
2. (YSM20R Dual-stage type) The "Convey Board" check screen appears. Confirm that "All position" is
ticked, and then press the [OK] button.
3. The "CONVEY AND FIX" screen appears. Set the board on the conveyor entrance of the machine.
4. Pressing the [OK] button on the "CONVEY AND FIX" screen transfers the board and fixes it on the
mount position.
(YSM20R Dual-stage type) The board is fixed on the mount position of the upstream stage.
Conveying board
Dual stage : [Unit] - [Conveyor] screen
[Convey Board] button
Set the board and press
[OK] button
"All position" needs to be ticked
24311-KMK-00