YSM20R_YSM20WR_Ope_E.pdf - 第156页
2-53 2 Basic operation 4 L ock the clamping lever assembly . Release the unclamping lever . Check that the clamping lever assembly locks into the feeder plate. Set the feeder correctly. Otherwise, the feeder could come o…
2-52
2
Basic operation
n
If SS feeder is set on ZS feeder exchange carriage
1
Clean the feeder plate.
2
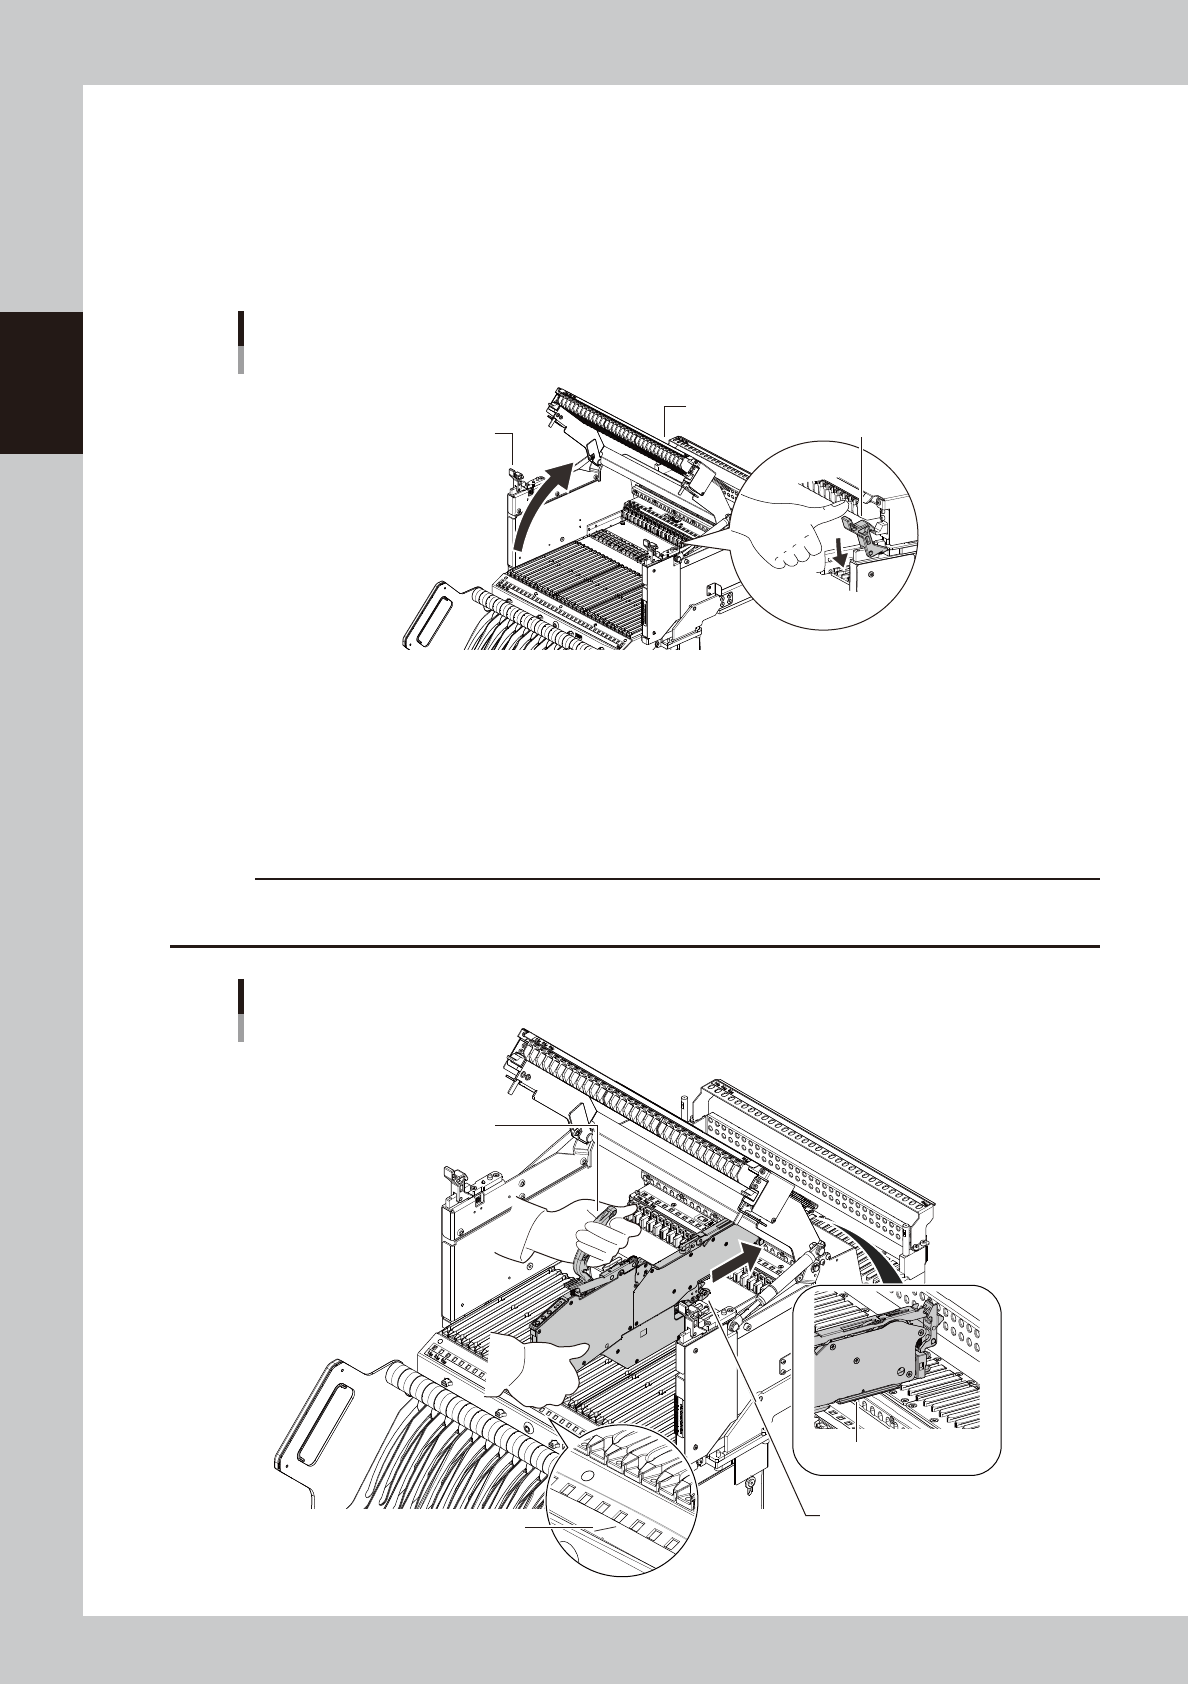
Open the guide rail cover.
1. Push the cover locks at left and right of the carriage to release them.
2. Lift up the guide rail cover to open it.
ZS Feeder exchange carriage
Open the guide rail cover
Guide rail cover
Cover lock
Cover lock
23216-KMK-00
3
Set SS feeder.
1. Hold the bottom of SS feeder and pull out the handle to backward.
2. Confirm the setting number
3. Place the feeder temporarily with its under rail aligned with the guide on the feeder plate side.
4. While keeping pulling the handle backward, slide the feeder on the feeder plate to surely insert the
feeder to the end.
c
CAUTION
• Do not use excessive force of shock to the devices while setting the feeder.
• Make sure to hold the unclamp lever completely. Otherwise, the clamp lever assembly would not open enough.
18
50
Check the setting number.
ZS Feeder exchange carriage
Setting SS feeder
Under rail
Clamping lever assembly
Pull out the handle backward.
23217-KMK-00
2-53
2
Basic operation
4
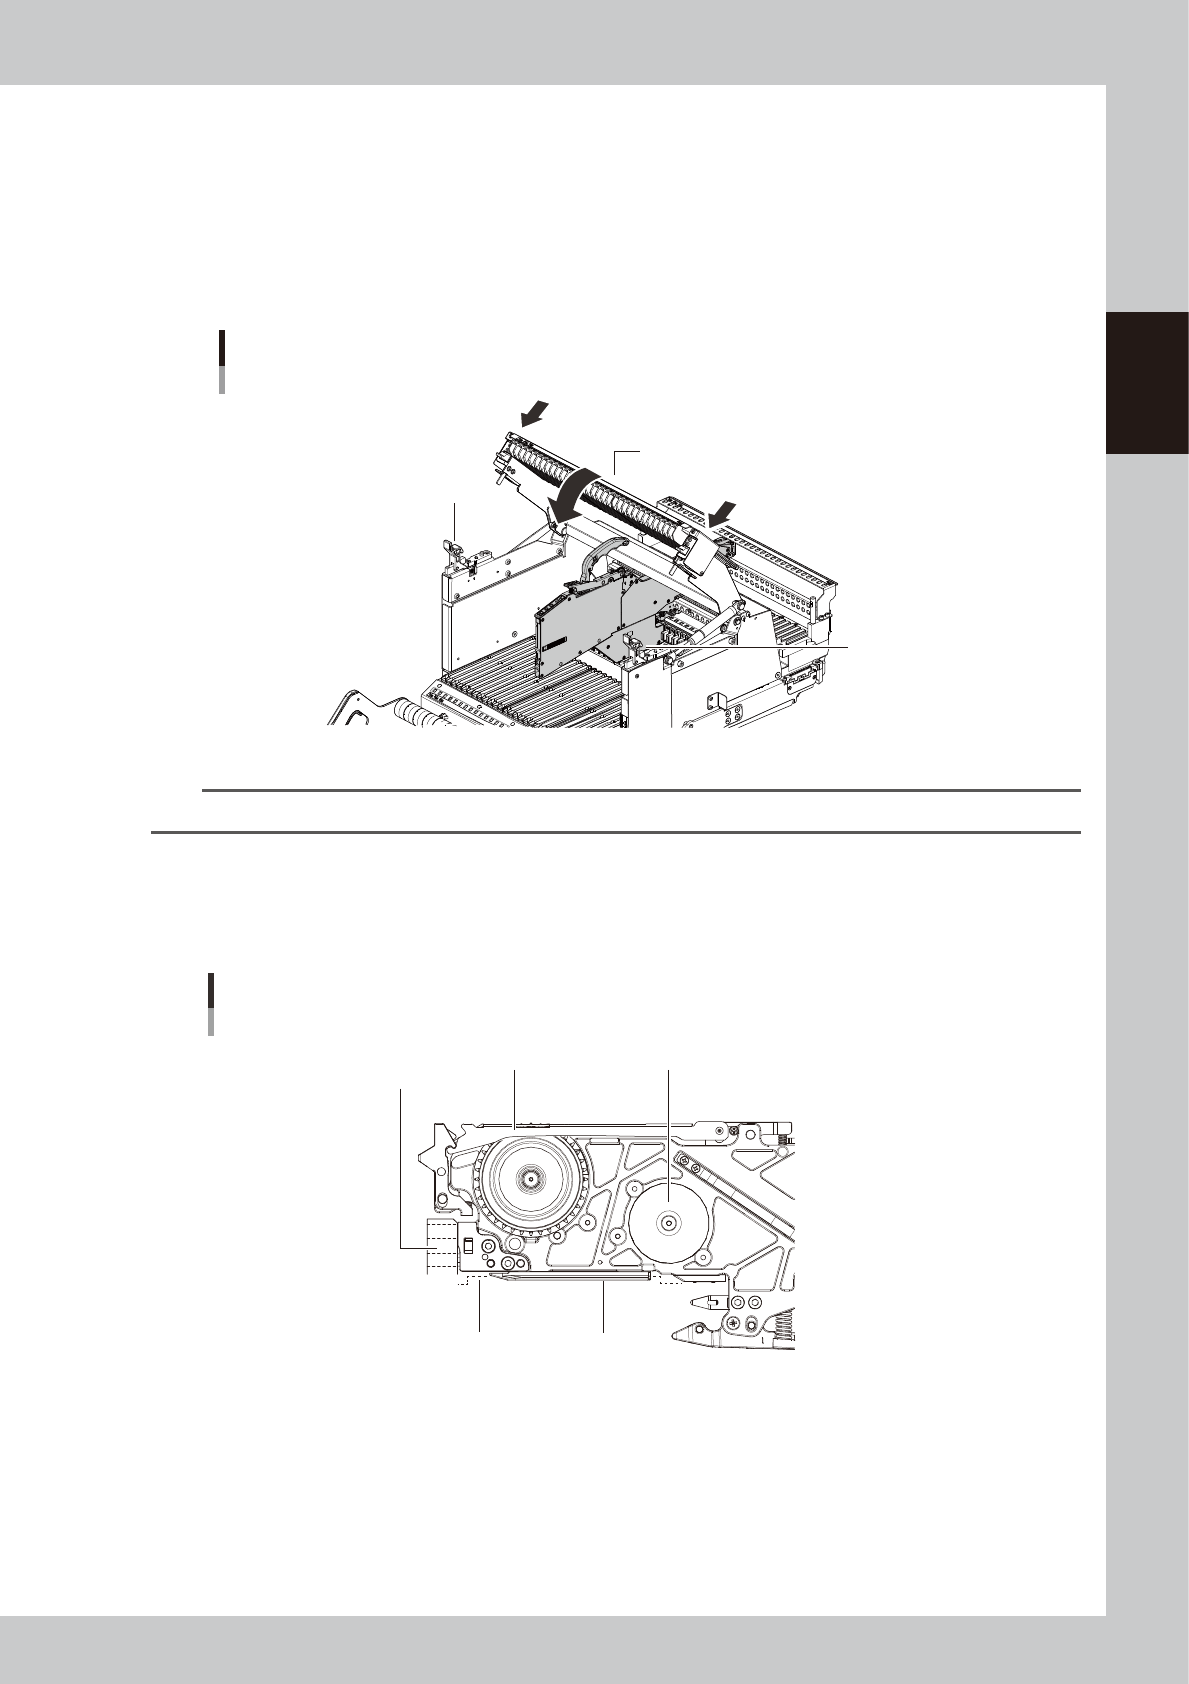
Lock the clamping lever assembly.
Release the unclamping lever. Check that the clamping lever assembly locks into the feeder plate. Set
the feeder correctly. Otherwise, the feeder could come off while mounting.
5
Close the guide rail cover.
1. Close the guide rail cover.
2. After closing the cover, push the cover locks on both sides of the carriage to surely lock them.
Guide rail cover
Cover lock
Cover lock
ZS Feeder exchange carriage
Clossing the guide rail cover
23218-KMK-00
n
NOTE
If the cover locks are released during production, the interlock stops the operation. Make sure that it is surely closed.
6
Check the state of setting in feeder.
View the feeder from the side to see that “the tape guide assembly is locked and not lifted”, “the
positioning device of the feeder reaches the far end” and “the under rail of the feeder firmly, correctly
sits in the feeder plate guide”.
Completing feeder setting
Illustration of the feeder end viewed from the side
Tape guide assembly Feeder body
Under rail
Feeder plate
positioning hole
Feeder plate guide
23219-KMK-00
2-54
2
Basic operation
4.1.3 Attaching the feeder exchange carriage on the mounter
This section describes the procedure to attach the feeder exchange carriage on the mounter.
n
NOTE
The types of the feeder exchange carriage depends on the machine specification. A machine can not work with
both SS feeder exchange carriage and ZS feeder exchange carriage together.
1
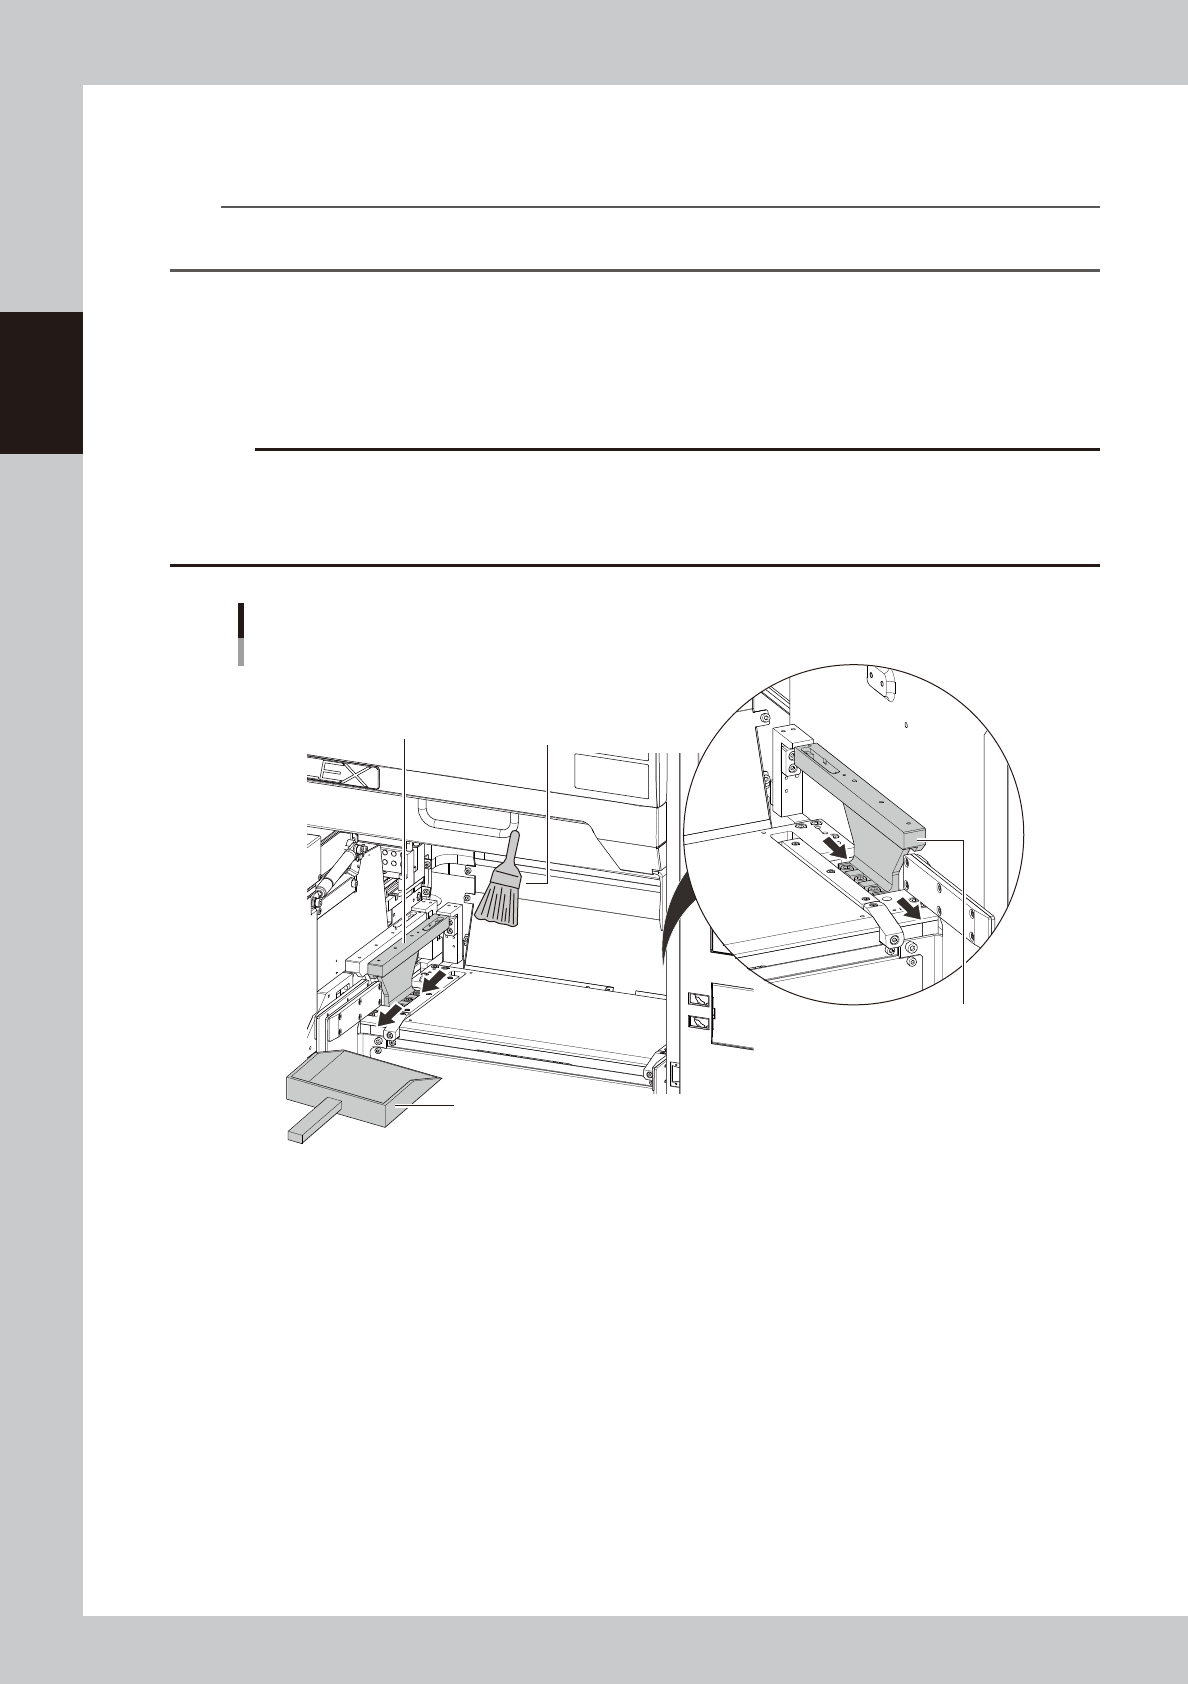
Clean around the clamp units of the mounter.
Before attaching the carriage on the mounter, remove the dust or foreign matter around the clamp
units of the carriage. Use the feeder plate cleaning brush that comes with the machine, a vacuum
cleaner (home use) or the vacuum assembly (option) to get rid of dust or foreign matter around the
clamp units.
c
CAUTION
If some parts or foreign matters are pinched on the clamp unit when attaching the carriage, the feeder is leaned
causing to pick up components unstably.
Some foreign matters entering to the connector of the clamp unit might cause the short circuit to damage the
equipment.
Cleaning the clamp unit
Receive dust with a dustpan
Cleaning brush
Clamp unit
Clamp unit
23220-KMK-00