YSM20R_YSM20WR_Ope_E.pdf - 第120页
2-17 2 Basic operation n Manual conveyor operation 2 [Unit] - [Conveyor] screen Conveyor manual buttons : YSM20R Dual-stage screen 6 7 14 8 9 10 11 12 13 24207-KMK-00 6. [Convey Board] button (Dual-stage) When pressing t…
2-16
2
Basic operation
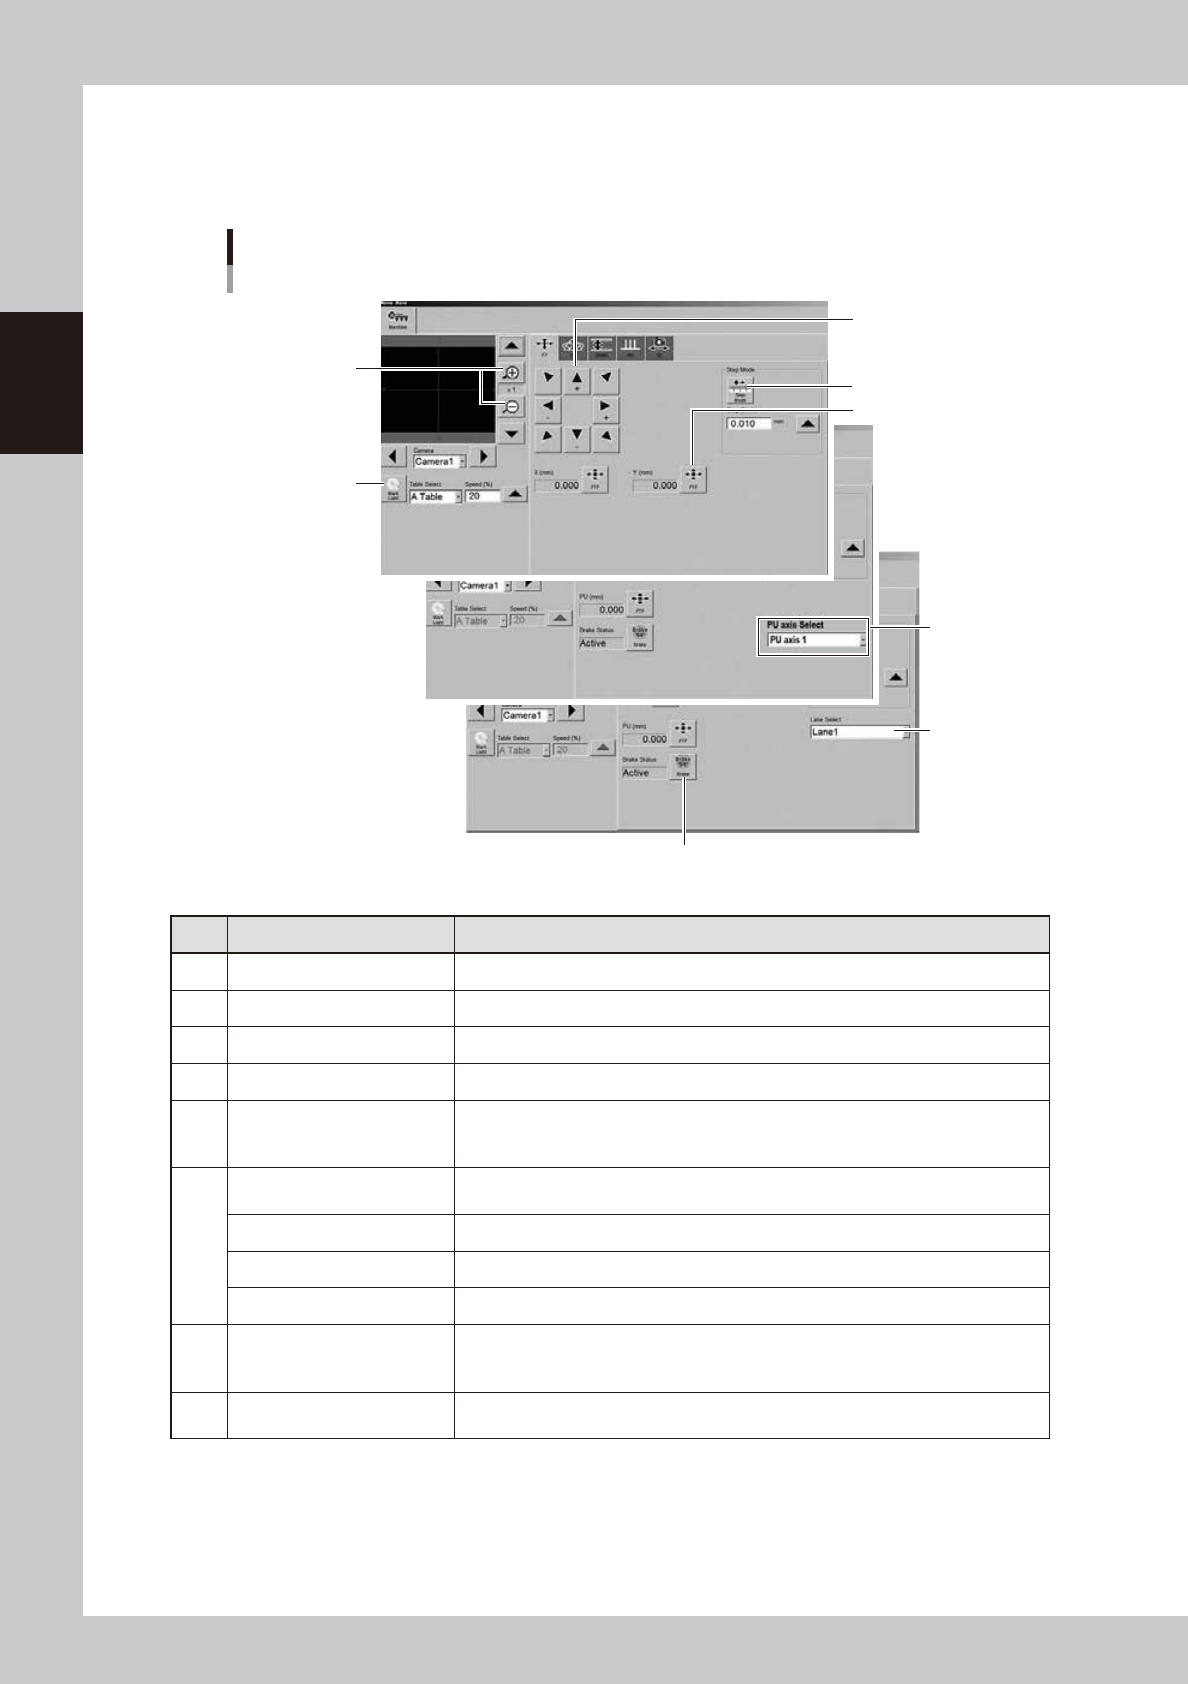
5. [Axis] button
Use this button when moving each axis manually.
Pressing the [Axis] button displays the "Move Axis" screen. Switch tabs on this screen to select the axis to be moved.
Press the [Arrow] buttons or the [PTP] button to move the axis over to the desired position.
"Move Axis" screen
1
2
3
5
4
6
7
8
24206-KMK-10
Button name Function
1 Zoom in/out (+, -) Zooms in or out the image. (16 times to 1/16 times)
2 Mark Light Allows changing mark lighting manually. Using this button does not affect data.
3 PTP The object moves to the numerically input coordinate.
4 Arrow Use these buttons to move the selected axis in the desired direction.
5 Step Mode
The inching stroke defines the distance to move when pressing an arrow button
once. With the [Step Mode] button pressed, pressing and holding an arrow button
does not stroke fast.
6
Head Select
Selects the head to be operated. (Available for operating the Z-axis and R-axis only.
Note that the several heads on the R-axis rotate simultaneously.)
Conveyor Select Selects the conveyor to be operated. (Dual-stage only)
U Axis Select Selects the U axis to be operated. (Dual-stage only)
PU Axis Select Selects the PU axis to be operated. (Dual-stage only).
7 Brake
Use this button when you want to release the brake during emergency stop.
(PU-axis only)
The brake is automatically released when the servo is turned on.
8 Lane Select
Select the lane to be operated when using both lanes of dual-lane.
(Dual-lane: Width-axis and PU-axis only)
2-17
2
Basic operation
n
Manual conveyor operation 2
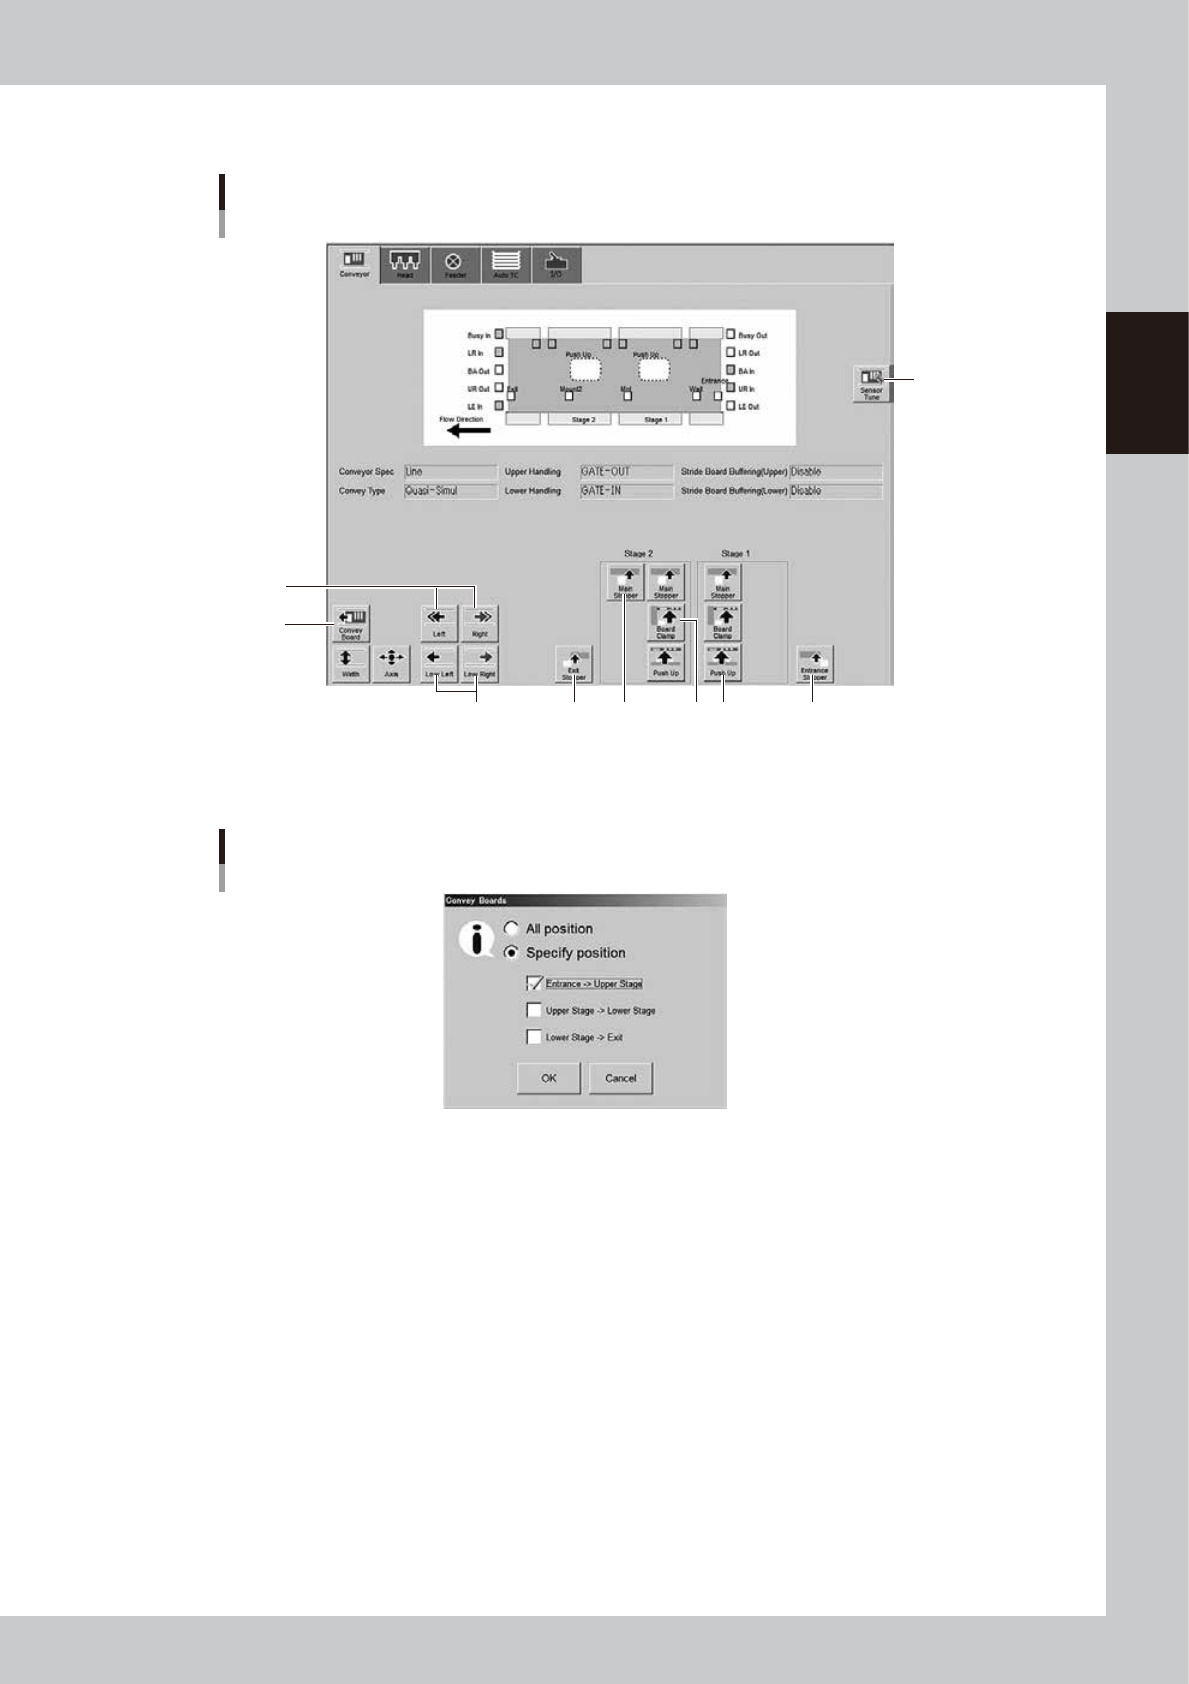
[Unit] - [Conveyor] screen
Conveyor manual buttons : YSM20R Dual-stage screen
6
7
14
8
9 10 11 12 13
24207-KMK-00
6. [Convey Board] button (Dual-stage)
When pressing the [Convey Board] button, the following dialog box will appear.
"Convey Boards" dialog box
24208-KMK-00
· All position
When selecting [All position], the board is transferred "entrance
→
stage on the upstream side", "stage on the upstream
side
→
stage on the downstream side", and "stage on the downstream side
→
exit".
· Specify position
Transfers the board only the route specified in the check box. When all selections are checked on, the operation becomes
the same as that when [All position] is checked on.
7. [Left] button, [Right] button
Rotates the conveyor motor in the left or right direction at high speeds.
8. [Low Left] button, [Low Right] button
Rotates the conveyor motor in the left or right direction at low speeds.
9. [Exit Stopper] button
Raises or lowers the exit stopper.
Raises or lowers the exit stopper that stops a board at the conveyor exit.
10.[Main Stopper] button
Raises or lowers the main stopper.
Use this button to stop the board transferred onto the conveyor at the mounting position.

2-18
2
Basic operation
11.[Board Clamp] button
Raises or lowers the board clamp plate.
Clamps the board by pushing up its edges from the bottom (underside).
12. [Push Up] button
Press this button to call up the “Board thickness” screen. Enter the data in the parameters on the screen. Press the [OK]
button. Then, the push-up stage goes up to clamp the board from behind (back face).
13. [Entrance Stopper] button
Raises or lowers the entrance stopper.
Use this button to stop the incoming board at the standby position.
14. [Sensor Tune] button
Tunes the conveyor sensor automatically. It is not required to perform auto tuning during normal operation. However, it
is used in the case where the conveyor width is changed manually or that the board cannot be detected correctly due to
the conveyor sensor malfunction.
c
CAUTION
Make sure that no board is on the conveyor before tuning the conveyor sensor. See the maintenance manual,
chapter 3, " 2.3.1 Checking conveyor sensor condition and operation”.