YSM20R_YSM20WR_Ope_E.pdf - 第122页
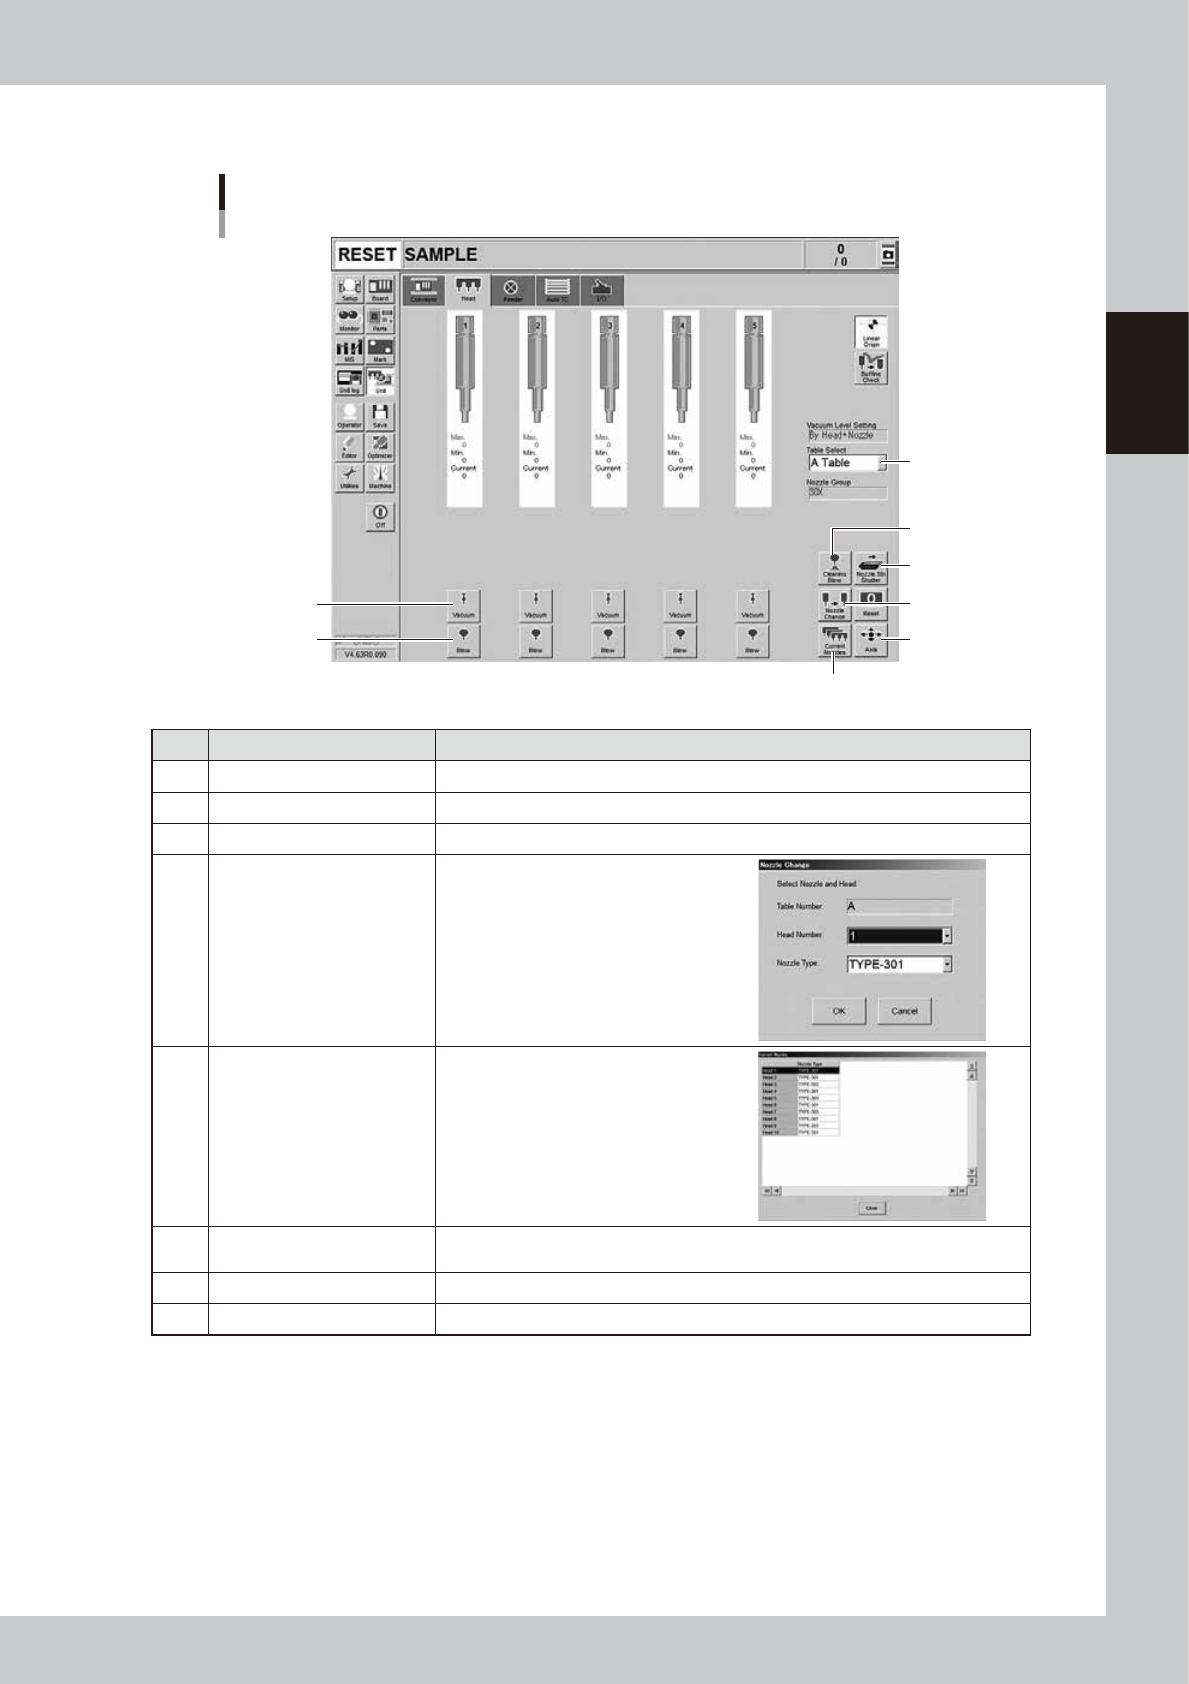
2-19 2 Basic operation n Manual head operation 1 2 3 4 5 6 8 7 [Unit] – [Head] screen 24209-KMK-00 Button name Function 1 V acuum T urns the vacuum of each head on or off. 2 Blow T urns the air blow in each head on or of…

2-18
2
Basic operation
11.[Board Clamp] button
Raises or lowers the board clamp plate.
Clamps the board by pushing up its edges from the bottom (underside).
12. [Push Up] button
Press this button to call up the “Board thickness” screen. Enter the data in the parameters on the screen. Press the [OK]
button. Then, the push-up stage goes up to clamp the board from behind (back face).
13. [Entrance Stopper] button
Raises or lowers the entrance stopper.
Use this button to stop the incoming board at the standby position.
14. [Sensor Tune] button
Tunes the conveyor sensor automatically. It is not required to perform auto tuning during normal operation. However, it
is used in the case where the conveyor width is changed manually or that the board cannot be detected correctly due to
the conveyor sensor malfunction.
c
CAUTION
Make sure that no board is on the conveyor before tuning the conveyor sensor. See the maintenance manual,
chapter 3, " 2.3.1 Checking conveyor sensor condition and operation”.
2-19
2
Basic operation
n
Manual head operation
1
2
3
4
5
6
8
7
[Unit] – [Head] screen
24209-KMK-00
Button name Function
1 Vacuum Turns the vacuum of each head on or off.
2 Blow Turns the air blow in each head on or off.
3 Nozzle STN Shutter Opens or closes the nozzle station shutter.
4 Nozzle Change
Opens the "Nozzle Change" screen.
Specify the head and nozzle type to
perform nozzle change.
5 Current Nozzles
Shows a list of nozzle types currently
attached to each head.
6 Axis
Opens the "Move Axis" screen. This is the same as the [Axis] button on the [Unit] -
[Conveyor] screen.
7 Cleaning Blow Displays the "Execution Nozzle Cleaning Blow" screen.
8 Table Select Switches the table display.
2-20
2
Basic operation
n
Manual feeder operation
2
5
8
9
3
6
4
1 7
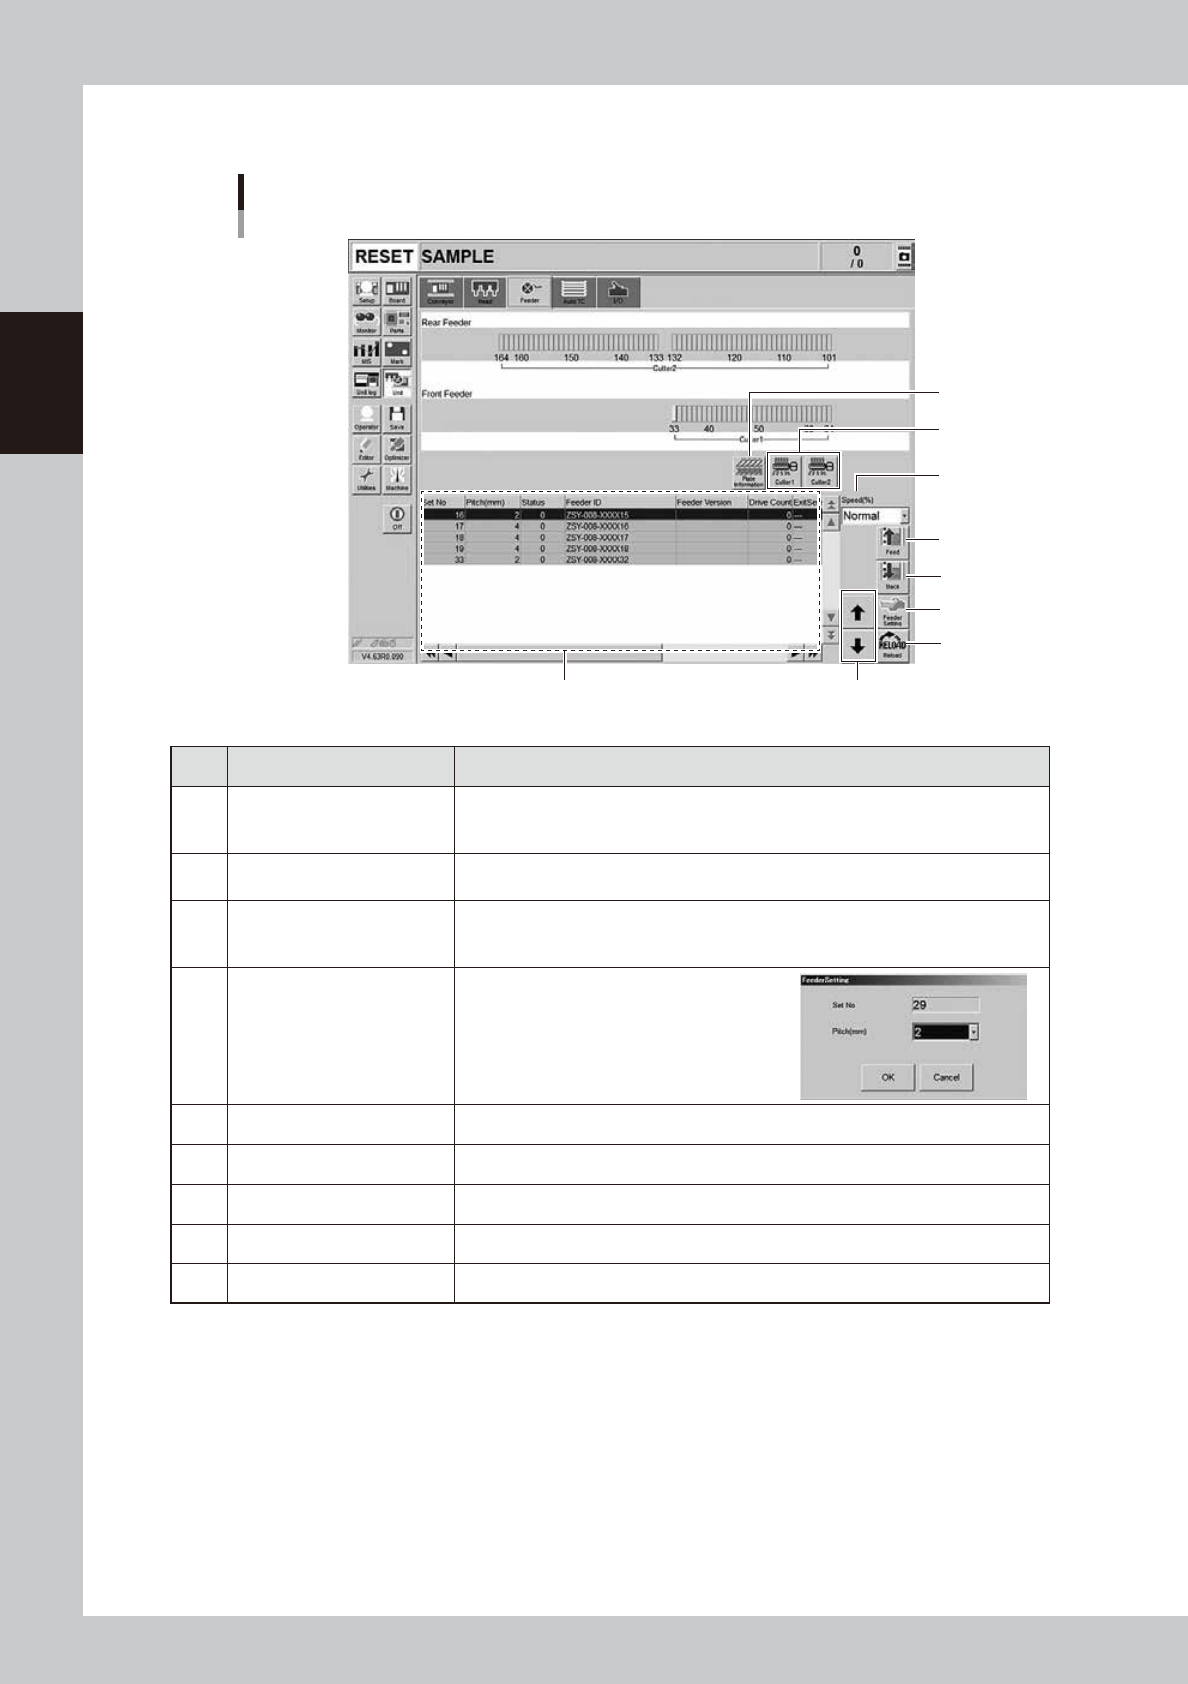
[Unit] – [Feeder] screen
24210-KMK-00
Button name Function
1 Feeder Information
Displays the information of the feeders set on the feeder plate.
The No. displayed in the "Status" column indicates the error code No. For error
details, refer to "SS Feeder User's Manual" and the "ZS Feeder User's Manual".
2 Feed
Feeds the tape on the feeder selected by the feeder information to one pitch.
Each time pressing this button advances the tape at the specified pitch.
3 Back
Moves the tape backwards by one pitch on the feeder selected by the feeder
information.
Each time pressing this button moves the tape backward at the specified pitch.
4 Feeder Setting
Pressing this button opens the feeder setting
dialog box that allows selecting a feed pitch
from 1 to 72 mm.
Set the feed pitch and press the [OK] button.
The set feeder pitch is stored in memory.
5 Speed Select the feed speed from the drop-down list with "Normal", 90,80, to 10%.
6 Reload Clears the feeder condition (memory) and reloads the setting.
7 Up/down arrows Moves the selected row up or down.
8 Cutter Opens or closes the tape cutter.
9 Plate Information Allows you to check the version of the plate board in the feeder plate.