YSM20R_YSM20WR_Ope_E.pdf - 第150页
2-47 2 Basic operation n Button operations and corresponding feed pitches Feeder type Setting Pitch [FEED], [BACK] Pressed 1 Time [FUNK+FEED] [FUNC+BACK] Pressed 1 Time ZSY -004 All pitches 1 mm 1 mm ZSY -008 0 2 mm 1 mm…
2-46
2
Basic operation
0
Align the first component with the standby position.
If pressing the [FEED] button and the [BACK] button on the feeder, the tape can be transferred or
returned with the pitch setting corresponding to the feeder type.
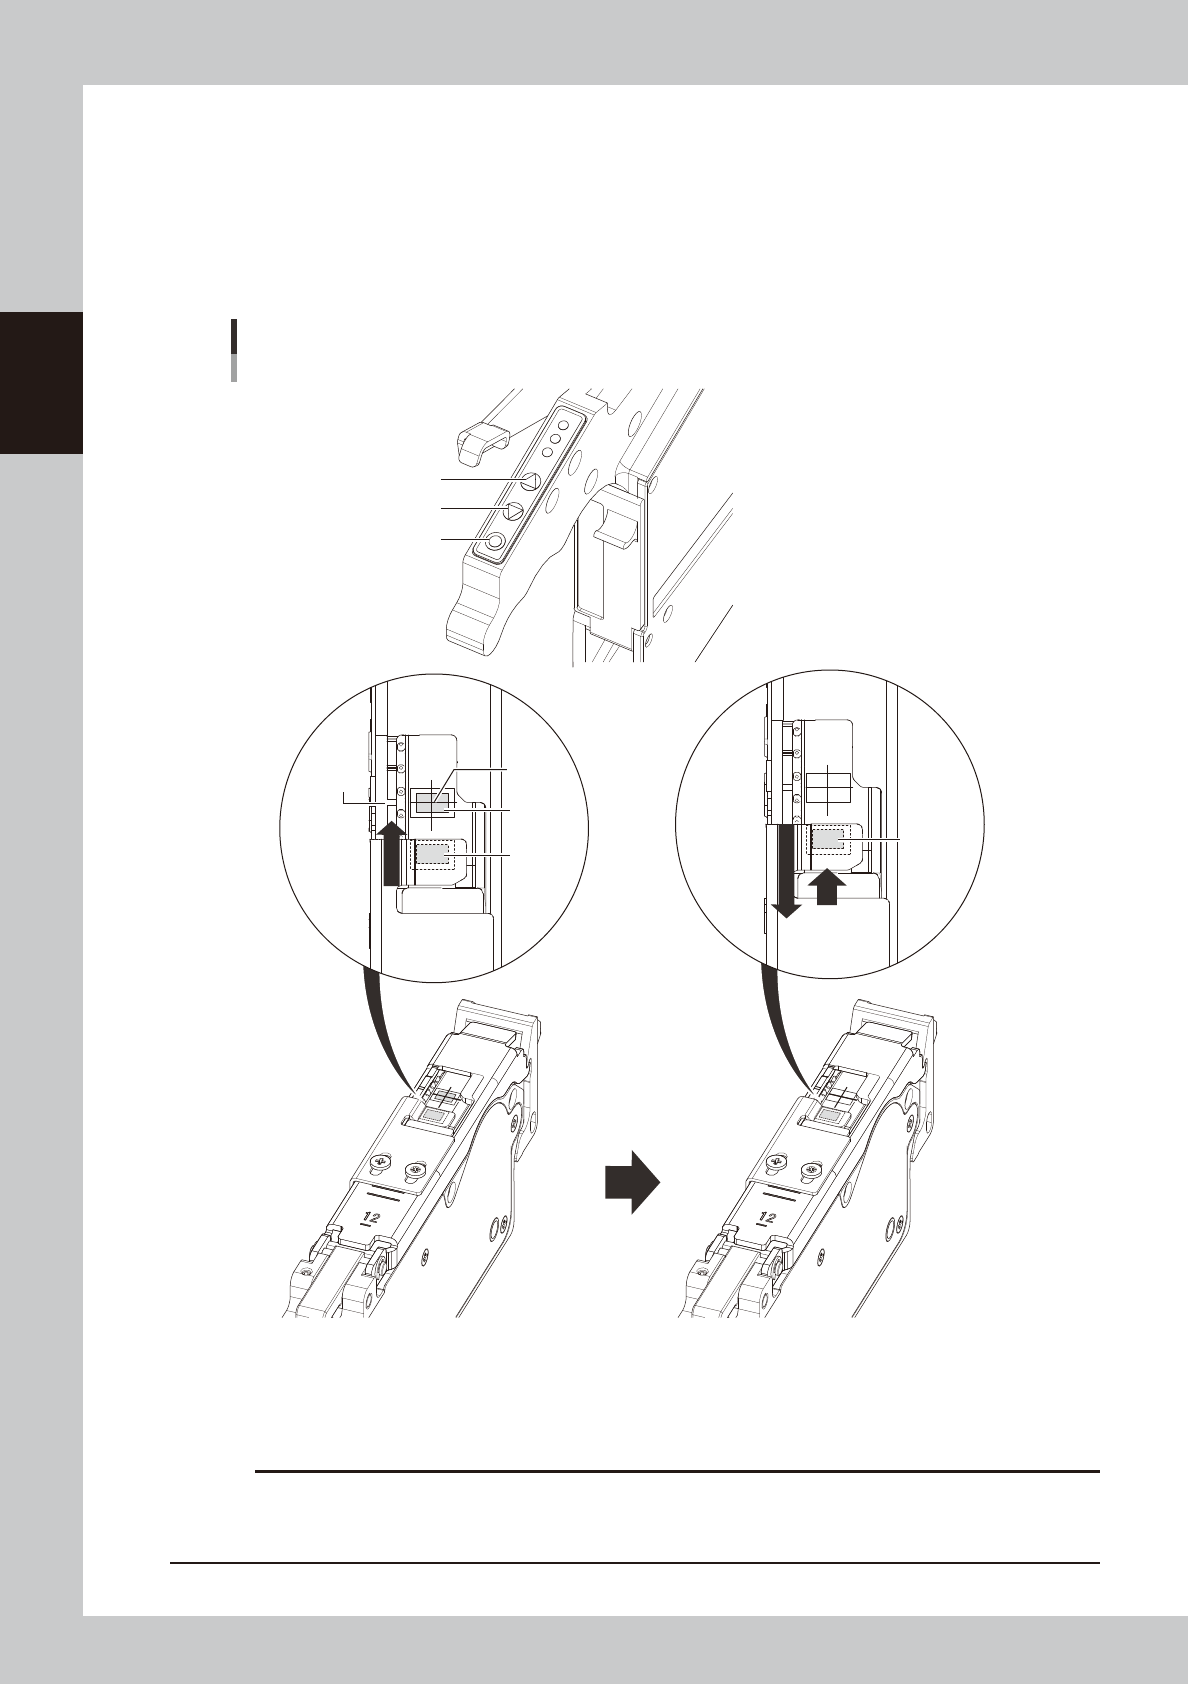
1. Press the [FEED] button and transfer the tape to locate the first component on the temporary pickup
position (marking (white)).
2. After pressing the component pitch and the [BACK] button once to return the component, press the
[FEED] button once and align the first component with the standby position.
Operation buttons and adjusting component position
[FUNC] button
[BACK] button
[FEED] button
Press the [FEED] button to feed the
component to the pickup position.
Press the component pitch and the [BACK] button
once to return the component. Then press the [FEED]
button once and align the first component with the
standby position.
Pickup
position
Marking
First
component
Standby
position
First
component
(Standby
position)
23210-KMK-00
c
CAUTION
Make sure to align the standby position by the [FEED] button. Press the [BACK] button more than twice to return the
component. Then press the [FEED] button to align the component with the standby position. If aligning the standby
position by the [BACK] button, the pickup position offset of the fist component will occur.
2-47
2
Basic operation
n
Button operations and corresponding feed pitches
Feeder type Setting Pitch
[FEED], [BACK]
Pressed 1 Time
[FUNK+FEED]
[FUNC+BACK]
Pressed 1 Time
ZSY-004 All pitches 1 mm 1 mm
ZSY-008
0 2 mm
1 mm1 1 mm
2 and higher 2 mm
ZSY - 2T6, 024,
032, 044, 056,
072, 088, 104
0
2 mm
2 mm
2 and higher Setting pitch
TIP
• For handling the feeder of 12 mm or wider, set the components pitch on the temporary tape set station / the
power station. Then, press the “FUNC” and “FEED” buttons or the “FUNC” and “BACK” buttons simultaneously. The
feeder feeds the tape by the set pitch. See the methods of memorizing feeder feed pitch in each station in
"4.1.4 Setting board data of component tape" in this chapter for the setting, .
• Continuous feed is possible by pressing and holding the "FEED / BACK" button.
• There is no continuous feed for the "FUNC + FEED" and "FUNC + BACK" buttons (even if pressed and held).
• See the “SS Feeder User’s Manual” for setting the feed rate of SS feeder.
q
Check the tape support plate position.
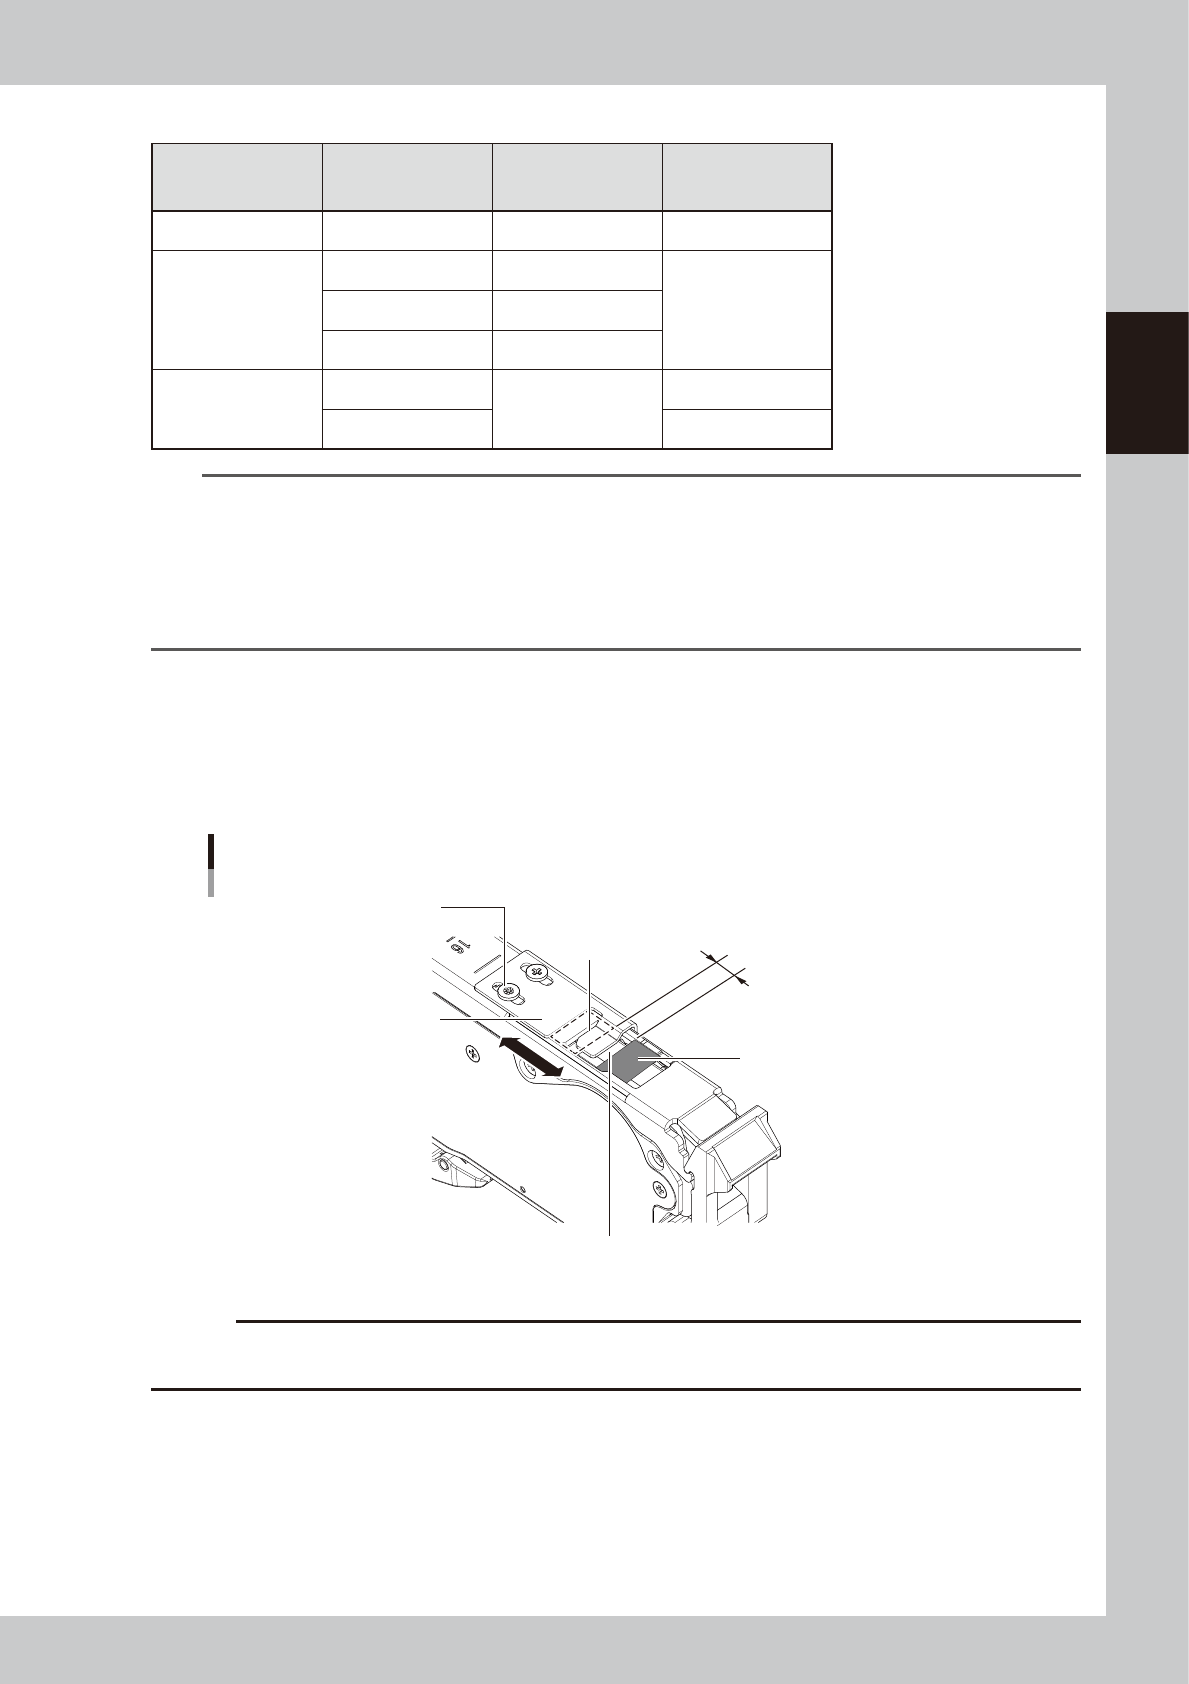
If the feeder type is 12 mm or wider, it is required to adjust the tape support plate according to the
components shape. Adjust the tape support plate position by loosening the 2 adjustment screws.
Locate the leading edge of the tape support plate between the standby position and the pickup
position (closer to the pickup position). Locate the leading edge of the tape support plate somewhat
closer to the pickup position between the standby position and the pickup position.
The leading edge of tape support plate
Aligning position of the tape support plate
Pickup position
Tape support plate
Adjustment screw
Standby position
Slide the tape support plate
to adjust the position.
Locate the leading edge of the tape
support plate somewhat closer to the
pickup position in the section.
23211-KMK-00
c
CAUTION
If the tape support plate is not adjusted, the components positions after removing the cover tape may get unstable,
causing possible incorrect components pickup.
2-48
2
Basic operation
w
Cut the carrier tape.
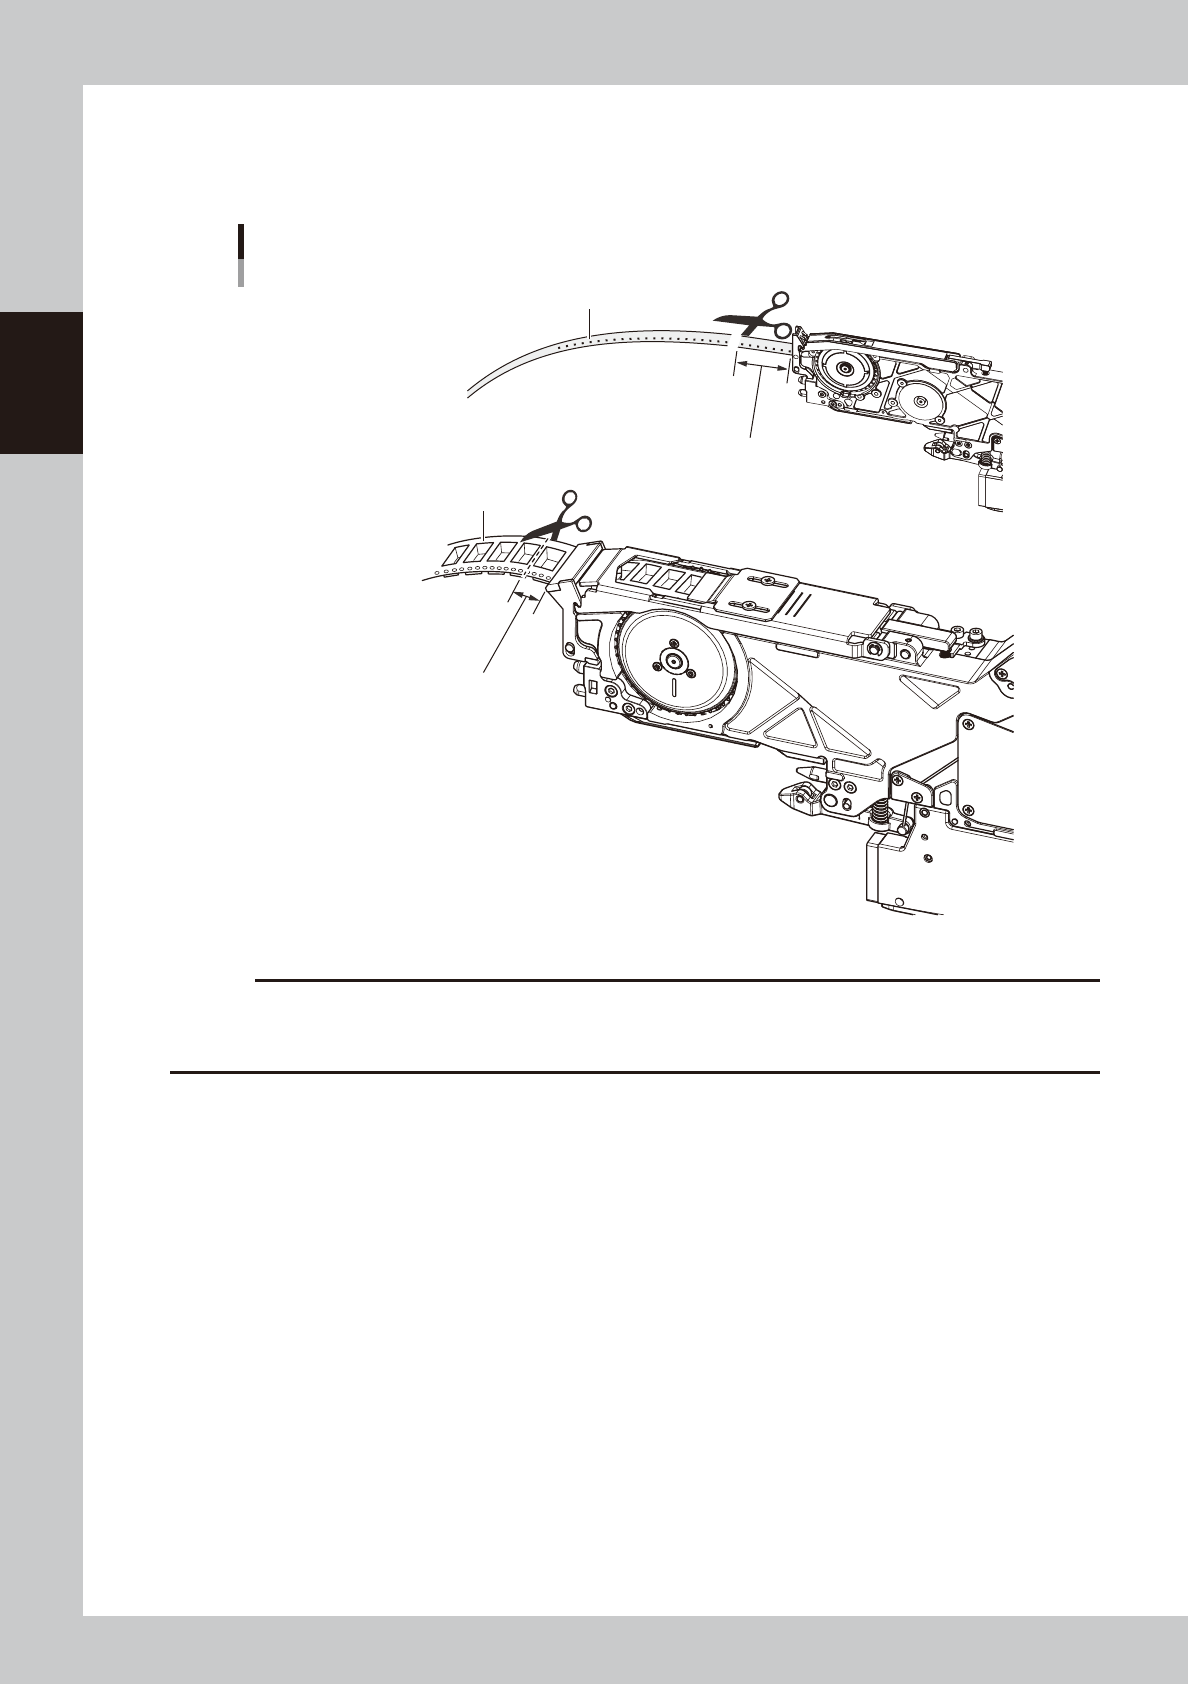
Before setting the tape feeder on the machine, feed the tape out until a component is at the pickup
position, then cut the carrier tape about 15 mm from the feeder tip.
■ 8 mm feeder
■ 12 mm/16 mm feeder
Cutting the carrier tape
Carrier tape
Cut the carrier tape about 15 mm
from the feeder tip.
Cut the carrier tape about 15 mm
from the feeder tip.
Carrier tape
23212-KMK-00
c
CAUTION
• If using the carrier tape without cutting the excess component, it could block the path way for discharging the tape.
• Cutting a hard emboss tape too short causes the carrier tape to touch at the slope entrance, then the feed can be
faulty.