YSM20R_YSM20WR_Ope_E.pdf - 第194页
3-6 3 Flow fr om starting up machine to production 1.4 W ar ming up the machine After starting up the machine, we recommend w arming it up for about 10 minutes in most cases. If less than two hours has elapsed after the …
3-5
3
Flow from starting up machine to production
2
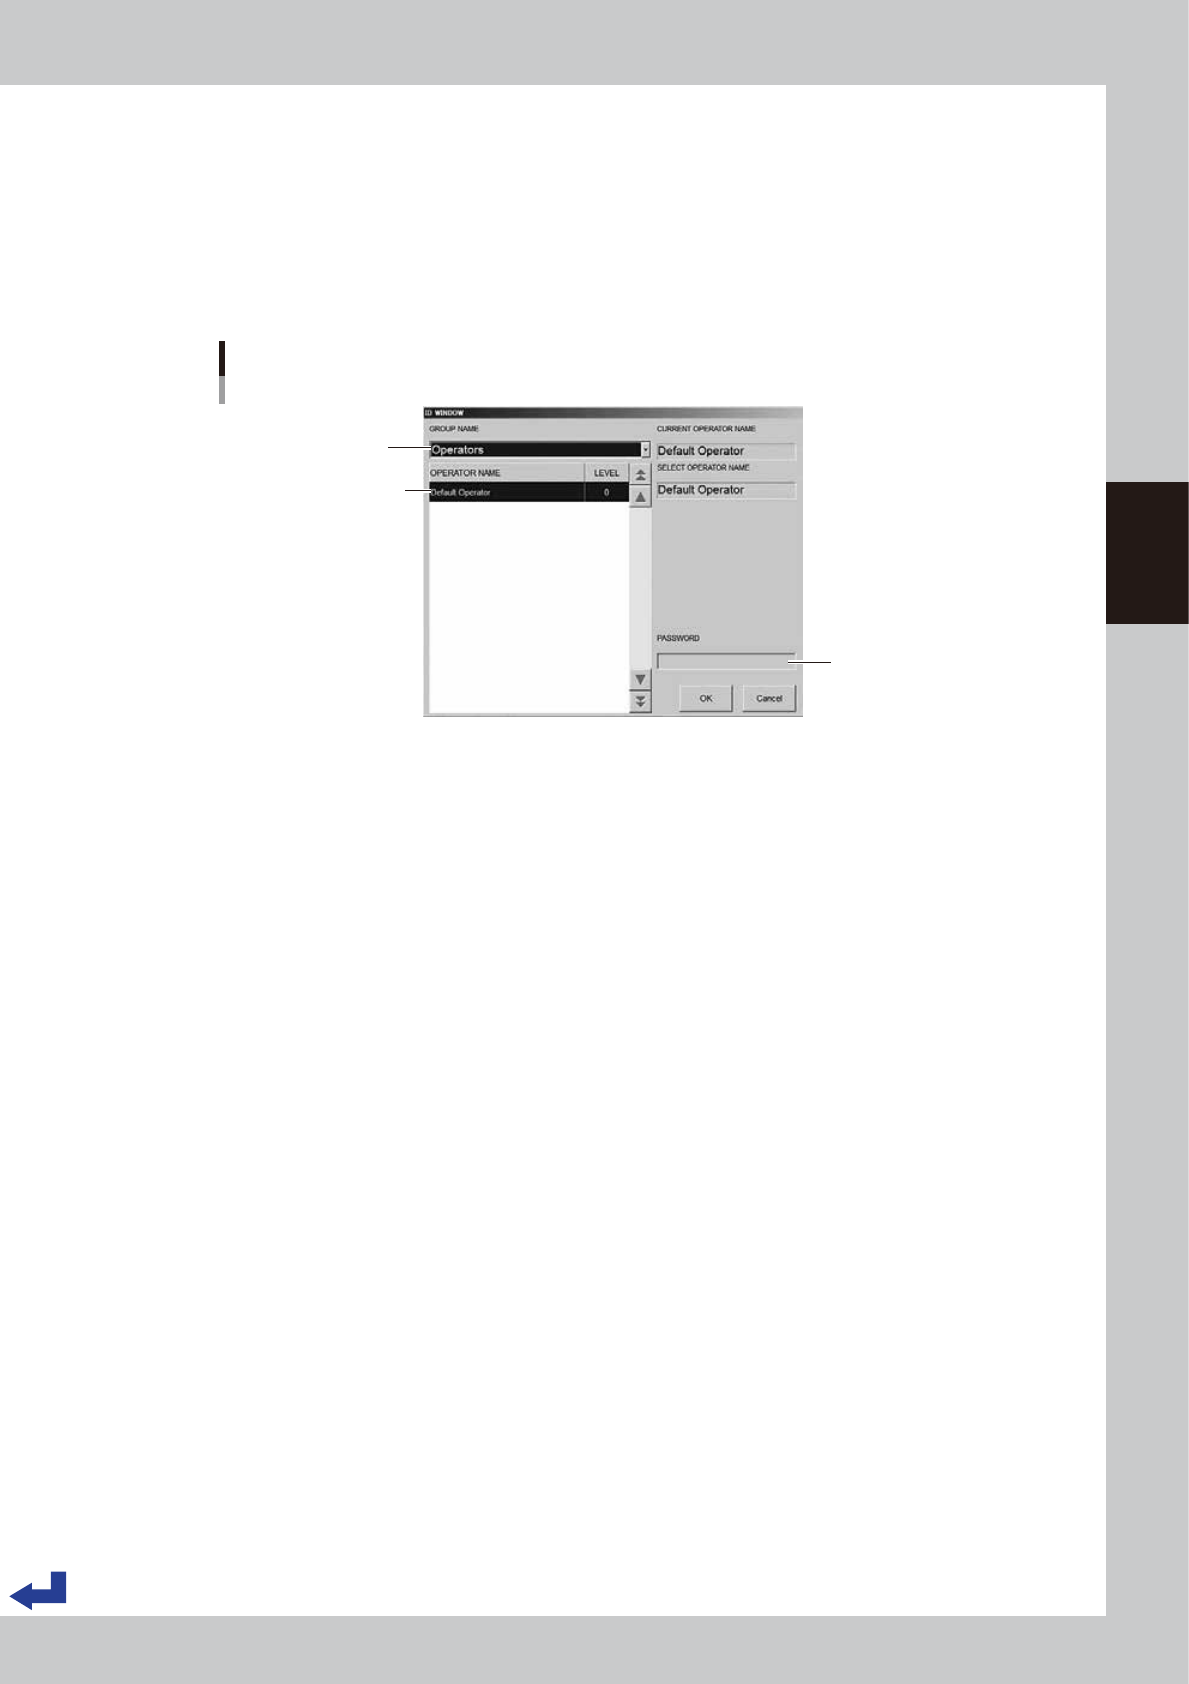
Assign the operator.
1. Pull down the “Operators” (Group name) on the “ID window” (operator window) and select an
“Administrator” or “Operator”.
2. Select the “Operator”.
3. (If passwords are used) Enter the corresponding password.
4. Press the [OK] button. The initial screen (the setup screen before selecting a board) appears on the
display.
Select group name.
Enter password.
Select operator name.
Specifying the operator
24303-KMK-00
3-6
3
Flow from starting up machine to production
1.4 Warming up the machine
After starting up the machine, we recommend warming it up for about 10 minutes in most cases. If less than
two hours has elapsed after the machine was last used, no warm-up is necessary.
1
Press the [Warm Up] button on the Setup screen.
The Warm-up screen then appears.
2
Enter a warm-up time.
Press the [Stop after time over] button and enter the warm-up time. Warm-up will automatically stop
when the warm-up time you set has elapsed. Normally, about a 10-minute warm-up is sufficient.
[Warm Up] button
“Warm up” screen
Warm-up time setting
[Setup] screen
Press this button to set warmup time.
24304-KMK-00
3
Start warming up the machine.
Press the [Start] button to start warm-up. The elapsed warm-up progress time and status appear in the
"Progress status" column.
c
CAUTION
If an abnormality occurs during warm-up, press the [Stop] button to stop operation immediately, check the cause of
the problem and eliminate it.
Indicates progress.
[Start] button [Stop] button
Warm-up time setting 2
24305-KMK-00
4
Finish the warm-up.
Warm-up will automatically stop when the warm-up time you set is reached. Press the [Close] button,
and return to the previous screen.
3-7
3
Flow from starting up machine to production
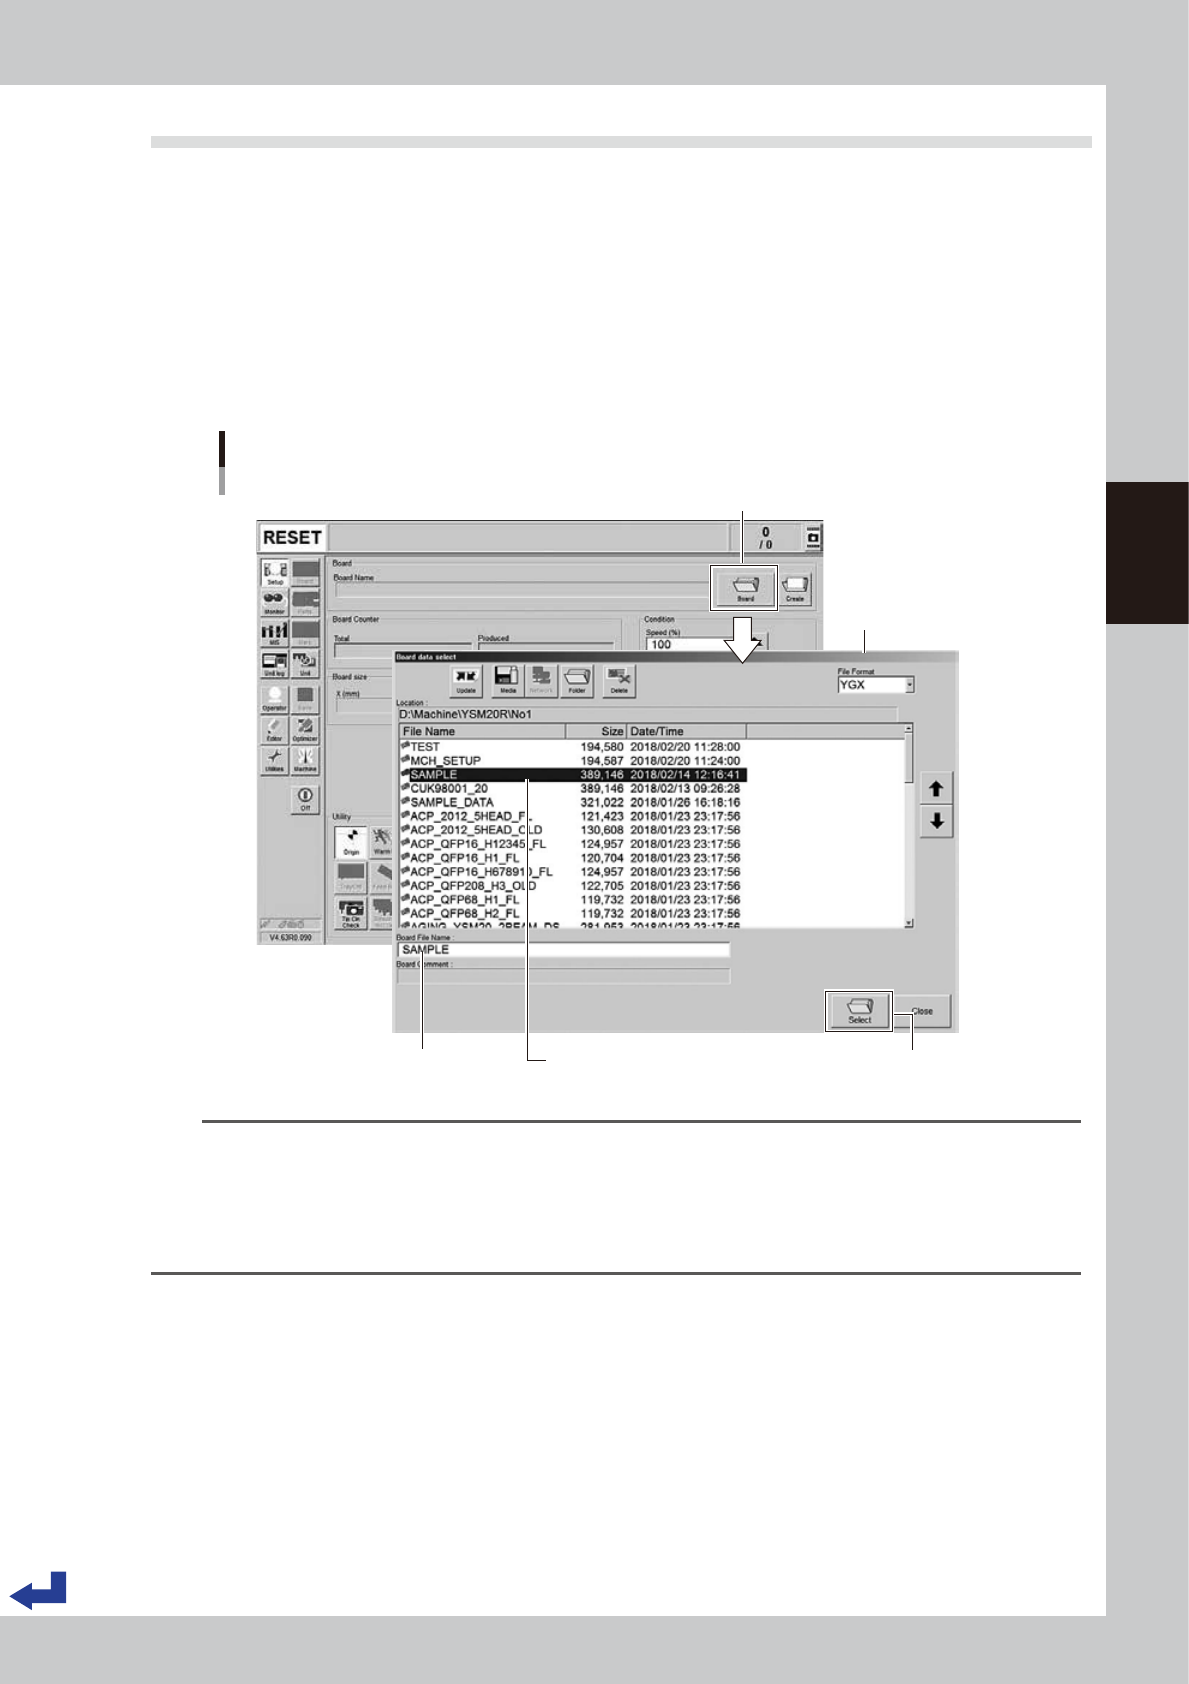
1.5 Selecting the board data
Select the board data used for production from those registered.
1
Call up the “Board Data Select” screen.
Press the [Board] button on the “Setup” screen to call up the “Board Data Select” screen.
YSM20WR Dual-lane: Press the [Lane switch] button to select the lane to be used for production.
(When using both lanes for production, press the [Lane Combine] button.)
2
Select the board data.
Select the board data used for the production from the list on the “Board Data Select” screen. Press the
[Select] button. The machine reads out the selected board data.
“Board data select” screen
[Select] button
Selecting the board data
[Setup] screen
Selected board name is displayed. Selected board name is displayed.
Press [Board] button.
24306-KMK-00
TIP
When using YSM20WR Dual-lane:
• Pressing the [Lane Combine] button displays the combined board data.
The combined board data is a board file that combined 2 board data. The combined board data is displayed in
orange.
• When selecting the combined board data, the board file name and board data name to be produced on the
selected lane are displayed on the free area of the "Setup" screen.