YSM20R_YSM20WR_Ope_E.pdf - 第189页
3-1 3 Flow fr om starting up machine to production 1. Flow from star ting up machine to production The following flow diagram shows the basic procedures from starting the machine, mounting components and stopping the mac…

Chapter 3 Flow from starting up machine to
production
Contents
1. Flow from starting up machine to production 3-1
1.1 Pre-operation check 3-2
1.2 Starting the machine 3-3
1.3 Selecting the operator 3-4
1.4 Warming up the machine 3-6
1.5 Selecting the board data 3-7
1.6 Conveyor unit setup 3-8
1.6.1 Laying out push-up pins 3-9
1.6.2 Adjusting board hold plate position 3-15
1.6.3 Checking condition of clamping the board 3-19
1.7 Preparing component tape (Tape feeder) 3-21
1.8 Preparing tray component supply unit 3-22
1.9 Confirming nozzles 3-24
1.10 Starting production 3-28
1.11 Ending production 3-29
1.12 Powering off the machine 3-30
1.13 Resuming operation from the stopped point 3-32
3-1
3
Flow from starting up machine to production
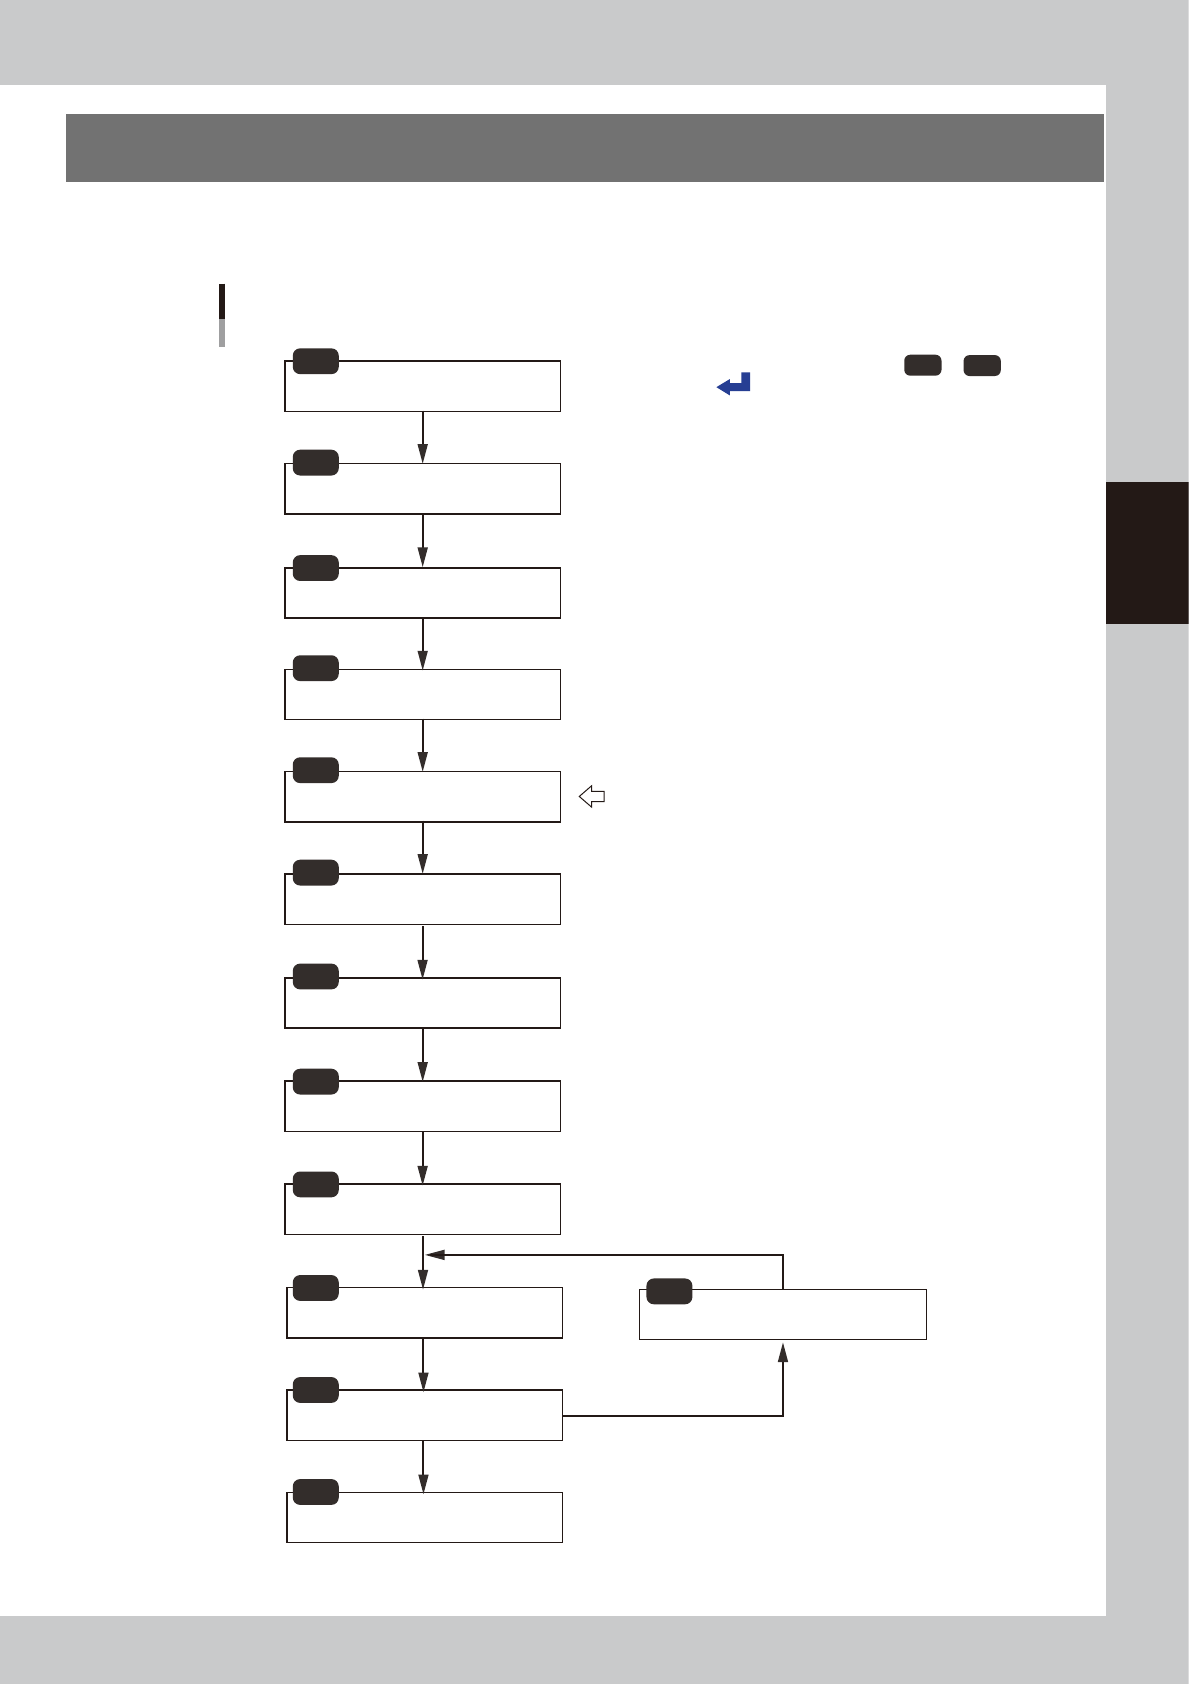
1. Flow from starting up machine to production
The following flow diagram shows the basic procedures from starting the machine, mounting components and
stopping the machine after finishing up the production.
Power on the machine.
Return the units to their origins.
Starting the machine
Pre-operation check
Selecting the operator
Resuming operation from the stopped point
Warming up the machine
Selecting the board data
Conveyor unit setup
Preparing component tape (Tape feeder)
Preparing tray components
( Tray component supply unit : option)
Starting production
Ending production
Powering off the machine
1.1
1.2
1.3
1.4
1.5
1.6
1.7
1.8
1.10
1.11
1.12
1.13
Check the operation speed.
Return the units to their origins.
Power off the machine.
Resume the operation where it left off.
Block skip
Start from this step if switching the production board data.
Confirming nozzles
1.9
Confirm the nozzle types.
Check the nozzle tip cleanness.
Flow from starting up machine to production
Check that the push-up pins, board
hold plate and state of securing board
in place are all right.
* Jump to desired page by clicking from to .
Click to return to this page.
1.1
1.13
23301-KMK-00
3-2
3
Flow from starting up machine to production
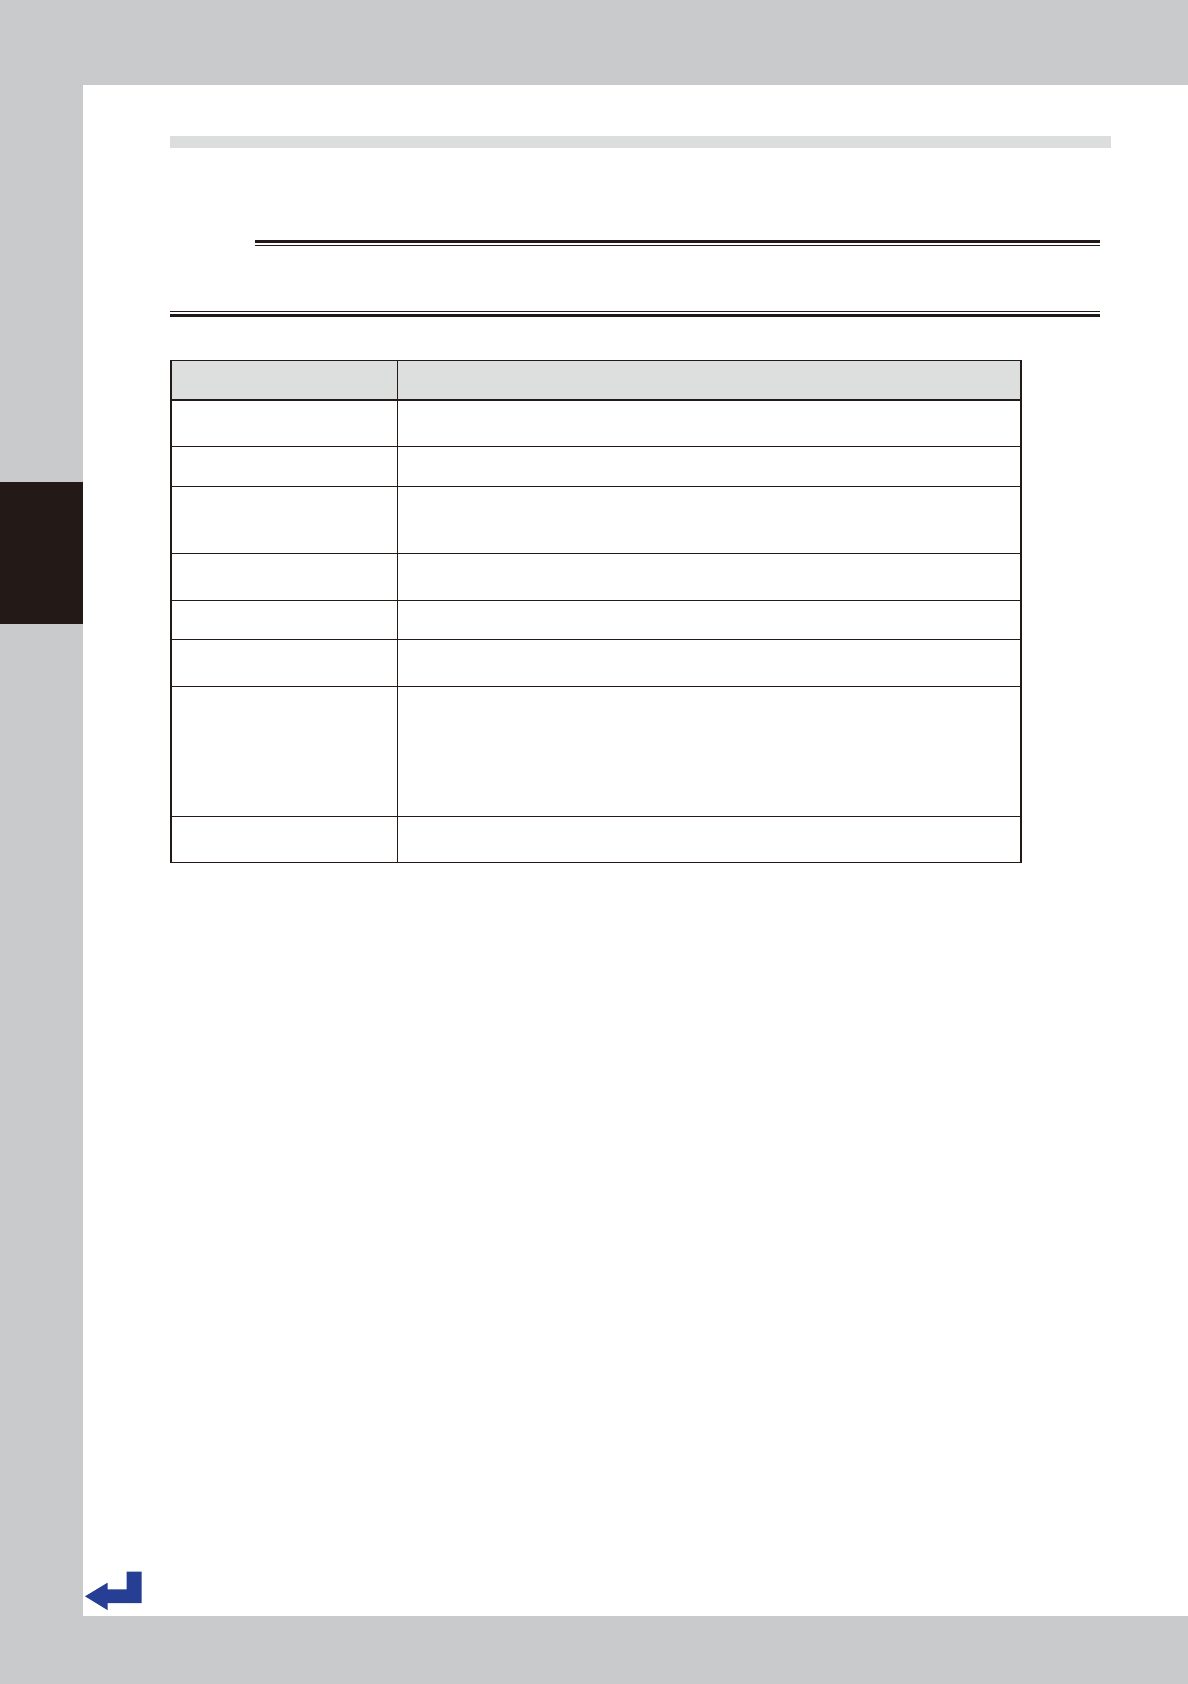
1.1 Pre-operation check
e
Check the following points before powering on the machine.
w
WARNING
BEFORE STARTING MAINTENANCE, MAKE ABSOLUTELY SURE TO POWER OFF THE MACHINE OR THE MACHINE IS IN THE
STATE THAT THE EMERGENCY STOP BUTTON IS PRESSED.
n
Pre-operation checklist
Check item Check point
Power supply
The specified power is connected to the power supply box located behind the front lower
right panel of the machine.
Safety cover The covers are closed.
Feeder Feeders are securely attached to the feeder plate and are not tilted.
No foreign objects are on the feeder and feeder plate. No used cover tape remains. The
feeder tail cover is closed.
Conveyor No chips or debris are on the conveyor.
No obstacles such as push-up pins are under the conveyor frame.
Head Each nozzle is correctly installed to the head.
Nozzle
The nozzle tips are not nicked, solder does not adhere to the nozzle tips, and nozzle
spring-action is smooth.
Tray component supply unit
(Option)
The pallet is correctly set up in place. No foreign objects are on the pallet
No pallet remains on the main body of the machine.
No pallet remains on the pallet station.(for sATS30 or sATS30NS)
Magazine door is surely closed.
The door switch is turned to "CLOSE".(for cATS10)The Magazine exchange switch is
turned to "RUN". (for sATS30 or sATS30NS)
Empty tape dust box
(Option)
No empty tape pieces are in the empty tape dust box.