EUKYX-199-3100_G5S2_Instruction_Vol3_E.pdf - 第104页
EUKYX 1-55 199-3100 5.17 Master Noz Lv (Indv .) 5. 1 7 Master No z L v ( Indv . ) Thi s window is not displayed wh en the multi -f unctional head is se lect ed. The master no zzle l evel i s t augh t ind ividua lly . [1]…
EUKYX
1-54199-3100
5.16 Support pin Pos
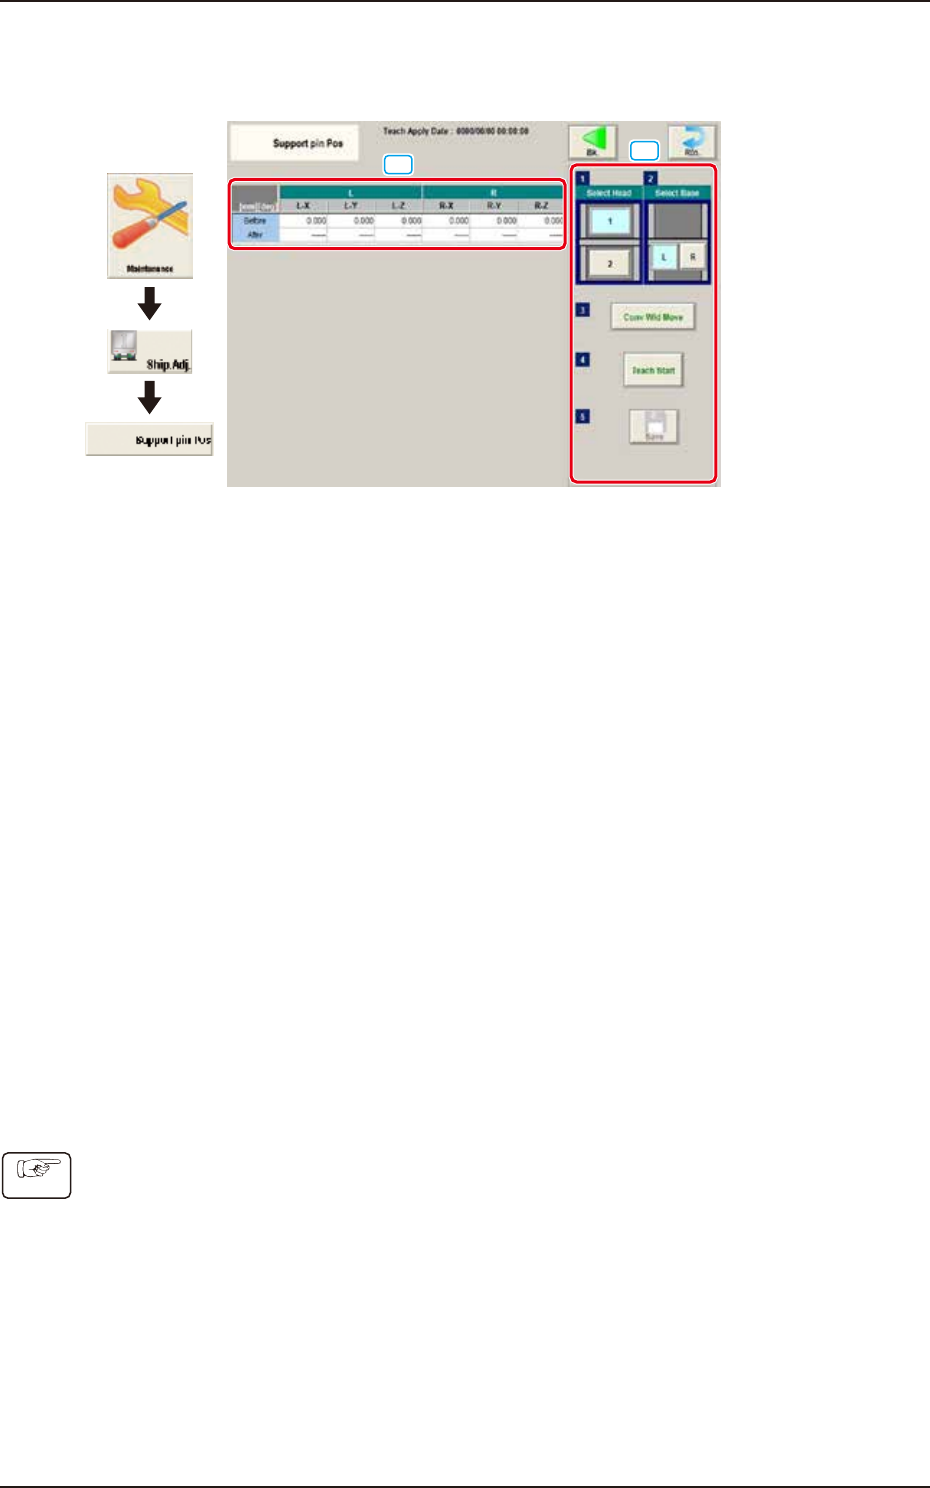
5.16 Support pin Pos
This window performs the teaching operation on the PCB support pin position.
[1]
[2]
Graphic
Development
F3A47
[1] Teaching Result
Before : Displayed are the offset values before the teaching operation.
After : Displayed are the offset values after the teaching operation.
[2] Operation buttons
Select Head
Select the head where the support pin position teaching is performed.
Select Base
Select the base where the support pin position teaching is performed.
[Conv Wid Move] Button
The head is evacuated and the conveyor width is extended to the limit.
[Teach Start] Button
The support pin position teaching is performed automatically.
[Save] button
The teaching results are saved.
• Teaching Jig
For the PCB support pin position teaching, the PCB support pin position teaching jig is used.
• Teaching Procedure
(1) Select the head to be used for the teaching.
(2) Select the base to be taught.
(3) Press the [Conv Wid Move] button. (The conveyor will move to the setup position.)
(4) Setup the PCB support pin teaching jig on the upper left and lower right.
(5) Press the [Teach Start] button. (The support pin position teaching is performed.)
(6) Press the [Save] button. (The teaching results are saved.)
Procedure
EUKYX
1-55199-3100
5.17 Master Noz Lv (Indv.)
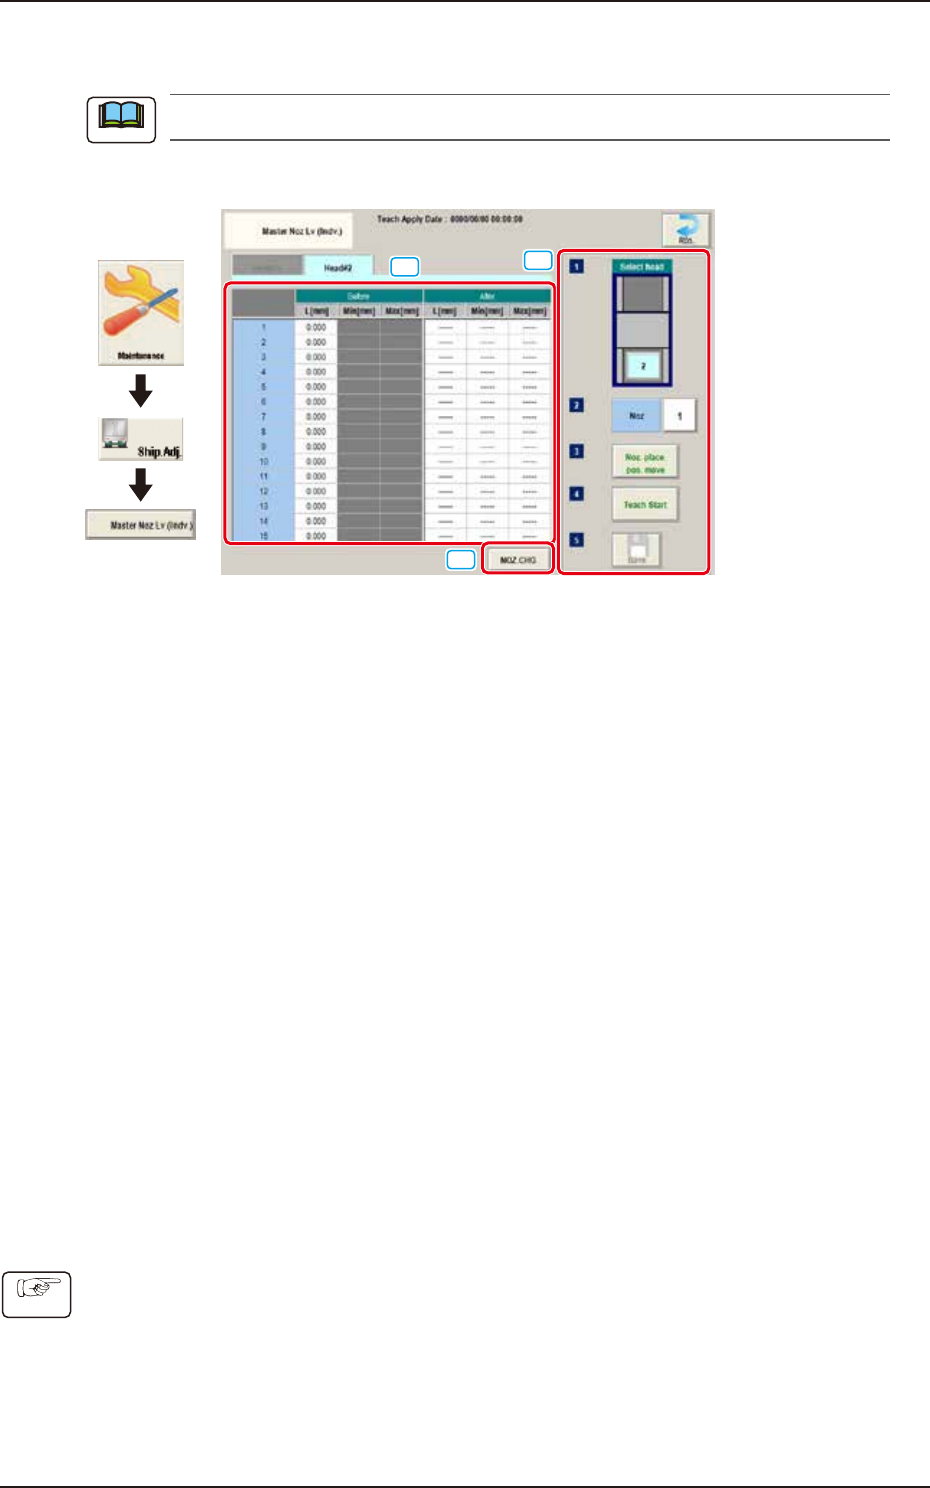
5.17 Master Noz Lv (Indv.)
This window is not displayed when the multi-functional head is selected.
The master nozzle level is taught individually.
[1]
[3]
[2]
Graphic
Development
F3A98
[1] Teaching Data Display Section
The offset value of the specified head is displayed.
[2] [NOZ.CHG.] button
The "NOZ.CHG." window is displayed. The nozzle is changed by operating the window.
[3] Teaching procedures section
The following buttons are arranged in teaching procedures section.
Select head
Select the head to be taught.
[Noz] Button
Specifies the nozzle to be taught.
When the [Nozzle] button is pressed, the data input window appears.
[Noz. place. pos. move] button
Pressing the button turns the specified nozzle to move to the machine front side when
attaching/detaching nozzle.
[Teach Start] button
Starts the teaching.
[Save] button
Saves the teaching results.
• Teaching Procedures
(1) Select the Head (1 or 2) to be taught.
(2) Press the [Noz] button and select the nozzle No. (from 1 through 15) on the [Noz] selection
window.
(3) Press the [Noz place. pos. move] button to attach the master nozzle.
(4) Press the [Teach Start] button.
(5) Press the [Save] button.
Note
Procedure
EUKYX
1-56199-3100
5.18 Table Offset
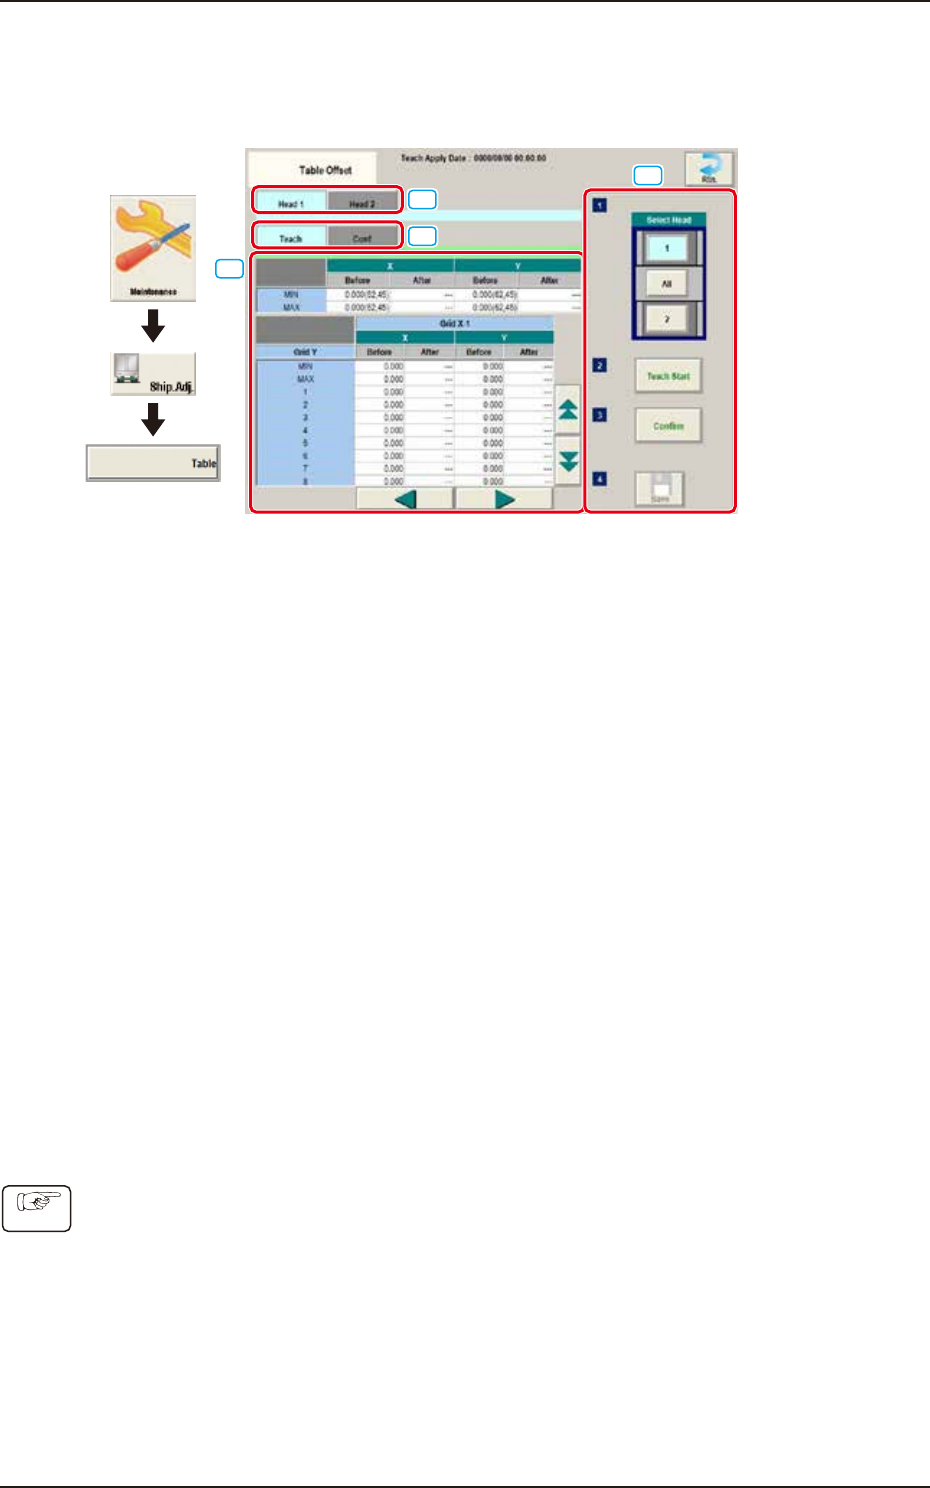
5.18 Table Offset
The offset amount (X, Y) is taught when the head is moved from the board positioning standard to
the specified distance.
[1]
[2]
[3]
[4]
Graphic
Development
F3A48
[1] Head1/ Head 2 Tabs
When each tab is pressed, the corresponding window of the head for teaching is displayed.
[2] “Teach/Conf” tabs
Switches the "Teach" window and "Conf" window.
[3] Teach/Conf window
The teaching data is displayed when the "Teach" tab is selected.
The confirmation data is displayed when the "Conf" tab is selected.
[4] Teaching procedures section
The following buttons are arranged in teaching procedures section.
Select head
Selects the head to be taught.
[Teach Start] button
Starts the teaching.
[Confirmation] button
Performs the confirmation.
[Save] button
Saves the teaching results.
• Teaching Procedures
(1) Set the jig board on the positioning place.
(2) Select the Head (1 or 2) to be taught.
(3) Press the [Teach Start] button. The teaching results are displayed on the teaching data.
(4) Press the [Confirm] button. The confirmation results are displayed on the confirmation data.
(5) Press the [Save] button.
Procedure