EUKYX-199-3100_G5S2_Instruction_Vol3_E.pdf - 第106页
EUKYX 1-57 199-3100 5.19 Self Calibration 5. 1 9 Se lf Calibration Thi s window is not displayed wh en the multi -f unctional head is se lect ed. The pl acement a ccu racy measurement is a utomatica l ly performe d in th…
EUKYX
1-56199-3100
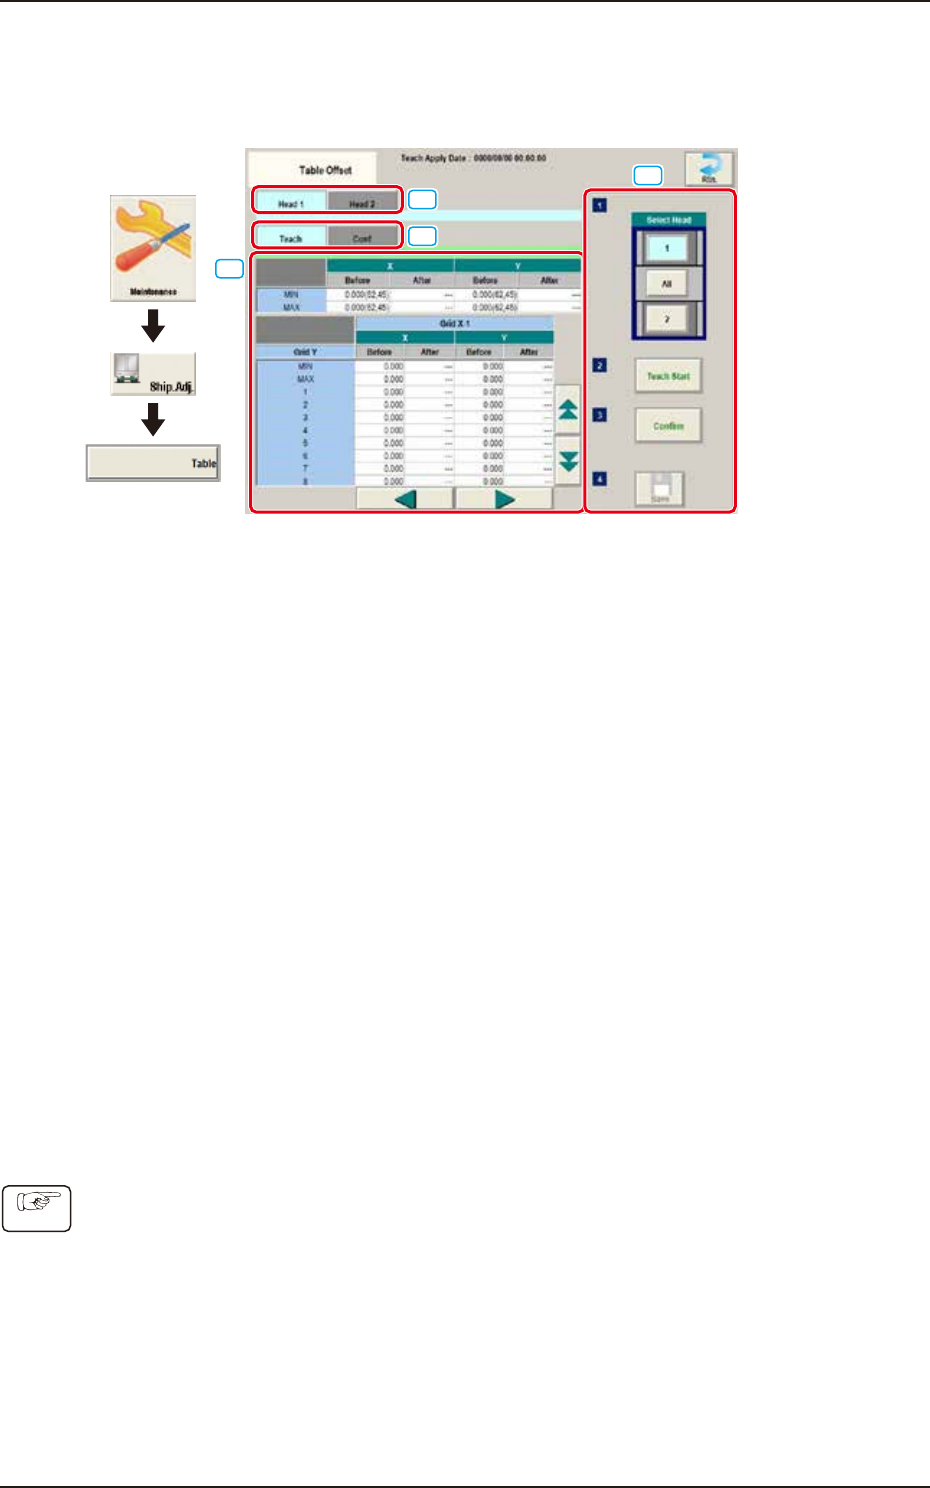
5.18 Table Offset
5.18 Table Offset
The offset amount (X, Y) is taught when the head is moved from the board positioning standard to
the specified distance.
[1]
[2]
[3]
[4]
Graphic
Development
F3A48
[1] Head1/ Head 2 Tabs
When each tab is pressed, the corresponding window of the head for teaching is displayed.
[2] “Teach/Conf” tabs
Switches the "Teach" window and "Conf" window.
[3] Teach/Conf window
The teaching data is displayed when the "Teach" tab is selected.
The confirmation data is displayed when the "Conf" tab is selected.
[4] Teaching procedures section
The following buttons are arranged in teaching procedures section.
Select head
Selects the head to be taught.
[Teach Start] button
Starts the teaching.
[Confirmation] button
Performs the confirmation.
[Save] button
Saves the teaching results.
• Teaching Procedures
(1) Set the jig board on the positioning place.
(2) Select the Head (1 or 2) to be taught.
(3) Press the [Teach Start] button. The teaching results are displayed on the teaching data.
(4) Press the [Confirm] button. The confirmation results are displayed on the confirmation data.
(5) Press the [Save] button.
Procedure
EUKYX
1-57199-3100
5.19 Self Calibration
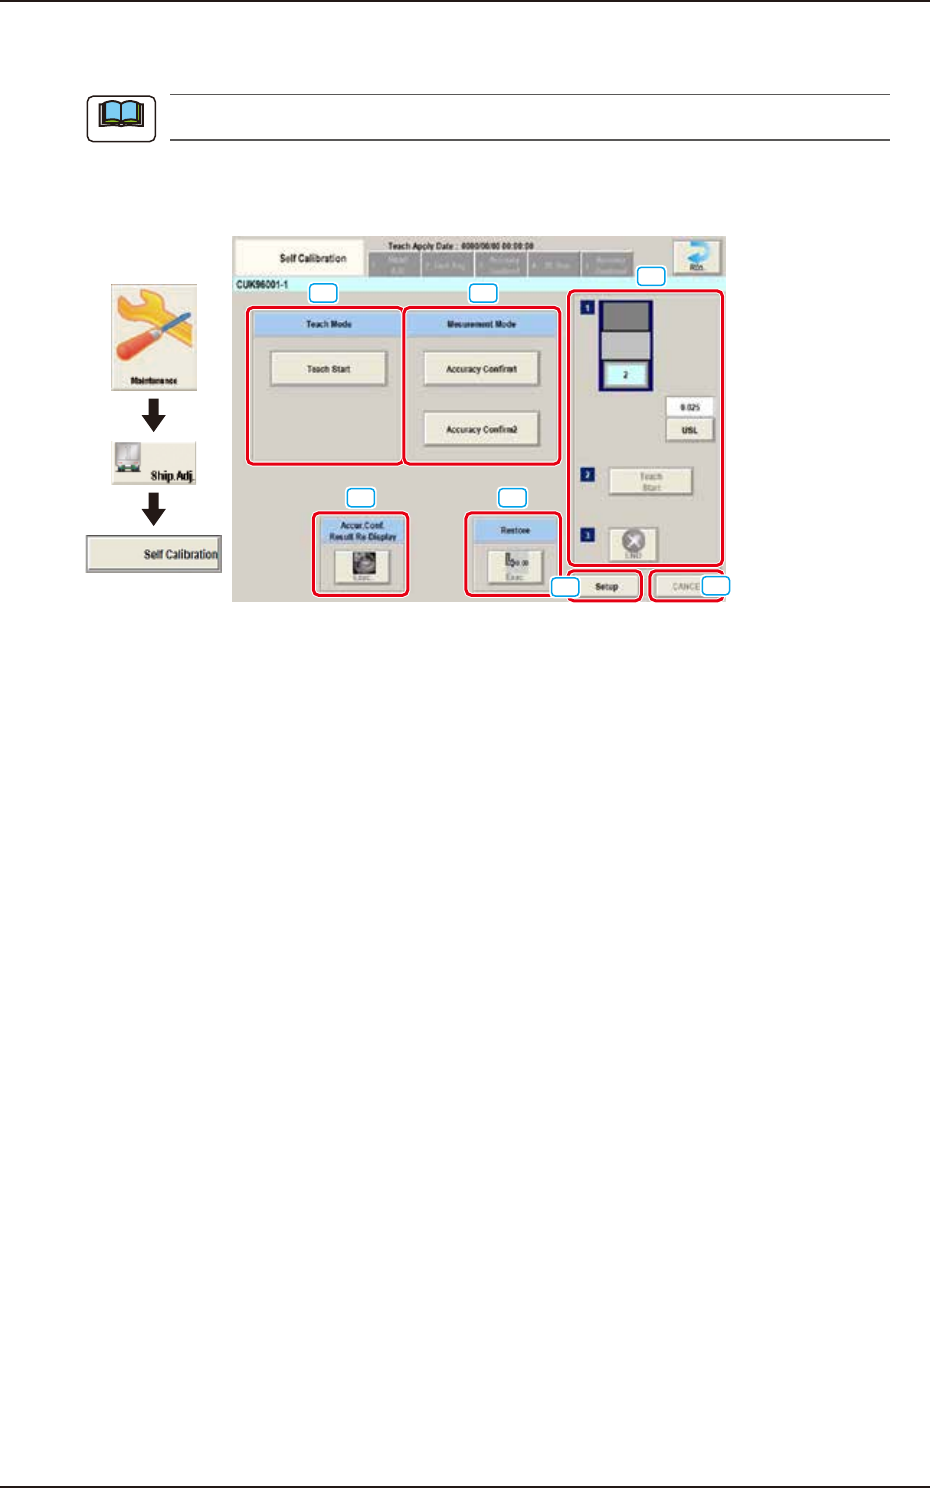
5.19 Self Calibration
This window is not displayed when the multi-functional head is selected.
The placement accuracy measurement is automatically performed in the machine and the results
are fed back to the offset data.
[1]
[2]
[3] [4]
[7]
[5]
[6]
Graphic
Development
F3A49
[1] Teach Mode / [Teach Start] button
Switches to the program for placement accuracy adjustment.
[2] Measurement Mode / [Accuracy Confirm1], [Accuracy Confirm2]buttons
Switches to the program for placement accuracy confirmation.
[3] Accur.Conf. Result Re-display
Displays the accuracy confirmation result per stage.
[4] Restore
Restores the backed up head offset data per stage.
[5] Setup
Performs the setup of items below required for self calibration
CNVR Set-up, Noz.Chg., PCB Xfer., and Fdr P-u Tch
[6] Cancel
Cancels the teaching.
[7] Teaching procedures section
The following buttons are arranged in teaching procedures section.
Select stage
:
Select stage to be taught.
[USL] button
:
Set the standard value.
[Teach Start] button
:
Start the teaching.
[END] button
:
Finish the teaching.
Note

EUKYX
1-58199-3100
5.19 Self Calibration
• Teaching Procedures for self calibration
(1) Prepare the following items before self calibration teaching.
NO. Name Qty
1 BARON glass board 1
2 BARON double sided tape 1
3 MIRROR_PLATE 1
4 0603 master tape 2
5 Nozzle for 0603 (HG33C) 30
6 8 mm wide feeder (GD-38080 or equivalent) 2
7 CPK 1
Prepare the items as needed.
F3A99
• Set the MIRROR_PLATE pins in the holes of backup base.
F3A100
• Set the operation mode.
1. Select [Product] - [Operation] - “Opr. Mode” - [Speed]. Select “Not Designated” for “Mode”.
2. Select [Product] - [Operation] - “Test Mode”. Select “Disable” for “TEST PATTERN”.
(2) Press the [Teach Start] button on Teach Mode.
(3) Press the [Setup] button. Perform teaching for CNVR Set-up, Noz.Chg., and Fdr P-u Tch.
(4) Set the BARON glass board on the transfer position.
(5) Press the [Teach Start] button in the teaching procedures section.
(6) Press the [END] button in the teaching procedures section.
Procedure
Note