EUKYX-199-3100_G5S2_Instruction_Vol3_E.pdf - 第128页
EUKYX 1-79 199-3100 6.3 RECOG 6.3. 2 Recog Light Pressi ng the [Recog Ligh t] tab on t he "RECOG" wi nd ow di spla ys t he fol lowi ng window . Graphic Development F3A73 [ 1 ] Sub Tab s The "Recog Li ght&q…

EUKYX
1-78199-3100
6.3 RECOG
6.3.1 Light Board
Pressing the [Light Board] tab on the "RECOG" window displays the following window.
[1]
[2]
[4]
[3]
Graphic
Development
F3A72
[1] Result
Displayed is the lighting board check result.
[2] Error code
Displayed is the lighting board error code.
[3] Version
When the diagnosis is performed and the result has no problem, the firmware version for the
lighting control panel is displayed.
[4] [CHECK] Button
When this button is pressed, the lighting control board check is executed.
EUKYX
1-79199-3100
6.3 RECOG
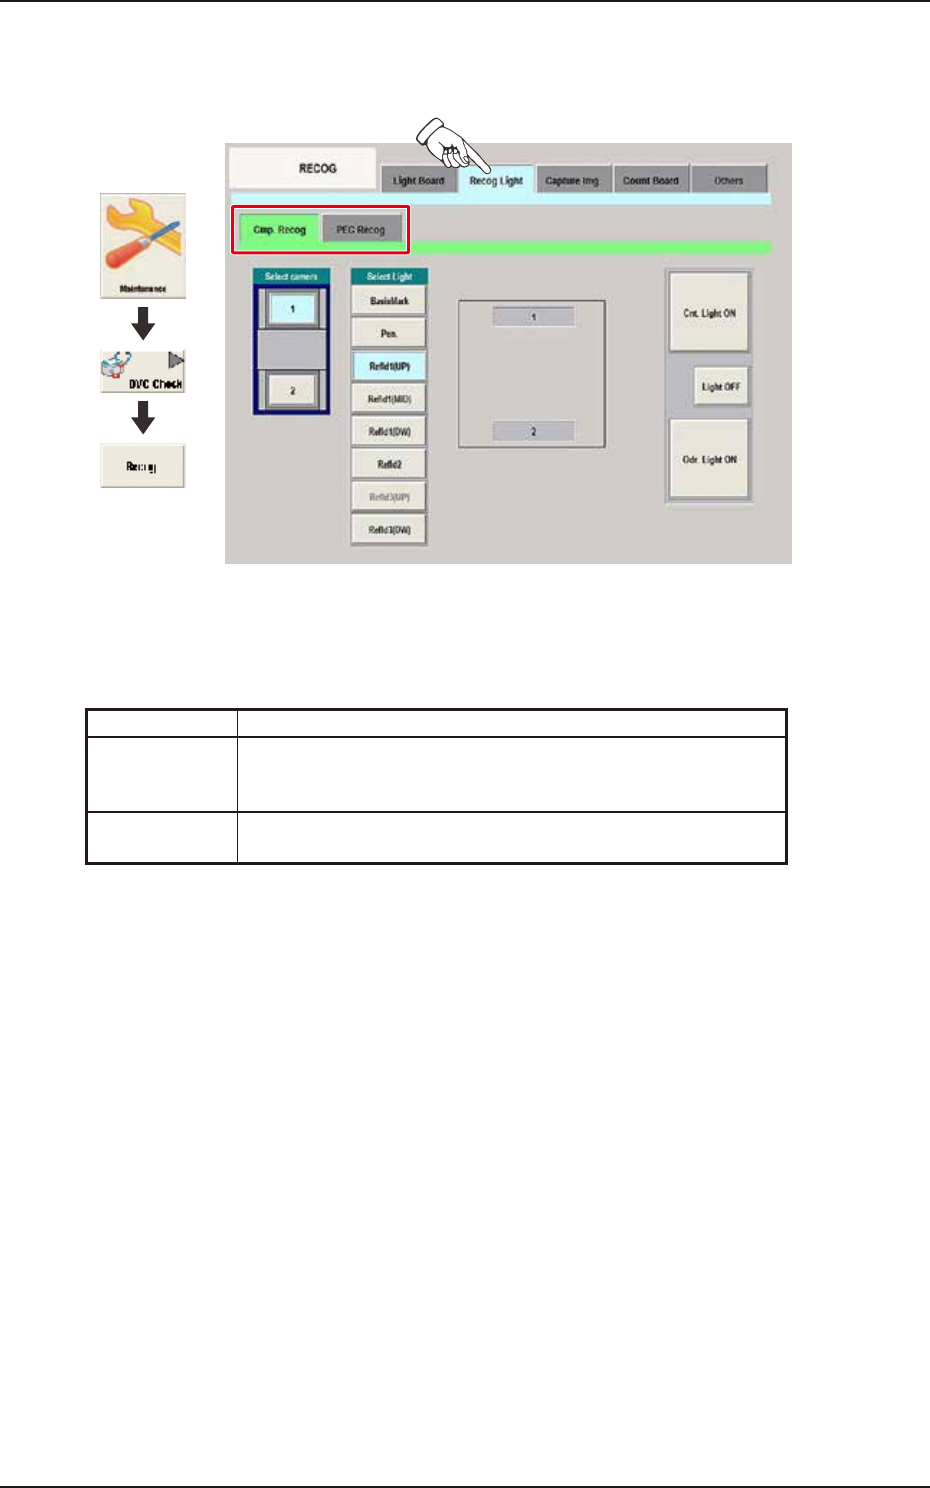
6.3.2 Recog Light
Pressing the [Recog Light] tab on the "RECOG" window displays the following window.
Graphic
Development
F3A73
[1] Sub Tabs
The "Recog Light" window is provided with the following two tabs. When each tab is pressed, the
corresponding tab sheet appears.
Sub tab Description
Cmp. Recog In this tab sheet the component recognition lighting is turned ON in
the minimum unit and the wire connection condition and
illumination condition are confirmed.
PEC Recog In this tab sheet the PEC recognition lighting is turned ON and the
wire connection condition and illumination condition are confirmed.
EUKYX
1-80199-3100
6.3 RECOG
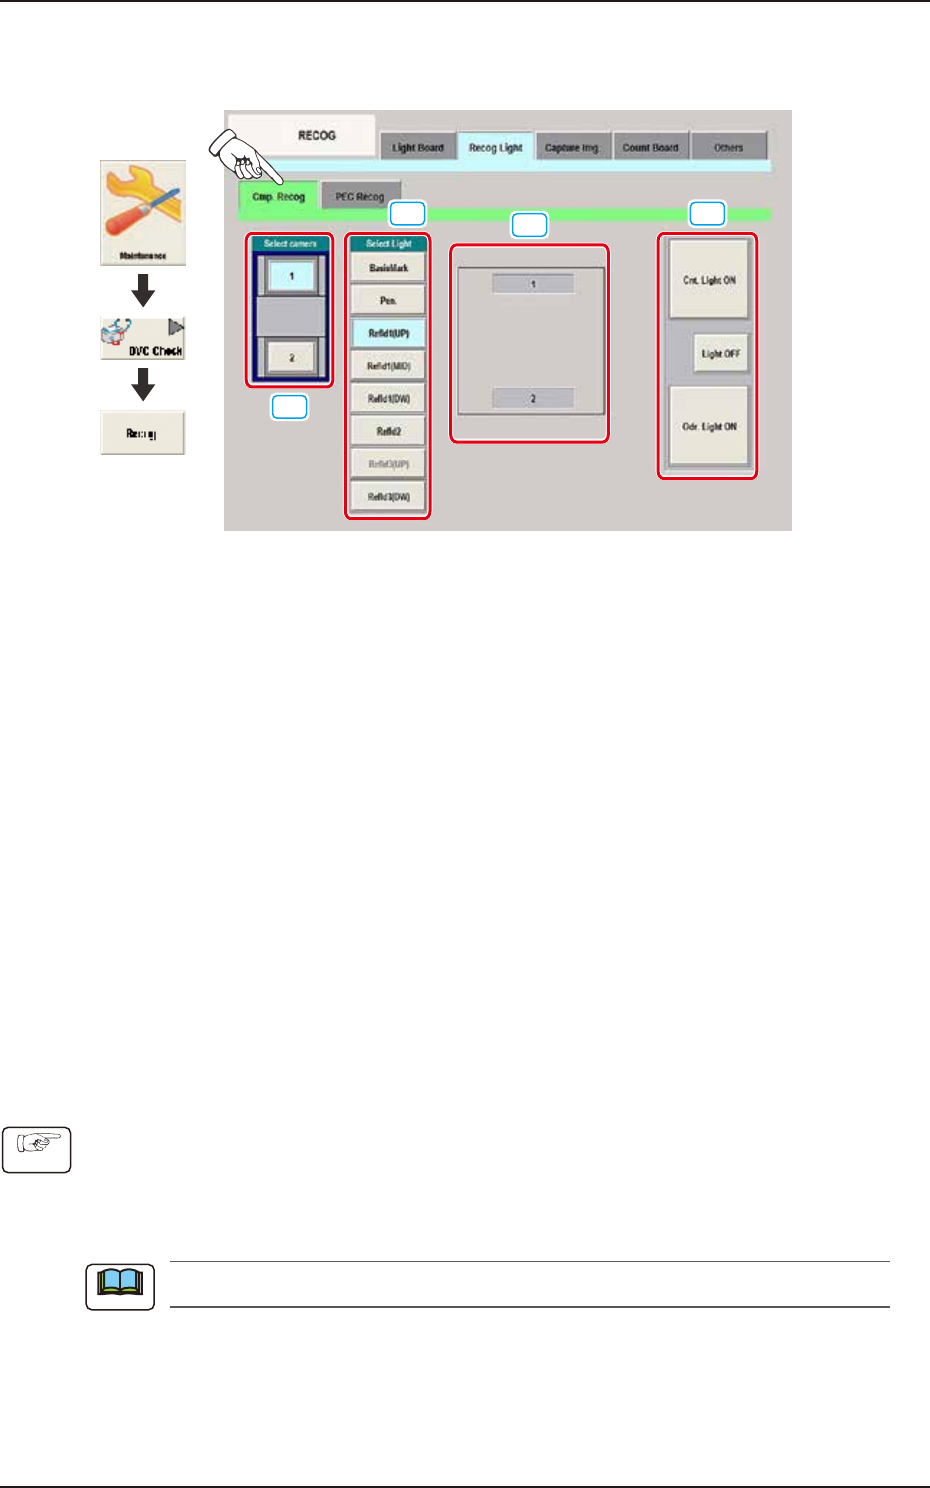
6.3.2.1 Cmp. Recog
Pressing the [Cmp. Recog] sub tab on the [Recog Light] tab displays the following window.
[1]
[2]
[3]
[4]
Graphic
Development
F3A74
[1] Select camera Buttons
Using these buttons, the component recognition camera to check the component recognition
lighting, is selected.
[2] Select Light Buttons
Using these buttons, the lighting pattern to be checked is selected.
[3] Recognition Lighting Image Display Section
The recognition lighting pattern is changed according to the lighting pattern selected using the "[2]
Recognition Lighting Selection Buttons".
[4] [Cnt. Light ON] Button
When this button is pressed, the recognition lighting selected in [2] is turned ON
continuously.
[Light OFF] Button
The recognition lighting that has been continuously turned ON is turned OFF.
[Odr. Light ON] Button
All of the recognition lighting shown in [2] are turned ON or OFF consecutively.
• Component Recognition Lighting Confirmation Procedure
(1) Select the component recognition camera to confirm with button [1].
(2) Select the lighting pattern to confirm with button [2].
(3) Select the lighting condition with button [4].
(The lamp is turned ON according to the selected lighting condition).
The lamps which currently turn ON, are indicated in yellow.
Procedure
Note