EUKYX-199-3100_G5S2_Instruction_Vol3_E.pdf - 第204页
EUKYX 2-56 199-3100 3. Auto Operation 3 . Au to Op eration Pressi ng the [Sys. Setting] - [ Op e. Pa l am] but tons di spl ays the fol lowi ng wi ndow . Graphic Development F3B71A The tab sheet may look diff erent , depe…
EUKYX
2-55199-3100
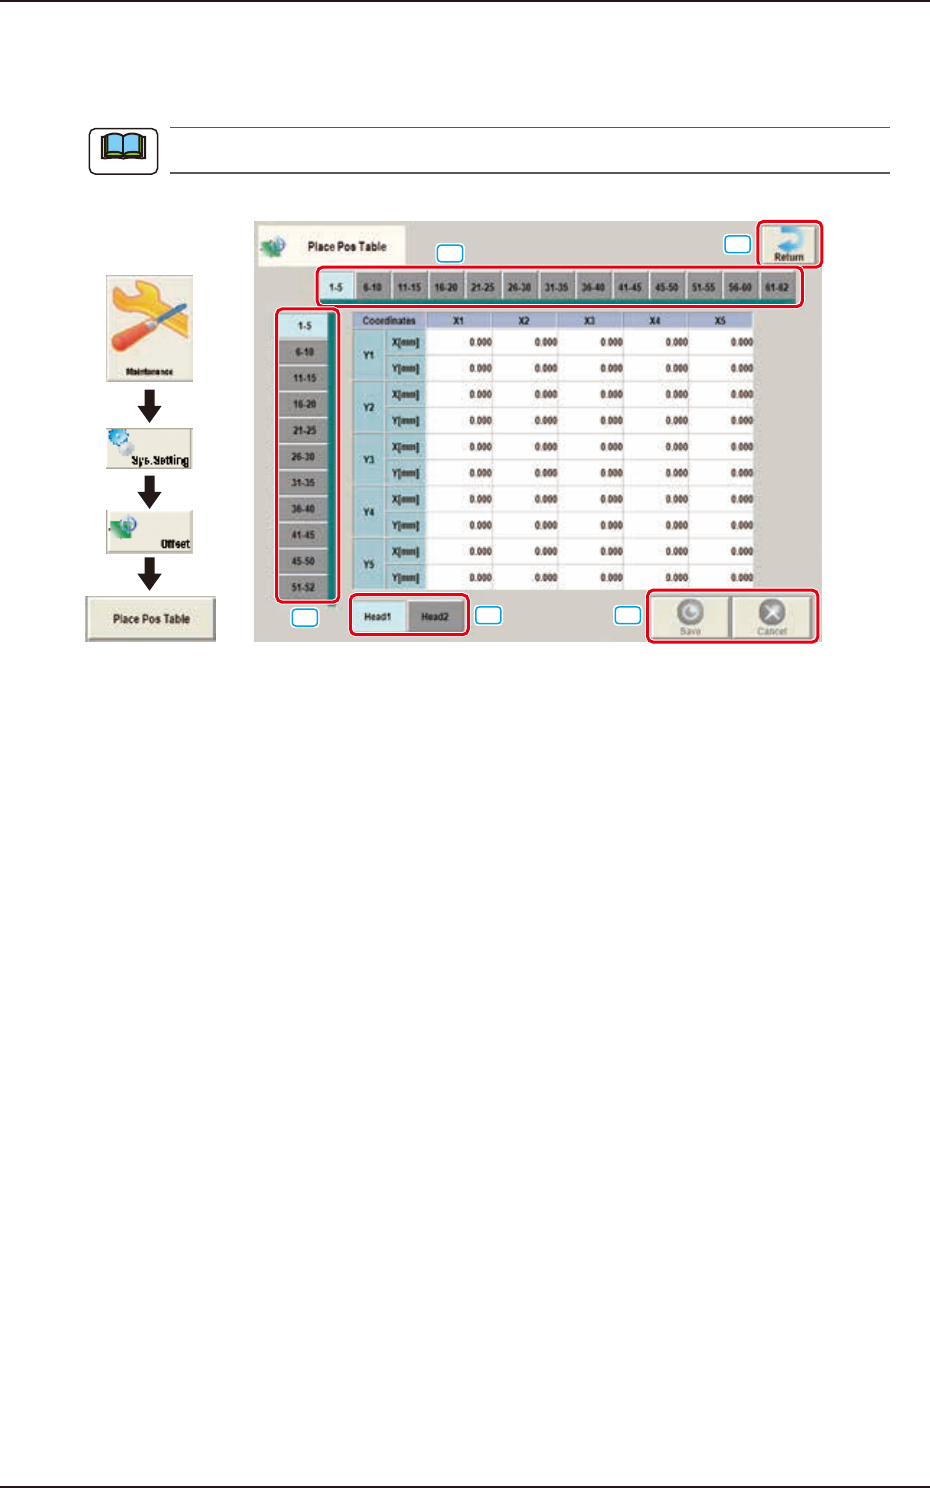
2.12 Place Pos Table
2.12 Place Pos Table
Pressing the [Place Pos Table] button on the "Offset Data" window displays the following window.
The display of the [Head 2] is same as the [Head 1].
Graphic
Development
[1]
[2]
[3]
[4]
[5]
F3B70
The window shows the place position table offset value from nozzle tip as a reference point. Place
components on a glass board in 10
×
10 mm grid pattern. At this time, the angle of head that picks
and mounts with nozzle 1 is 0 degree. Then enter the measured values (X and Y) on the window.
[1] Head Select Tab
The head to be input is selected.
[2] Direction “X” Select Tab
The point on the grid in the direction “X” for the selected tab, is displayed.
[3] Direction “Y” Select Tab
The point on the grid in the direction “Y” for the selected tab, is displayed.
[4] [Return] button
Returns to the “Offset Data“ window.
[5] [Save] button
Saves the entered data.
[Cancel] button
Cancels the entered data and returns to the saved data.
Note
EUKYX
2-56199-3100
3. Auto Operation
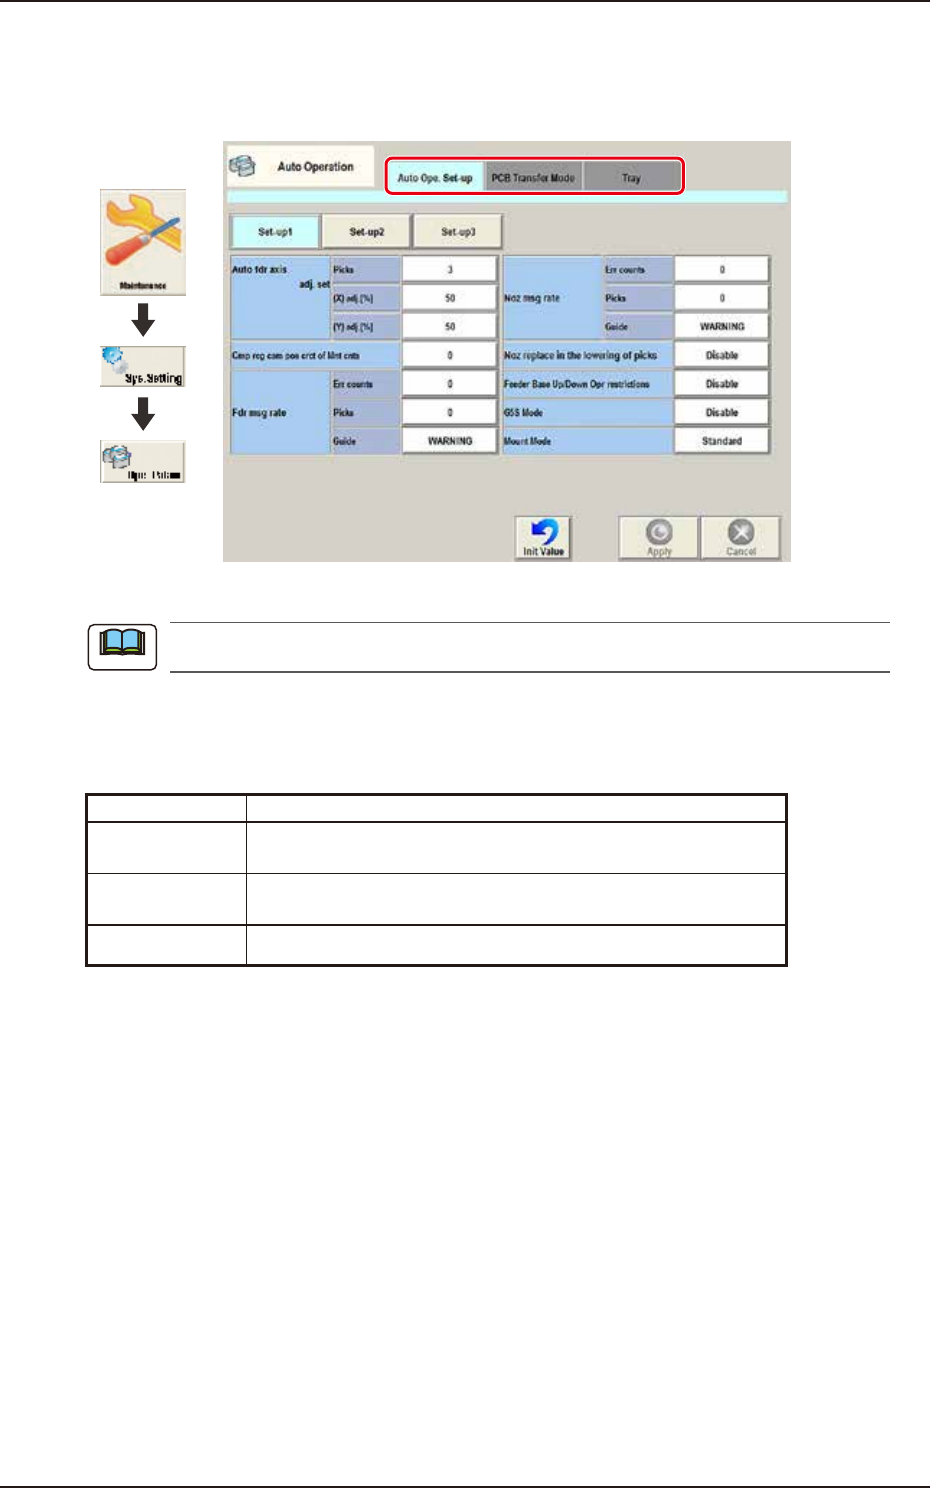
3. Auto Operation
Pressing the [Sys. Setting] - [Ope. Palam] buttons displays the following window.
Graphic
Development
F3B71A
The tab sheet may look different, depending on which options are selected.
[1] Tab sheet
The "Auto Operation" window is provided with the following 3 tabs. When each tab is pressed, the
corresponding tab sheet appears.
Tab Description
Auto Ope.
Set-up
Set various types of parameters related to the automatic
operation of the machine.
PCB Transfer
Mode
Set the operation mode of the input and output machines and the
requirements for PCB transfer and positioning operations.
Tray Set the information of tray matrix when a tray unit is used.
Note
EUKYX
2-57199-3100
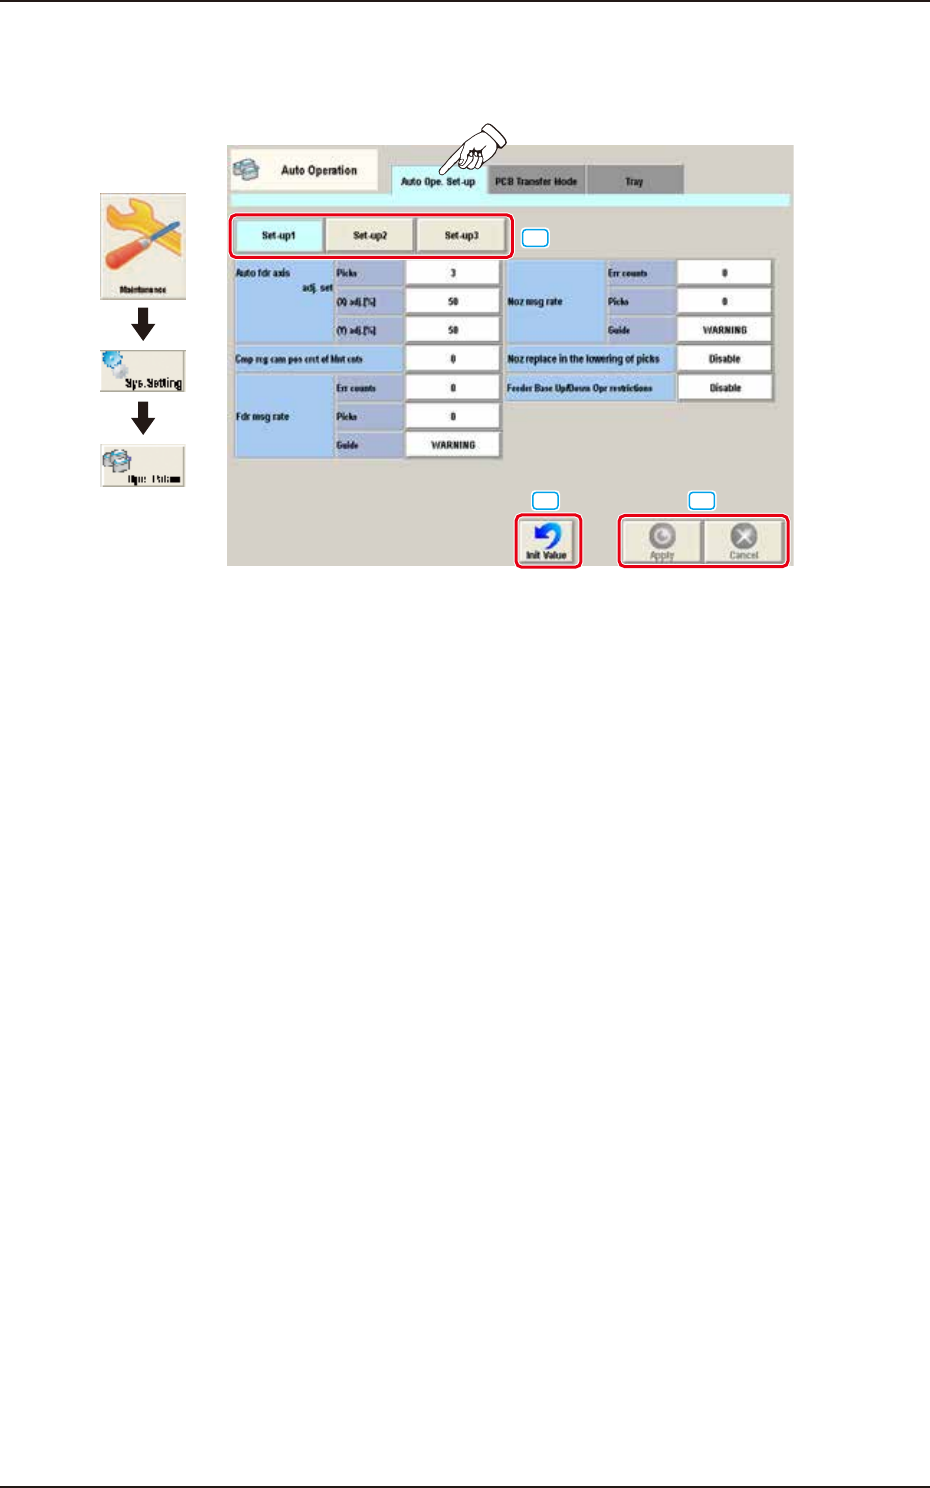
3.1 Auto Ope. Set-up
3.1 Auto Ope. Set-up
Pressing the [Auto Ope Set-up] tab on the "Auto Operation" window displays the following window.
Graphic
Development
[1]
[2]
[3]
F3B72A
[1] Set-up Change Button
The window is changed over from "Set-up 1", "Set-up 2", or "Set-up 3".
[2] Init Value Button
When this button is pressed, the auto operation set-up is initialized.
[3] [Apply] button
When this button is pressed, the input data is applied.
[Cancel] button
When this button is pressed, the input data is cancelled and the window returns to the save data.