EUKYX-199-3100_G5S2_Instruction_Vol3_E.pdf - 第224页
EUKYX 2-76 199-3100 4.3 Light T ower Alarm [6] [ ▲ ], [ ▼ ] But ton Pressi ng these but tons scrol ls the data item . [ 7 ] Init V alue Return the par ameters for the Lig ht T ower and Al arm S ound to the i ni tia l val…
EUKYX
2-75199-3100
4.3 Light Tower Alarm
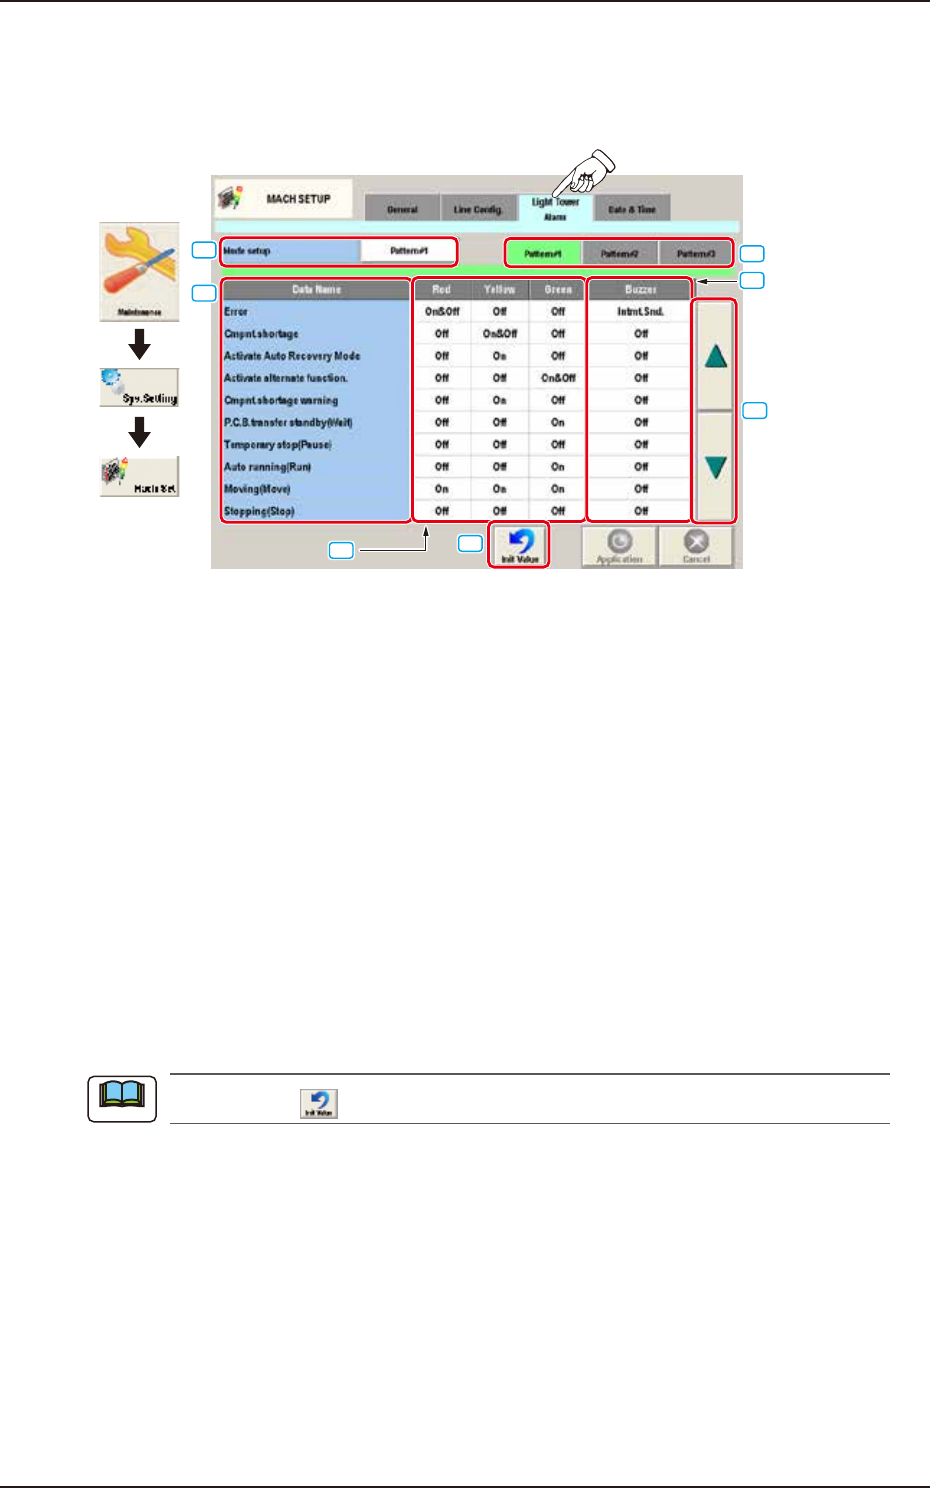
4.3 Light Tower Alarm
Pressing the [Light Tower Alarm] tab on the "MACH SETUP" window displays the following window.
Set the color of tower light and buzzer sound.
Graphic
Development
[1]
[2]
[3]
[4]
[5]
[6]
[7]
F3B81A
[1] Mode setup
The patterns are changed over.
[2] Tower Light Selection Buttons
[Pattern #1], [Pattern #2], and [Pattern #3] display buttons
These buttons can be used to save the setting of each tower light.
When one of these buttons is selected, the corresponding lighting pattern appears, enabling you to
change the settings.
[3] Data Name
Displayed are the items for which the colors (red, yellow, and green) of the tower lights and the
types of alarm sounds should be specified.
[4] Red, Yellow, Green
Set "On", "On&Off", or "Off" for the tower lights (red, yellow, and green).
[5] Buzzer
Set "Off" or "Intmt. Snd." in each text box to specify the types of alarm sounds.
When the icon (
) is pressed, the standard settings (defaults) resume.
Note
EUKYX
2-76199-3100
4.3 Light Tower Alarm
[6] [
▲
], [
▼
] Button
Pressing these buttons scrolls the data item.
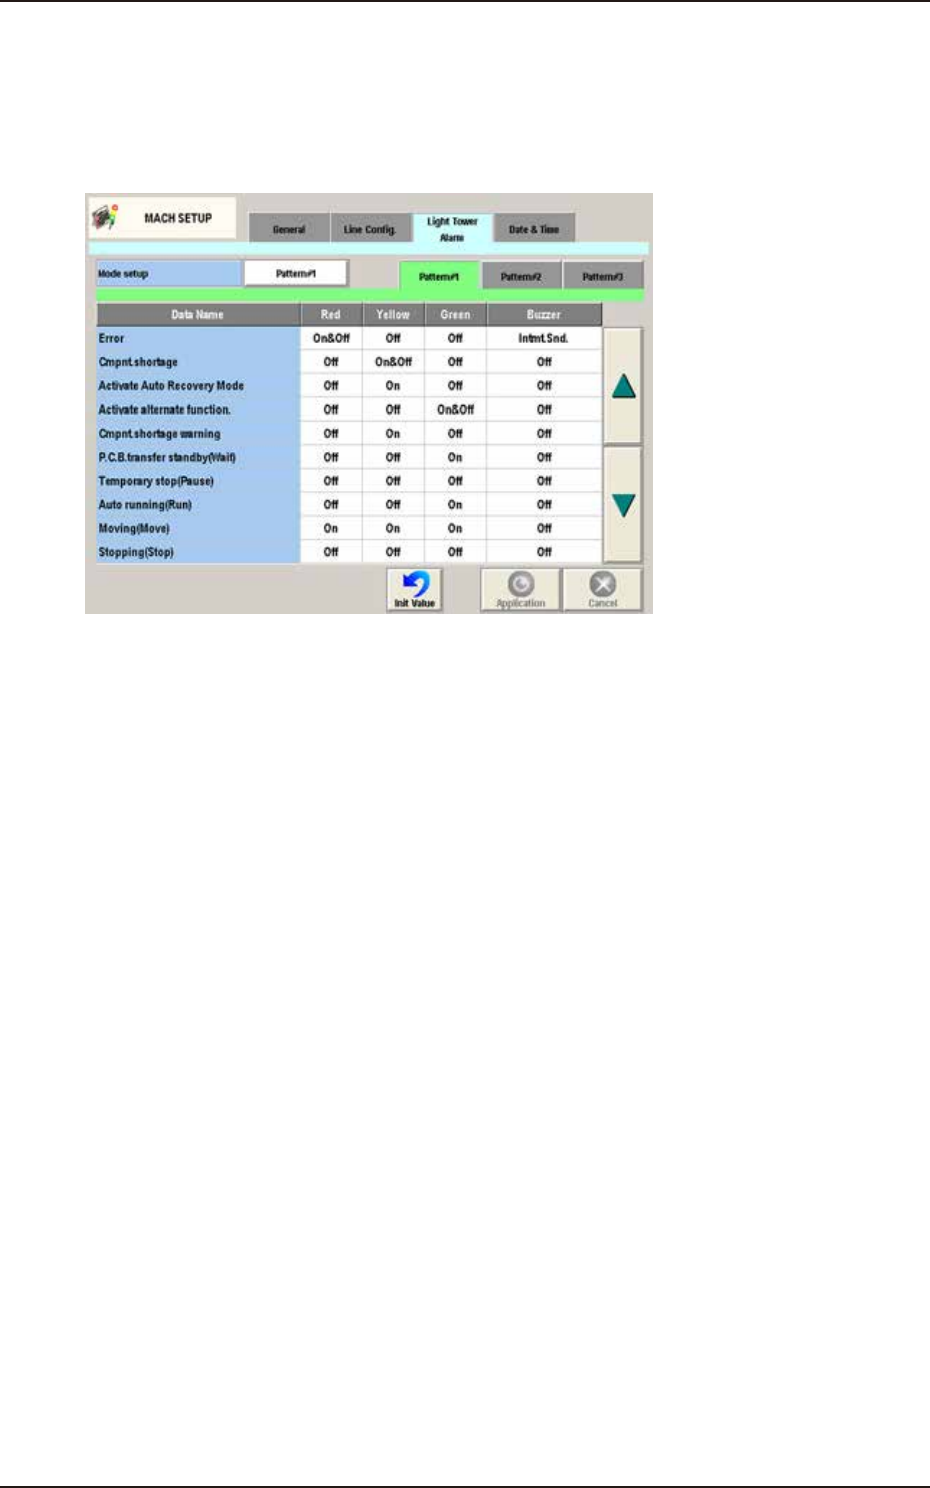
[7] Init Value
Return the parameters for the Light Tower and Alarm Sound to the initial values.
The initial values are as follows.
F3B84A
EUKYX
2-77199-3100
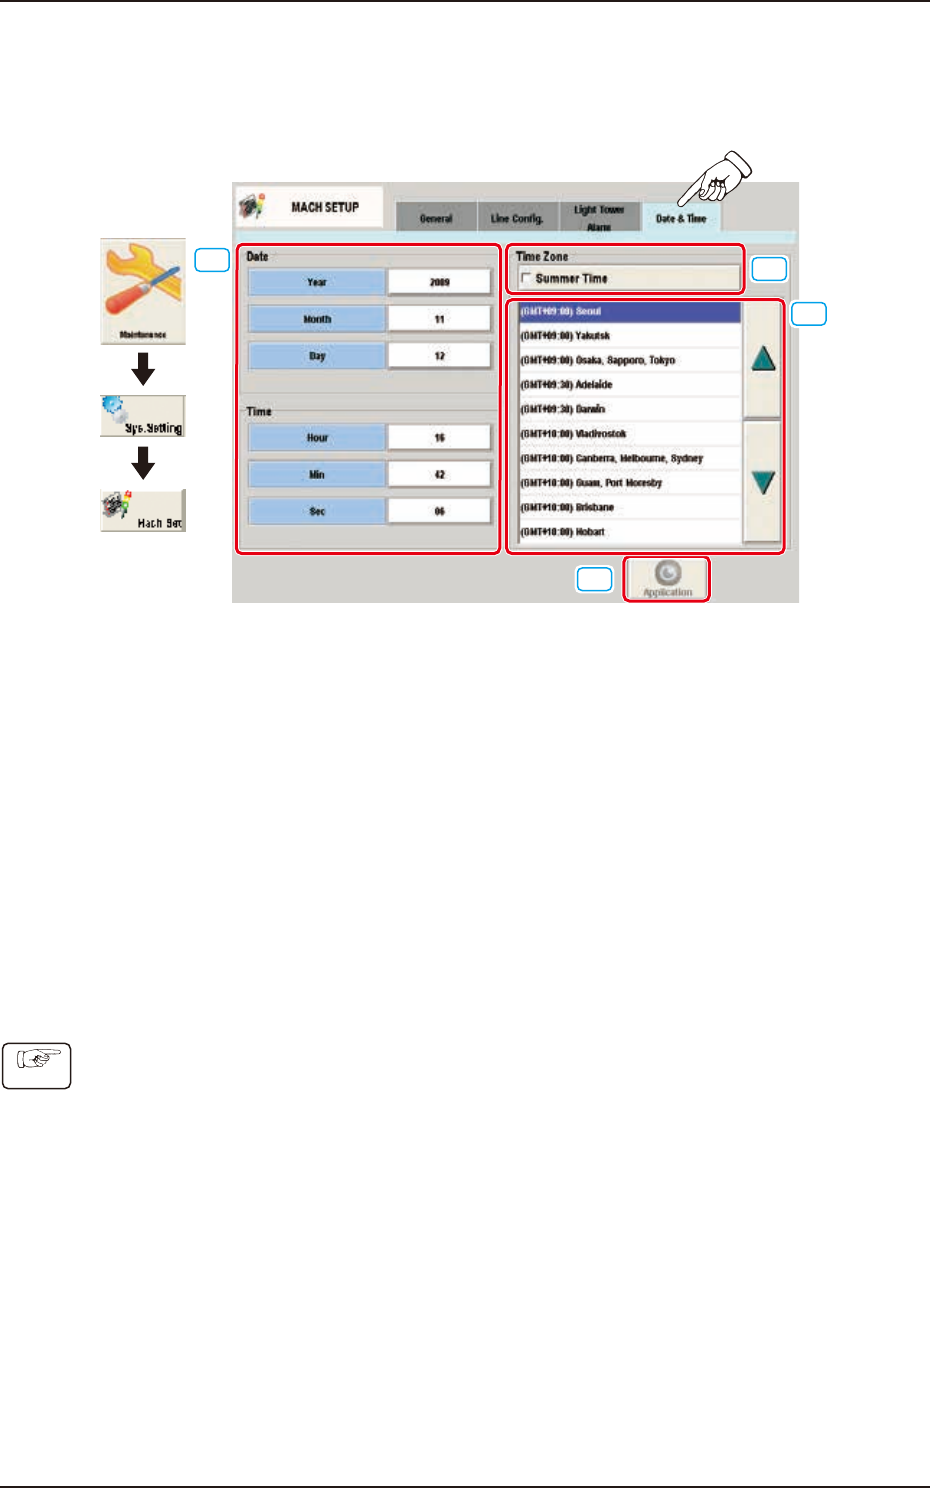
4.4 Data & Time
4.4 Data & Time
The system clock (year, month, day, hours, minutes, and seconds) can be adjusted and a time zone
can be selected.
Graphic
Development
[1]
[2]
[3]
[4]
F3B85
[1] Edit Buttons
The buttons to open the input window for Year, Month, Day, Hour, Min, and Sec are arranged.
[2] "Summer Time" Check Box
Tick this button to specify the summer time. A check mark appears inside the box, indicating that
the summer time is selected.
[3] "Time Zone" List
Select the proper time zone from this list.
[4] [Application] button
The data adjusted with the edit buttons is confirmed and set in the machine by means of this
button.
• How to specify the date and time
(1) When the [Year] button is pressed, the “Year” edit window opens.
(2) Enter a year in the entry field of the “Year” edit window and press the [Set] button.
The entered year appears in the corresponding text box.
(3) Follow the same procedure to specify a month, a day, hours, minutes, and seconds.
(4) Select the proper time zone from the “Time Zone” list pane.
(5) When the [Application] button is pressed, the settings are determined.
Procedure