EUKYX-199-3100_G5S2_Instruction_Vol3_E.pdf - 第82页
EUKYX 1-33 199-3100 5.5 PCB Recog Light [ 3] [Light Pt ] butt on The camera 1 or camera 2 l igh tin g pattern is selected from the foll owing i tems. ALL : Whe n sele cte d, the tea ching for t he ring - lamp or co axial…
EUKYX
1-32199-3100
5.5 PCB Recog Light
5.5 PCB Recog Light
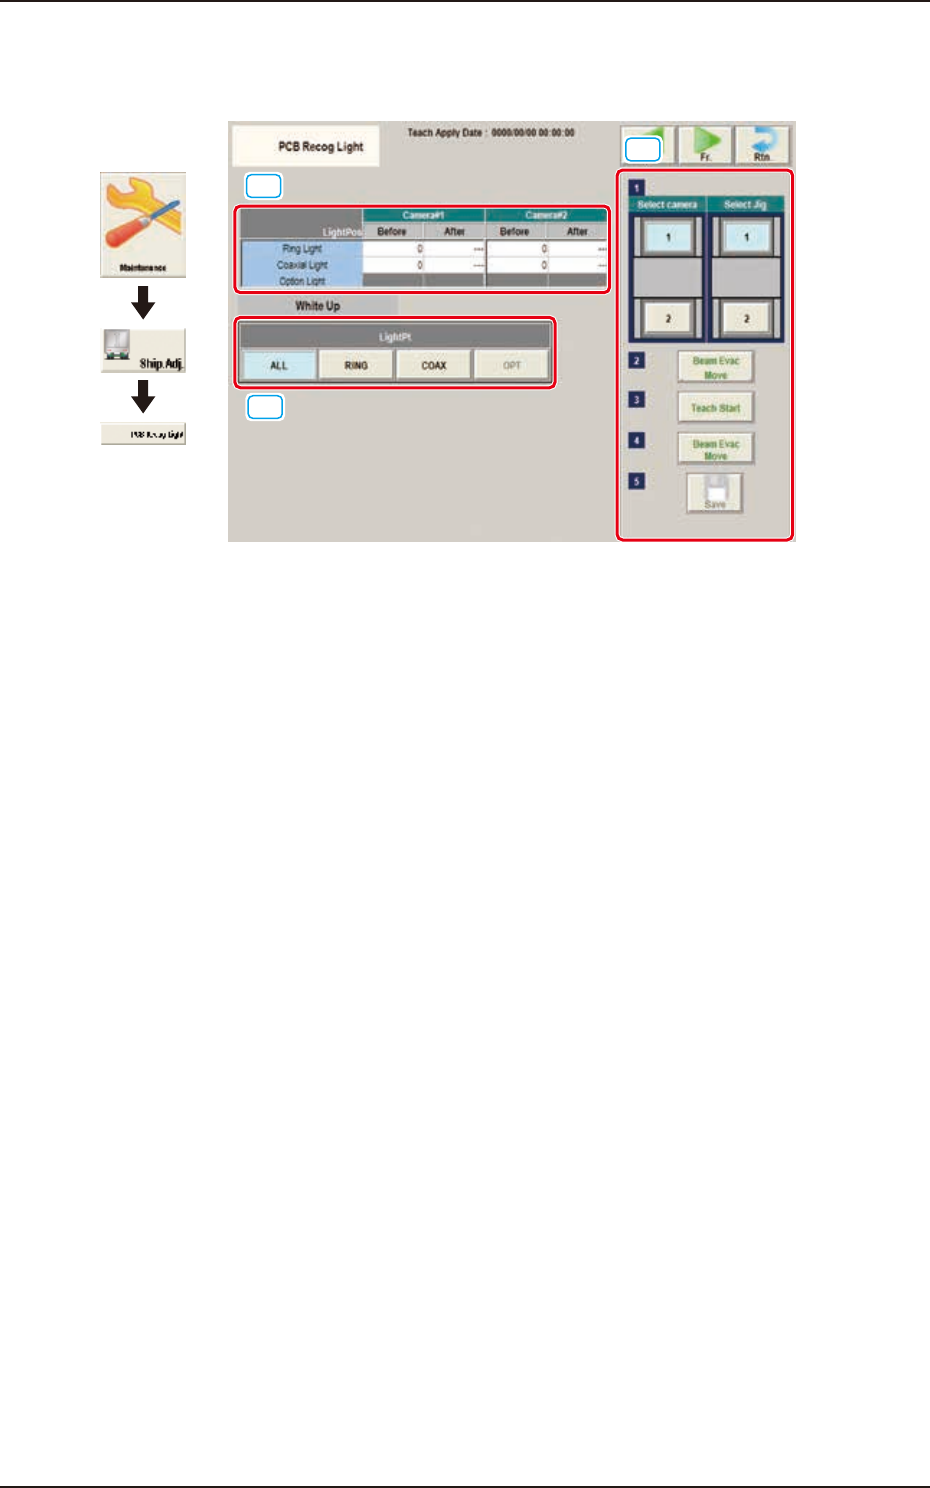
The window displays the light teaching of PCB recognition camera.
[1]
[2]
[3]
Graphic
Development
F3A30
[1] Teaching Data Display Section
Displayed are offset data items for each lighting pattern for the designated camera.
[2] Teaching procedures section
The following buttons are arranged in teaching procedures section.
Select camera
Selects the PEC recognition camera to be taught.
Select Jig
Selects the block where the jig is set up.
[Beam Evac Move] button
Moves the XY beam to their home positions.
[Teach Start] button
Starts the teaching.
[Beam Evac Move] button
Moves the XY beam to their escape positions.
[Save] button
The teaching results are saved.
EUKYX
1-33199-3100
5.5 PCB Recog Light
[3] [Light Pt] button
The camera 1 or camera 2 lighting pattern is selected from the following items.
ALL : When selected, the teaching for the ring-lamp or coaxial lamp is performed.
RING : When selected, the teaching for the ring-lamp is performed.
COAX : When selected, the teaching for the coaxial lamp is performed.
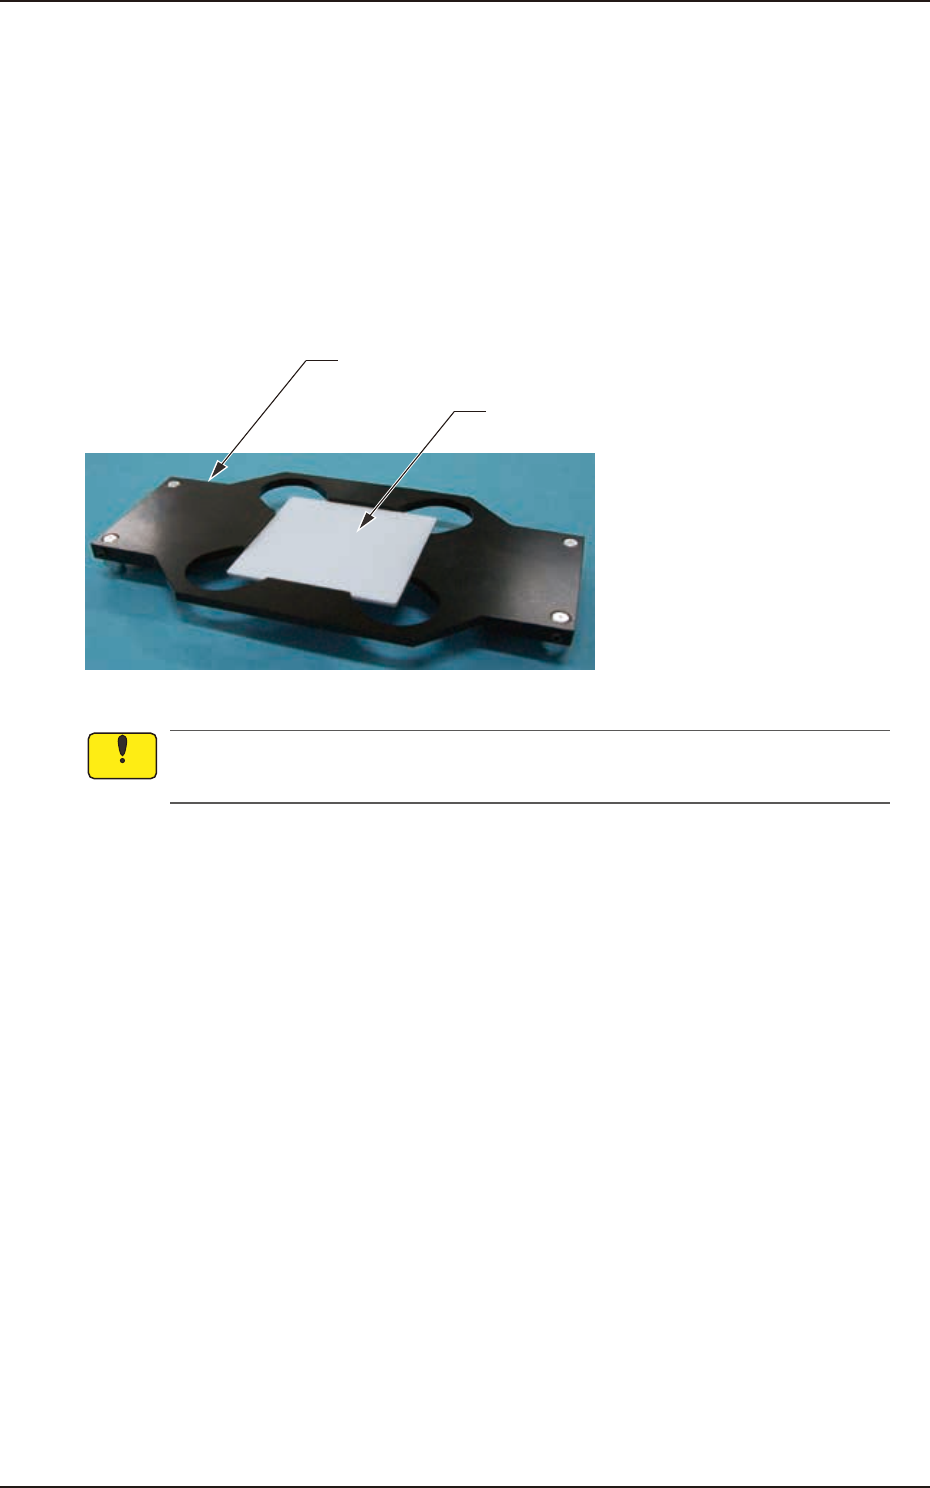
• Teaching Jig for PEC Recognition Camera Lighting
The following jigs are used for the teaching on the PEC recognition camera lighting. Before the
teaching, combine the jig with the teaching glass jig mounting support jig and place it on the PEC
recognition camera. After the teaching operation, remove it.
Teaching Glass Jig Mounting Support Jig
Teaching Glass Jig
(JG-0287,KYF-M8840-00)
(JG-0286,KYF-M8830-00)
F3A31
Set-up the teaching glass jig mounting support jig securely so that it does not rise. If the
mounting condition is not satisfactory, the head, etc., might be damaged.
Notice
EUKYX
1-34199-3100
5.5 PCB Recog Light
• Teaching Procedure
Before performing the teaching operation, press the [ZERO] button in the "Control" menu to
zero all axes.
(1) Select the camera for which the teaching is performed in the "Select Camera" section.
(2) Select the block where the jib is setup in the "Select Jig" section.
(3) Press the [Beam Evac Move] button and within 10 seconds, press the [START] button on the
operation panel.
The cover is unlocked automatically.
(4) Open the cover. Turn up the white side of the teaching glass jig and set up the PEC
recognition lighting teaching jig on the PEC recognition camera.
(5) Press the [Jig Set Conf] button.
(6) Close the cover.
(7) Press the [Teach Start] button. (The PEC recognition camera will move onto the PEC
recognition lighting teaching jig to perform the teaching operation on lighting.)
(8) Press the [Beam Evac Move] button and within 10 seconds, press the [START] button on the
operation panel.
The cover is unlocked automatically.
(9) Open the cover of relevant block.
(10) Remove the setup PEC recognition lighting teaching jig.
Unless the lighting teaching jigs are removed, the head would be damaged.
(11) Close the cover.
(12) Press the [Save] button to save the teaching results.
Note
Procedure
Note
Note
Notice