EUKYX-199-3100_G5S2_Instruction_Vol3_E.pdf - 第227页
EUKYX 2-79 199-3100 5.1 Password • How to set o r change a p assword ( 1 ) Press the button appropri ate for the u ser' s access authori t y . (Th e "P assword Entr y" window will be displaye d) . F3B87 (2…
EUKYX
2-78199-3100
5. Password Setting
5. Password Setting
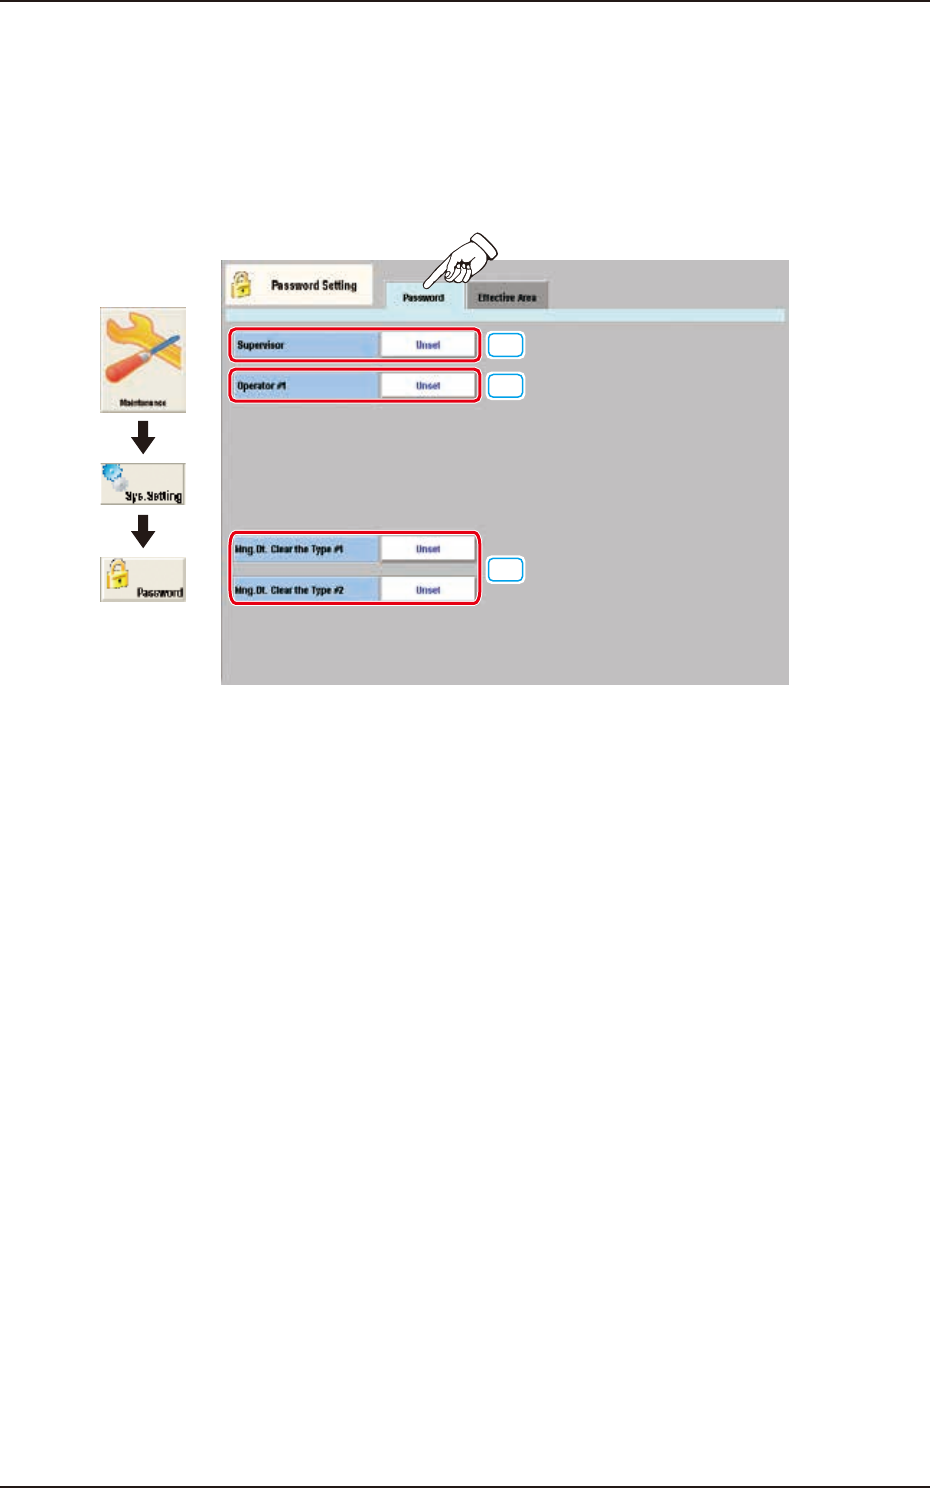
Pressing the [Sys. Setting] - [Password] buttons displays the following window.
5.1 Password
The password can be set according to the user authority on the following window.
[1]
[2]
[3]
Graphic
Development
F3B86
[1] Supervisor
A password can be set in this group box for the user who has the scope of authority as "Supervisor".
[2] Operator #1
A password can be set in this group box for the user who has the scope of authority as "Operator #1".
[3] Mng. Dt. Clear the Type #1
Mng. Dt. Clear the Type #2
A password can be set in this group box for the user who has the scope of authority for clearing the
management data type 1 and type 2 (totalization data).
EUKYX
2-79199-3100
5.1 Password
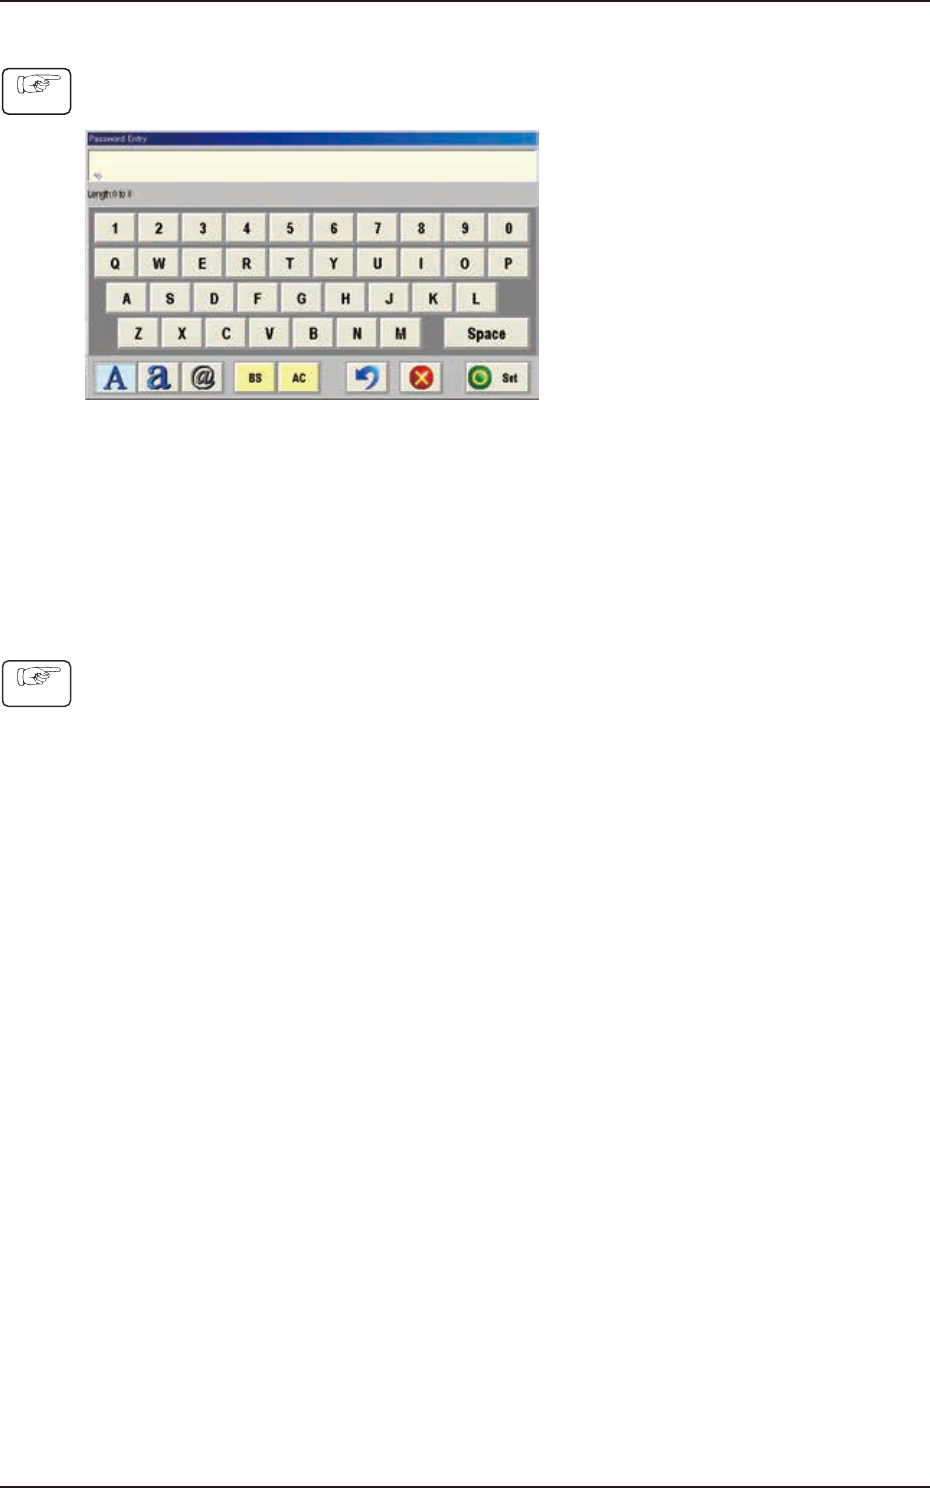
• How to set or change a password
(1) Press the button appropriate for the user's access authority.
(The "Password Entry" window will be displayed).
F3B87
(2) Enter the desired password.
(The entered string of characters are expressed using "*" in the "Password" entry box.)
(3) When the [Set] button is pressed, the "Password Reentry" window opens.
(Enter the same password again and press the [Set] button. The password is set or changed
and "Set" appears in red on the right side of the selected password entry button.)
• How to cancel the set password
(1) Press the button appropriate for the user's access authority.
(The "Password Entry" edit window will be displayed.)
(2) Press the [Set] button without entering any characters in the entry box. The "Password
Reentry" window opens. Press the [Set] button again without entering any characters.
(The preset password is canceled and "Not Set" appears in blue on the right side of the
selected password entry button.)
Procedure
Procedure
EUKYX
2-80199-3100
5.2 Effective Area
5.2 Effective Area
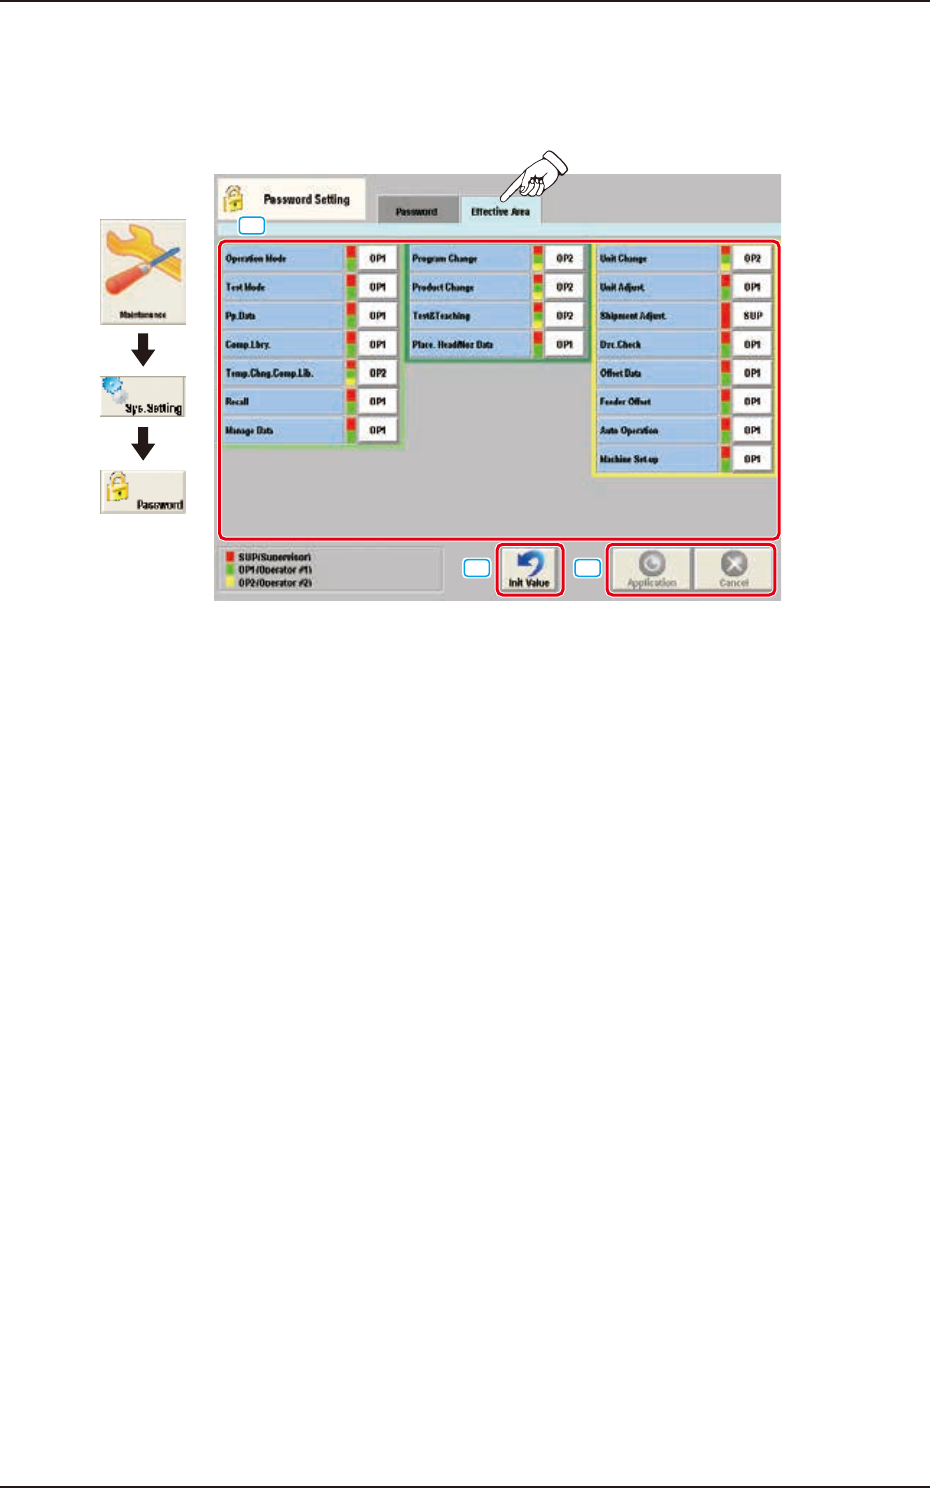
This window enables the operator to set the user's authority range. When the [Effective Area] tab is
pressed on the "Password Setting" window, the "Effective Area" tab sheet appears.
[1]
[2] [3]
Graphic
Development
F3B88
[1] Effective Area setting button
Set the scope of authority (available range) to use the described functions.
The pop-up menu appears by pressing the button. Select "OP2", "OP1", or "SUP". The labels
on the buttons indicate that the functions described on the left side of the buttons are
available for the following operators.
SUP : Only the supervisor is given the authority to use the function.
A red bar appears on the right side of the function name.
OP1 : The supervisor and the operator #1 are given the authority to use the function.
Red and green bars appear on the right side of the function name.
OP2 : The supervisor, the operator #1, and the operator #2 are given the authority to
use the function.
That is, the selection means that all operators can use the function.
Red, green, and yellow bars appear on the right side of the function name.
[2] [Init Value] Button
When this button is pressed, the effective area set-up is initialized.
[3] [Apply] button
When this button is pressed, the input data is applied.
[Cancel] button
When this button is pressed, the input data is canceled and the window returns to the saved data.