PathMaster-REV-L-4.5-1.pdf - 第115页
Machine Operati on Manual Revision L / February 2020 Page 115 of 2 00 Example In the exampl e below, t he first 2D line is show n with the “ Use Current Z Height ” selected at the Z height of z ero. The re is no offse t …
Machine Operation Manual
Revision L /
February 2020
Page 114 of 200
• If “No” is selected, the “Override Tool Height” checkbox will be automatically
selected again, and no change will take place. If “
Yes” is selected, all the points that
have been taught in the current path segment and any future points in the current
path segment will have the selected Calibrated Z Height value as the Z-axis
coordinates.
How to Use the Tool Height Options
There are two ways to change the Tool Height options as shown below.
• When you teach a path select “Use Calibrated Z Height” or “Use Current Z Height,”
or select an option from the drop-down
Surface menu. Available options depend on
the workcell configuration and the function.
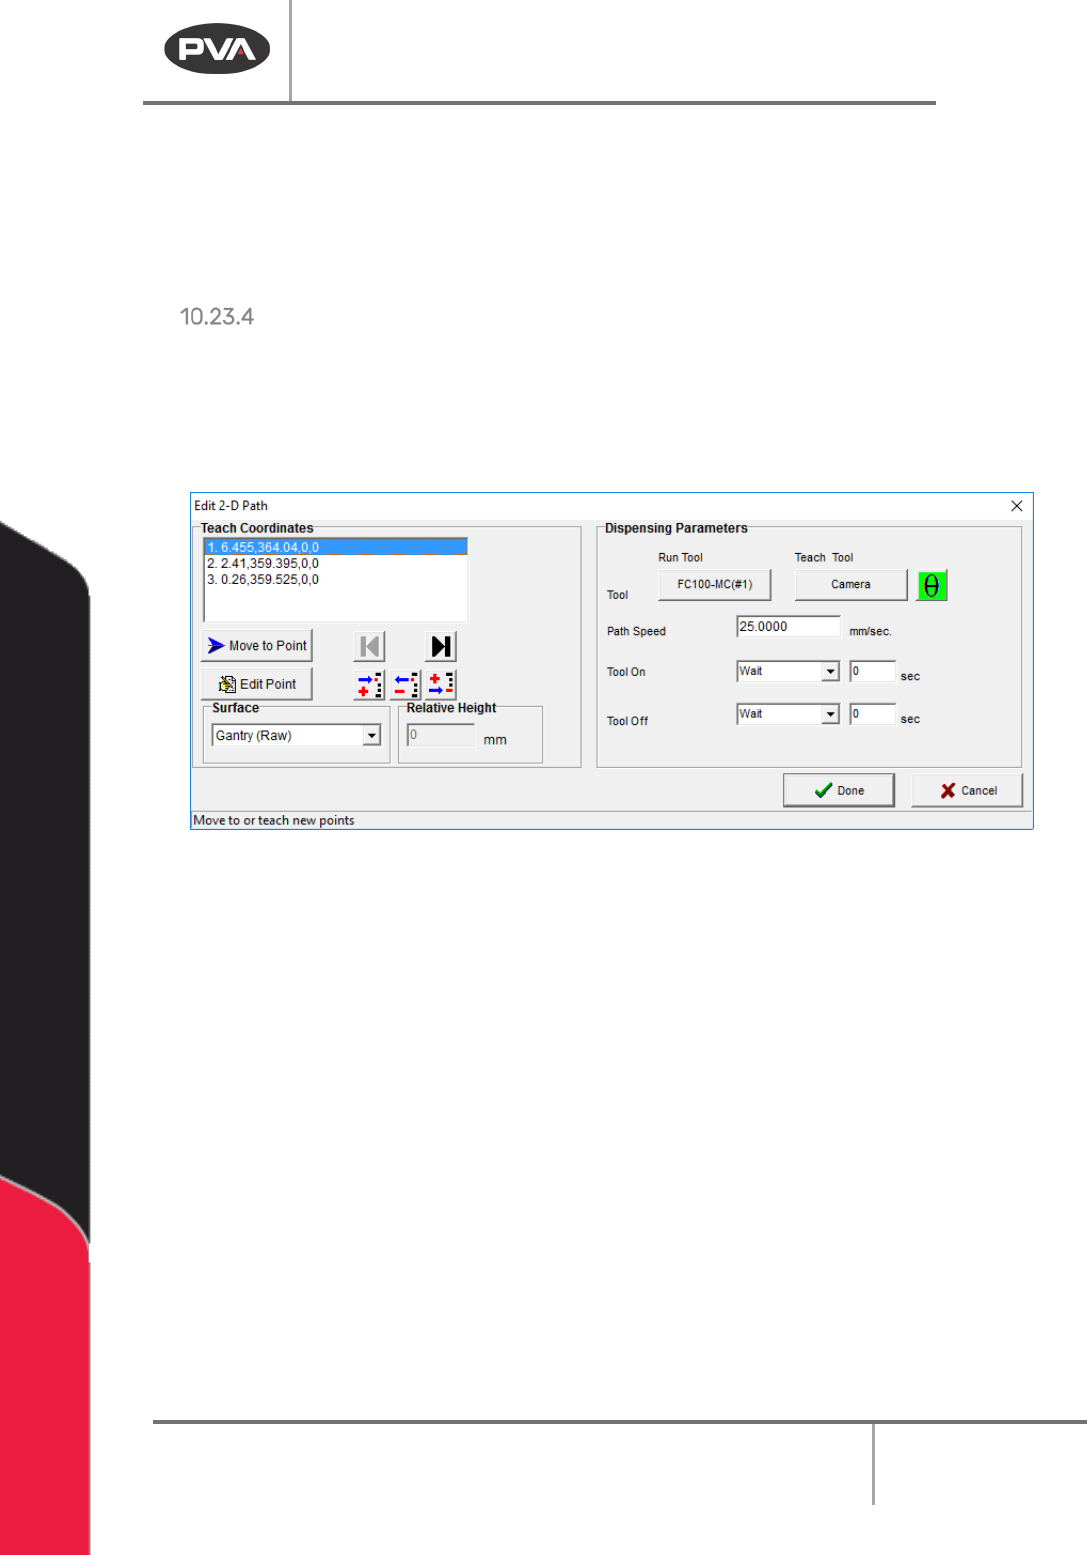
Figure 138: Teach Window Tool Height
• After a path has been taught you can change the settings in the Edit window. Refer
to Figure 67.
All necessary offsets are automatically set by PathMaster.
Machine Operation Manual
Revision L /
February 2020
Page 115 of 200
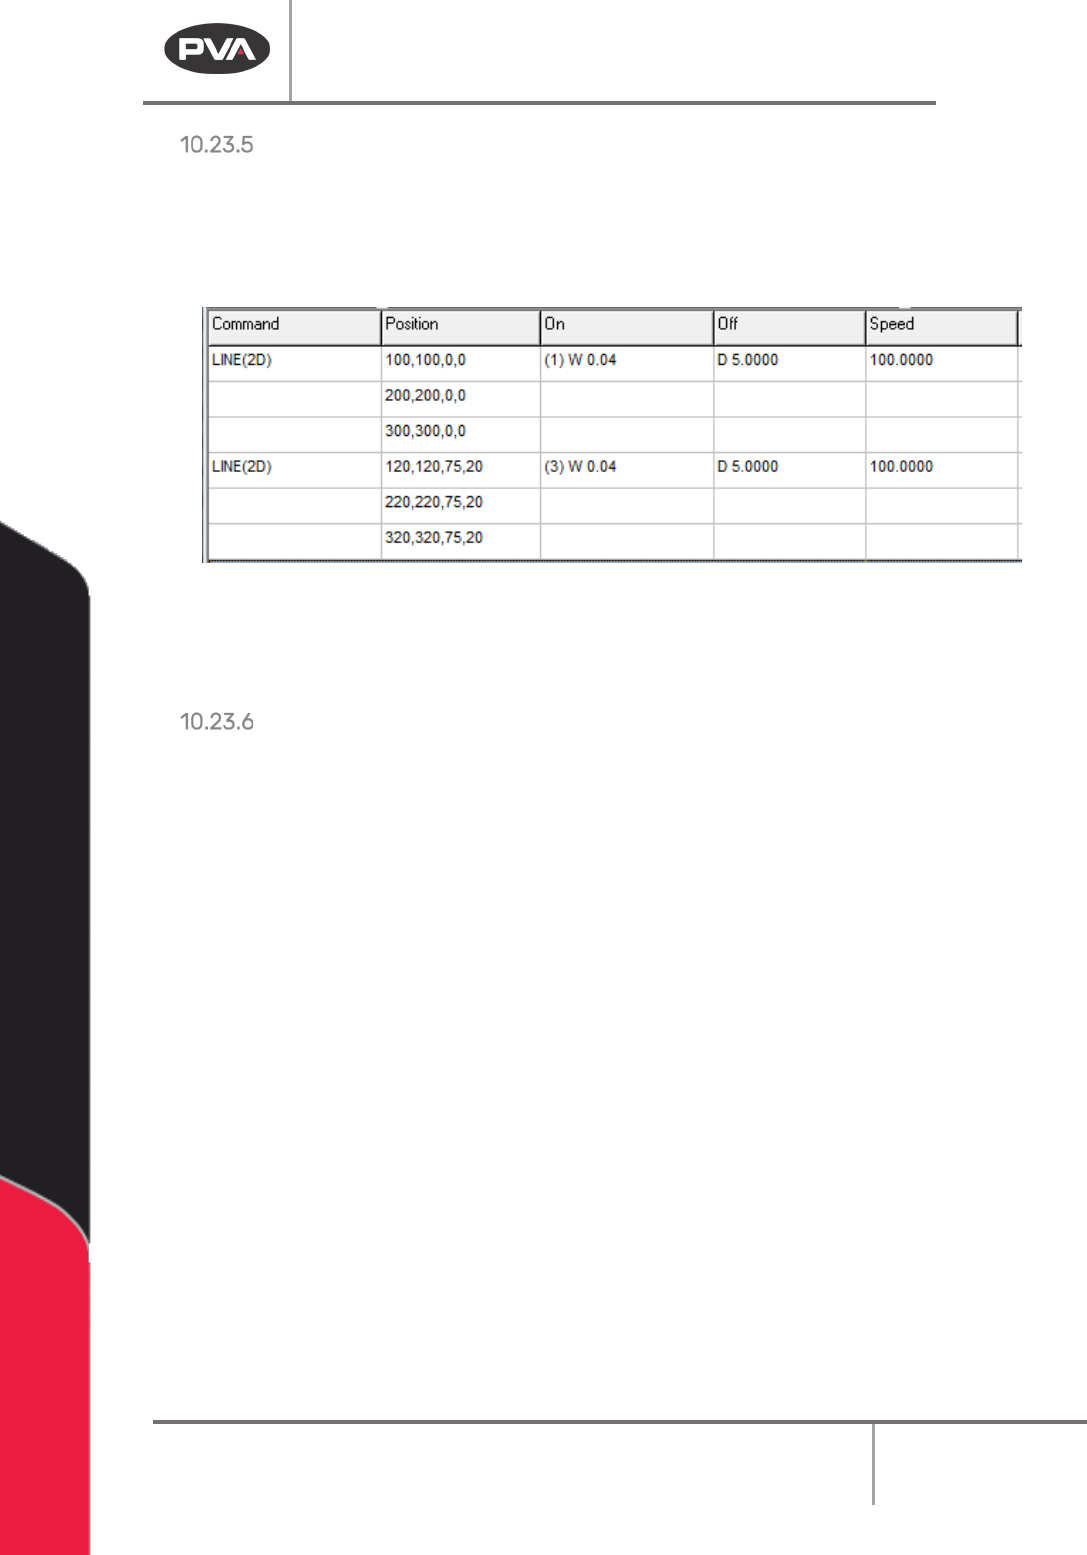
Example
In the example below, the first 2D line is shown with the “Use Current Z Height” selected at
the Z height of zero. There is no offset shown, and so the displayed value is zero. For the
second 2D line, the first function was copy and pasted, another Run Tool was selected and
“
Use Calibrated Z Height” was selected.
Figure 139: 2D Lines Before and After Switching Tools
The difference in coordinates from the first 2D Line and the second, show XYW offsetting
and the calibrated height has been used for Z.
Offline Programming (FastPath)
When you use FastPath (the teach tool must be enabled), all taught positions will use the
tool height values for the Z position. This makes the transition from programming offline to
online easier.
Machine Operation Manual
Revision L /
February 2020
Page 116 of 200
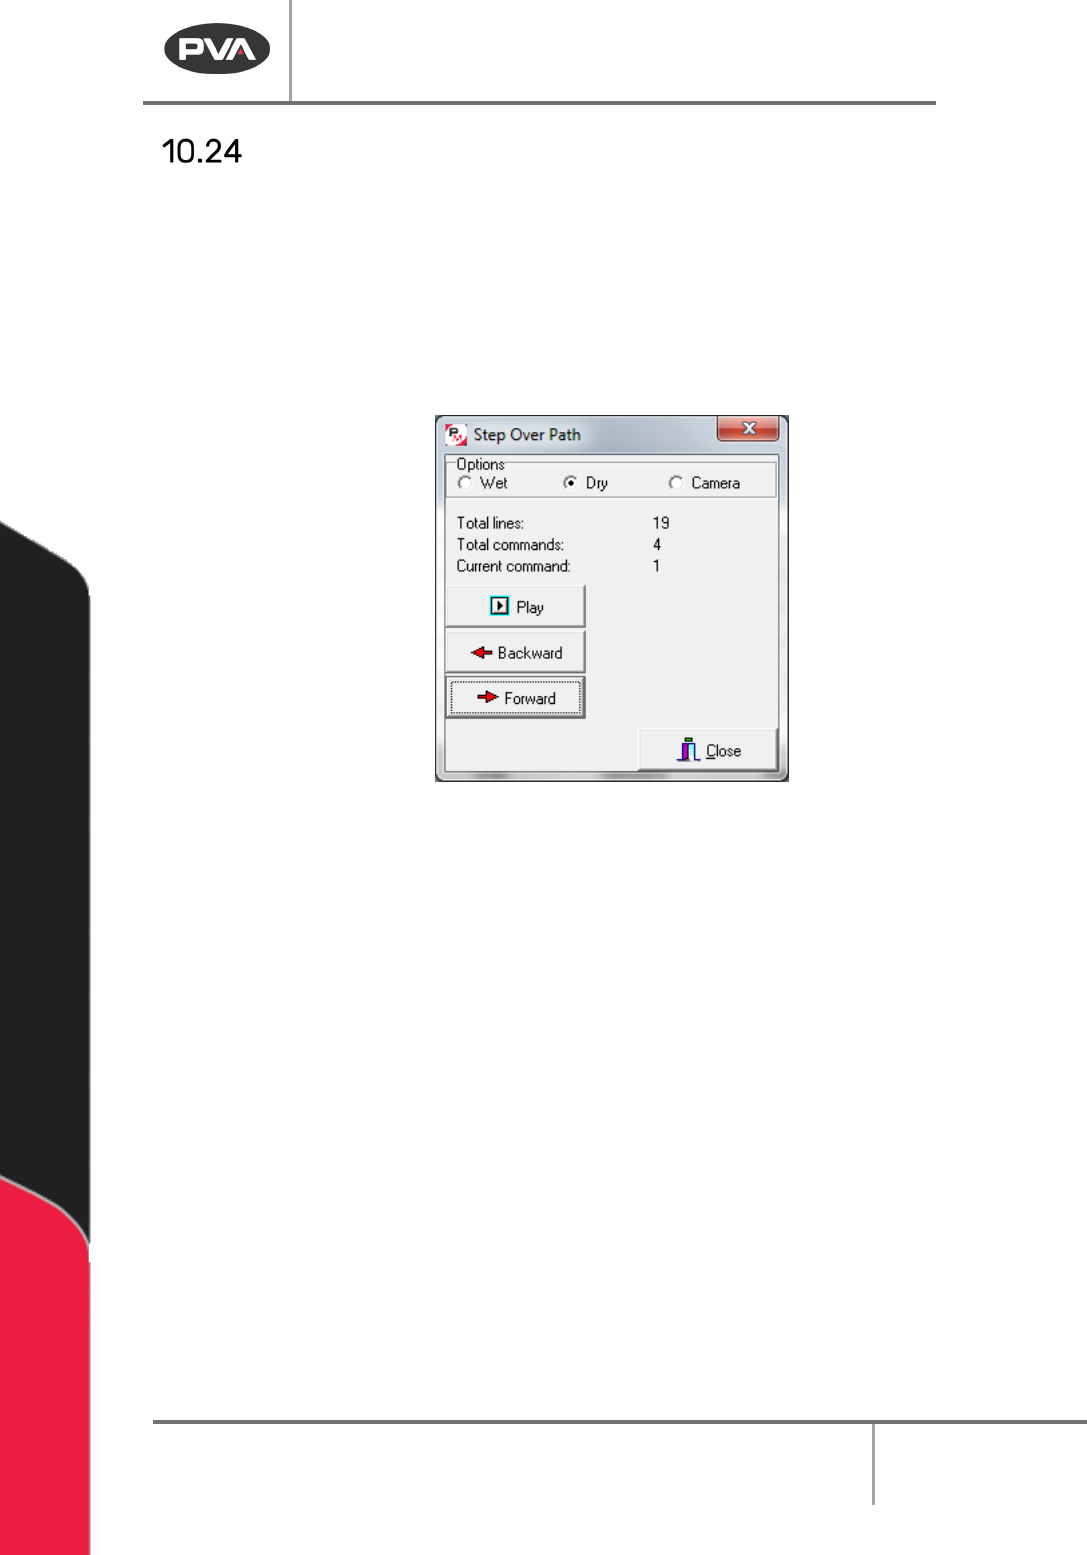
Step Over
The Step Over function allows playback of previous or next path segment to be executed
one step at a time as well as playback wet or dry.
1. Select the Step Over function, select
Main Menu > Utilities > Step Over Path
.
2. Select the correct Option Wet, Dry, or Teach Tool.
3. Select the Command you want to play with the “Backward” and “Forward” buttons.
The highlighted command in the edit window is the command that will play.
Figure 140: Step Over Path
4. Select “Play” to operate the path segment as selected.
5. Select “Close” to exit and not play a path.